
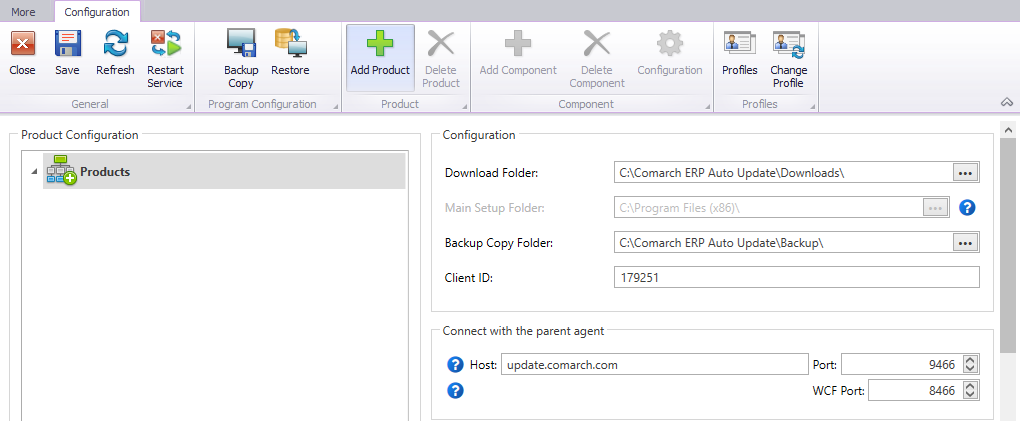
In order to install and use a selected Comarch component, first you need to add and configure it in Comarch Auto Update. To start with, in the main menu select [Configuration] and then in the Product Configuration section, highlight Products and select the [Add Product] button.
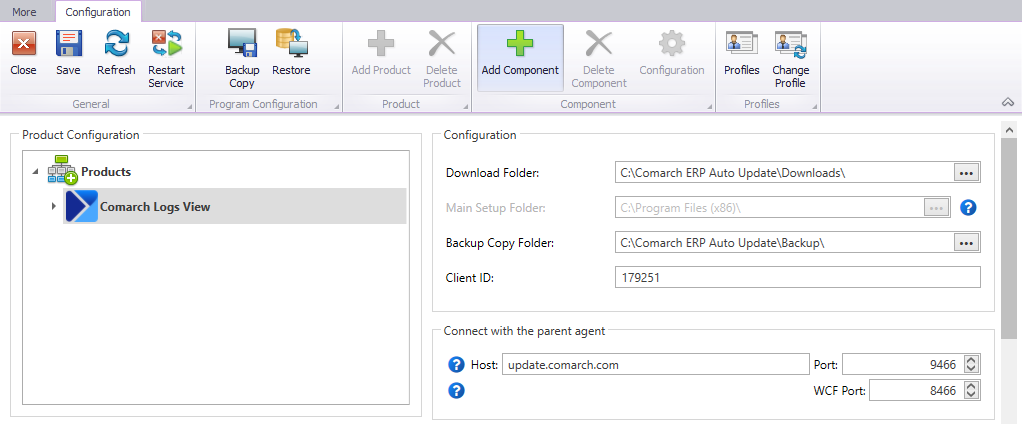
After adding the product, you also need to add an appropriate component. To do so, highlight the product in the product configuration section and then select the [Add Component] button, similarly as when selecting a product.
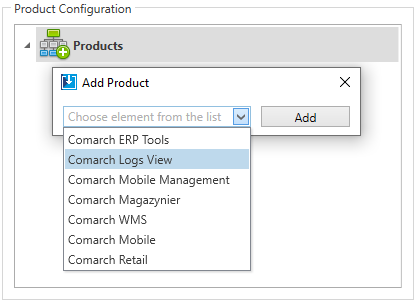
Next, select a component (Comarch Logs View in this case) followed by the [Add] button. After adding the product and highlighting it in the Product Configuration section, the [Configuration] button in the Component button group will activate.
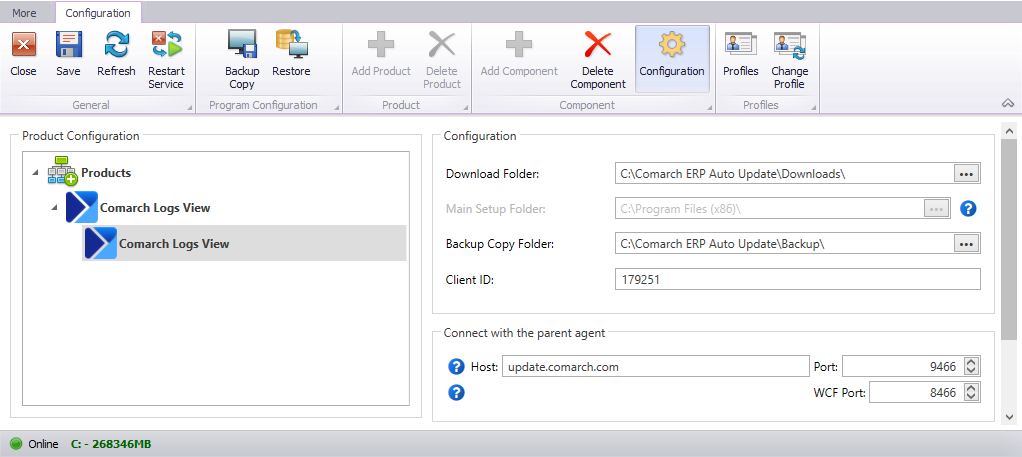
Selecting the [Configuration] button will open the component configuration window, where you need to define relevant parameters prior to its installation.
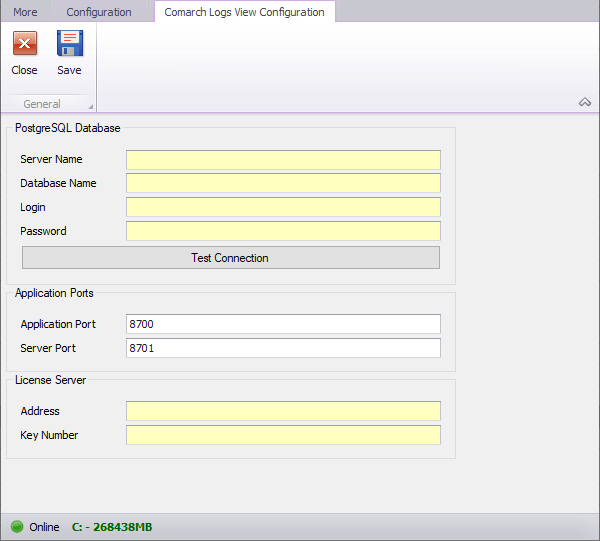
The view is divided into several groupings:
- PostgreSQL Database
- Server Name – name or address of SQL server on which a database will be created
- Database Name – database name. If the database with the name provided in this field does not exist, a relevant message will be displayed and the database will be created.
- Login – login defined during PostgresSQL installation. The default login is: postgres
- Password – password to the above-specified login
- Test Connection – used to verify the corrected of data completed in the fields
- Application Ports – Comarch Logs View application-related ports:
- Application Port – the default application port is: 8700
- Server Port – the defaut server port is: 8701
- License Server – license server address and license key number
In case of installing Comarch Logs View with ports other than the default ones (application port 8700 and server port 8701), line <add key=”LogsViewPort” value=””/> must be added under <appSettings> in altum.exe.config and ds.exe.config files, providing the server port between ” “, which was previously entered in the component configuration window in Comarch Auto Update tool.
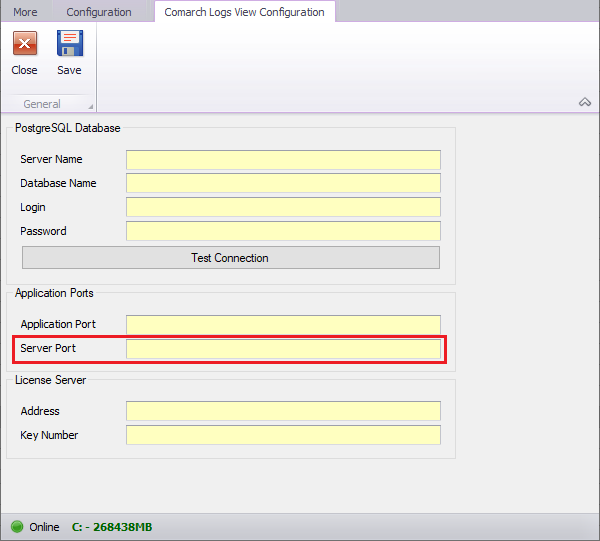
altum.exe.config and ds.exe.config files can found in the setup folder of Comarch ERP Standard.
After you go through the configuration steps, select the [Save] button. Then you can proceed to the component installation. To do so, switch to the main view of Comarch Auto Update application, where the previously configured components will be available for download and installation.

Components can either be only downloaded or downloaded and installed by selecting the respective buttons, as needed. A properly installed component is communicated with a green icon with a tick symbol and the version number. Information about any newer version is displayed above the components.
An older version of the component can be installed through advanced actions described in article Advanced actions.
