
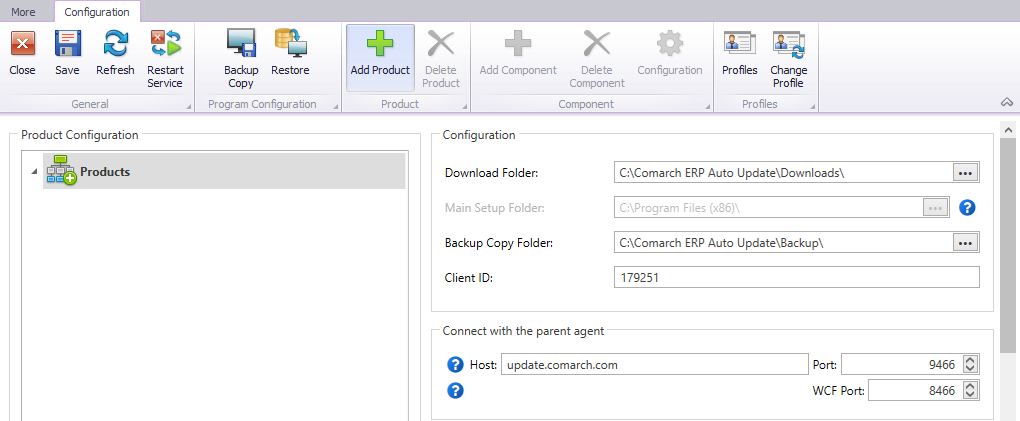
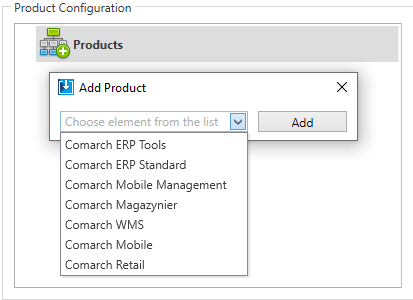
In order to install and use a selected Comarch component, first you need to add and configure it in Comarch Auto Update. This article illustrates how to do in on the example of Comarch Retail product. To start with, in the main menu select [Configuration] and then in the Product Configuration section, highlight Products and select the [Add Product] button.
After adding the product, you also need to add an appropriate component. To do so, highlight the product in the product configuration section and then select [Add Component] button, similarly as when selecting a product.
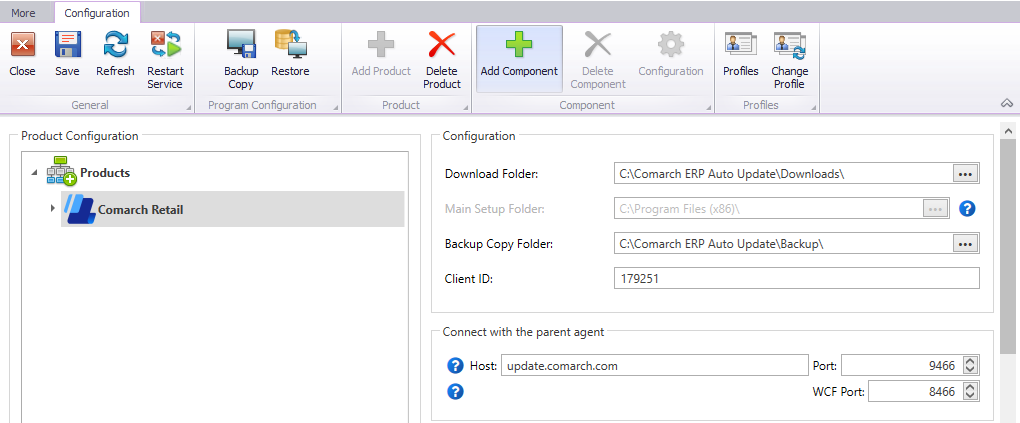
Next, select a component (Comarch POS in this case) followed by the [Add] button. After adding the product and highlighting it in the Product Configuration section, the [Configuration] button in the Component button group will activate.
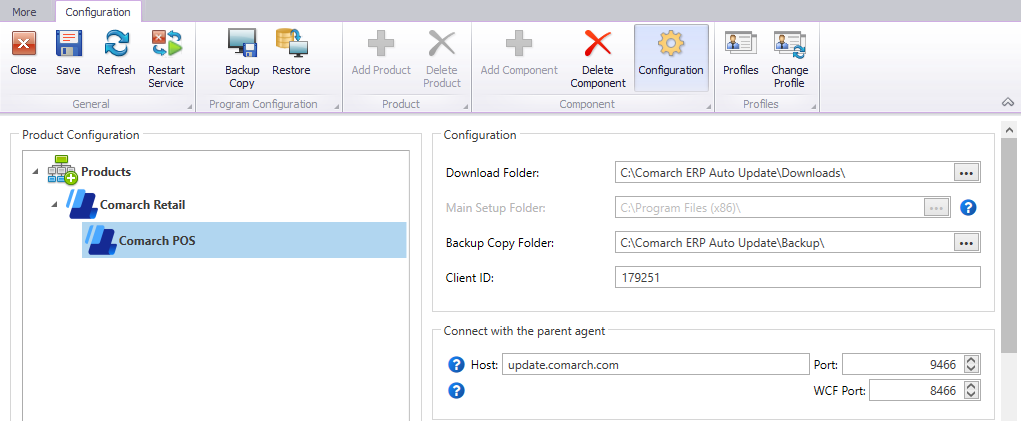
Selecting the button opens the component configuration window where you need to define appropriate parameters prior to its installation.
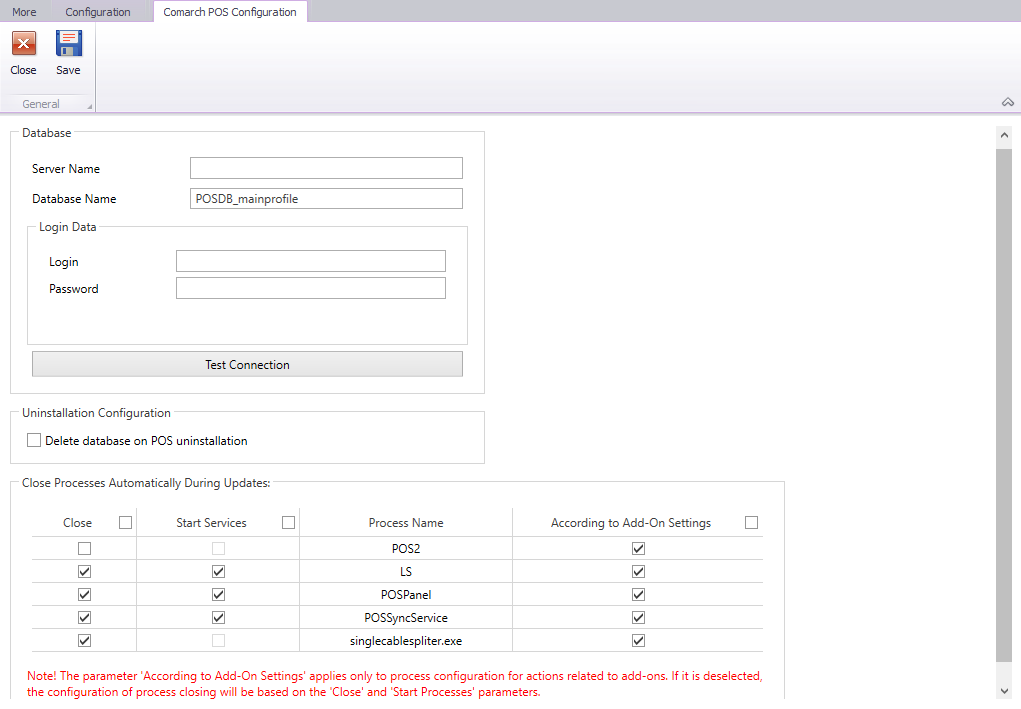
The component configuration window is composed of the following sections:
Database – specify the POS database connection parameters in this section. The database will be restored under the specified name and sever. This is required in order to install a component. This data can be edited if you change the sever, database or login. Fields to complete in this section:
- Server Name – name or address of SQL server on which a database will be created
- Database Name – name under which a database will be created on the server
- Login– SQL login with sysadmin permissions, entitled to log on and perform operations on the above-selected server
- Password – password to the above-specified login
After you complete the fields, select [Test Connection] button to verify the correctness of data.
Uninstallation Configuration– parameter is this section is used to delete a database and uninstall Comarch POS application at the same time. It is deselected, by default.
Close Processes Automatically During Updates – this section controls maintenance of associated processes and services when updating a component or installing quick fixes add-ons. It is composed of the following columns:
- Close – closes a process or stops the service prior to installation
- Start Services – if selected, it starts the service upon installation. This parameter is insensitive for processes.
- Process Name – name of the process or service the record with parameters refers to
- According to Add-On Settings – if selected, the processes and services will perform as described in the article Add-ons. This parameter is only used during add-on installation.
After you go through the configuration steps, select the [Save] button. Then you can proceed to the component installation. To do so, switch to the main view of Comarch Auto Update application, where the previously configured components will be available for download and installation.
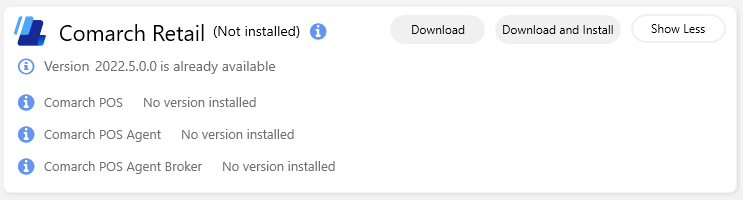
Components can either be only downloaded or downloaded and installed by selecting the respective buttons, as needed. A properly installed component is communicated with a green icon with a tick symbol and the version number. Information about any newer version is displayed above the components.
An older version of the component can be installed through advanced actions described in article Advanced actions.

Comarch Discount Engine Service component configuration
Discount Engine – Synchronization Service
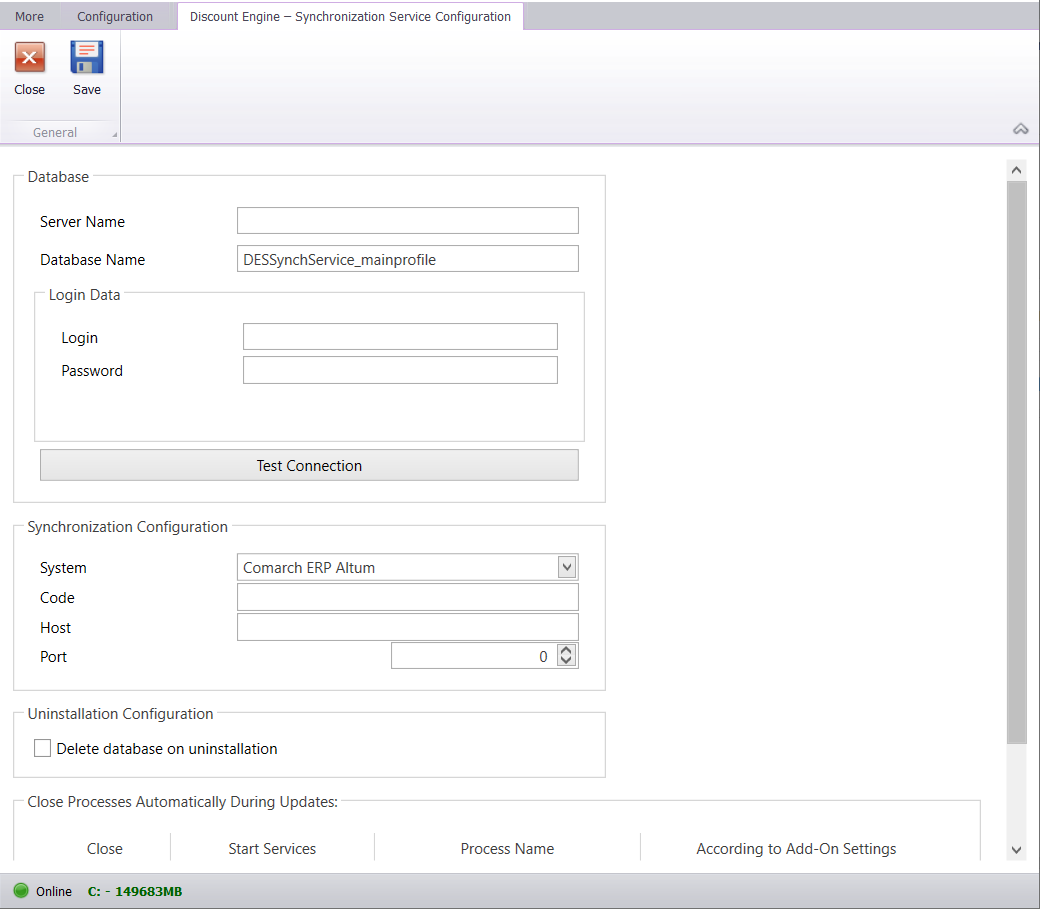
The component configuration window is composed of the following sections:
Database – specify the database connection parameters in this section. The database will be restored under the specified name and sever. This is required in order to install a component. This data can be edited if you change the sever, database or login. Fields to complete in this section:
- Server Name – name or address of SQL server on which a database will be created.
- Database Name – name under which a database will be created on the server.
- Login – SQL login with sysadmin permissions, entitled to log on and perform operations on the above-selected server.
- Password – password to the above-specified login.
After you complete the fields, select [Test Connection] button to verify that the entered credentials are correct.
Synchronization Configuration – fields to complete in this section:
- Code – code required to connect DES with OMS Data service.
- Host – host name of the OMS data service.
- Port – port used by OMS data service – set automatically via profile configuration (the default value for master profile is 8099)
Uninstallation Configuration – the parameter in this section is used to delete a database and uninstall Comarch POS application at the same time. It is deselected, by default.
Close Processes Automatically During Updates – this section controls maintenance of associated processes and services when updating a component or installing quick fixes add-ons. It is composed of the following columns:
- Close – closes a process or stops the service prior to installation
- Start Services – if selected, it starts the service upon installation. This parameter is insensitive for processes.
- Process Name – name of process or service a record with parameters refers to.
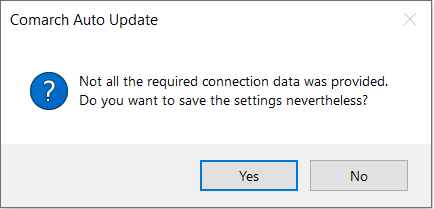
Before saving the changes, Comarch Auto Update verifies whether the provided SQL Server credentials are correct and complete and displays the following message:
Discount Engine – Discount Service
Discount Engine Configuration – Discount Service includes only a database configuration.
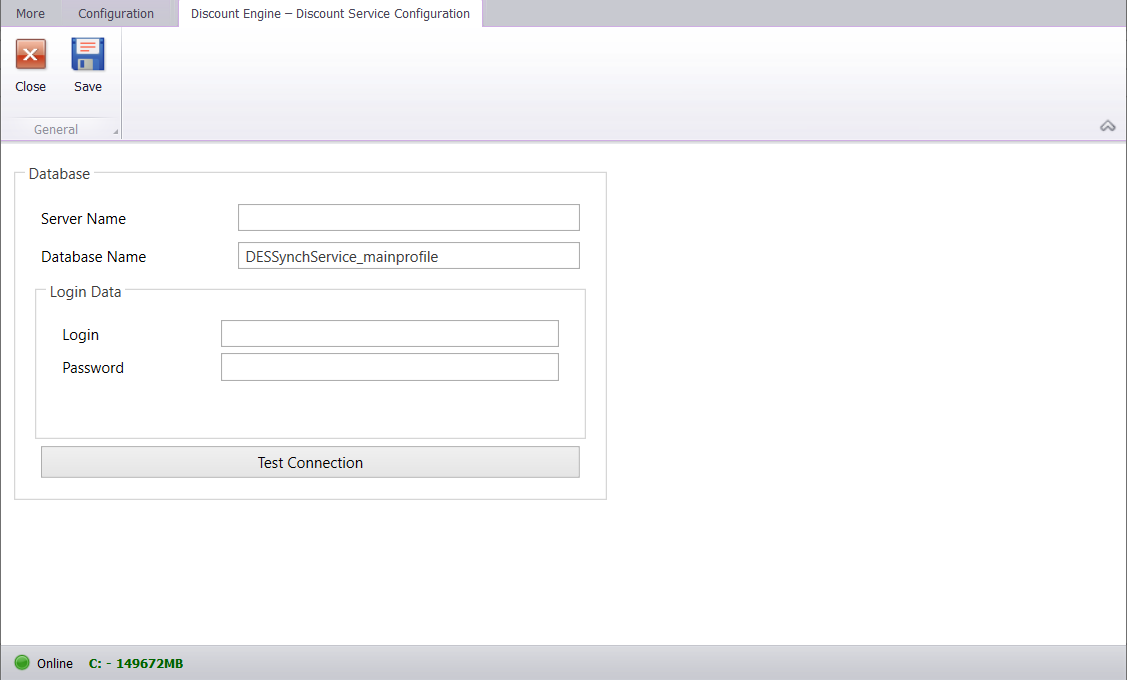
The database connection parameters are also required for this component. The database will be restored under the specified name and sever. This is required in order to install a component. This data can be edited if you change the sever, database or login.
Fields to complete in this window:
Server Name – name or address of SQL server on which a database will be created.
Database Name – name under which a database will be created on the server.
Login – SQL login with sysadmin permissions, entitled to log on and perform operations on the above-selected server.
Password – password to the above-specified login.
After you complete the fields, select [Test Connection] button to verify that the entered credentials are correct.