In the main Comarch Auto Update window, there is a view that you can open with the [SSL Configuration] button under Configuration.

The SSL Configuration view is divided into two sections. In the left section, you can test switching to SSL. In the right section, you can configure SSL communication for child agents.
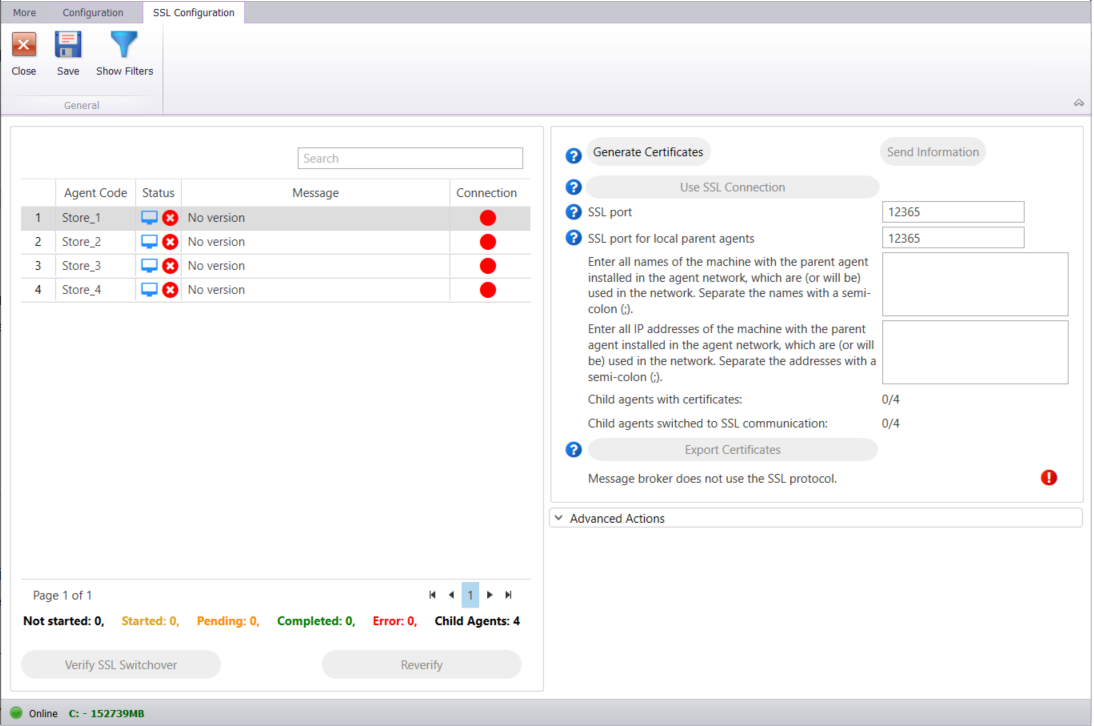
To switch to SSL communication, first generate certificates for the parent agent using the [Generate Certificates] button. SSL certificates are generated for child agents and local parent agents. The button is active when all child agents in the agent network are using the version that allows switching to SSL.

The following configuration settings are mandatory:
- SSL port – the port over which child agents will connect to the parent agent. Its default value is 12365.
- SSL port for local parent agents – the port over which the child agents with defined locations and local parent agents will connect to the local parent agents. Its default value is 12365. If you have no network location, it is recommended to leave the default value.
- All names of the machine with the parent agent installed – type into the text box the semicolon-separated names of the machine with the parent agent installed (domain names).
- All IP addresses of the machine with the parent agent installed – type into the text box the semicolon-separated IP addresses of the machine with the parent agent installed.
Once you have completed all configuration settings, you can generate a certificate using the [Generate certificates] button.
Selecting the [Send Information] button will notify the child agents that the certificates have been generated and are available for download. You can use this button when child agents in the previous step were offline or when you encountered problems downloading the certificates. The Child agents with certificates parameter informs about the number of child agents with generated certificates.
Once the child agents have downloaded their certificates, select the [Use SSL Connection] button to begin the process of switching the network to SSL communication. The Child agents switched to SSL communication informs how many child agents were switched to SSL communication.
The [Export Certificates] button exports SSL certificates for child agents to the selected folder. It is useful for mPOS child agents to manually add the certificate in the Android system.
.cer certificate must be installed on a mobile device (Android → Settings → Security → Install certificates). The path may vary depending on your Android version.
.pfx certificate must be added to the mPOS folder.
In mPOS, continue to Start menu → Settings → Auto Update and enter the following:
- certificate name (without .pfx extension)
- certificate password
- enable SSL
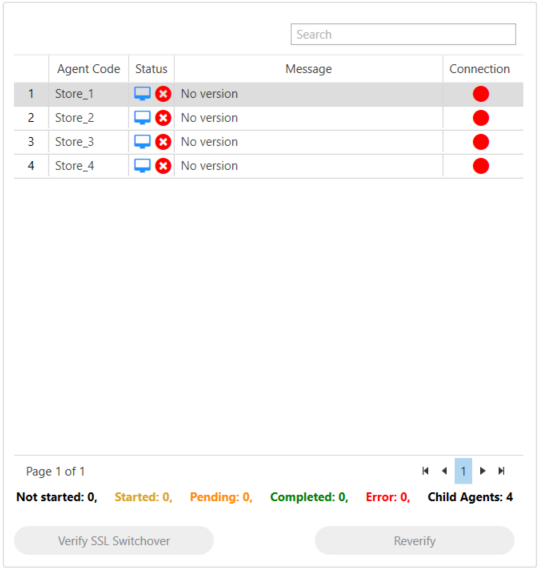
After the certificates are generated, the [Verify SSL Switchover] button becomes active so as to configure the time to test switching child agents to SSL.

The test is a 2-step verification. It verifies:
- certificate generation on child agents – in this step, child agents test-generates the certificates needed to connect to the parent agent. Any errors are returned to the parent agent. If this step completes successfully, the message “Certificates generated successfully!” is displayed in the Message
- connection over SSL port – in this step, a child agent checks if there is an open connection to the parent agent over the port defined for SSL (the default port is 12365). If this step completes unsuccessfully, a corresponding message is displayed “Failed to establish connection over the SSL port 12365.”. If it completes successfully, the message displayed is the following: “SSL communication switchover test completed successfully!”
Using the [Reverify] button, you can re-test the switchover only for the child agents on which the test completed unsuccessfully.
All child agents are listed on the left under the Status section.
The test result is communicated to the child agents that meet the switchover to SSL conditions.
According to the value of the parameter Number of child agents that can simultaneously perform remote actions, a defined number of messages is sent simultaneously.

As child agents perform the test, when some complete the test, others will receive messages within a defined number of simultaneous actions.
Once the child agents have downloaded their certificates, click the [Use SSL Connection] button to begin the process of switching the network to SSL communication.

The [Use SSL connection for RabbitMQ] button is available when the environment is switched to SSL communication. It switches RabbitMQ to SSL communication over the port 5671.
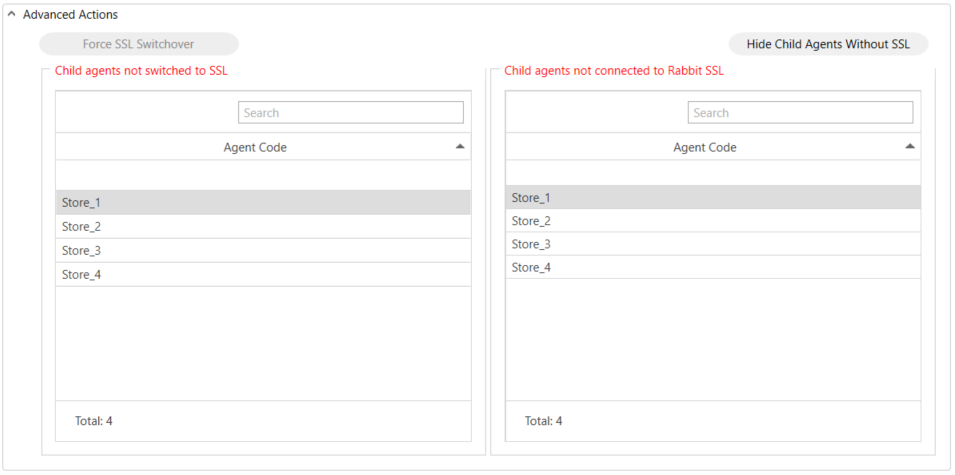
In the new section Advanced Actions under the SSL Configuration view, you can force the agent network to switch to SSL communication using the [Force SSL Switchover] button. It is inactive by default, and selecting it forces the agent network to communicate over SSL.

There is also the [Show child agents without SSL] button that lists child agents as:
- child agents not switched to SSL
- child agents not connected to Rabbit SSL