General information
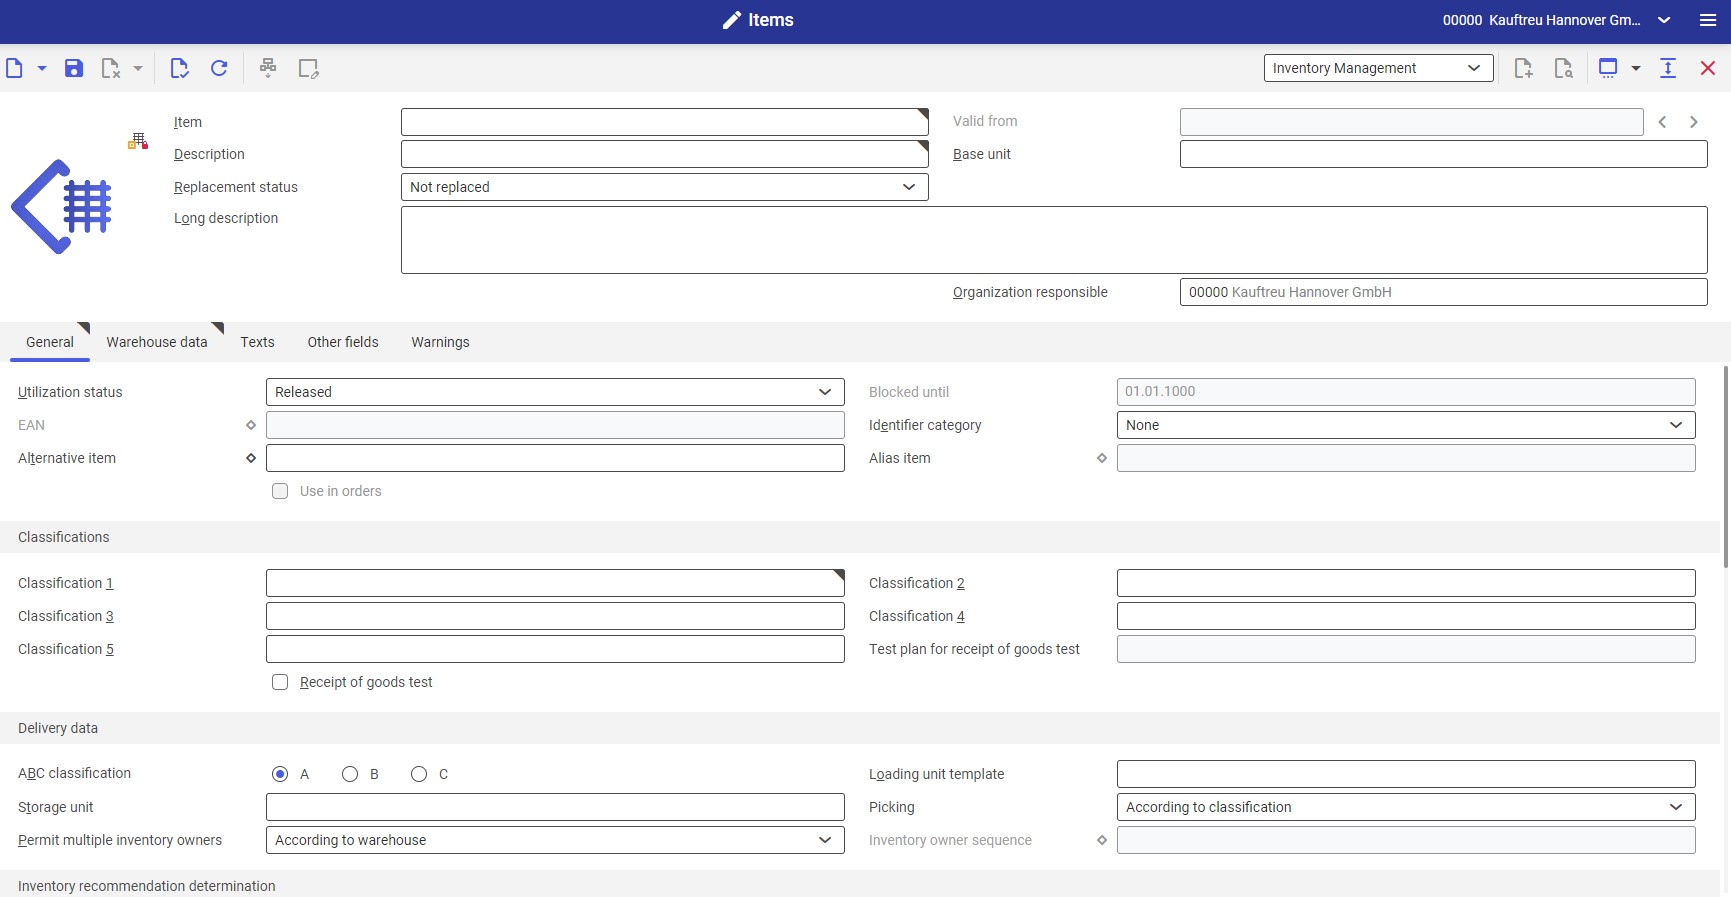
The following article provides procedures for handling the Inventory management view of the Items application. The procedures contain instructional steps, e.g. for creating or editing item data.
More information on the fields available in the Inventory management of the Items application may be found in the Items, Inventory management view article.
Creating an inventory item
In the Inventory management view, it is not possible to create:
- Kit items
- Alias items
- Service and billing items
- Externally manufactured items
Preconditions
In a multi-site or single-site environment with activated content-based authorizations, the selected organization must be an inventory management organization.
Furthermore, only the users assigned to the organization responsible for an item can generate new utilizations for that item.
Instructions
1. Open the Items application and switch to the Inventory management view

2. Open the item you want to enter as an inventory item
3. If required, change the utilization status of the inventory item under the General tab. You can choose between the Released and Blocked statuses.
4. Define the required fields:
- Classification 1 – select a classification of the Inventory item classification 1 type
5. If required, fill out the other fields with the desired inventory management data
6. Click the [Save] button in the standard toolbar
Deleting an inventory item
Inventory items are not deleted directly and must first be marked for deletion. Only those versions of inventory items that have their entire validity period in the future can be deleted directly, since they have not been used yet.
Marking an inventory item for deletion
Preconditions
The inventory item has not been marked for deletion yet.
Instructions
1. Open the Items application and switch to the Inventory management view
2. Open the inventory item to be marked for deletion
3. In a multi-site environment, select the organization for which you are editing the item
4. Click [Mark for deletion] in the standard toolbar
5. Confirm the warning if you really want to mark the inventory item for deletion. The inventory item will be marked for deletion and the changes will be saved.
Unmarking an inventory item for deletion
Preconditions
The inventory item has been marked for deletion.
In the case of variant items, deletion markers can only be removed if the inventory management data of the related reference item has not been marked for deletion.
Instructions
1. Open the Items application and switch to the Inventory management view
2. Open the inventory item you want to unmark for deletion
3. In a multi-site environment, select the organization for which you are editing the item
4. Click [Unmark for deletion] in the standard toolbar. The deletion marker will be removed.
Deleting inventory item versions
Preconditions
An inventory item version that will be valid only in the future exists.
Instructions
1. Open the Items application and switch to the Inventory management view
2. Open the inventory item whose future version you want to delete
3. In a multi-site environment, select the organization for which you are editing the item
4. Using the [Next] and [Back] buttons, browse through the Valid from field and switch to a future version of the inventory item to be deleted
5. Click [Delete] in the standard toolbar. The selected version of the inventory item will be deleted.
Creating a new version of an inventory item
Preconditions
In order to generate a new version, it is important for the item to have inventory management data. In a multi-site environment, the selected organization should have the data processing accepted. In the Inventory management view, you can generate a new version for items of the following material types:
- Inventory item
- Storage units
- Variant items
Instructions
1. Open the Items application and switch to the Inventory management view
2. Open the item from which you would like to create a new version
3. Click [New] and [New version] in the standard toolbar
4. Enter a future date from which the inventory item will be valid in the Valid from field
5. Click the [Save] button in the standard toolbar. The new version of the inventory item will be saved.
Changing the utilization status of an inventory item
Preconditions
A utilization status may be changed by either releasing or blocking it.
Instructions
1. Open the Items application and switch to the Inventory management view
2. Open the inventory item whose utilization status is to be changed
3. Change the value of the Utilization status field to Released or Blocked on the General tab
4. If the Blocked option is selected, enter a future date in the Blocked until field
5. Click the [Save] button in the standard toolbar. The utilization status will be saved.
Warehouse data tab in the Inventory management view
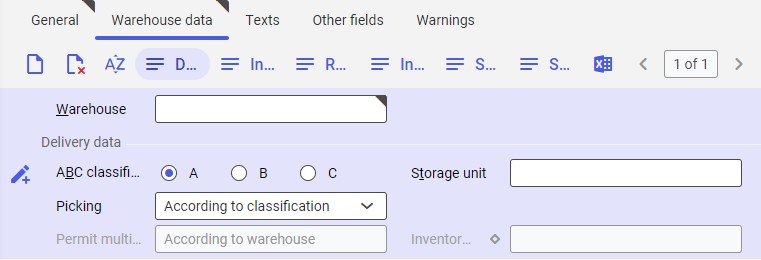
It is possible to overwrite some data entered on the General tab on the Warehouse data tab at the warehouse level.
Creating warehouse data
Preconditions
In a multi-site environment, the selected organization must have the data processing accepted for inventory management data.
Instructions
1. Open the Items application and switch to the Inventory management view
2. Open the inventory item for which warehouse data is to be added
3. In a multi-site environment, select the organization for which you are editing the item
4. Switch to the Warehouse data tab

5. Click the [New] button in the standard toolbar of the work pane. A new line will be generated in the list. Some of the fields will be automatically filled-in with data entered on the General tab.
6. In the Warehouse field, enter the warehouse for which this data will be valid
7. If necessary, it is also possible to edit data in the ABC classification, Picking, and Storage unit
8. Click the [Save] button in the standard toolbar
Deleting warehouse data
Preconditions
In a multi-site environment, the selected organization must have the data processing accepted for inventory management data.
Instructions
1. Open the Items application and switch to the Inventory management view
2. Open the inventory item whose warehouse data you want to delete
3. In a multi-site environment, select the organization for which you are editing the item
4. Switch to the Warehouse data tab
5. Select the data for the warehouse to be deleted
6. Click the [Delete] button in the standard toolbar of the work pane
7. Click the [Save] button in the standard toolbar. The warehouse data will be deleted.
Accepting an inventory item for a selected organization
Preconditions
This functionality exists only in a multi-site environment or if content-based authorizations have been activated in a single-site environment.
Instructions
1. Open the Items application and switch to the Inventory management view
2. Open the item whose inventory data is to be accepted
3. Select the organization for which you want to accept the inventory item
4. Click [Accept data for the selected organization] in the standard toolbar
5. Click the [Save] button in the standard toolbar. The inventory management data will be accepted for the selected organization.
Accepting data processing for a selected organization
Instructions
1. Open the Items application and switch to the Inventory management view
2. Open the item for which you want to accept inventory management data processing
3. Select the organization for which you want to accept the inventory management data processing
4. Click [Accept data processing for the selected organization] in the standard toolbar
5. Click the [Save] button in the standard toolbar. The inventory management data processing will be accepted for the selected organization.
