
Topic overview
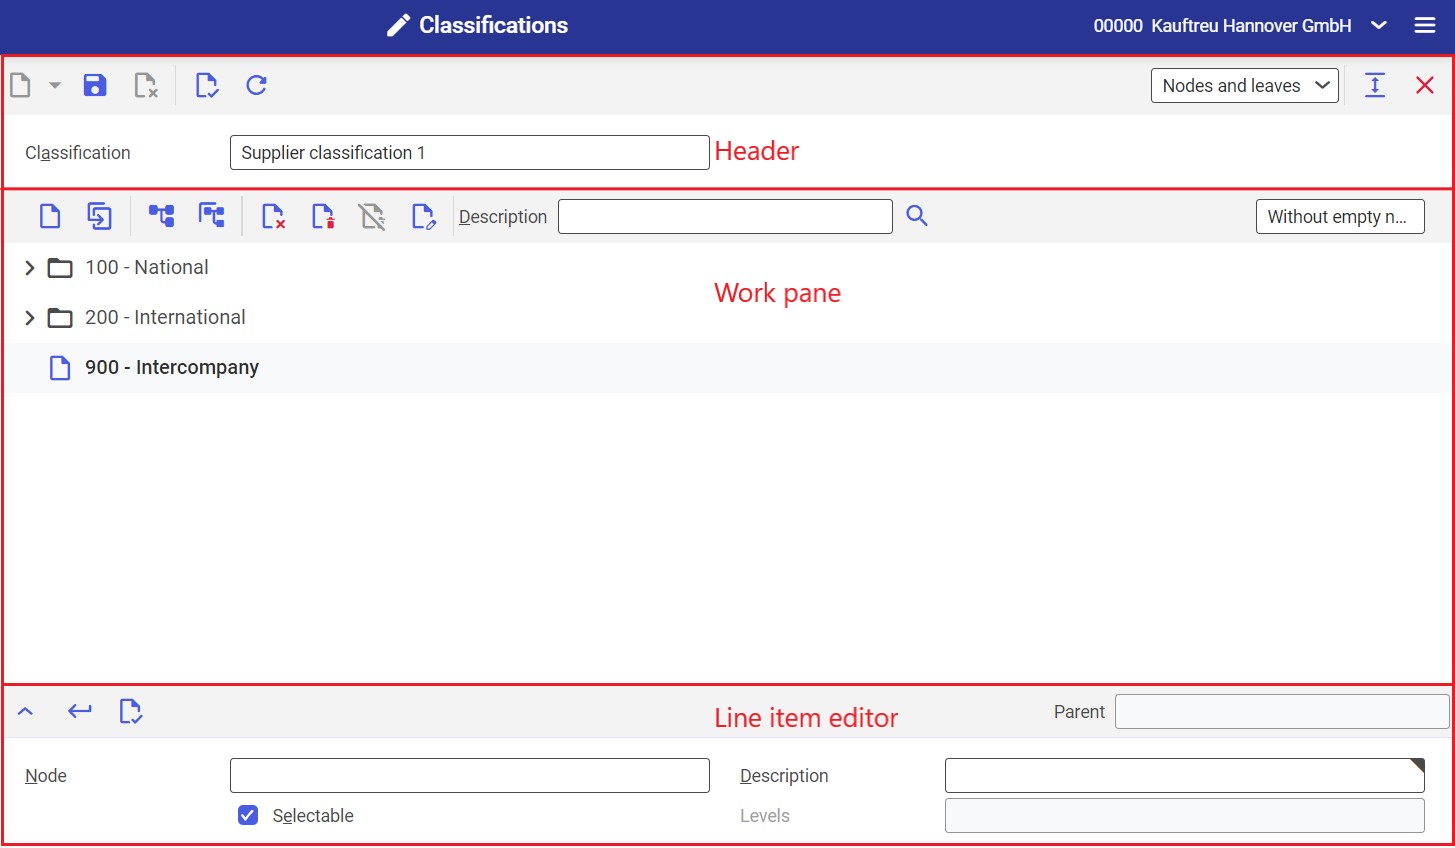
The Classifications application allows creating a multi-level classification structure with parent and subordinate nodes that make it possible to classify data and business entities in Comarch ERP Enterprise.
This article describes the procedures for handling Classifications application. The procedures contain instructional steps regarding, e.g., creating or editing nodes, as well information regarding potential initial requirements and action results.
Detailed information regarding the Classifications application can be found in the article Classifications.
Search for classifications
Instructions
To find a classification, complete the following steps:
- Open the Classifications application
- Enter the classification’s identification in the Classification field of the application header or search it on the list under the field’s [Value assistant] button
- Click [Refresh] in the standard toolbar to display the classification and its nodes
Create a node
Instructions
To create a new node at the same or subordinate level, complete the following steps:
- Open the Classifications application
- Open the classification for which you want to create the node (see Search for classifications) and select it in the work pane
- In the work pane’s toolbar, click either [New nodes at the same level] or [New subordinate nodes]. If the classification does not have any node defined, it is first necessary to create a subordinate node; after that, it will be possible to define nodes at the same and subordinate levels. Clicking [New nodes at the same level] or [New subordinate nodes] moves the cursor to the line item editor.
- In the line item editor, fill in the fields defining the new node
- Click the [Accept] button in the toolbar of the line item editor to add the node to the classification structure in the work pane
- Click [Save] in the standard toolbar of the application header to save changes
Edit a node
Instructions
To edit an existing classification node, complete the following steps:
- Open the Classifications application
- Open the classification for which you want to edit the node (see Search for classifications)
- Select the node you want to edit
- Select [Edit] button in the toolbar of the work pane. The node data appear in the line item editor.
- Modify the node data in the line item editor.
- Click the [Accept] button in the editor toolbar. Node data will be updated in the work pane.
- Click [Save] in the standard toolbar of the application header to save changes/
Duplicate a node
Instructions
To duplicate an existing classification node, complete the following steps:
- Open the Classifications application
- Open the classification whose node you want to duplicate (see Search for classifications)
- Select the node you want to duplicate in the work pane
- In the work pane’s toolbar, select [Duplicate in nodes at the same level] or [Duplicate in subordinate nodes]. All node data, except for the identification number, will appear in the editor (the Node field will be empty).
- Enter the identification number of the new node in the Node field of the line item editor
- Click the [Accept] button in the toolbar of the line item editor to accept changes and move the node to the classification structure
- Click [Save] in the standard toolbar of the application header to save changes
Delete a node
Preconditions
A node can only be deleted if neither itself nor any of it subordinate nodes is used in the system. You must have the administrator authorizations to delete a node.
Instructions
To delete a classification node, complete the following steps:
- Open the Classifications application
- Open the classification whose node you want to delete (see Search for classifications)
- Select the node you want to delete in the work pane
- Select [Delete] in the work pane’s toolbar. The selected node and its subordinated nodes will be deleted from the classification tree.
- Click [Save] in the standard toolbar of the application header to save changes.
Mark a node for deletion
Preconditions
A node can only be marked for deletion if it has not been already marked for deletion and if neither itself nor any of its subordinate nodes is used anymore in the master data and in the configuration base data.
Instructions
To mark a node for deletion, complete the following steps:
- Open the Classifications application
- Open the classification or node to be marked for deletion (see Search for classifications)
- Select the node you want to mark for deletion in the work pane
- Select [Mark for deletion] in the work pane’s toolbar. The selected node and its subordinated nodes will be marked for deletion.
- Click [Save] in the standard toolbar of the application header to save changes.
Unmark a node for deletion
Preconditions
A deletion marker can only be removed if a given node is marked for deletion and its parent node does not have a deletion marker.
Instructions
- Open the Classifications application
- Open the classification or node you want to unmark for deletion (see Search for classifications)
- Select the node you want to unmark for deletion in the work pane
- Select [Unmark for deletion] in the work pane’s toolbar. The deletion marker for the node and its subordinate nodes will be removed.
- Click [Save] in the standard toolbar of the application header to save changes.
Create level descriptions
Level descriptions are used in order to make it easier to search for nodes. They act as additional node names.
Instructions
To create a level description for a classification, complete the following steps:
- Open the Classifications application
- Open the classification for which you want to create level descriptions (see Search for classifications)
- Switch to the Level descriptions view in the standard toolbar. The classification structure in the work pane will be replaced with the level description table, containing a toolbar and the Level and Description columns.
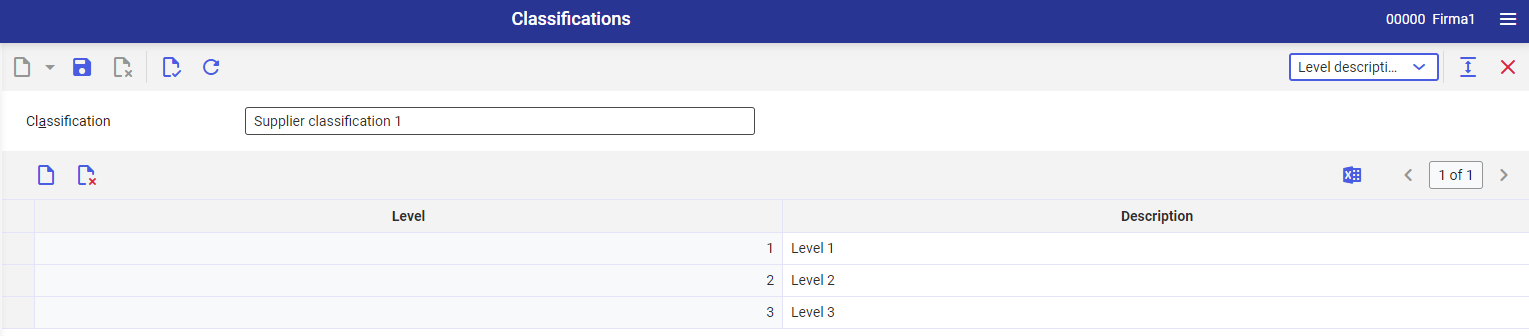
- Select [Add] in the table’s toolbar. A new row will be added in the table.
- Enter a level description in the Description field.
- Click [Save] in the standard toolbar of the application header to save changes.
Delete level descriptions
Preconditions
Level descriptions can only be deleted if there is no description with a higher number in the system or if all descriptions with higher numbers have been deleted.
Instructions
- Open the Classifications application
- Open the classification for which you want to delete level descriptions (see Search for classifications)
- Switch to the Level descriptions view in the standard toolbar
- Select a row with the description to be deleted
- Click [Set/remove deletion marker] in the table’s toolbar. The selected row will be marked for deletion.
- Click [Save] in the standard toolbar of the application header to save changes. The selected table row will be deleted.