
The Export collection points batch application allows exporting collection points defined in the Collection points application into selected sales channels.
To properly export data, the following conditions need to be met:
- A given collection point must be created and saved in the Collection points application, as well as marked as active (with the Active parameter on the General tab) and visible (with the Visible parameter on the General tab)
- The collection point must be assigned to a sales channel in the Collection point assignments application
The application, as other batch applications, is displayed as a dialog window. It is composed of the Application and Batch settings tabs, which are further divided into sections and other tabs.
Application tab
The tab’s header contains fields presenting information on the application:
- Batch application – it displays the name of the application
- Development object – it displays the name of the development object related to the application
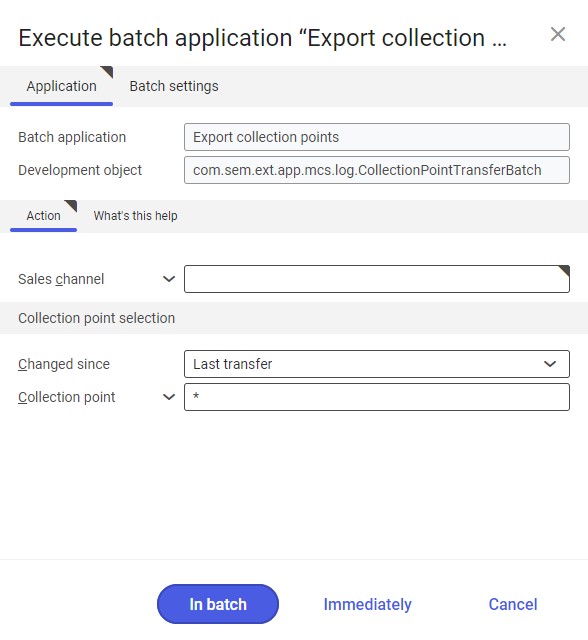
Action tab
The tab contains the following field:
- Sales channel – it allows defining a sales channel to which collection points are to be sent
Collection point selection section
The section contains settings referring to collection points to be exported:
- Changed since – it allows selecting collection points to be exported. It is done by selecting a period during which such points have been added or last modified. Available options include:
- Anytime – it exports all collection points, regardless of whether or when they have been exported
- Last transfer – it exports those collection points that have not been exported during the previous export operations or that have been modified afterwards
- Collection point – the field allows selecting collection points to be exported. Collection points can be entered manually (separated with commas) or selected from the list under the [Value assistant] button.
Batch settings tab
The tab contains settings for processing the application in the background:
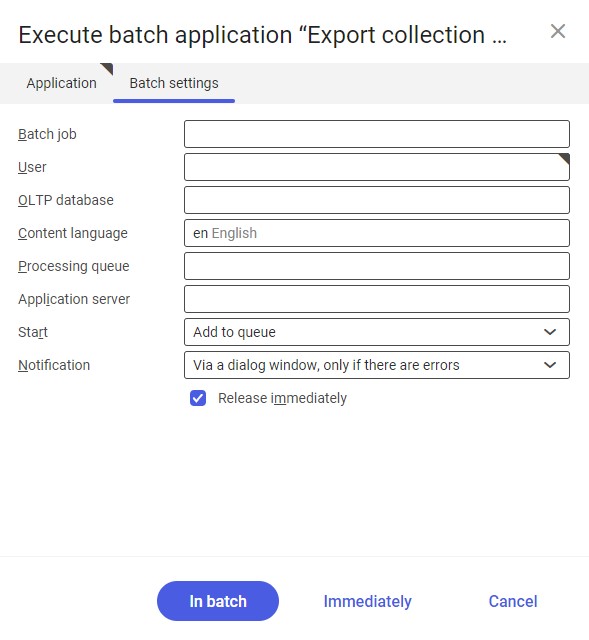
- Batch job – the name of a batch job. The field may be filled in manually or left empty. Thanks to this name, it will be possible to find a given batch job in the Batch job application.
- User – the identification of a user who creates a batch job. The field is automatically filled in with the data of the logged-in user. The data can be changed manually or using the [Value assistant] button on the right-hand side of the field.
- OLTP database – the OLTP database to which the user is logged in. The field can be filled in using the [Value assistant] button.
- Content language – the content language of the OLTP database where batch processes are performed, retrieved from the system settings. The field is filled in automatically; the automatic value may be changed by selecting another language on the list under the [Value assistant] button.
- Processing queue (required) – a queue that will be used to schedule batch jobs to be processed in the system. A job starts to be processed once the previous job in the queue has been processed. The value of this field can be changed manually or using the [Value assistant] button.
- Application server – the application server where a batch job is to be performed. A relevant value may be selected under the [Value assistant] button.
- Start – the field’s drop-down list makes it possible to select a value determining an export operation’s start time. Available values include:
- Add to queue (default) – an import job is added to the job queue
- At restart of application server – the import will be performed after the server is restarted
- Scheduled: external – it makes it possible to manage the operation time of the batch application from the operating system
- Scheduled: once only – it makes it possible to define the import time once using the fields Begin and Maximum run time
- Scheduled: as a series – selecting this option allows creating a pattern of how often the batch application is to be run and activates additional fields:
-
- Series canceled – it is responsible for displaying notifications if a job is not completed successfully or an error occurs
- Begin – the start date and time of a batch job
- Maximum run time – it allows defining the maximum run time for a job
- Timeout notification – if this parameter is selected, the system sends a relevant notification if the timeout of a given batch job expires
- Serial pattern – it allows defining a pattern for batch jobs

Serial pattern - End – it allows defining the end time for a batch job
-
- Notification – the field’s drop-down list allows the user to select if, how, and when notifications about the import status are to be displayed. Available options include:
- No
- Using a dialog window
- Via a dialog window, only if there are errors
- By Workflow
- By Workflow, only if there are errors
- Release immediately (available and selected by default if the Add to queue or At restart of application server options have been selected in the Start field) – it immediately initiates the import operation. If it is not selected, it is necessary to release a given batch job in the Batch jobs application; otherwise, the process will not be continued.
To run the collection point export operation, define batch settings and select the [In batch] button.