
Introduction
The application Output planning results allows creating a report which will be a result of the process of executed material requirements planning and displaying the data presented in the Material requirements query application. The document allows, for example, checking generated planning recommendations and occurring conflicts.
The application Output planning results is composed of the standard button bar and sections Parameters and Settings.
The output document contains the data from the Material requirements query application based on specific parameters. The output document includes the following areas:
- Line item data and output parameters
- Item MRP data
- Table of periods
- Demand origin/coverage element
- Conflict planning
Some of these output areas can be hidden in order to obtain possibly the most compact form of the output data, containing required information only.
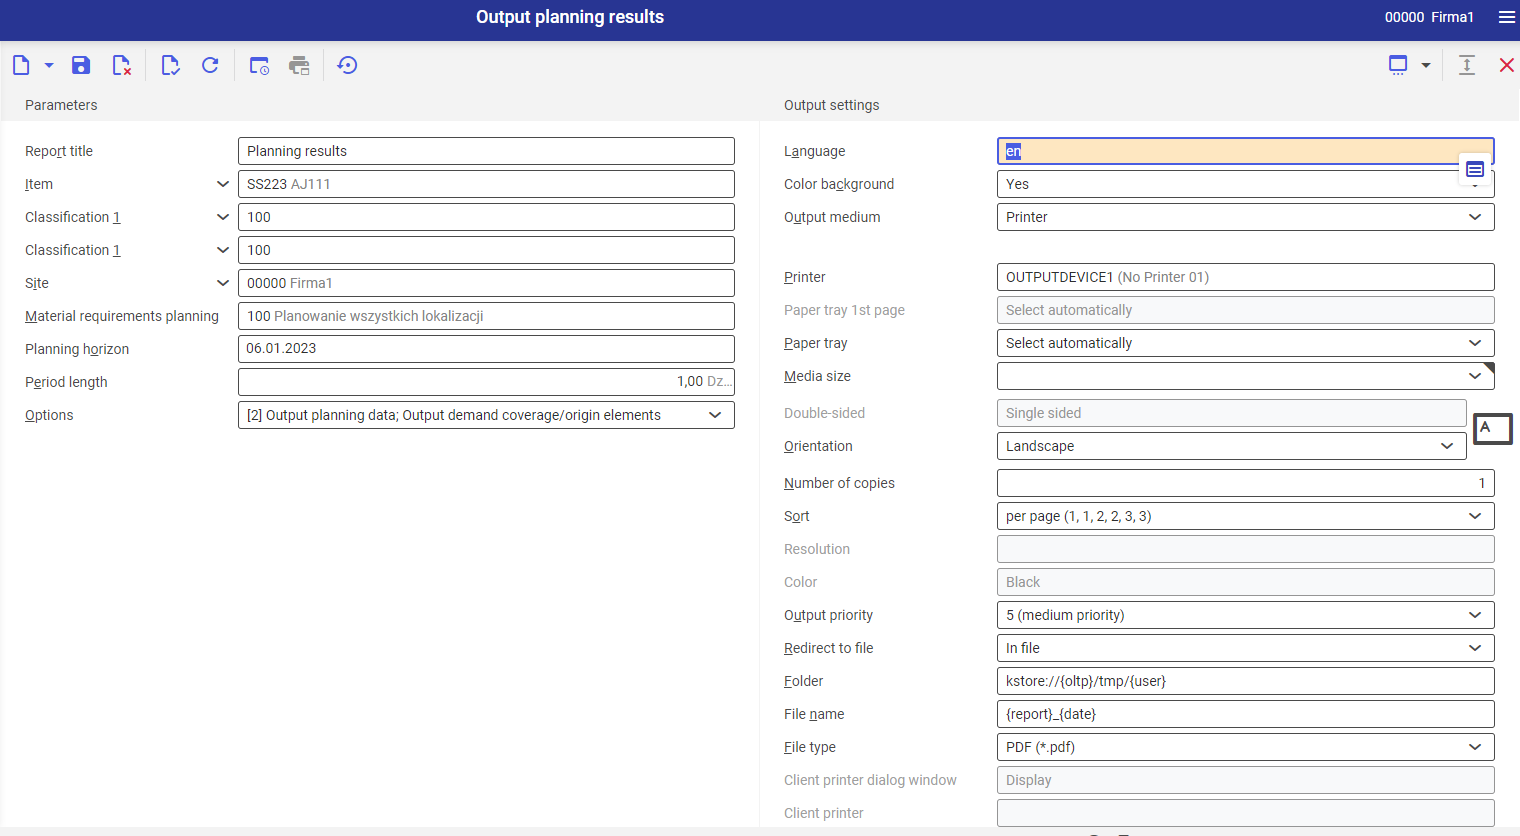
Section Parameters
Below, description of the parameters allowing for limiting the output criteria, can be found:
- Report title – allows for defining the output document name. Default value is Planning results.
- Item – allows for selecting an item in order to limit the scope of the output. If no value is selected, the report will contain the data of all items of the planning process. To be able to display item’s data in the output, first the item must be processed by the Material requirements planning application.
- Purchasing item classification 1 – item related to selected classification will be displayed in the output.
- Production item classification 1 – item related to selected classification will be displayed in the output.
- Site – allows for selecting the site for which the output with planning results is to be generated.
- Material requirements planning – allows for selecting material requirements planning from which it is necessary to generate the output with final results of the planning process.
- Planning horizon – allows for defining the date until which the report is to be generated. The planning horizon must occur after the date of material requirements planning execution.
- Period length – allows for defining the number of calendar days for which the data in the output is to be summed up. The default value is 1 day. It is not possible to define more than 999 days.
- Options – allows for defining options affecting the output layout, the user can select more than one option. Available values:
- Output planning data – specifies whether in the output the item planning data for the site is to be visible in the output
- Output demand coverage/Origin elements – specifies whether the output should include the list of demand coverages and origin elements
- Output conflicts – specifies whether conflicts demand coverages/origin elements should be included in the output as subordinate lines. This option is available only if the option Output demand coverage/Origin elements is selected.
- Suppress empty periods – specified whether periods without receipts/releases or planning recommendations are supposed to be displayed
Section Settings
- Language – the default value is the original report language
- Color background (refers to tables) – this field indicates whether in the report, rows are supposed to be alternately colored. Used background color is specified on the basis of the current color scheme selected in the user settings.
- Output medium (mandatory field) –from a drop-down list, it is necessary to select option determining whether the report is supposed to be added, sent by fax or by e-mail.
After selecting the option Printer, the following fields appear:
- Printer – with the use of the [Value assistant] button it is necessary to select one of available devices
- Paper tray 1st page – in this field, it is possible to define paper tray for the first page
- Paper tray – with the use of this parameter it is possible to select paper tray from which the printer takes the paper
- Media size – from a drop-down list it is possible select the format in which the report will be printed. By default, the A4 value is set.
- Double-sided – this parameter indicates whether the printout is to be one- (value selected by default) or two-sided. In case of two-sided printout, it is possible to flip it by the longer or shorter edge.
- Orientation – allows for selecting printout orientation from a drop-down list. Sheet of paper icon, placed on the right side of the row, presents selected printout orientation.
- Number of copies – number of copies of the printout, field filled-in manually
- Sort – this field indicates whether the printout is to be performed per copy (option selected by default) or by page.
- Resolution – this field displays printout resolution settings for selected printer. Available options:
- Normal
- High
- Draft
- 200×1.200 dpi
- 600×600 dpi
- Color – allows for selecting color printout (if the printer is provided with such option) or leaving it in black and white
- Output priority – this parameter specifies the printout sequence according to assigned priority. From a drop-down list it is possible to select parameters from 1 (the highest) to 9 (the lowest).
- Redirect to file – field allowing for redirecting report. Available options:
- No – the report will not be redirected
- In file – the report will be saved to a file
- In file and print – the report will be saved to a file and sent to the client’s printer, if such option is available
- Folder – field available after selecting the option Redirect to file → In file. It allows for selecting the folder in which the report will be saved.
- File name – field available after selecting the option Redirect to file → In file. Allows for entering the name for the report file.
- File type – parameter available after selecting the value In file in the Redirect to file field. Thanks to the parameter, from a drop-down list it is possible to select the format in which the report will be saved.
- Client printer dialog window – displays dialog window for the report printout
- Client printer – in this field, it is necessary to specify client’s printer
After selecting the option Fax, the following settings are displayed:
- Fax – selection of one of available devices
- Sender ID – fax sender data
- Control sequence – character string that will be used when controlling fax. This number will be transferred directly to the ERP system.
- Fax number – in this field, it is necessary to enter the number of the receiving device
- Subject – fax subject, entered manually
- Media size – selection of paper size from a drop-down list. By default, the value A4 is set.
- Output priority – this parameter specifies the dispatch sequence according to assigned priority. From a drop-down list it is possible to select parameters from 1 (the highest) to 9 (the lowest).
- Resolution – this field displays printout resolution settings for selected printer. Available options:
- Normal
- High
- Draft
- 200×1.200 dpi
- 600×600 dpi
- Double-sided – this parameter indicates whether the printout is to be one- (value selected by default) or two-sided. The option is available, if the fax has the option of double-sided printout.
- Orientation – allows selecting printout orientation from a drop-down list. Sheet of paper icon, placed on the right side of the row, presents selected printout orientation.
- Send – in this field, it is necessary select whether the document should be sent immediately or after a specific timeout is reached (the timeout can be additionally defined in the field below)
- Time point sent – time within which the document is supposed to be sent
After selection the option E-mail, the following settings are displayed:
- E-mail gateway – with the use of the [Value assistant] button, it is possible to select the e-mail gateway through which the document will be sent
- From – e-mail address of the sender. This field is filled-in by default with the user’s e-mail address and cannot be edited.
- Reply to – e-mail address to which the response should be sent. The field should be filled-in, only if the response is to be sent to a person different than the sender.
- To – field filled in with the e-mail address/addresses of the recipient/recipients
- CC – in this field, it is necessary to enter e-mail addresses to which the message is to be sent as copy.
- BCC – in this field, it is necessary to enter e-mail addresses to which the message is to be sent as copy. These addresses will be not visible for other recipients.
- Subject – field for entering the subject of the message
- Text – message content (it is possible to choose normal text or HTML). To fill-in the filed, it is necessary to click on the diamond icon which opens dialog window allowing for entering the message content.
- Attachment – this field allows for adding an attachment to the message, e.g., image or document, if the selected gateway is provided with such option
- File type – attachment type selected from a drop-down list.
- Output priority – this parameter specifies the dispatch sequence according to assigned priority. 1 – the highest, 9 – the lowest
Output result
After releasing the report looks as follows:
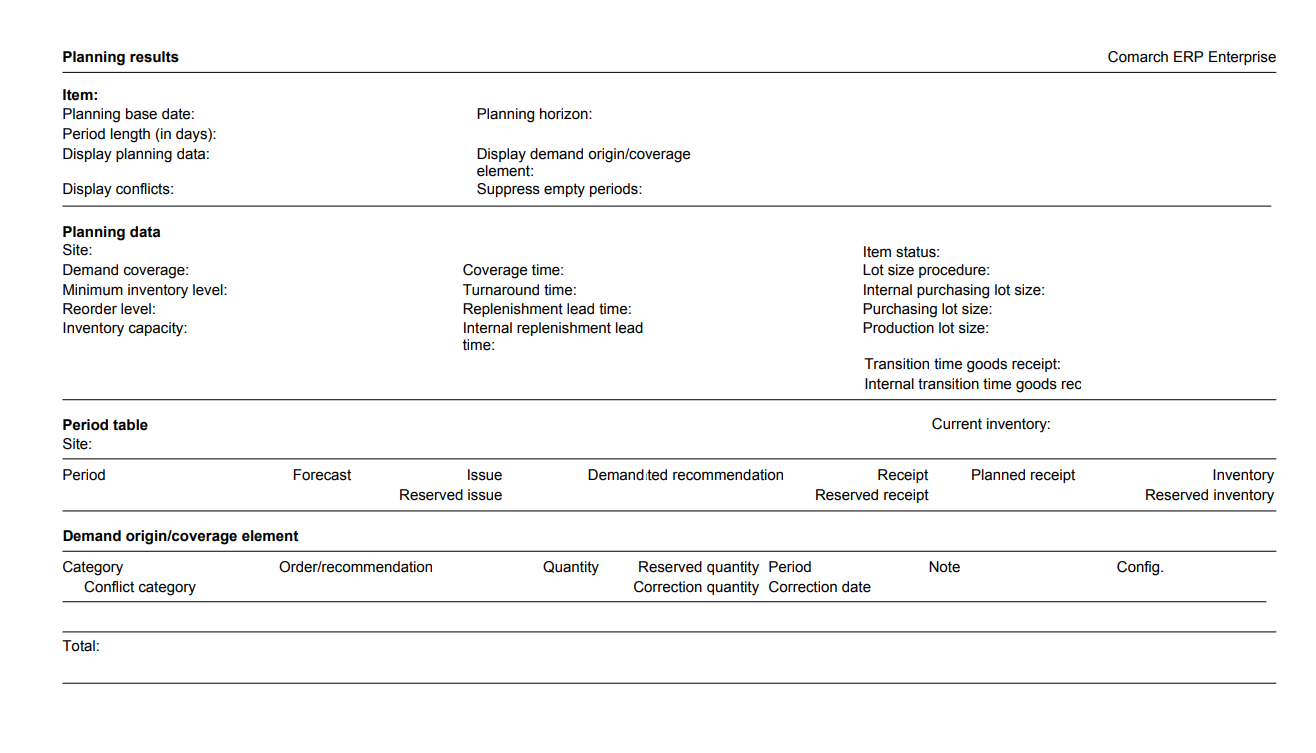
The output printout is divided into the following sections:
- Item – contains information regarding the item for which the planning results are generated in the report
- Planning data – the basic source data retrieved from the item data and necessary for executing planning, is displayed
- Period table – presents existing requirements and planning results
- Output demand coverage/Origin elements – documents and requirements recommendations are displayed
Output
The output is relevant for the application Output Planning results, which can be used, e.g., for assigning permissions.
Planning results: com.cisag.app.production.aps.rpt.APSResultMaterial
Authorizations
Authorizations can be assigned both through authorization roles and by assigning organizations.
The authorizations concept is described in technical documentation Authorizations.
Organizational assignments
For the user to be able to use the Output Planning results, must be assigned to an organization that is connected to at least one of the following organization structures:
- Inventory management
Authorizations for Business Partners
The application Output Planning results is not released for the business partners.