
The Bills of resources application makes it possible to define a production process by associating a bill of material and routing. The following document presents the procedures for handling the application.
Adding a new bill of resources
- Open the Bill of resources application
- Select the [New] button to create a new bill of resources sheet
- Enter the name of the new bill of resources created for the production process in the Bill of resources field
- Enter the description of the new bill of resources in the Description field
- On the General tab, define a routing and bill of material to be used by the bill of resources
- Save the new bill of resources by selecting the [Save] button.
After the new bill of resources is saved, the application displays operations retrieved from the associated routing in the work pane. - The system allows assigning specific materials to selected operations. For this purpose, select an operation to which materials are to be assigned and click the [Assign material] button in the work pane’s toolbar. The Assign materials dialog window will open. More information on the window may be found below.
- In the Assign materials window, select materials to be assigned to a given operation
Note
If materials are not assigned to particular operations, they will be unpacked before the first operation. This may lead to inventory being reserved too soon.
- Assign materials using the [Assign] button in the Assign materials dialog window
Note
The action of deleting an operation used for a bill of resources performed in the Routings application deletes that operation from the bill of resources as well. If an operation is replaced with another one in the Routings application, it is necessary to reassign materials in the Bills of resources application, as it is not done automatically.
Hint
A bill of resources can be duplicated by selecting the buttons [New] → [Duplicate].
Assign materials dialog window
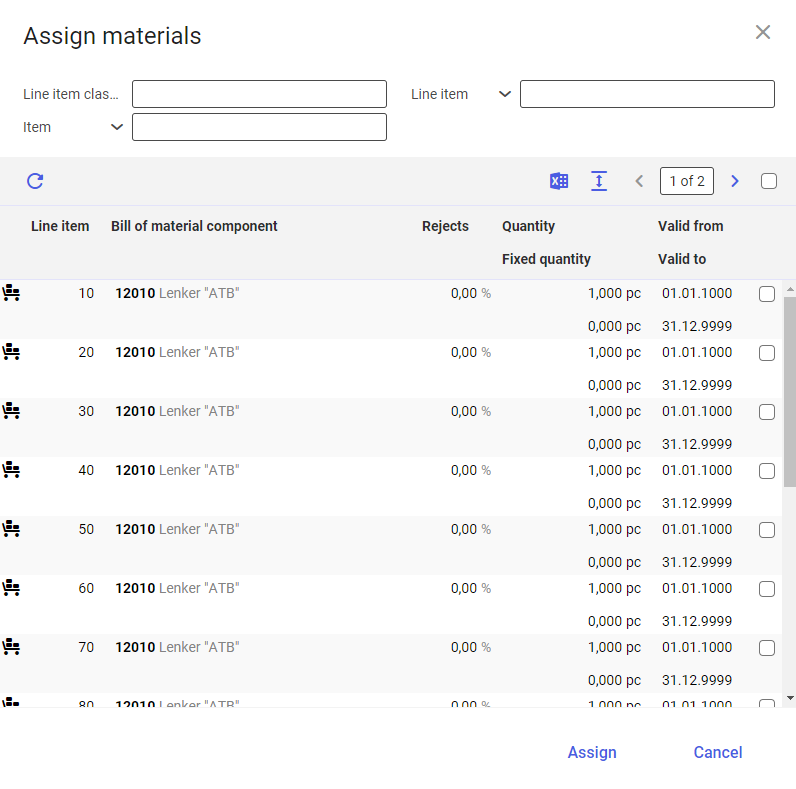
The Assign materials dialog window is composed of:
- Header – it contains fields allowing the user to filter table data
- Table – it contains unassigned materials retrieved from a bill of material assigned to the bill of resources
The dialog window’s header contains the following fields:
- Line item classification – it allows filtering materials according to an assigned bill of resources classification
- Line item – it allows filtering materials according to a line item number assigned to them in a bill of material
- Item – it allows filtering materials according to item names
The table contains the following buttons and columns:
- [Refresh] – it allows refreshing data in the table
- [Output pages already displayed into file] – it allows exporting table data to an XLS file
- [Show/hide title bar] – it allows showing/hiding the names of table columns
- [Select all] – it allows selecting all table line items
- Line item – it displays the number of a line item retrieved from an assigned bill of material
- Bill of material component – it displays an item name
- Rejects – it displays the percentage amount of material rejects
- Quantity – it displays a quantity depending on a reference factor defined for a given item
- Fixed quantity – in the case of a fixed quantity defined for a line item, such a quantity is not recalculated after defining the quantity of a production order – quantities will always be assigned the same value
- Valid from/Valid to – it displays a material’s validity period retrieved from an assigned bill of material