
This article contains the procedures for handling the Countries application: how to create and edit a country and a region. It also informs about possible requirements and effects.
Procedures
This article provides the procedures on:
- How to create a region
- How to edit a region
- How to delete a region
- How to create and edit address formats
- How to validate numbers
How to create a region
To create a new country region, follow the steps below:
- In the Country field in the application query pane, specify the country for which to create a region by selecting the [Value assistant] button or manually.
- Select the [Add] button in the work pane. An empty record will be added in the table.
- In the new record, type a region identification in the Region column using three characters (digits, letters or a their combination) maximum and then specify a description for the region.
- In the Language field, you can optionally select a language for the region.
- Select the [Save] button in the standard toolbar to save the changes.
How to edit a region
An existing region is modifiable. To make changes, follow the steps below:
- In the Country field in the query pane, select the country whose region is to be edited. Available regions will be displayed in the work pane.
- Click in the column to be edited and enter your changes.
- Select the [Save] button in the standard toolbar to save the changes.
How to delete a region
Preconditions
To delete a region, you need to have administrator authorization to use a specific business entity.
To delete a region, follow the steps below:
- In the query pane, select the country whose region is to be deleted.
- Select a region in the work pane. The record will be highlighted in the color of the theme selected in the user settings.
- Select the [Set/remove deletion marker] button in the toolbar under the work pane. The region will be marked for deletion.
- Finally, select the [Save] button in the application’s standard toolbar. The region will be deleted.
How to create and edit address formats
To create an address format that will be used to validate the entered addresses, follow the steps below:
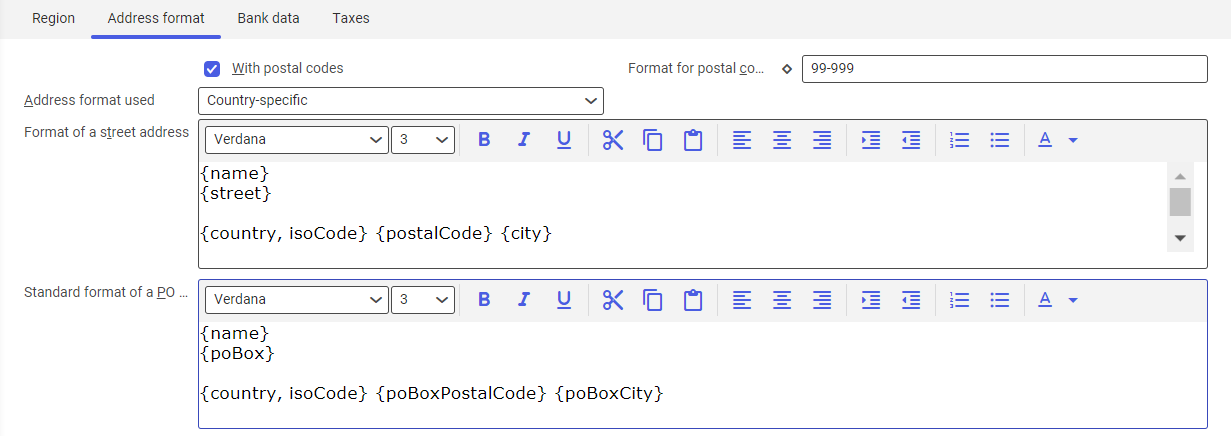
- Open the Countries application and go to the Address format tab.
- In the query pane, select the country for which an address format will be created.
- Set the Address format used field to Country-specific to ensure that the address format can be used for the selected country.
- Using any substitute marks, add a standard format for street addresses and PO box addresses.
- Select the [Save] button in the standard toolbar to save the changes.
-
- Open the Countries application and go to the Address format tab.
- In the query pane, select the country for which a postal code validation to be added.
- In the Format for postal code validation, enter the default format by using any substitute characters, for example: AA – 99 999.
- In order to add more formats, click on the diamond-shaped icon and in the opened window, select the [Add] button and then add another format.
- Select the [Save] button in the standard toolbar to save the changes.
A complete list of substitute marks is provided in article Countries → Allowed address formats.
HintYou can also add a deletion marker for address formats or export the address formats into a file.
{street}
{country, isoCode} – {postalCode} {city}
A list of allowed substitute marks is provided in article Countries → Allowed address formats.
How to validate numbers
The procedure below provides an example of how to define a format for validation of postal codes. Formats to validate bank identifications, bank account numbers, IBAN, tax numbers and VAT IDs under Bank data and Taxes tabs of the Countries application are created in the same way.
To add number validation, follow the steps below: