
The Voucher document templates application makes it possible to define a standard for voucher documents (with regard to data arrangement and layout), a method used when exporting them, and an archiving method.
The application is composed of:
- Header – it contains the basic data of a template to be defined
- Work pane – it allows defining details concerning the template
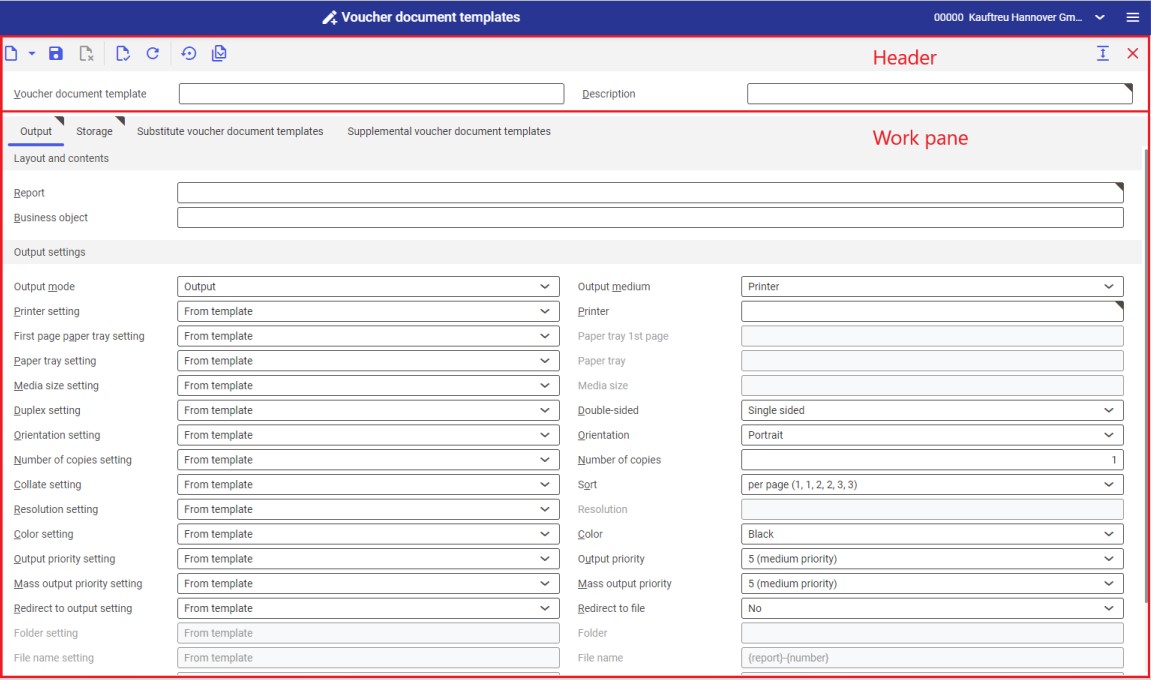
Header
The application header allows editing or adding a new voucher document template and makes it possible to enter basic data for a given template. The following buttons are available:
- [New] – it makes it possible to add or duplicate a voucher document template
- [Save] – it allows saving a template in the database
- [Delete] – it allows deleting a voucher document template. This action cannot be executed if a given template is being used.
- [Validate] – it makes it possible to validate and confirm parameters entered
- [Refresh] – it refreshes the template view
- [Set output settings to “From template”] – it sets the From template value in for all the fields in the Output settings groupin in the work pane
- [Validate all] – it makes it possible to validate and confirm all parameters entered
The header contains the following fields:
- Voucher document template – it displays the name of a voucher document template being defined/previewed
- Description – it displays the additional description of the template
Work pane
The work pane of the Voucher document templates application makes it possible to enter and edit data defining voucher documents exported to a medium.
Output tab
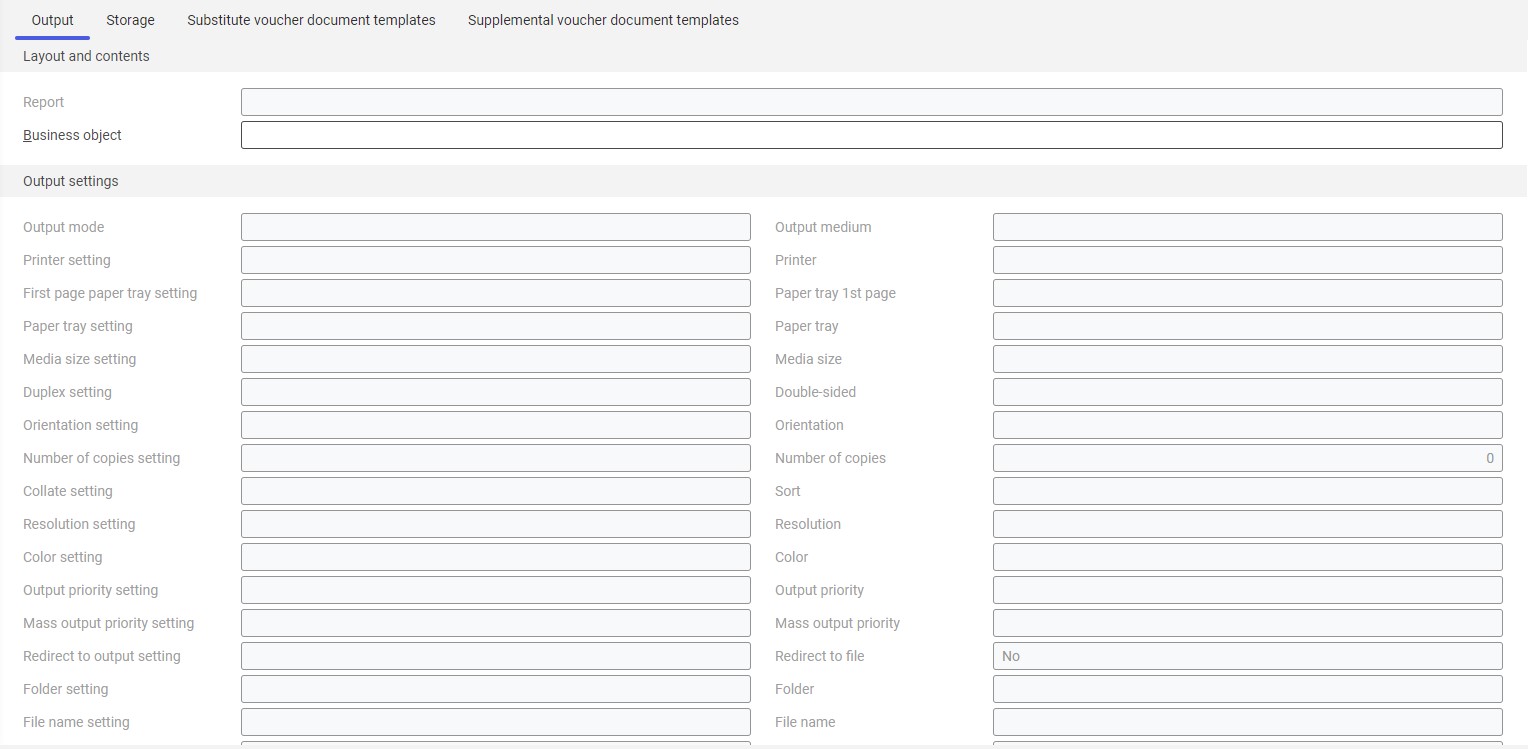
Layout and contents grouping
The grouping contains the Report field, that allows defining the database, that is the data source of a voucher template.
Output settings grouping
It allows defining detailed output settings for a given voucher document template.
The Output mode field enables the user to define export data configuration; available options include:
- Output – vouchers will be exported automatically to a selected medium
- No outputting – documents will not be published – exported to a medium; if storing is enabled, they are only stored in the database
Depending on the selected output medium, the range of definable settings is different. The first column allows the user to determine how a given setting assigned to a medium is to retrieve its values:
- From template – the field value for a medium will retrieve a value defined in the created voucher document template
- From user settings – the field value will be editable in an application using the voucher document template
- Do not use – settings not defined or a missing option on a device
The second column allows the user to define detailed settings for an appropriately selected output medium. The following output media and their corresponding setting fields are available:
Printer:
- Printer – it allows selecting a device with the use of the [Value assistant] button. Selecting a printer activates fields in this grouping that make it possible to adjust preferred printout settings.
- Paper tray 1st page – it allows defining a paper tray for the first page of the printout
- Paper tray – it allows selecting a paper tray to be used by the printer
- Media size – the field’s drop-down list allows selecting a format in which the report should be printed. By default, it is set as A4.
- Double-sided – it allows defining whether the printout is to be single- (default value) or double-sided. For double-sided printouts, it is possible to have the printout flipped according to the longer or shorter edge.
- Orientation – it allows selecting a printout orientation from a drop-down list.
- Number of copies – number of printout copies
- Sort – it specifies whether the printout is to be made according to copies (default) or according to page
- Resolution – this field displays available printout resolution settings for a selected printer. By default, it is set as 600×600 dpi; it is also possible to set the 1200×1200 dpi resolution.
- Color – it allows selecting color printout (if the printer supports this option) or leaving it in black and white
- Output priority – it determines the printout sequence according to an assigned priority. The drop-down list makes it possible to select parameters from 1 (the highest) to 9 (the lowest).
- Redirect to file – it allows redirecting the report:
- In file
- In file and print
- In file and on client printer
- Folder – this field is activated after selecting the In file option in the Redirect to file field. It makes it possible to select a folder where the report is to be saved.
- File name – this field is activated after selecting the In file option in the Redirect to file field. It makes it possible to enter the report file’s name.
- File type – this field is activated after selecting the In file option in the Redirect to file field. It makes it possible to select a format in which the report is to be saved.
- Client printer dialog window – it allows specifying whether a client printer dialog window is to be displayed
- Client printer – it makes it possible to define a client printer
Fax:
- Fax – it allows selecting one of the available devices. Selecting a device activates fields in this grouping.
- Sender ID – fax sender data
- Control sequence – a string of characters applied to control fax. This number will be transferred directly to Comarch ERP Enterprise system.
- Fax number – in this field, enter the number of the receiving device. A device must be selected in the Fax field to enter the number.
- Subject – a fax subject to be filled in manually
- Media size – it allows selecting the size of paper from a drop-down list. By default, it is set as A4.
- Resolution – this field displays available printout resolution settings for a selected fax device. By default, it is set as 600×600 dpi; it is also possible to set the 1200×1200 dpi resolution.
- Double-sided – it determines whether the report printout is to be single- or double-sided. This option is available if the fax device supports double-sided printing.
- Orientation – it allows selecting a printout orientation from a drop-down list. The paper card icon on the right visualizes the selected orientation.
- Output priority – it determines the sending sequence according to an assigned priority. The drop-down list makes it possible to select parameters from 1 (the highest) to 9 (the lowest).
- Mass output priority – it determines the publishing sequence according to an assigned priority. The drop-down list makes it possible to select parameters from 1 (the highest) to 9 (the lowest).
E-mail:
- E-mail gateway – using the [Value assistant] button, it is possible to select an e-mail gateway that is to be used to send the document
- Output attachments – it allows adding documents as attachments to e-mail messages
- From – the e-mail address of the message sender. By default, it is filled in with the address of the logged-in user and cannot be edited.
- Reply to – the e-mail address to which the reply is to be sent. The field should only be filled in if the reply is to be sent to a person different than the message sender. The field is defined in an application where the template defined is to be used.
- To – it allows defining the e-mail address(es) of the recipient(s) The field is defined in an application where the template defined is to be used.
- Cc – it allows entering the e-mail addresses of persons who are to receive the message as a copy
- Bcc – it allows entering the e-mail addresses of persons who are to receive the message as a copy These addresses will not be displayed to other recipients.
- Subject – the message’s subject
- Text – the message’s content (it can be entered as HTML or text only).
- Attachment – it allows adding an attachment, e.g. an image or document, to the message
- File type – in this field, it is necessary to select a file type from a drop-down list
- Output priority – it determines the sending sequence according to an assigned priority: 1 – the highest, 9 – the lowest
Storage tab
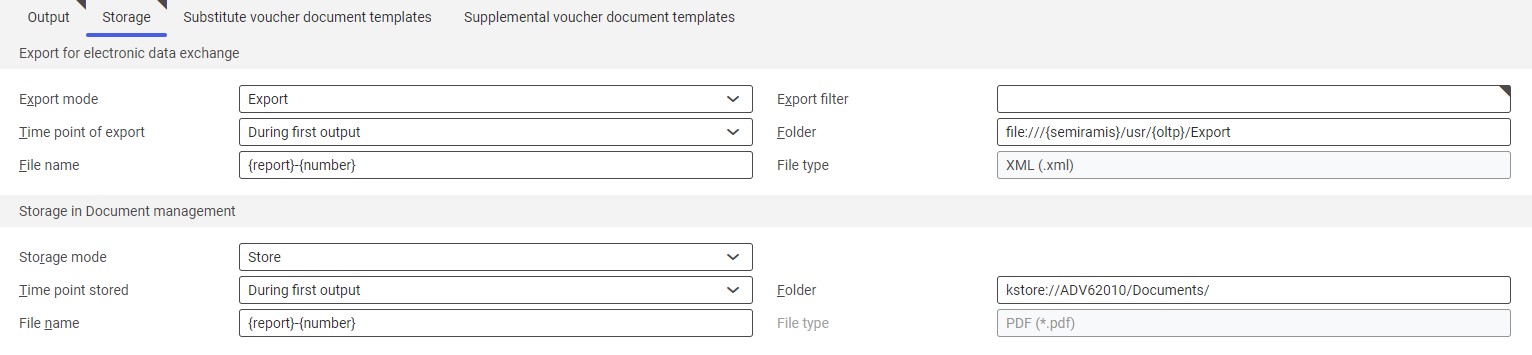
The tab makes it possible to define settings for voucher document storage in the system.
Export for electronic data exchange grouping
The section contains the following fields to be filled in:
- Export mode:
- Export – data will be exported to a medium
- No exported – data will not be exported to a medium
- Export filter – it allows defining a data export filter
- Time point of export:
- During first output – data will be exported upon outputting the original voucher document
- During output and reprint – data will be exported upon outputting the original voucher document and its copies
- Folder – it allows defining a path in the OLTP database where data will be saved
- File name – the name of a data file to be saved
- File type (non-editable) – by default, the export format it is set as XML
Storage in Document management grouping
- Storage mode:
- Store – voucher documents will be stored
- No storing – voucher documents will not be stored
- Time point stored:
- During first output – data will be stored upon outputting the original voucher document
- During the first output and copy output – data will be stored upon outputting the original voucher document and its copies
- Folder – it allows defining a location in KStore where documents are to be stored
- File name – the name of a stored document
- File type (non-editable) – by default, the storage format it is set as PDF
Substitute voucher document templates tab
The tab makes it possible to define different templates of a specific voucher document for particular users.
The table header contains the following buttons:
- [Add] – it makes it possible to add a new table row
- [Find and add multiple persons] – it makes it possible to add a group of defined system users to the table and assign voucher document templates to them
- [Set/remove deletion marker] – it allows setting/deleting a deletion marker for a table line item
The tab’s table contains the following columns:
- Person – it specifies to which person a given voucher document template is to be assigned
- Substitute voucher document template – it specifies a voucher document template which is to be assigned to a given person
Supplemental voucher document templates tab
The tab makes it possible to define additional voucher documents to be exported together with a given voucher document.
The table header contains the following buttons:
- [Add] – it makes it possible to add a new table row
- [Set/remove deletion marker] – it allows setting/deleting a deletion marker for a table line item
The tab’s table contains the following columns:
- Sort order – it specifies the entering sequence of supplemental voucher documents. By default, entered line items are numbered in increments of 10.
- Supplemental voucher document template – it specifies a supplemental voucher document template to be generated when the voucher document template that is being created is used