Contents
Selecting the [Customers] button in the main menu opens the list of customers. The list presents customers belonging to a region to which the currently logged-in employee is assigned.
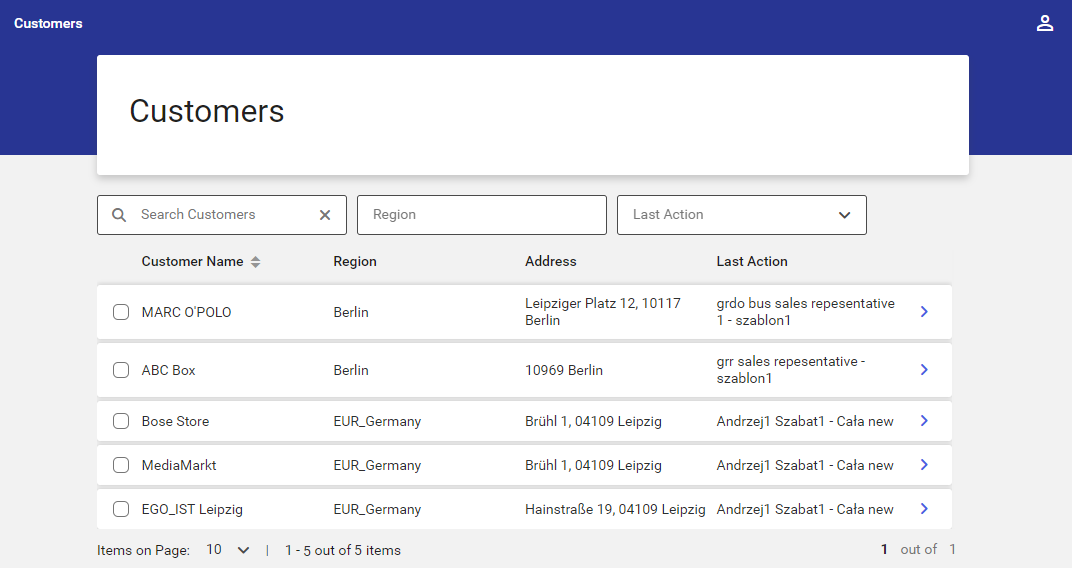
The Customers screen contains the following columns:
- Customer Name
- Region – a customer’s default region or group
- Address
- Last Action – it displays the last action registered for a given customer (presenting an employee’s full name and the appointment’s name)
Results on the customer list may be filtered out with the use of the following filters:
- Search Customers – a possibility to search customers by name or city
- Region – a possibility to select customers according to a region entered in the filter. The list of regions is displayed as a tree structure sorted alphabetically. The list may be narrowed down to a specific region by entering its name in the Search field and makes it possible to select appropriate regions and subregions.
- Last Action – a possibility to select customers depending on the date of the last appointment:
- Over 5 Days Ago
- Over Week Ago
- Over Two Weeks Ago
- Over Month Ago
- Other Date
Additionally, the list of customers may be sorted alphabetically (ascending/descending) by customer names.
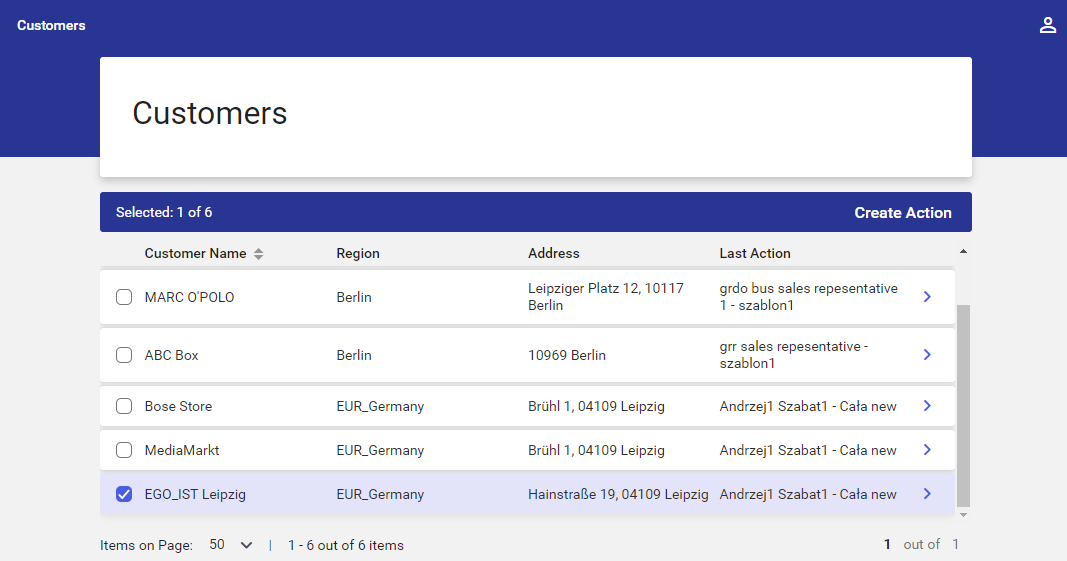
On the left-hand side of each customer’s name, there is a checkbox enabling the user to select a given customer. After at least one customer is selected, the option [Create Action] is activated, making it possible to schedule a new action for selected customers.
Customer details
Selecting the ![]() arrow on the right-hand side of each customer’s row opens the screen with customer details.
arrow on the right-hand side of each customer’s row opens the screen with customer details.
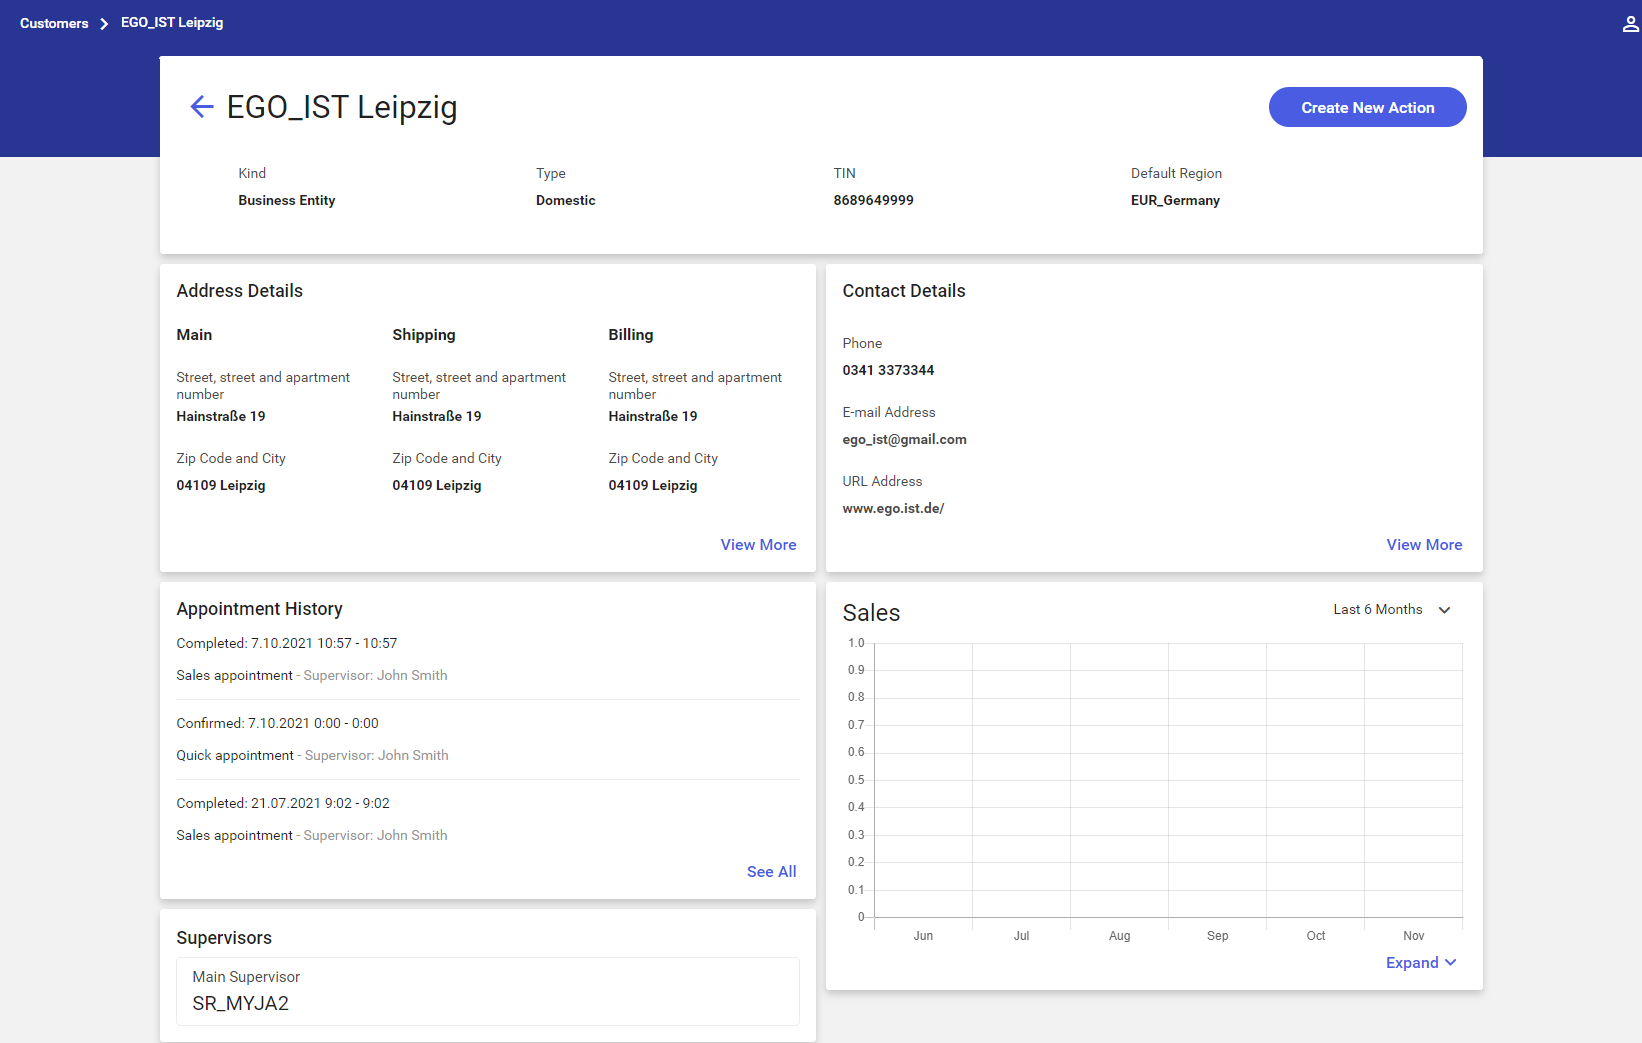
The screen presents detailed information on a given customer, divided into six separate sections:
- General
- Address Details
- Contact Details
- Appointment History
- Supervisors
- Sales
General

The General section contains basic information on a given customer:
- Kind
- Type
- TIN
- Default region
Next to the customer name, there is the [Create New Action] button, allowing the user to schedule a new action for the selected customer.
Address details
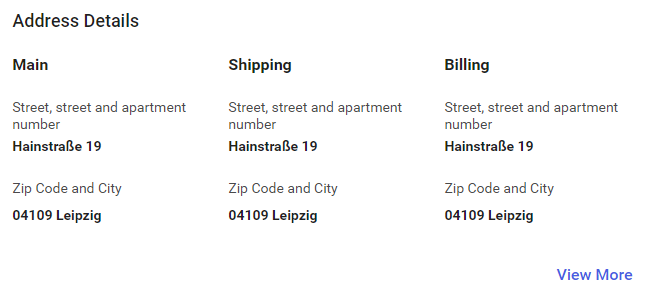
The Address Details section is divided into separate columns according to address types:
- The Main column presents the main address – it is only possible to define one main address; the main address is required
- The Shipping column presents a shipping address; this address is optional
- The Billing address presents a billingaddress; this address is optional
If a customer has more than one address belonging to a specific address group, the application additionally presents the [View More] button. Selecting it opens a new screen named Address Details, which displays all addresses in the following columns: Main, Shipping, Billing, and Mailing.
Contact details

The following contact details can be defined for a customer:
- Phone number(s)
- E-mail address(es)
- URL addres(es) directing to a customer’s website
The main tile with contact details displays one phone number, one e-mail address, and one URL address, provided they have been defined on the customer form. Data that has not been defined is not displayed. If there is more than one element belonging to a given contact group, the application additionally presents the [View More] button. Selecting it opens a new screen named Contact Details, which displays all contact details defined for a given customer.
Appointment history
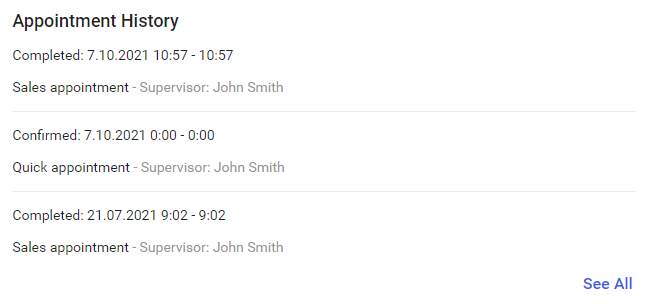
The Appointment History section presents information on all appointments with a given customer.
Details displayed by the section include:
- Appointment status
- Appointment date
- Duration
- Appointment name
- Supervisor – the full name of an employee completing the appointment
For appointments with the status Suspended and Pending, the application displays the completion start date.
For appointments with the status Confirmed and Unconfirmed, the application displays the scheduled end and start date.
If no appointments have been completed with a given customer, the section displays the message “No customer appointments”. By default, the application displays the last three appointments, with a possibility to open a summary containing the list of all past appointments ([See All] option).
Selecting the [See All] option in the Appointment History section opens the detailed list of all appointments defined for a given customer.
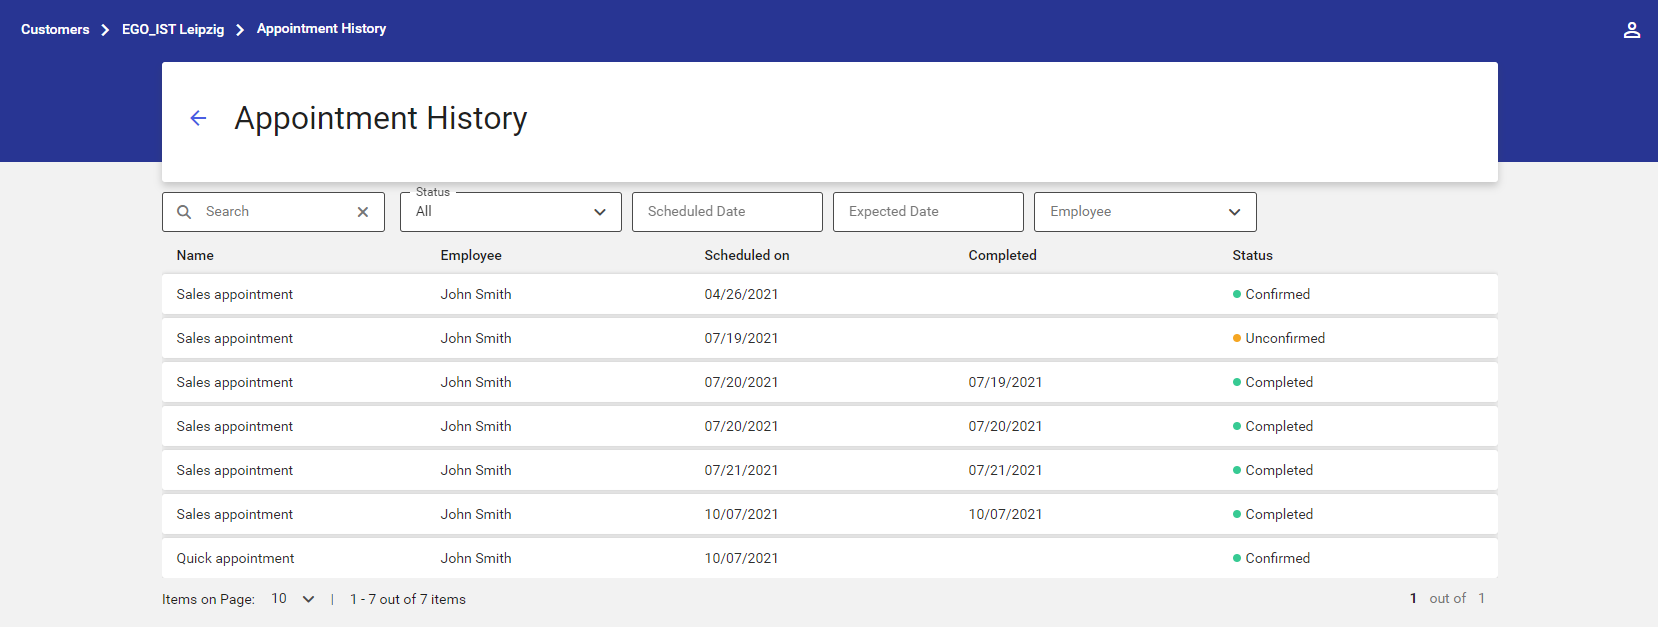
The Appointment History list presents the following information:
- Appointment name
- Employee’s full name or acronym
- Scheduled on – a scheduled appointment date
- Completed – an appointment’s completion date
- Status:
- Unconfirmed
- Confirmed
- Completed – a finished and completed appointment
- Rejected – a finished and uncompleted or finished and rejected appointment
- Canceled
- Pending
- Suspended
Additionally, the Appointment History list can be filtered out with the use of the following filters:
- Search – it filters the list by appointment names or employee first or last names
- Status – it filters the list by appointment statuses. Available statuses include: Unconfirmed, Confirmed, Canceled, Pending, Rejected, Suspended, and Completed.
- Scheduled Date – it filters the list by appointment scheduled dates:
- The user can enter a specific scheduled date
- Scheduled Date – From – a start date within the range of searched appointments
- Scheduled Date – To – an end date within the range of searched appointments
- To accept selected start and end dates, it is necessary to click [Confirm]
- Expected Date – it filters the list by appointment expected dates:
- The user can filter appointments according to specific scheduled or completed dates
- Expected Date – From – a start date within the range of searched appointments
- Expected Date – To – an end date within the range of searched appointments
- To accept selected start and end dates, it is necessary to click [Confirm]
- Employee – it sorts the list by employees
After an appointment is selected, the application opens its preview window containing the appointment’s details.
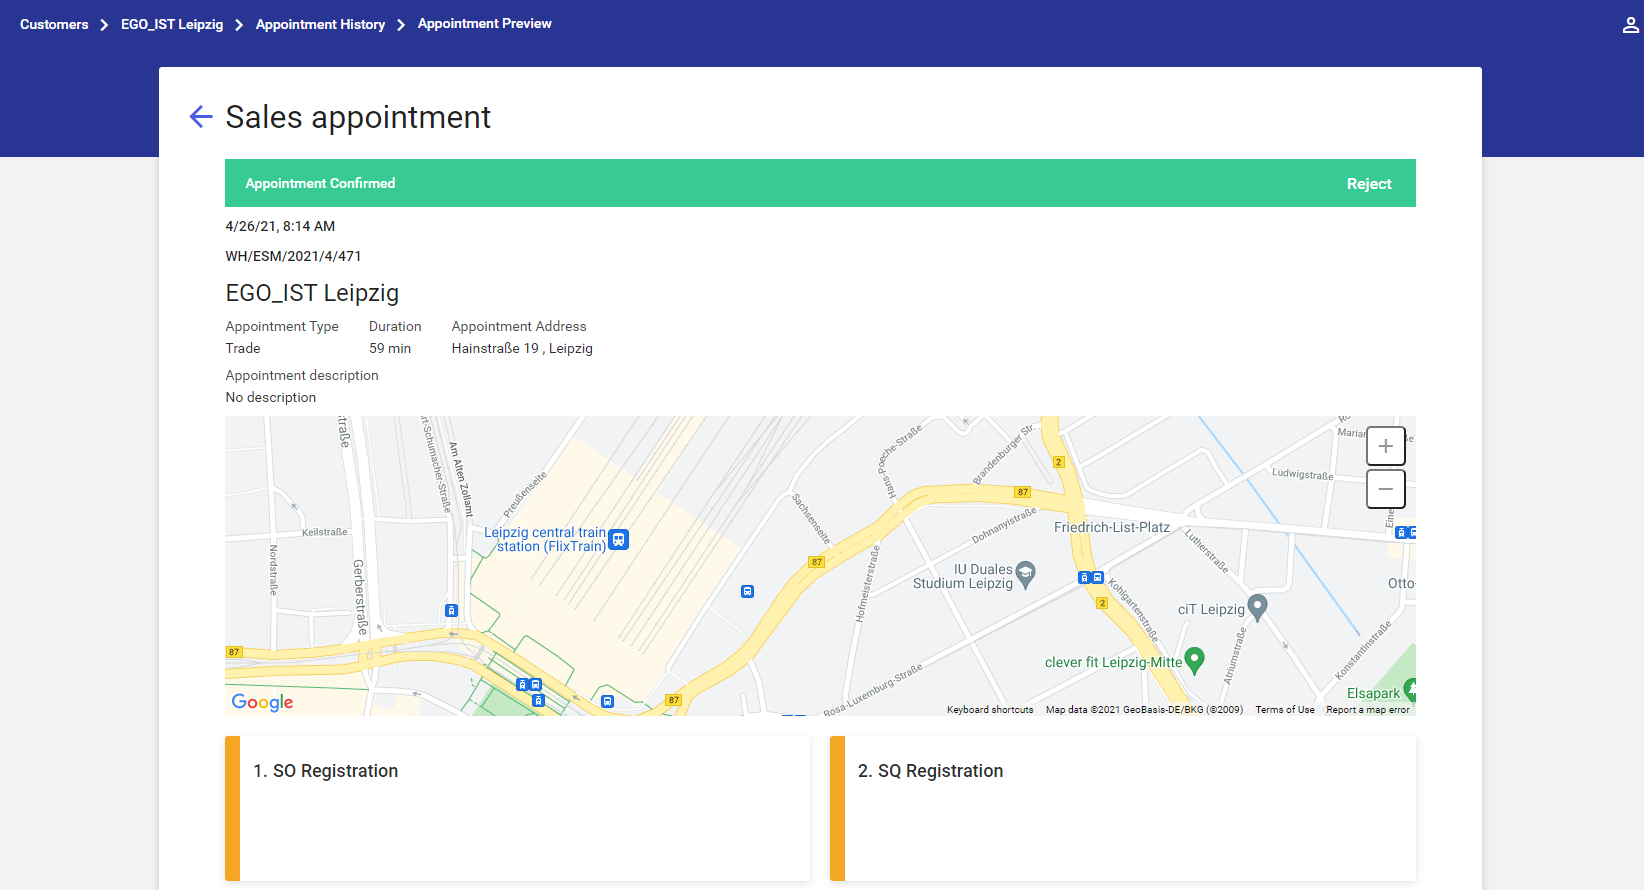
More details on the action preview may be found in the Actions article.
Supervisors
The Supervisors section presents information on a supervisor assigned to a given customer. By default, the supervisor is an employee assigned to a region as the main supervisor. If no main supervisor is assigned to a region, the application displays a temporary one.

Sales
The Sales section presents a graph with the total values of sales order documents related to a given customer.

Data presented on the graph are calculated on the basis of values from confirmed sales order documents.
It is also possible to select a period for which data is to be displayed:
- Month
- Last 6 Months
- Year
Selecting the [Expand] option displays detailed information on:
- Documents Value (total) – the total value of sales order documents issued within a given period
- Documents Value (subtotal) – the subtotal value of sales order documents issued within a given period
- Number of Documents – the number of sales order documents whose date of issue falls within the period defined in a selected filter
- Last Document – it shows the number of the last sales order document issued