The [Actions] button in the main menu displays the detailed list of actions scheduled for employees.
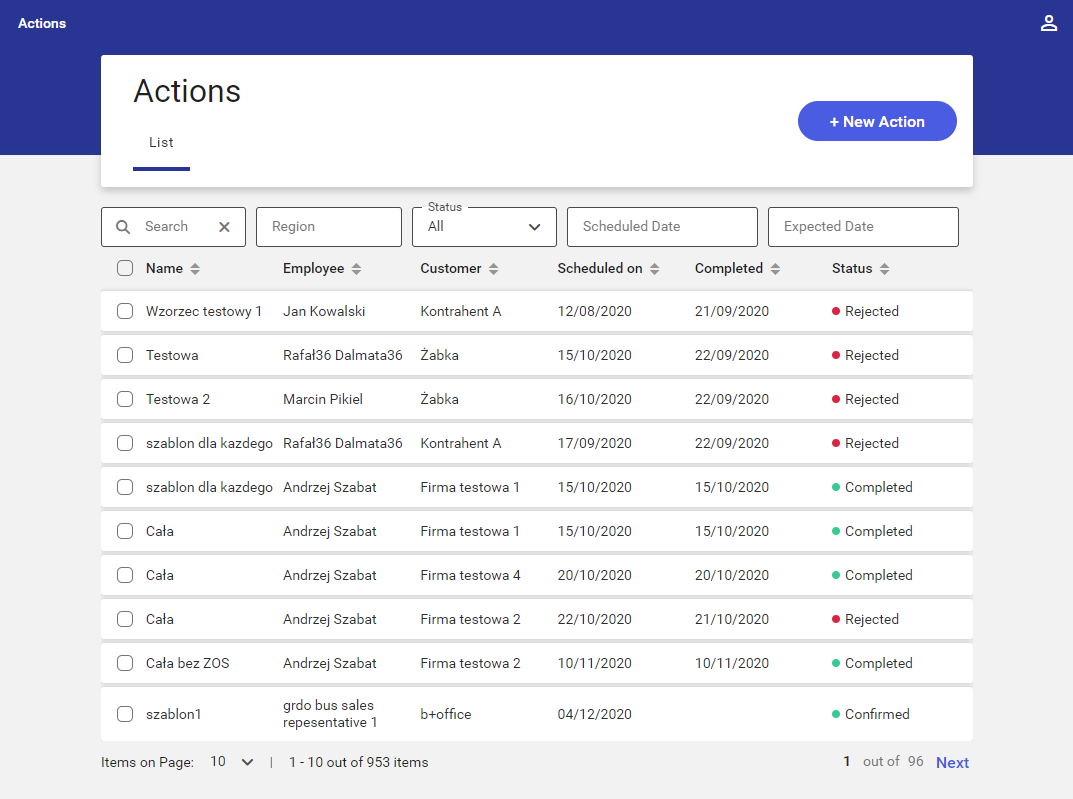
The application makes it possible to schedule, confirm, reject, and verify the status of sales appointments. The list of actions contains the following columns:
- Name
- Employee – it displays employees’ full names or acronyms if a full name is not given
- Customer – it displays a customer’s name
- Scheduled on – it displays scheduled appointment dates
- Completed – it displays the actual appointment date
- Status:
- Unconfirmed
- Confirmed
- Completed – an appointment that has been finished and completed
- Rejected – an appointment that has been finished but uncompleted or finished and rejected
- Canceled
- Pending
- Suspended
The list of actions may be filtered out using the following filters:
- Search – it allows filtering the list by appointment name or the first or last name of an employee or customer
- Region – it allows filtering the list by region to which assigned employees belong. The list of regions is displayed as a tree structure sorted alphabetically. The user can narrow the list down to a specific region by typing its name in the Search field or by selecting regions and subregions on the displayed list.
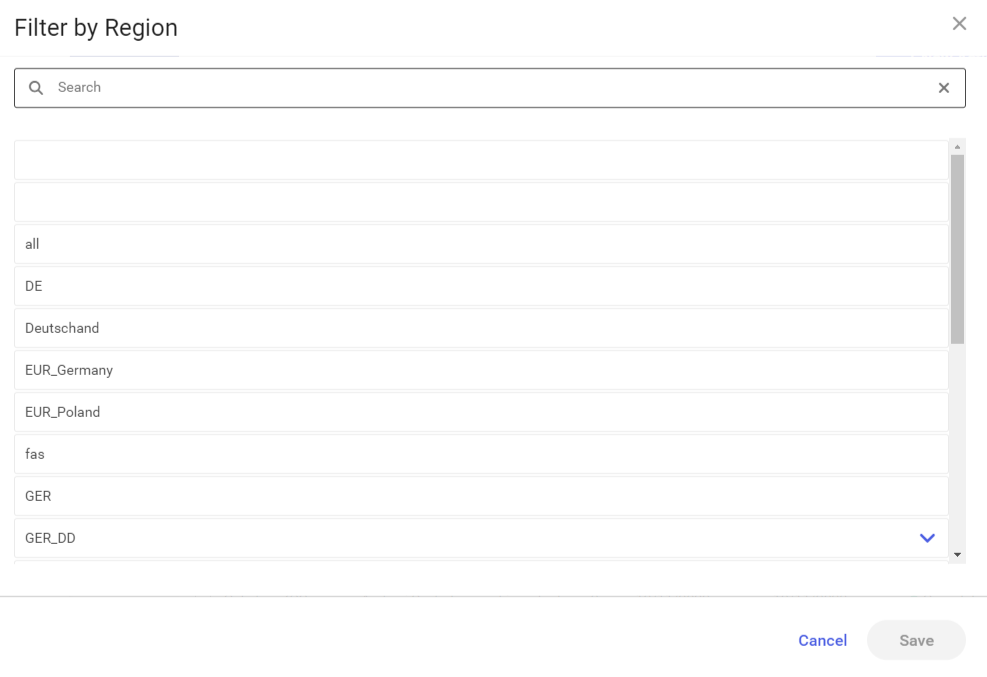
If a region contains subregions, the ![]() arrow is presented next to the region’s name, enabling the user to expand the region structure. Selecting the
arrow is presented next to the region’s name, enabling the user to expand the region structure. Selecting the ![]() arrow collapses individual regions.
arrow collapses individual regions.
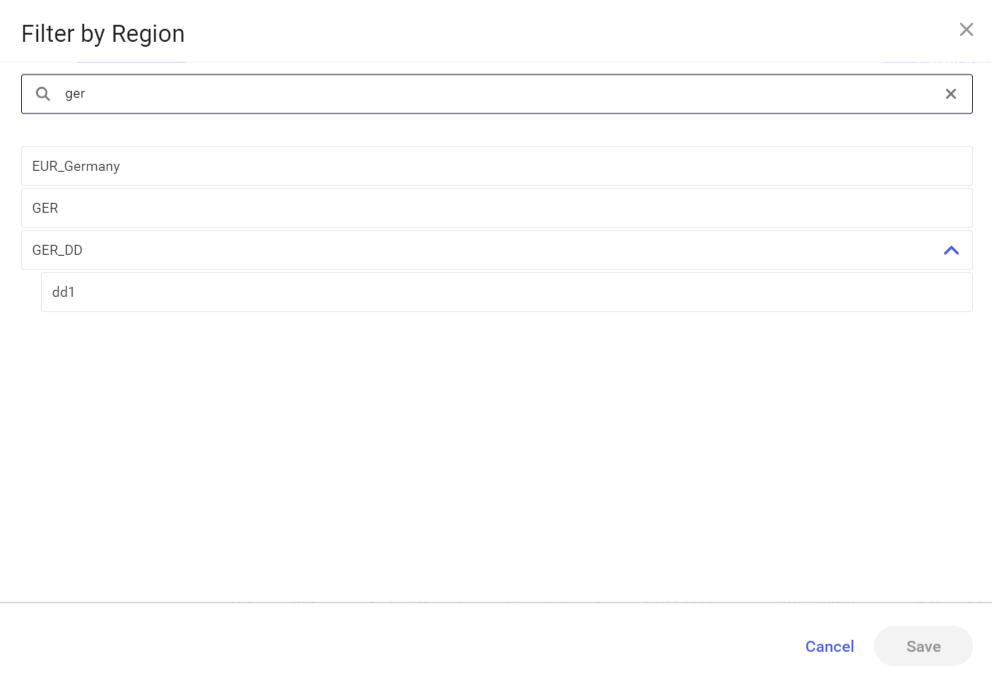
Selecting a region on the list highlights it and activates the option [Save]. Selecting [Cancel] returns the user to the previous screen.
- Status – it allows filtering the list by appointment status. Available statuses include: Unconfirmed, Confirmed, Completed, Rejected, Canceled, Pending, and Suspended.
- Scheduled Date – it allows filtering the list by scheduled appointment date
- Expected Date – it allows filtering the list by expected appointment date
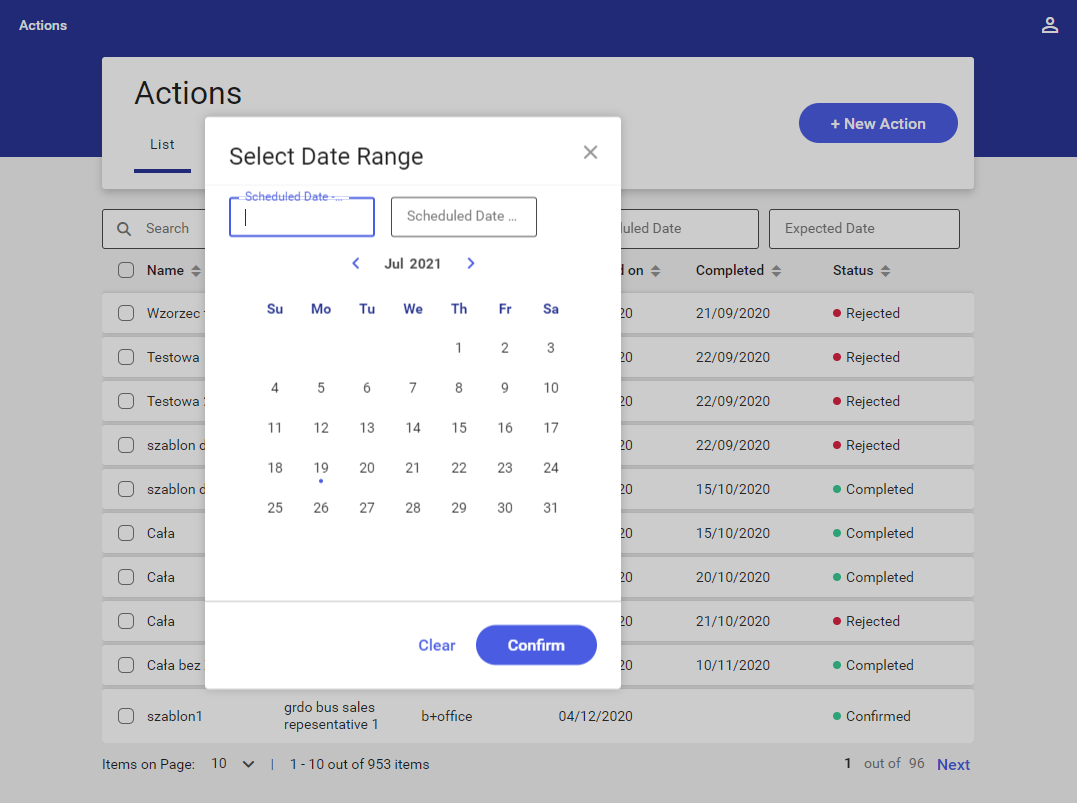
The list of actions may also be sorted ascending or descending by selecting a relevant arrow on the button next to one of the list’s columns.
Action preview
The [Actions] screen makes it possible to preview an appointment, regardless of its status.
In most cases, appointments are completed in Comarch Mobile Sales application.
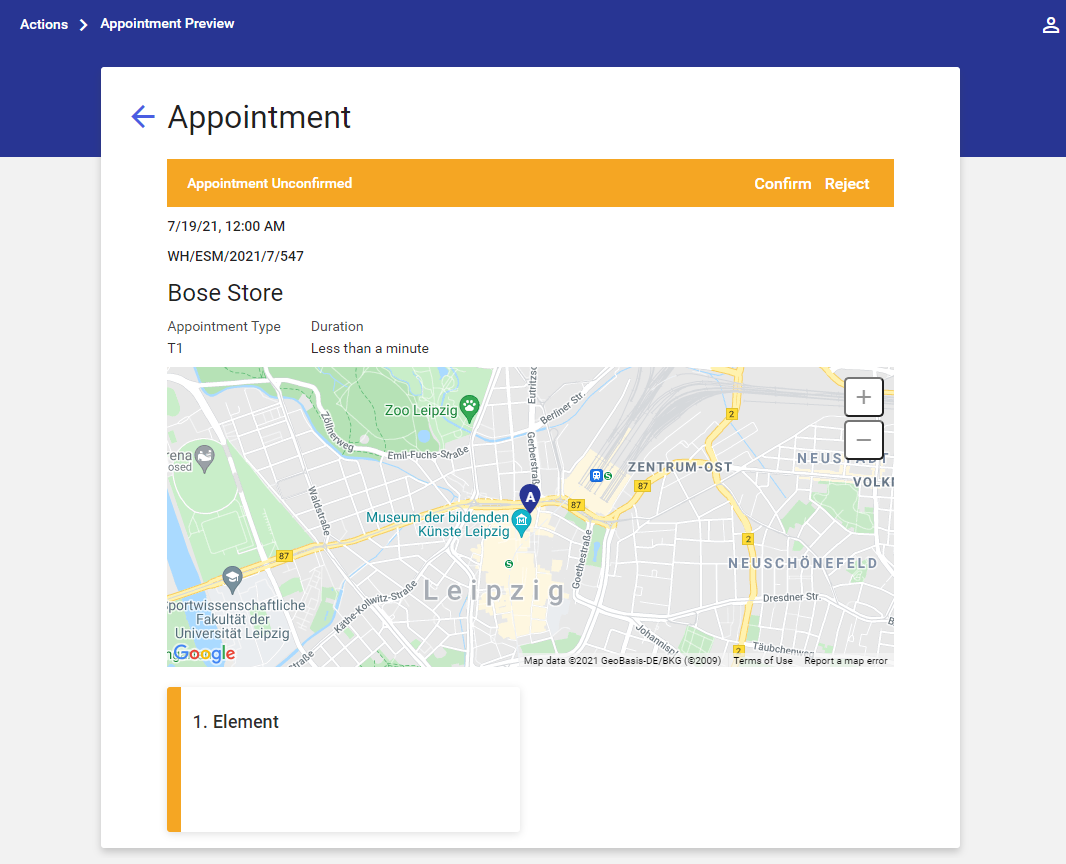
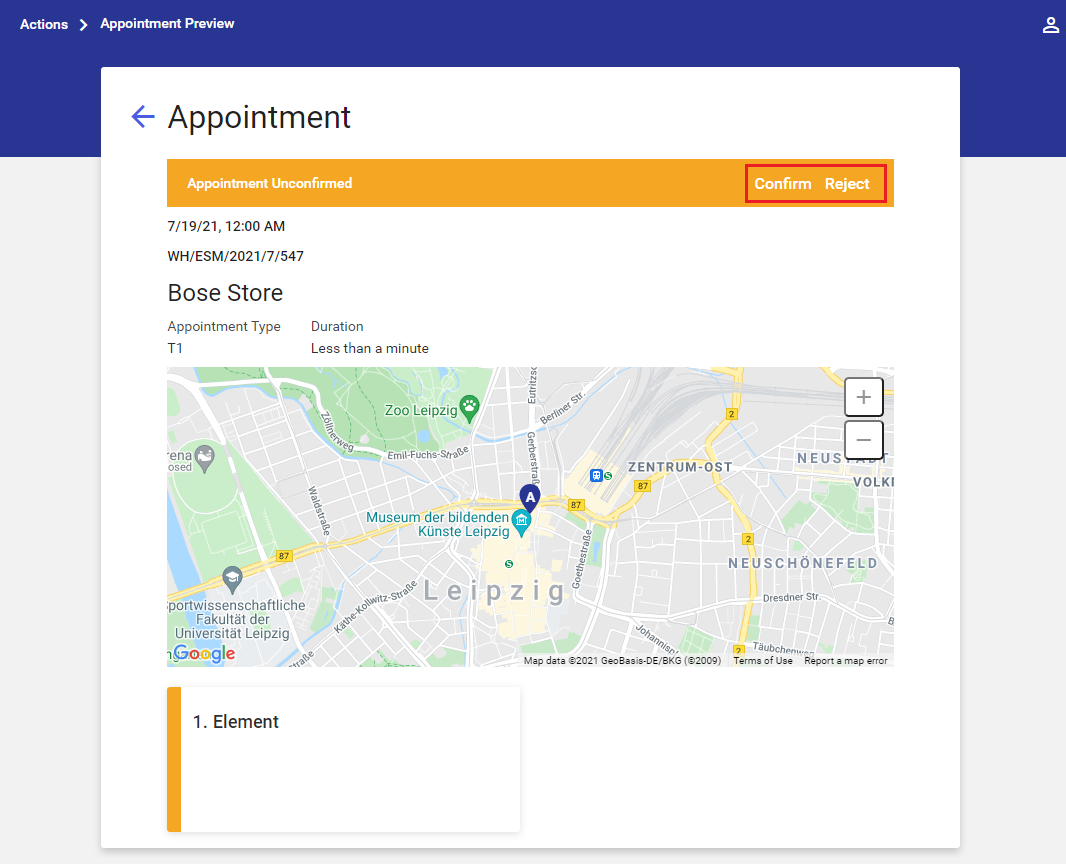
The appointment preview screen presents the appointment’s name and status, its scheduled date and time, a document number, the customer’s name and address (presented on a Google map), an appointment type and duration, and appointment elements.
Confirming and rejecting actions
The user can confirm or reject a given appointment in one of the two ways:
- In the preview of a given appointment; additional options [Confirm] and [Reject] are available next to the appointment status
- On the list of actions; additional options [Confirm Appointments] and [Reject Appointments] are displayed after selecting the checkbox next to a given appointment
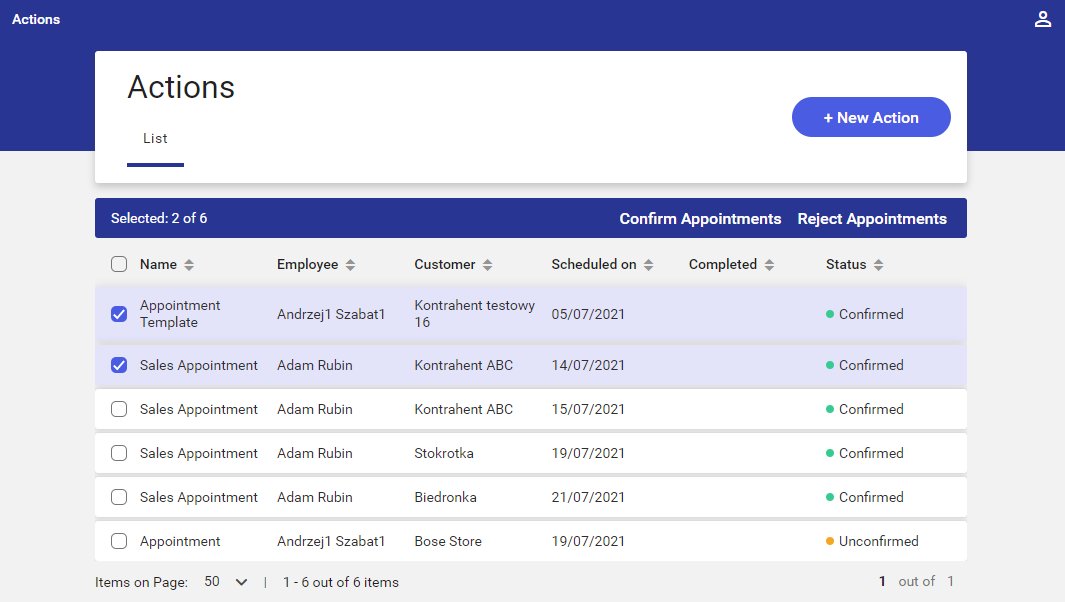
Comarch Mobile Management application makes it possible to edit action statuses:
- An unconfirmed appointment may be confirmed or rejected
- A confirmed appointment may be rejected
Selecting the [Reject Appointments] button displays a screen enabling the user to enter a reason for appointment rejection and add a description.
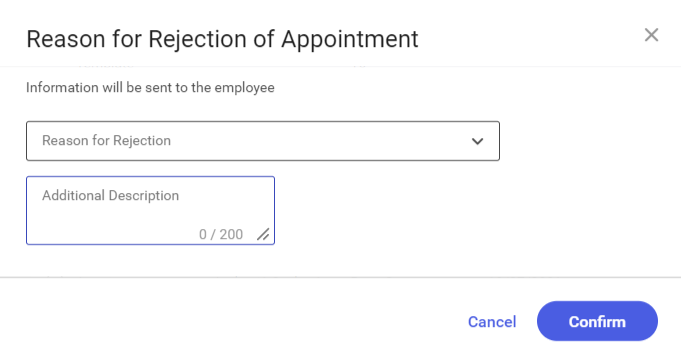
Selecting the ![]() arrow expands the list of reasons for rejection defined in directories (more information may be found in the Directories article).
arrow expands the list of reasons for rejection defined in directories (more information may be found in the Directories article).
Once the button [Confirm] is selected, the application presents the following notification in the bottom right corner of the screen: “Success! Rejected [number of appointments]“.

Scheduling actions
The [Actions] screen in Comarch Mobile Management application makes it possible to schedule actions. More information on action scheduling in Comarch Mobile Management may be found in the Scheduling appointments article.

