Contents
To start the process of scheduling an action, select the button [+ New Action] on the Actions screen.
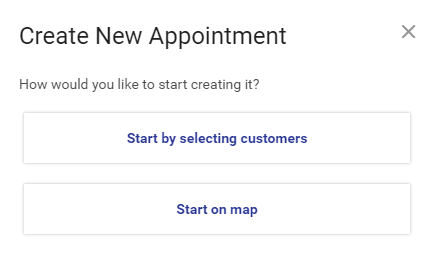
There are two ways to schedule an action:
- By selecting customers
- On the map
Starting by selecting customers
Scheduling initiated with the selection of customers consists of the following steps:
1. Select Customers
2. Select Template
3. Configure Appointments
4. Select Supervisor
5. Summary
Step 1 – Select Customers
Selecting the option [Start by selecting customers] displays the first of five steps of the scheduling process. The user can now select customers for whom the action is to be scheduled.
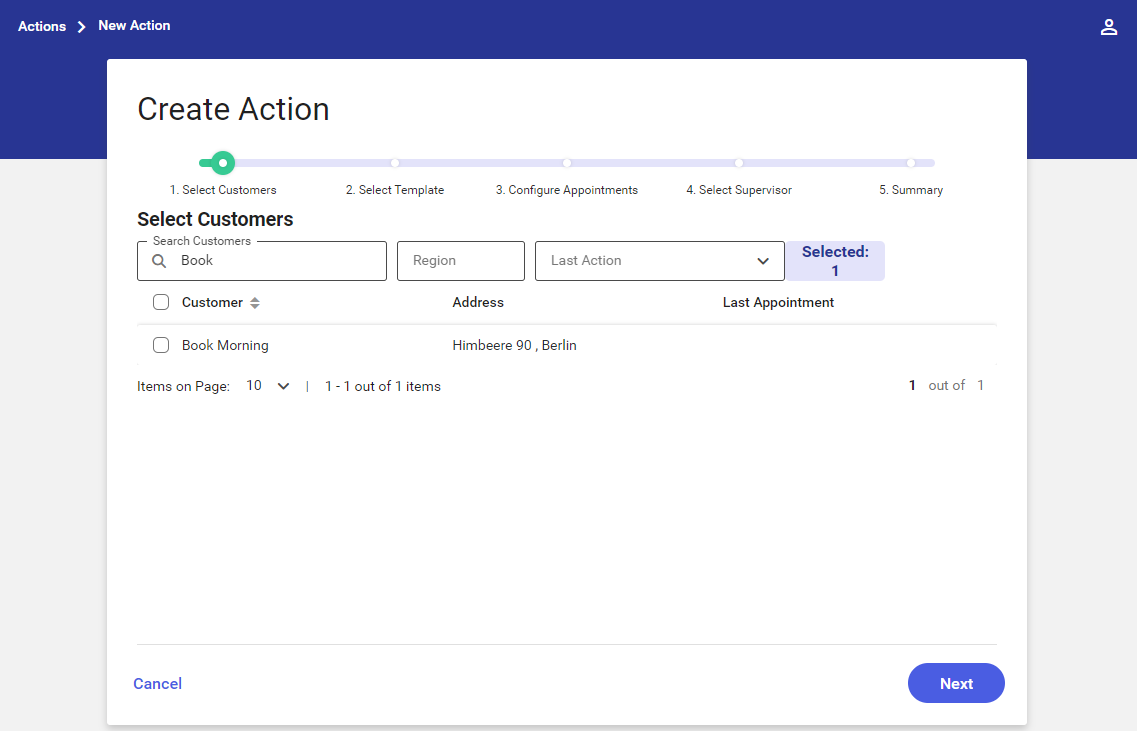
The list of customers may be narrowed down with the use of the browser located in the header:
- Search Customers – a text field enabling the user to search customers by their name and city
- Region – it makes it possible to search a region to which a customer belongs. The list of regions is displayed as a tree structure sorted alphabetically. The list may be narrowed down to a specific region by entering its name in the Search field and makes it possible to select appropriate regions and subregions.
- Last Action – it makes it possible to select customers depending on the date of the last appointment:
- Over 5 Days Ago
- Over Week Ago
- Over Two Weeks Ago
- Over Month Ago
- No actions
- Choose own date
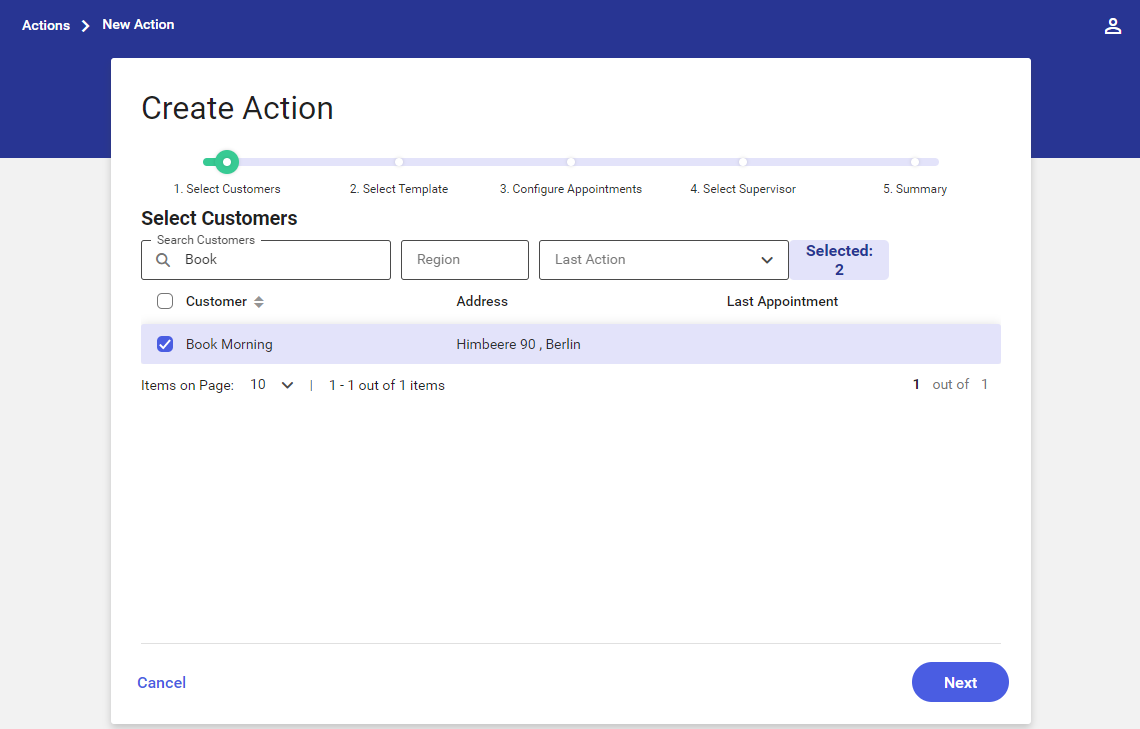
To select a customer for the action being scheduled, click the checkbox next to that customer’s name.
Once a customer is selected, the customer’s row is highlighted in blue and the [Selected] button appears, presenting the number of currently selected customers.
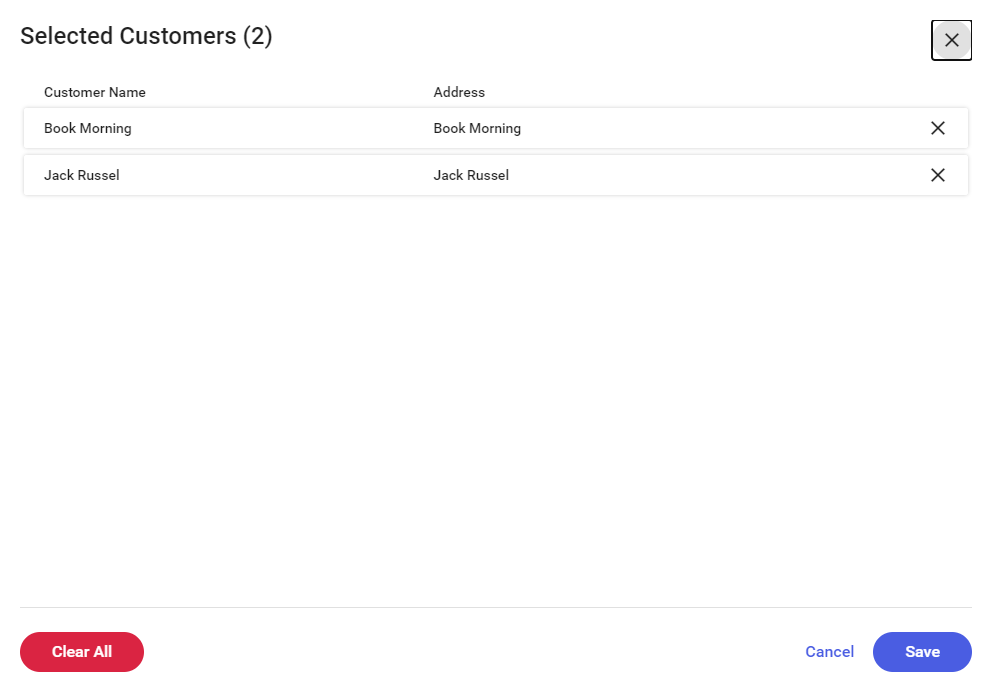
Clicking the [Selected] button displays the Selected Customers screen, presenting the list of selected customers. The user may edit the list by using one of the following buttons:
 – it deletes a single customer
 – it deletes all the selected customers
To save changes made on the screen, select the option [Save].
The list of customers on the Select Customers screen is composed of the following columns:
- Customer – a customer’s name
- Address – a customer’s street, street/apartment number, city
- Last Appointment – an employee’s full name, the name of an appointment template
To proceed to the next step, select the option [Next].
To cancel changes and return to the previous screen, select the option [Cancel].
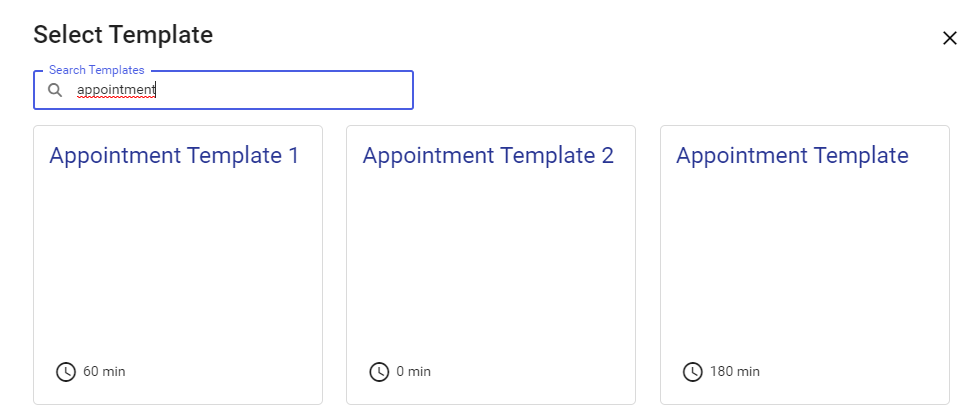
Step 2 – Select Template
Once the user selects the option [Next], the application displays the second of five steps of the scheduling process: Select Template. The user may now select one of the available appointment templates or create a custom appointment without using any template ([Create Appointment with No Template] option).
The Select Template screen contains the Search Template filter (a text field), enabling the user to search appointment templates by their name.
The screen presents the following data related to appointment templates:
- Name – an appointment template’s name
- Duration – an appointment’s duration defined on a template
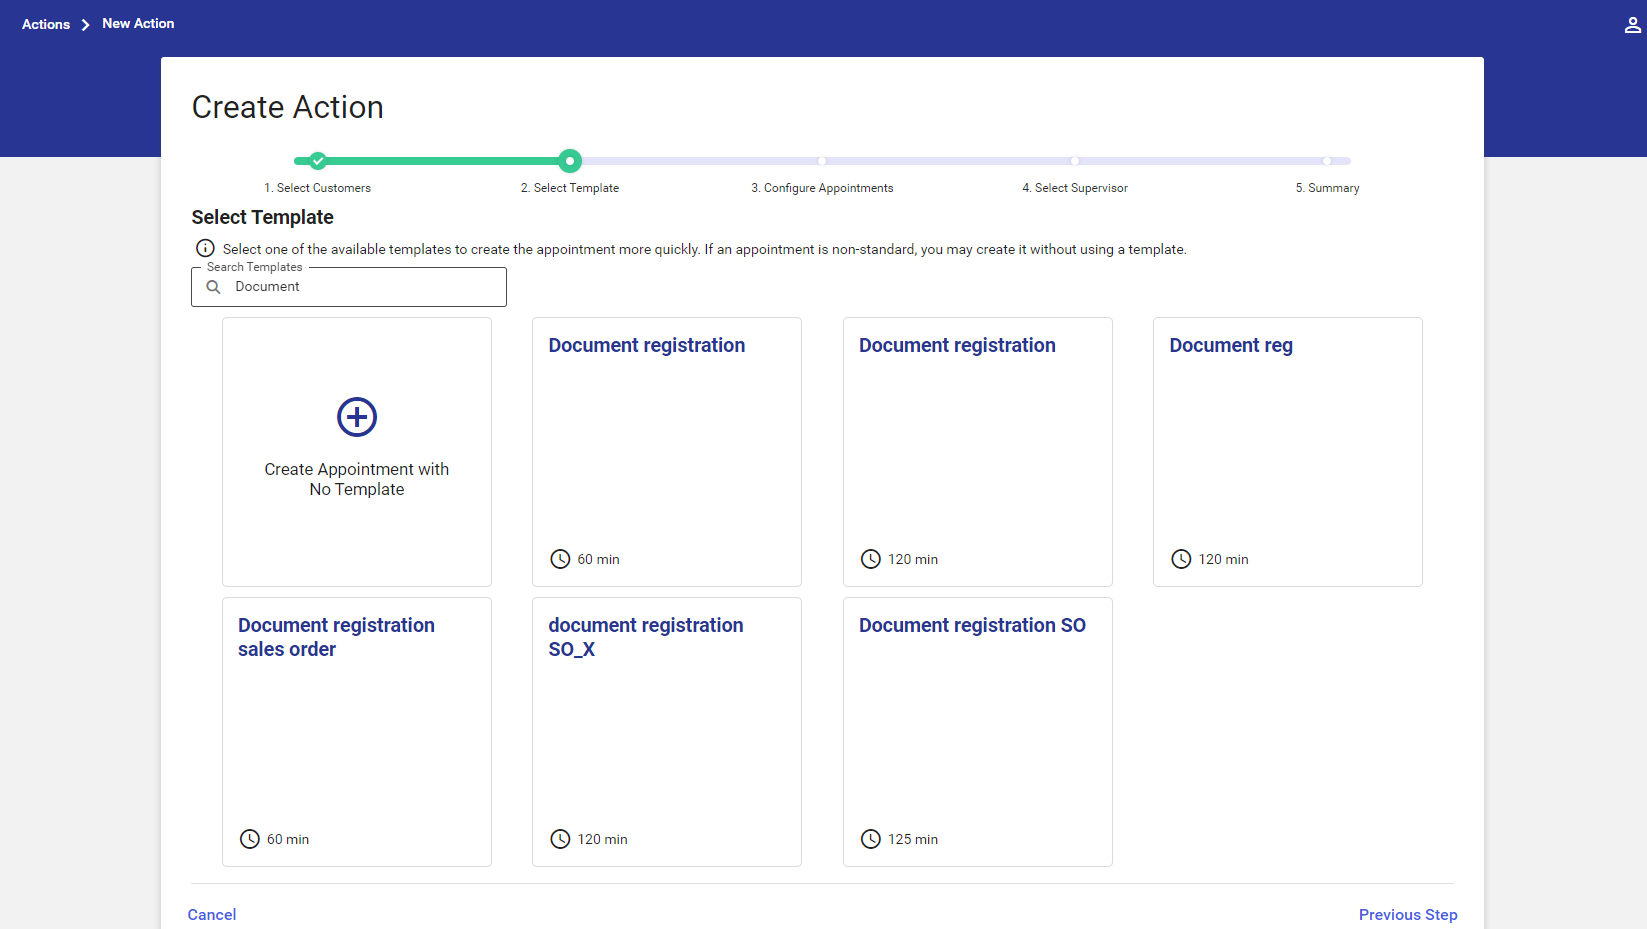
Selecting a given template displays information on the appointment’s elements. It also makes it possible to select or adjust the template.
By default, the application presents the first two elements assigned to an appointment template. If a given template contains more elements, the application displays the information: “+ [number of remaining elements] other”.
Selecting the option [Create Appointment with No Template] opens the Configure Appointments screen, where it is possible to fill in particular appointment data (on an empty form).
Clicking the option [Select] opens the next step, filling in data on the basis of a given appointment template.
Selecting the option [Customize] opens the template customization screen.
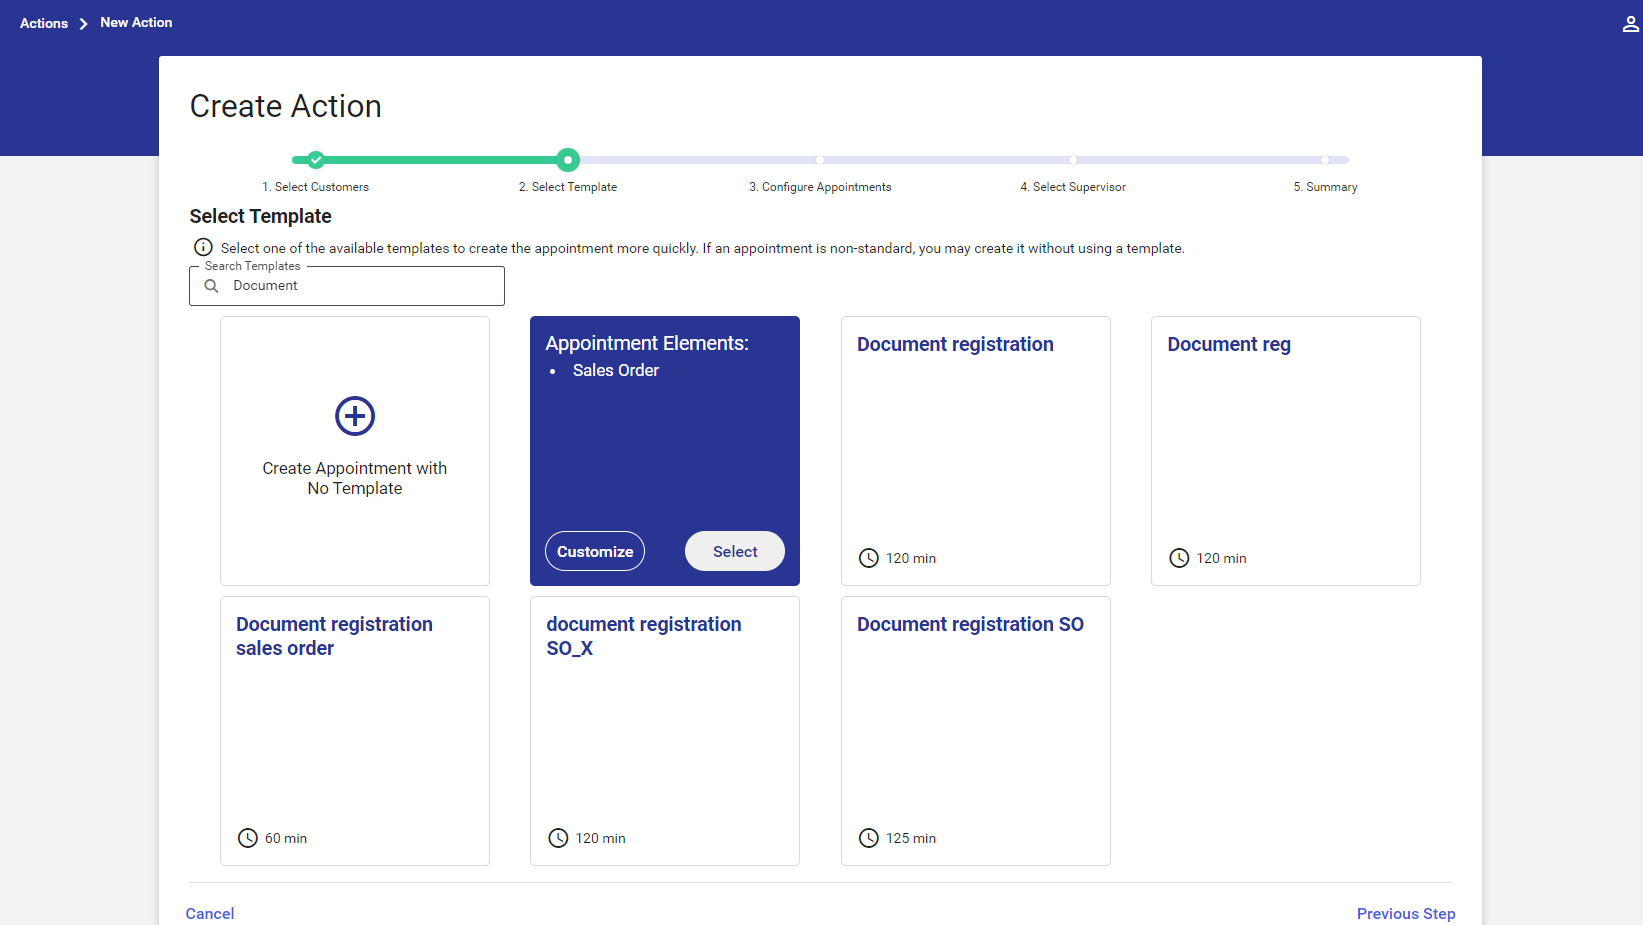
On the Customize Template screen, it is possible to edit a given appointment template.
On the Customize Template screen, it is possible to change the following values:
- Appointment Name (required) – the name is transferred from a selected appointment template
- Appointment Type – the type is transferred from a selected appointment template
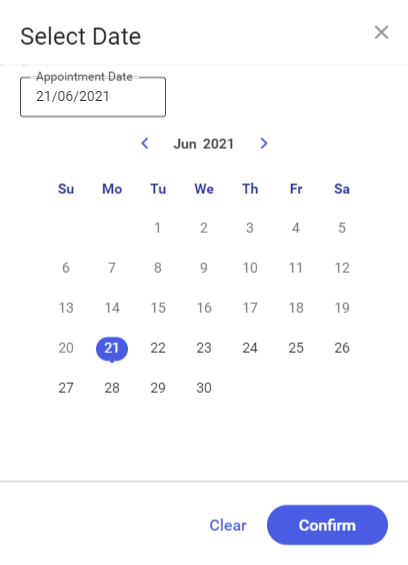
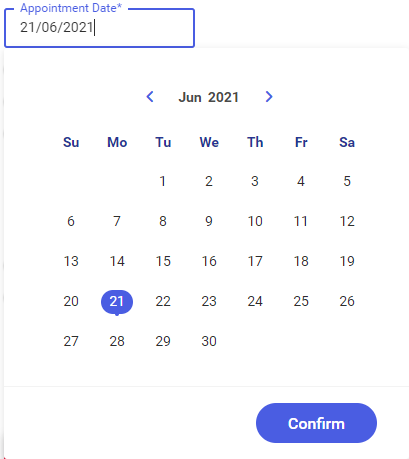
- Appointment Date – a date specified for all appointments added. By default, it is the current date, with a possibility to change it on the calendar screen
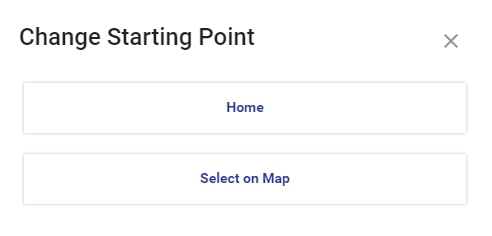
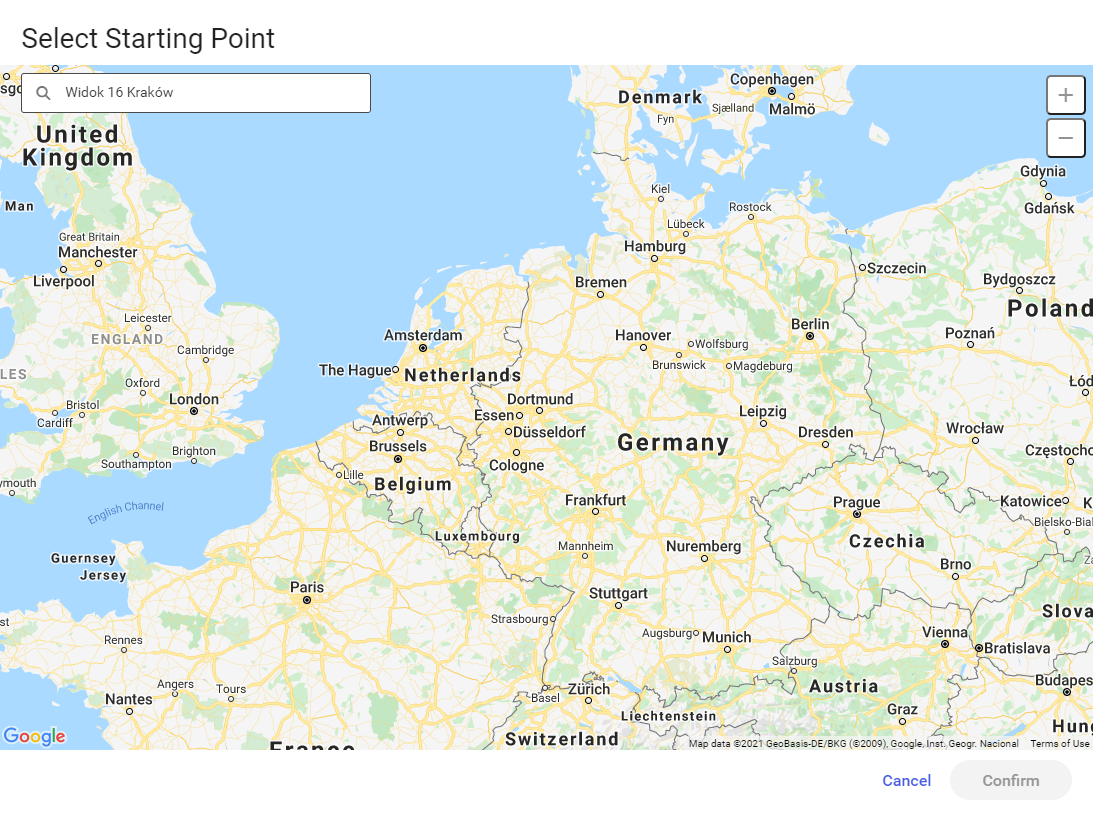
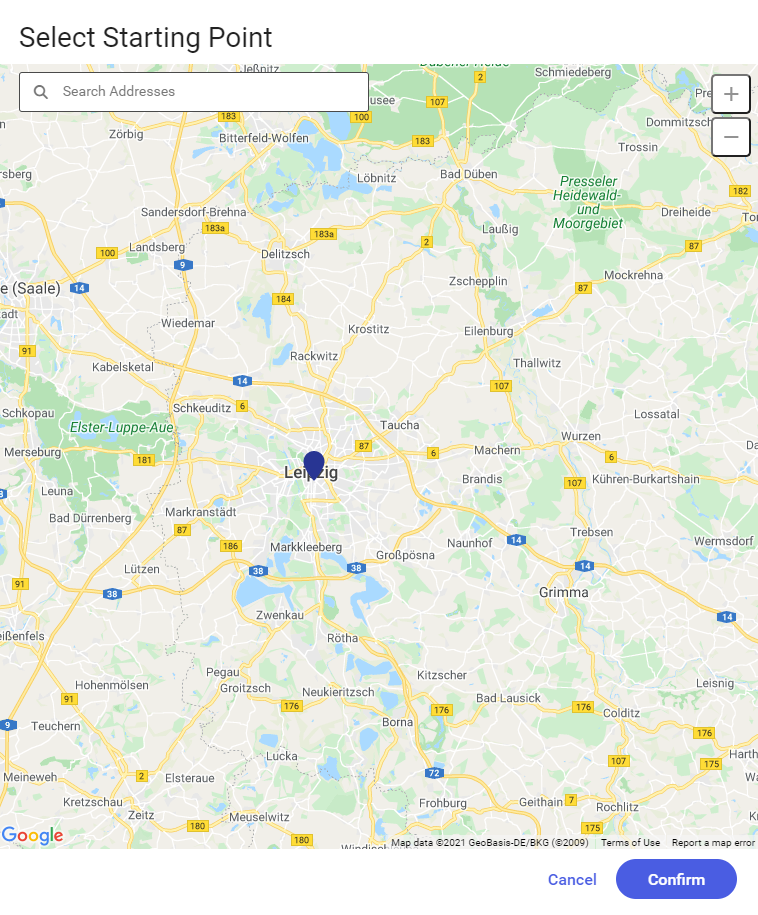
- Starting Point – a route’s starting place:
- Home (address) – the employee’s place of residence (default)
- Select on Map – a point selected on the map
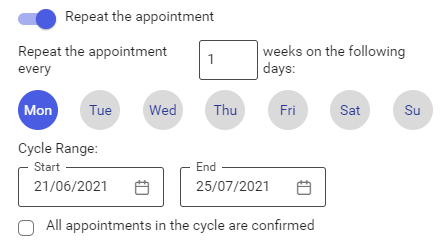
- Repeat the appointment – switching the Repeat the appointment toggle allows the user to specify how often and on which days the appointment is to be repeated. The parameter All appointments in the cycle are confirmed determines whether or not copied appointments are to be created as confirmed.
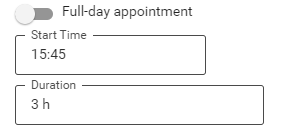
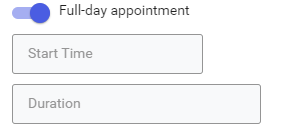
- Full-day appointment – the toggle allows setting the appointment as an all-day appointment. If the user switches the toggle, the start time and duration become grayed out (non-editable).
- Appointment confirmed – the appointment confirmation toggle allows the user to specify whether the appointment is to be created as confirmed
- Note for Employee – it makes it possible to enter an additional description of the appointment being scheduled (maximum 200 characters)
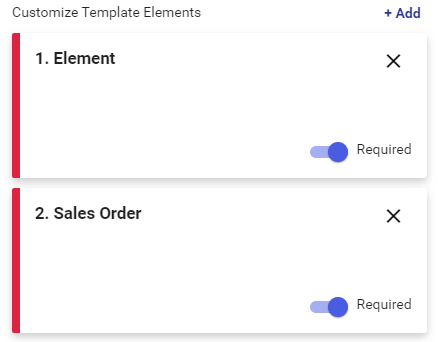
Additionally, the screen contains the Customize Template Elements section which presents the details of appointment template elements: name, description, and the Required toggle.
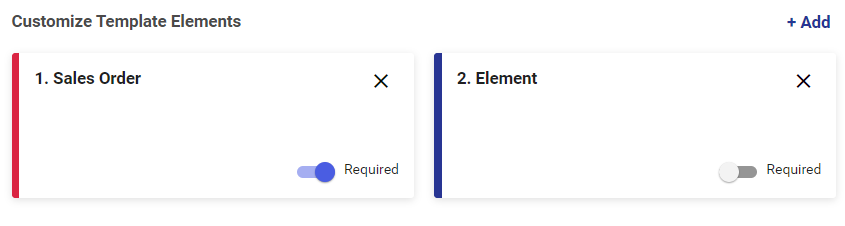
The section allows the user to:
- Add a new appointment template element: selecting the [+ Add] option opens the Add Template Elements screen
- Delete an appointment template element: selecting the button makes it possible to delete an existing appointment template element
- Specify whether a given template element is required
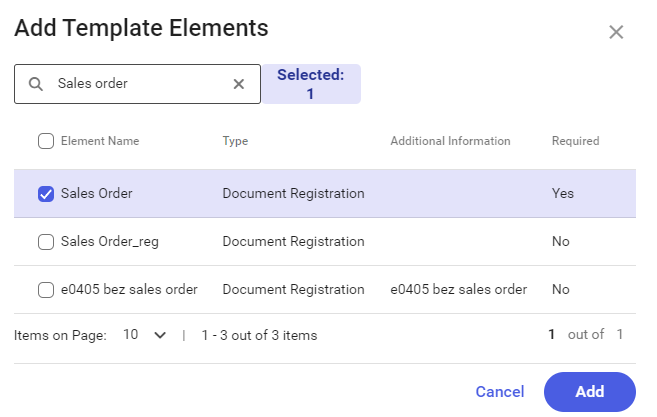
If the user selects a template element, its row is marked in blue and the [Selected] button is displayed, presenting the number of currently selected template elements. To add the elements, click the [Add] button.
Clicking the [Selected] button opens the Selected Elements screen, containing the list of selected elements. The user may edit the list with the use of the following buttons:
 – it removes a single template element
 – it removes all the selected elements
The list of elements presents the following information:
- Element Name
To save changes made on the screen, select the [Save] button.
Once all fields are defined, it is possible to proceed to the next step by selecting the [Next] button in the bottom part of the screen.
Step 3 – Configure Appointments
On the Configure Appointments screen, it is possible to additionally adjust appointments for the purposes of selected customers.
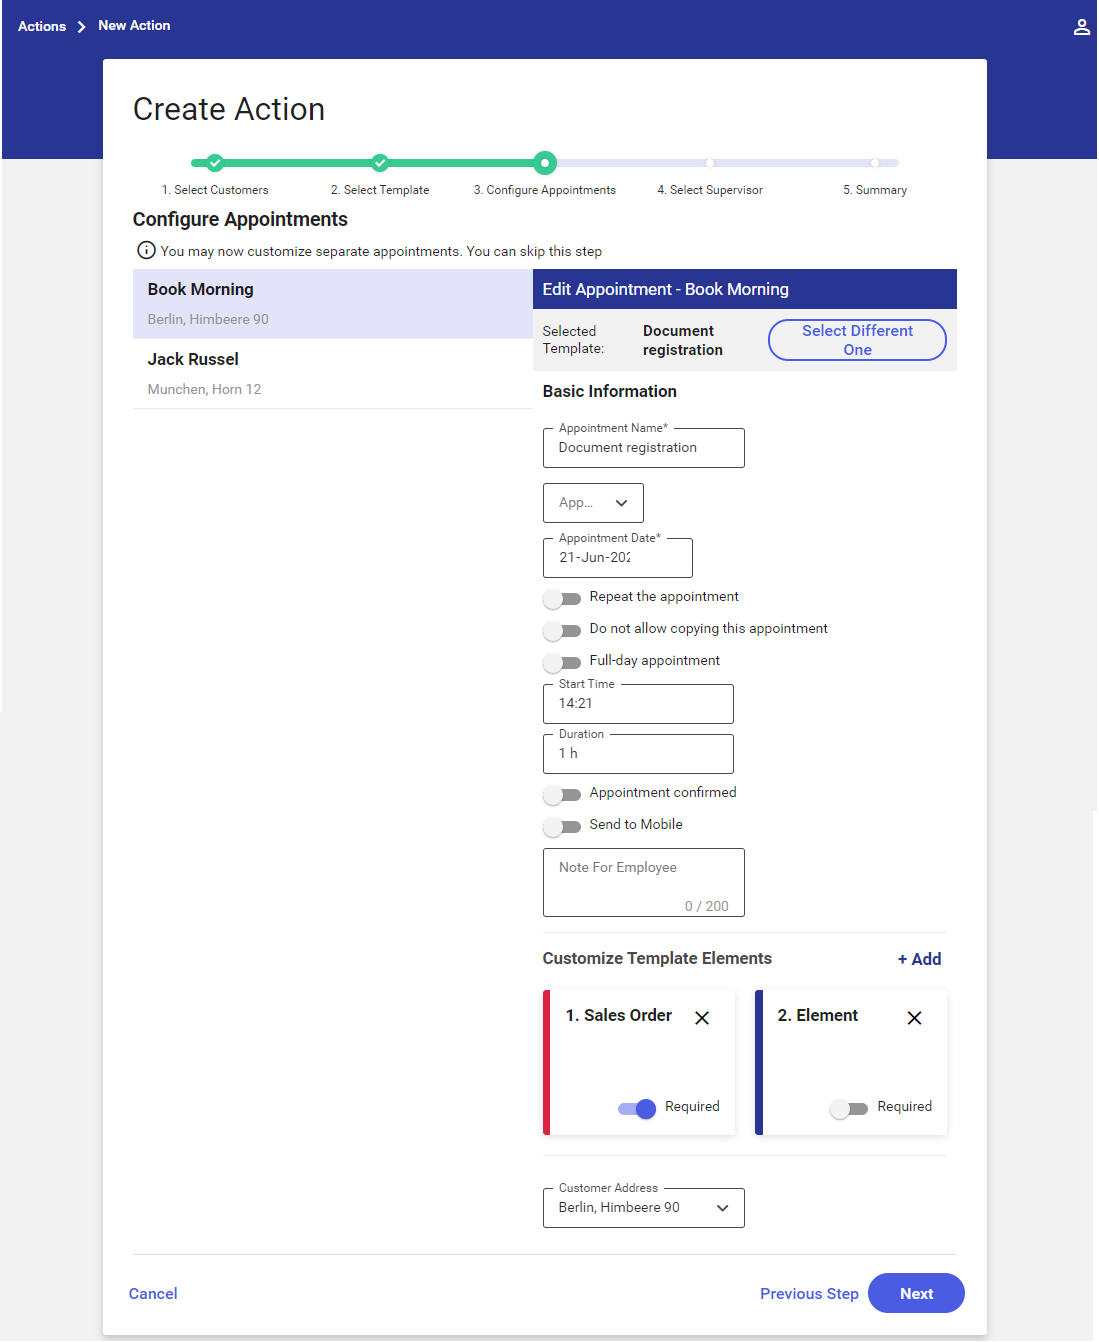
The left-hand side of the window presents the names and addresses of customers added to the appointment.
By default, the first customer from the list is selected, while the right-hand side displays the appointment for that customer, making it possible to:
- Select another appointment template – the button [Select Different One]
- All standard fields for appointment template customization and additionally:
- Do not allow copying this appointment – switching this toggle blocks the possibility to copy the appointment (the appointment becomes a one-time appointment)
- Send to Mobile – it allows the user to define whether the appointment is to be sent to Comarch Mobile
- Customer address selection – by default, the customer address is defined as that customer’s main address. The user can edit that address if other addresses are defined in the ERP system:
- Other addresses may be selected from the drop-down list of defined customer addresses
Once all fields are defined, it is possible to proceed to the next step by selecting the [Next] button in the bottom part of the screen.
Step 4 – Select Supervisor
The Select Supervisor screen presents information on supervisors for whom appointments can be scheduled. By default, the list of recommended supervisors is displayed, showing supervisors who have no conflicts on a given day (specified when creating the action) and have the most experience.
Additionally, the application verifies whether a given employee has access to templates selected in the previous step. If not, such an employee is not presented on the list.
The list of supervisors is composed of the following columns:
- Employee – an employee’s full name or acronym
- Scheduled Appointments – the number of appointments already scheduled for the employee, where the scheduled date is the same as the date of the action being scheduled
- Route Hours – a hint of the hours during which new appointments can be scheduled:
- Any – if the employee has no actions scheduled on a given day
- Range of hours – the employee’s first available time slot on a given day, taking into account the duration of the appointment currently being defined
- No suitable hours – if the employee has actions scheduled for a given day and cannot schedule another action
- Experience – the sum of all appointments completed by a given employee
The screen contains the Search Supervisors filter which enables searching a supervisor by first name/last name/acronym.
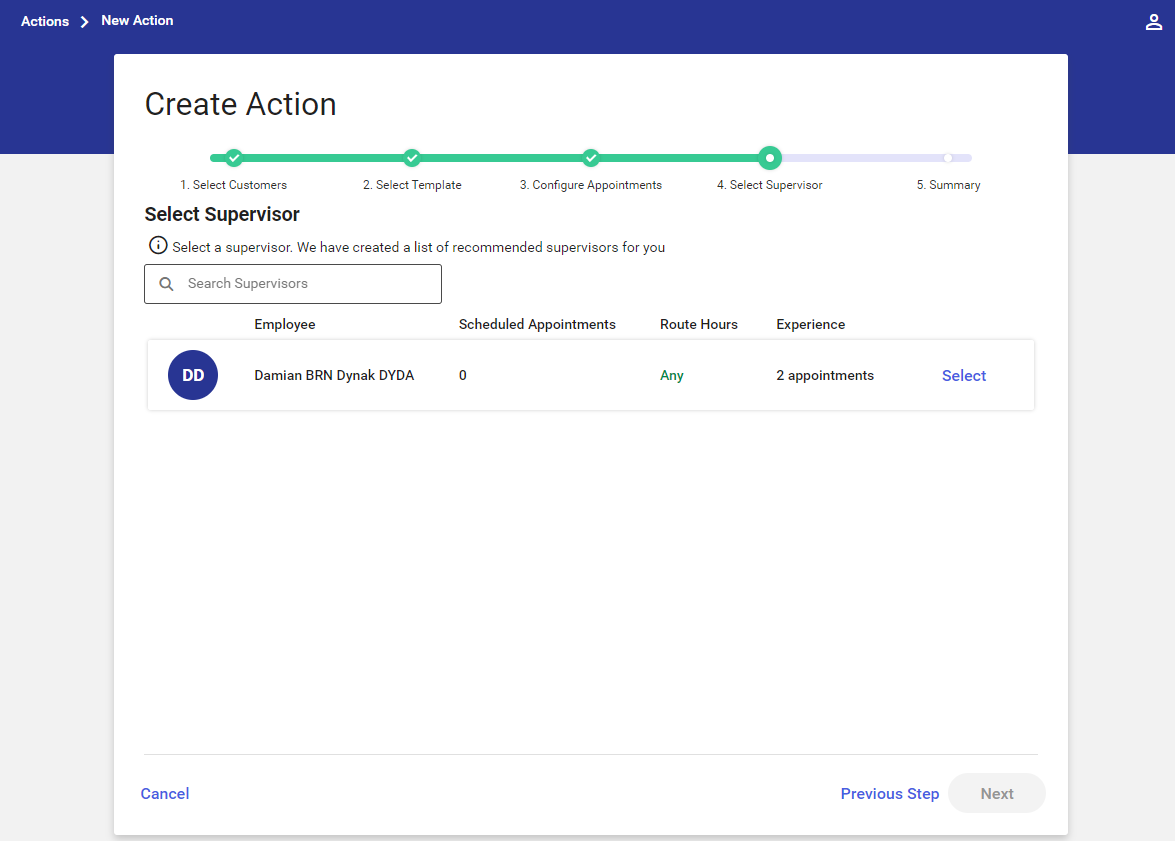
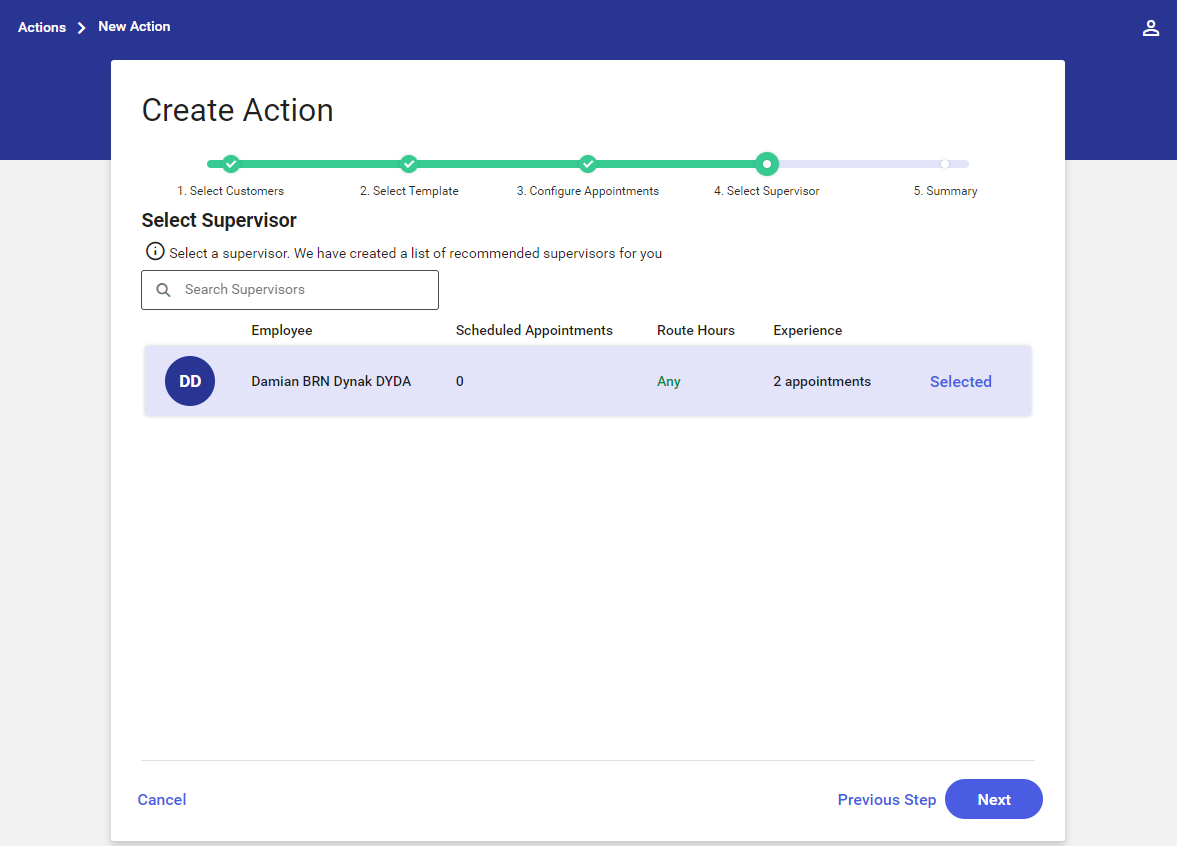
To select a supervisor, click the [Select] option – the row of that supervisor will be highlighted in blue and the [Next] option will become active.
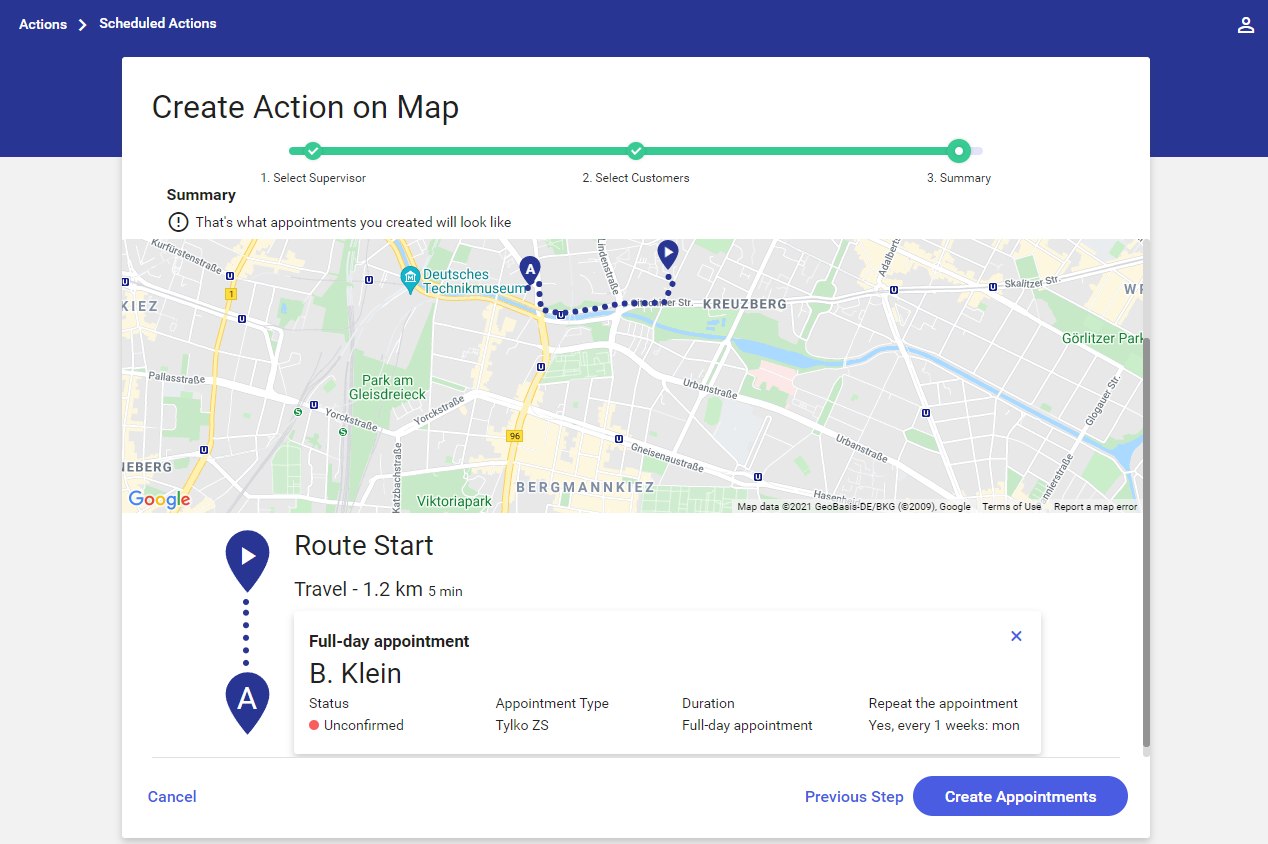
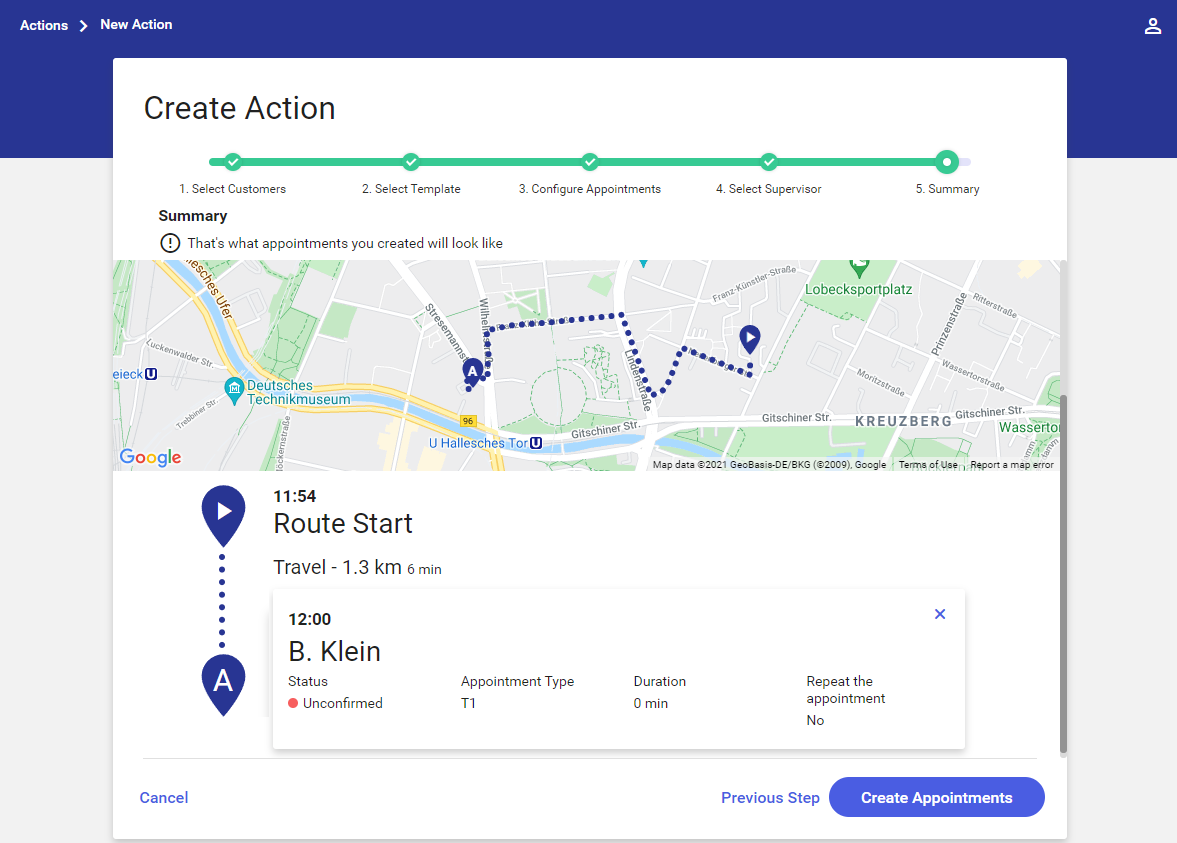
Step 5 – Summary
Once the supervisor is selected, the Summary screen presents route details:
- Route Start – a selected starting point
- Travel – information on the time of travel, number of kilometers
- Scheduled start time of the appointment
- Name of the customer selected in the appointment’s details:
- Status – Confirmed/Unconfirmed
- Appointment Type
- Duration
- Repeat the appointment – information on whether an appointment is to be carried out regularly
On the Summary screen, it is possible to reschedule the suggested route:
- The order of scheduled appointments may be changed
- An appointment may be deleted – once the button is selected, the application displays the question: “Are you sure you want to delete [Appointment name] from the schedule?]”
If appointments that have already been scheduled in the system are rescheduled as a result of adding/customizing subsequent appointments, they will be presented with additional information marked in red: “Appointment scheduled earlier – Appointment rescheduled” after the appointment start time.
Selecting the [Create Appointments] button creates appointments on the basis of data entered.
In turn, selecting the [Previous Step] button returns the user to the Select Supervisor screen.
Starting on the map
Scheduling an appointment initiated on the map contains three steps:
1. Select Supervisor
2. Select Customers
3. Summary
Step 1 – Select Supervisor
To start the action scheduling process on the map, go to the [Actions] screen, click the [+ New Action] button in the top right corner and select the option [Start on map].

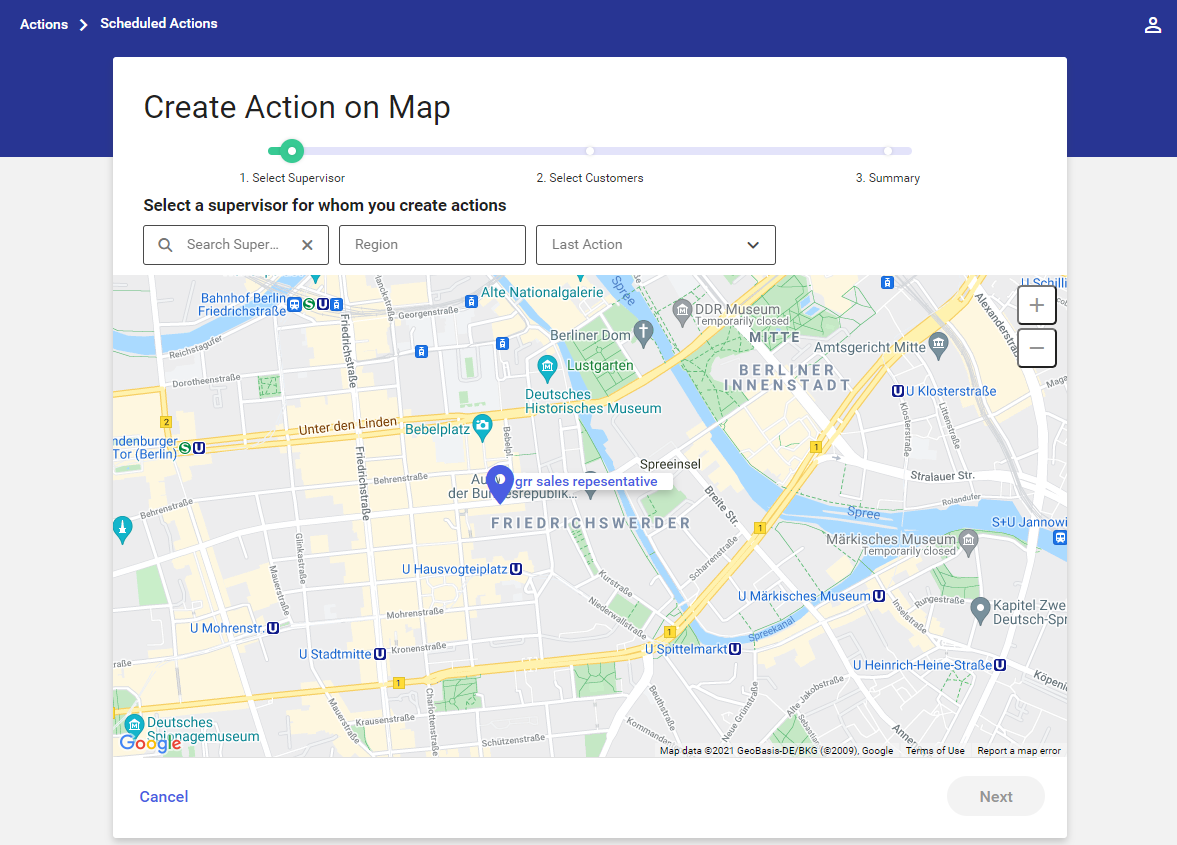
In the first step, select a supervisor for whom the action is to be scheduled. The map displayed shows employee pins (with either employees’ full names or acronyms if no name is given) that indicate the location of the employees.
The screen contains the following filters:
- Search Supervisors – supervisors may be searched by their first or last name or by their acronym

- Region – it makes it possible to search a region to which a supervisor belongs. The list of regions is displayed as a tree structure sorted alphabetically. The list may be narrowed down to a specific region by entering its name in the Search field and makes it possible to select appropriate regions and subregions.
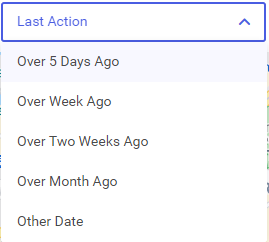
- Last Action – it makes it possible to select customers depending on the date of the last appointment:
- Over 5 Days Ago
- Over Week Ago
- Over Two Weeks Ago
- Over Month Ago
- Other Date
Once a supervisor is selected on the map, the [Next] button in the bottom right corner of the screen becomes active, enabling the user to proceed to the next step.
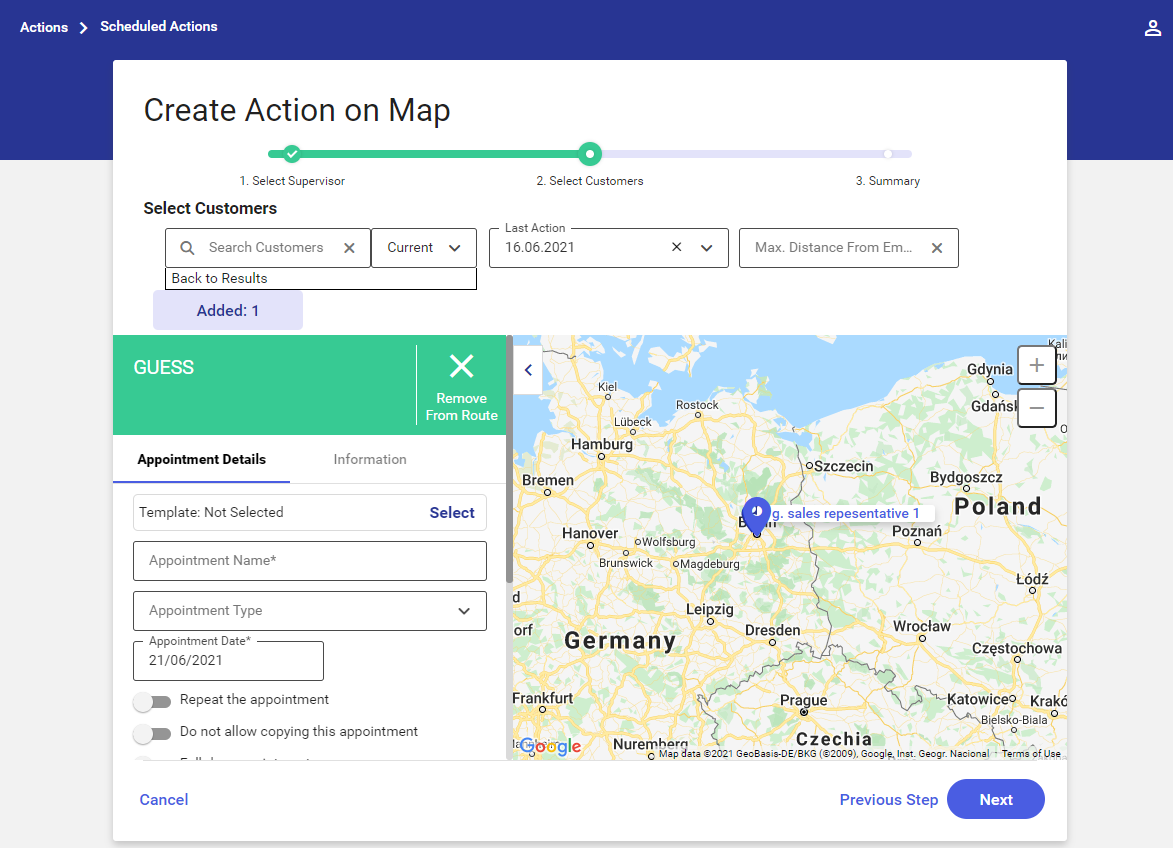
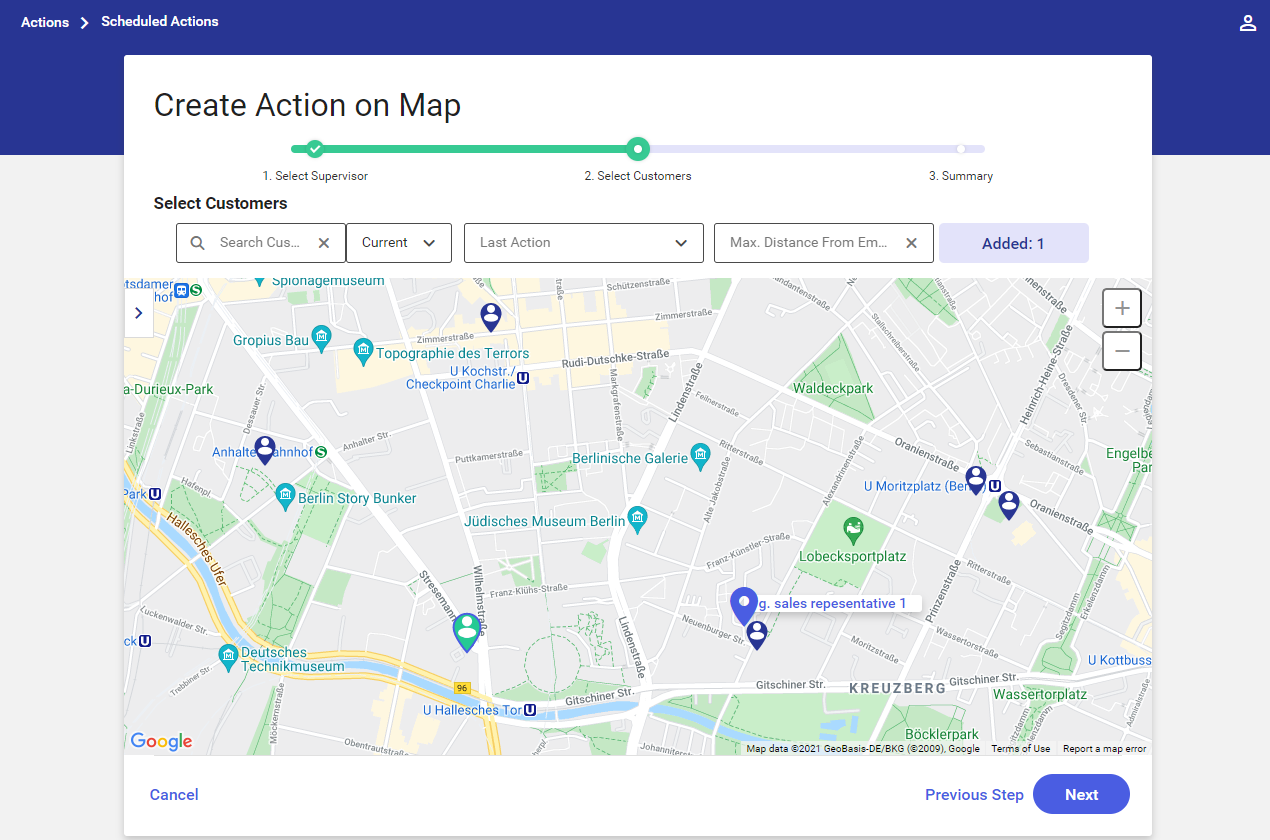
Step 2 – Select Customers
Clicking the [Next] button initiates the second of three stages of the action scheduling process.

By default, the second step displays the map of customers (along with their location) who are currently assigned to a given employee in CEE and for whom an appointment may be scheduled.
The application now contains an additional filter which allows the user to narrow down the customer list with the use of one of the following options:
- All – it displays the list of all customers
- Current – it narrows the list down to the customers currently assigned to a given user
- Leads – after selecting this filter and filling in the field Search Customers, the list of customers is updated with customers located nearby a given supervisor and meeting selected search criteria
The Search Customers field available on the screen makes it possible to search current customers and leads. Once data is entered in this field, the application presents the list of customers meeting specified search criteria, allowing the user to select a relevant customer.
Additionally, the following filters for searching customers are available:
- Last Action – it makes it possible to select customers depending on the date of the last appointment:
- Over 5 Days Ago
- Over Week Ago
- Over Two Weeks Ago
- Over Month Ago
- Other Date
- Max. Distance From Employee – distance (in km) between a given customer and the employee, calculated based on the distance (radius) between the address specified on the customer form and the employee’s location


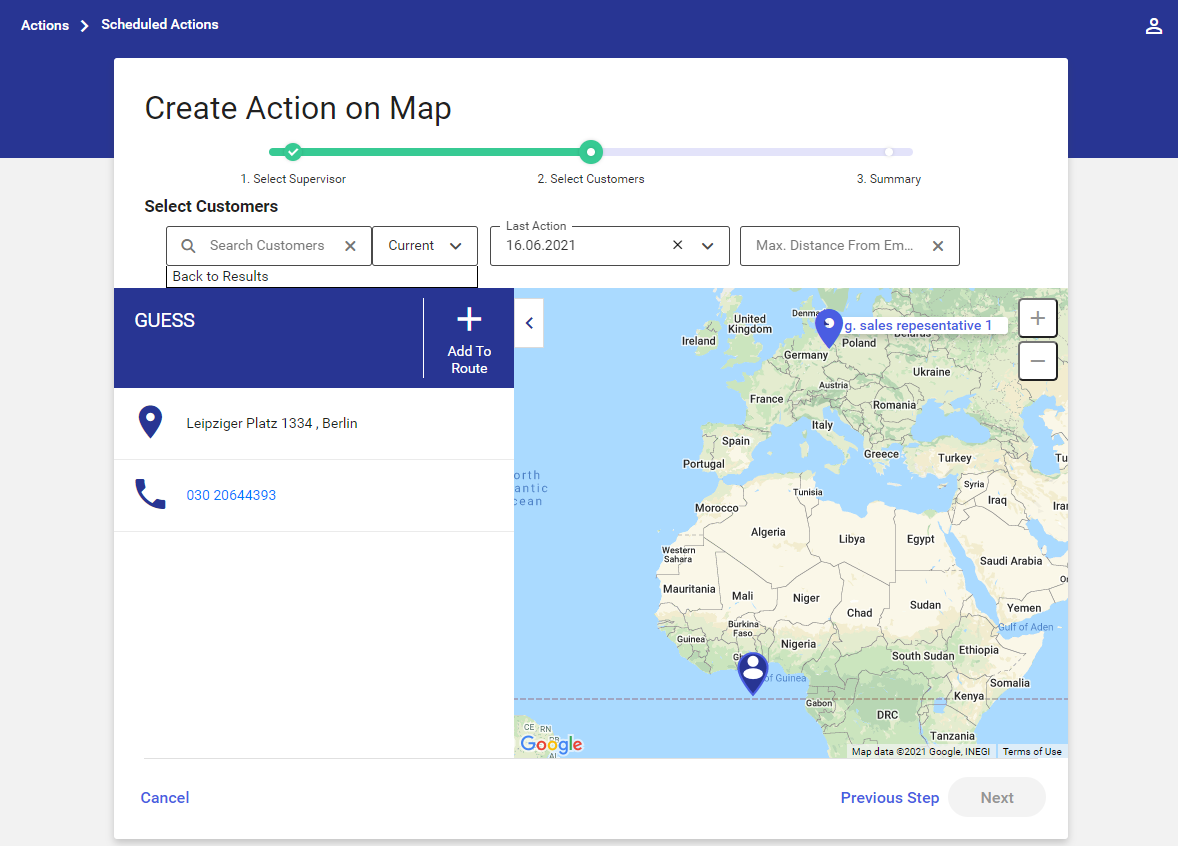
After selecting a particular customer on the list, the customer is marked on the map and the application presents the following details of the customer:
- Address data
- Phone number (if defined) with the possibility of making a call if the application is running on a mobile device
- E-mail address (if defined) with the possibility of sending a message
- Last two actions performed in relation to the customer (not applicable to leads):
- The date the action has been completed and the action’s name
- The field may be expanded to display additional information:
- Appointment supervisor
- Appointment elements
Selecting customers for scheduled actions
Additionally, it is possible to add one or more customers to a route and define an appointment schedule.
In order to add a customer to a route, the user must select a relevant customer ID and click the [+Add To Route] button. The selected customer ID will then change from blue to green. If a given customer has been added to a route, the application additionally displays the ![]() button, along with information on the number of customers added to a route.
button, along with information on the number of customers added to a route.
Selecting the [Added] option makes it possible to display the list of customers selected and allows the user to remove them from a scheduled route:
- – removes a single customer
- – removes all customers selected
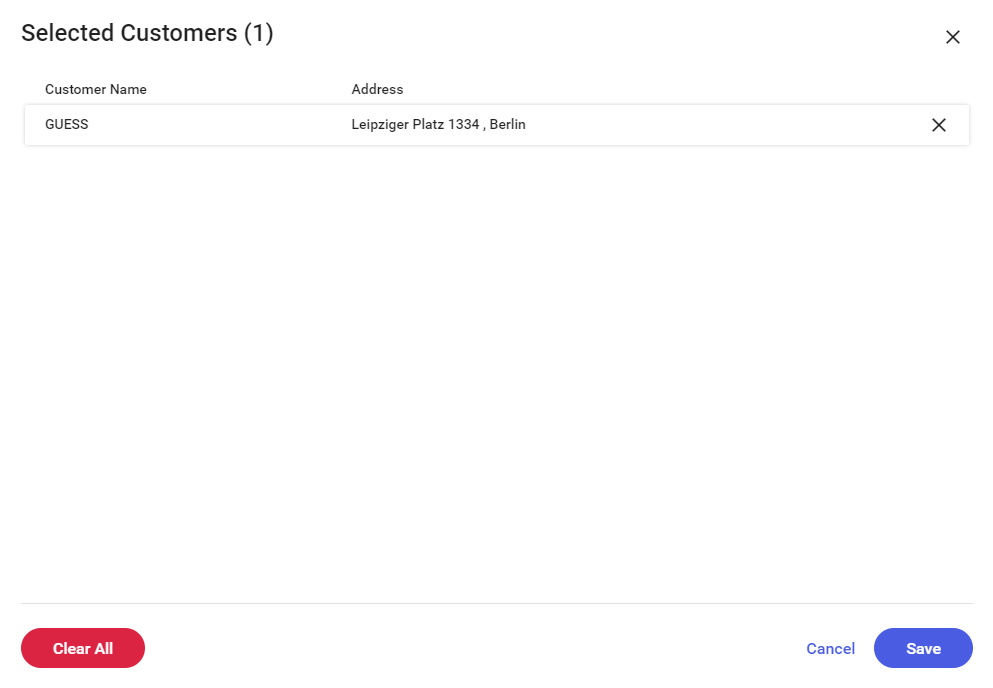
In order to save changes, select the option [Save].
Once a customer is added to a route, the application displays two tabs: Appointment Details and Information.
Setting parameters for actions scheduled for selected customers
After adding a customer to a route, it is possible to adjust parameters and settings for the scheduled action.
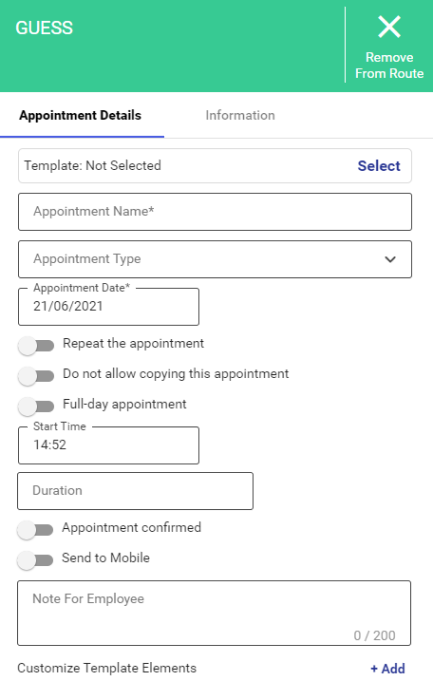
The Appointment Details tab contains the following options:
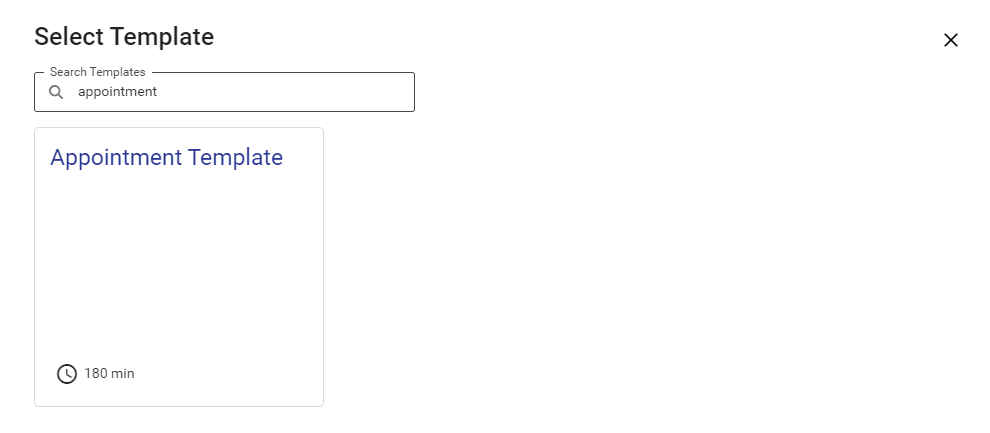
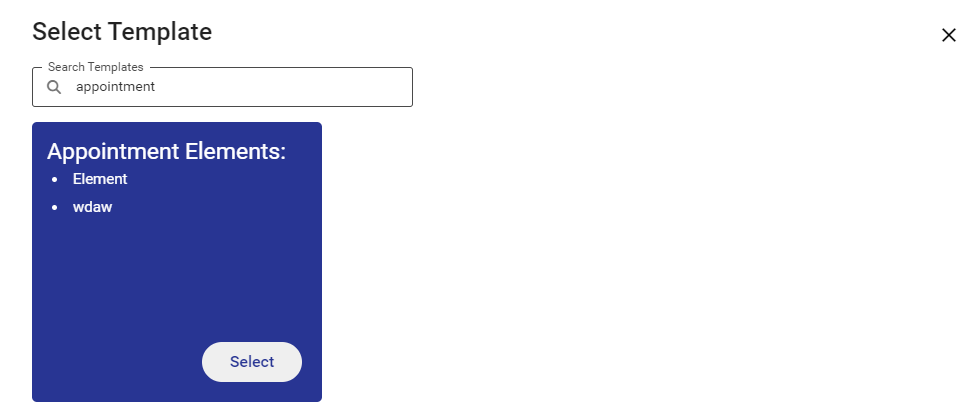
- Template – clicking the option [Select] displays an additional selection window with all appointment templates assigned to a given employee. After selecting a given template, the application displays the list of elements of that template and the [Select] button.
- Appointment Name – the name is copied from a selected appointment template. The field is required and editable.
- Appointment Type – the type is copied from a selected appointment template. The field is editable.
- Appointment Date – by default, it is the current date, with a possibility to change it on the calendar screen. The field is required.
- Repeat the appointment – switching the Repeat the appointment toggle allows the user to specify how often and on which days the appointment is to be repeated. The parameter All appointments in the cycle are confirmed determines whether or not copied appointments are to be created as confirmed.
- Do not allow copying this appointment – switching this toggle blocks the possibility to copy the appointment (the appointment becomes a one-time appointment)
- Full-day appointment – the toggle allows setting the appointment as an all-day appointment. If the user switches the toggle, the start time and duration become grayed out (non-editable).
- Start Time – by default, the current time is set as the appointment’s start time, with a possibility to change it
- Duration – the appointment’s duration may be set between 00:00 and 23:59
- Appointment confirmed – the appointment confirmation toggle allows the user to specify whether the appointment is to be created as confirmed
- Send to Mobile – it allows the user to define whether the appointment is to be sent to Comarch Mobile
- Note for Employee – it makes it possible to enter an additional description of the appointment being scheduled (maximum 200 characters)
Additionally, the screen contains the Customize Template Elements section, presenting the names and descriptions of appointment template elements, as well as the Required parameter for all elements.
The section allows the user to:
- Add a new appointment template element: selecting the [+Add] option opens the window Add Template Elements
- Delete an appointment template element by selecting the button
- Specify whether a given template element is required
If the user selects a template element, its row is marked in blue and the [Selected] button is displayed, presenting the number of currently selected template elements. To add the elements, click the [Add] button.
Clicking the [Selected] button opens the Selected Elements screen, containing the list of selected elements. The user may edit the list with the use of the following buttons:
- – it removes a single template element
- – it removes all the selected elements
The list of elements presents the following information:
- Element Name
To save changes made on the screen, select the [Save] button.
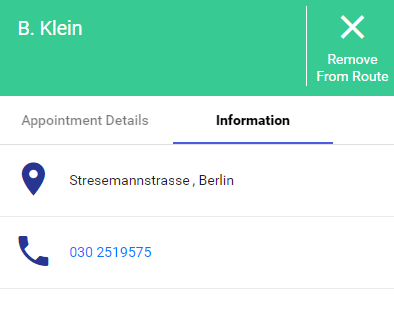
The Information tab contains detailed information about the selected customer:
- Address data
- Phone number (if defined) with the possibility of making a call if the application is running on a mobile device
- E-mail address (if defined) with the possibility of sending a message
- Last two actions performed in relation to the customer (if any; applicable only to current customers):
- The date the action has been completed and the action’s name
- The field may be expanded to display additional information:
- Appointment supervisor
- Appointment elements
The section with appointment details and customer information may be collapsed by selecting the ![]() button.
button.
When another customer is being added to a route, appointment details are copied in accordance with parameters set for the previous customer. This means that all fields related to the appointment are automatically filled in with data entered for the previous customer (with a possibility to edit the data).
Step 3 – Summary
After the user selects customers and defines appointment details, the third step presents a summary containing appointment details on the map:
- Route Start – the location of the selected user
- Travel – travel duration and distance
- Start time scheduled and customer data:
- Status – Confirmed/Unconfirmed
- Appointment Type
- Duration
- Repeat the appointment – information on whether an appointment is to be carried out regularly
Also, the Summary screen makes it possible to change the order of the suggested route by dragging and dropping appointments or to delete a selected appointment with a given customer using the ![]() button.
button.
Selecting [Previous Step] returns the user to the previous screen: Select Customers.
Selecting [Create Appointments] adds new appointments to the system according to the data entered.