Contents
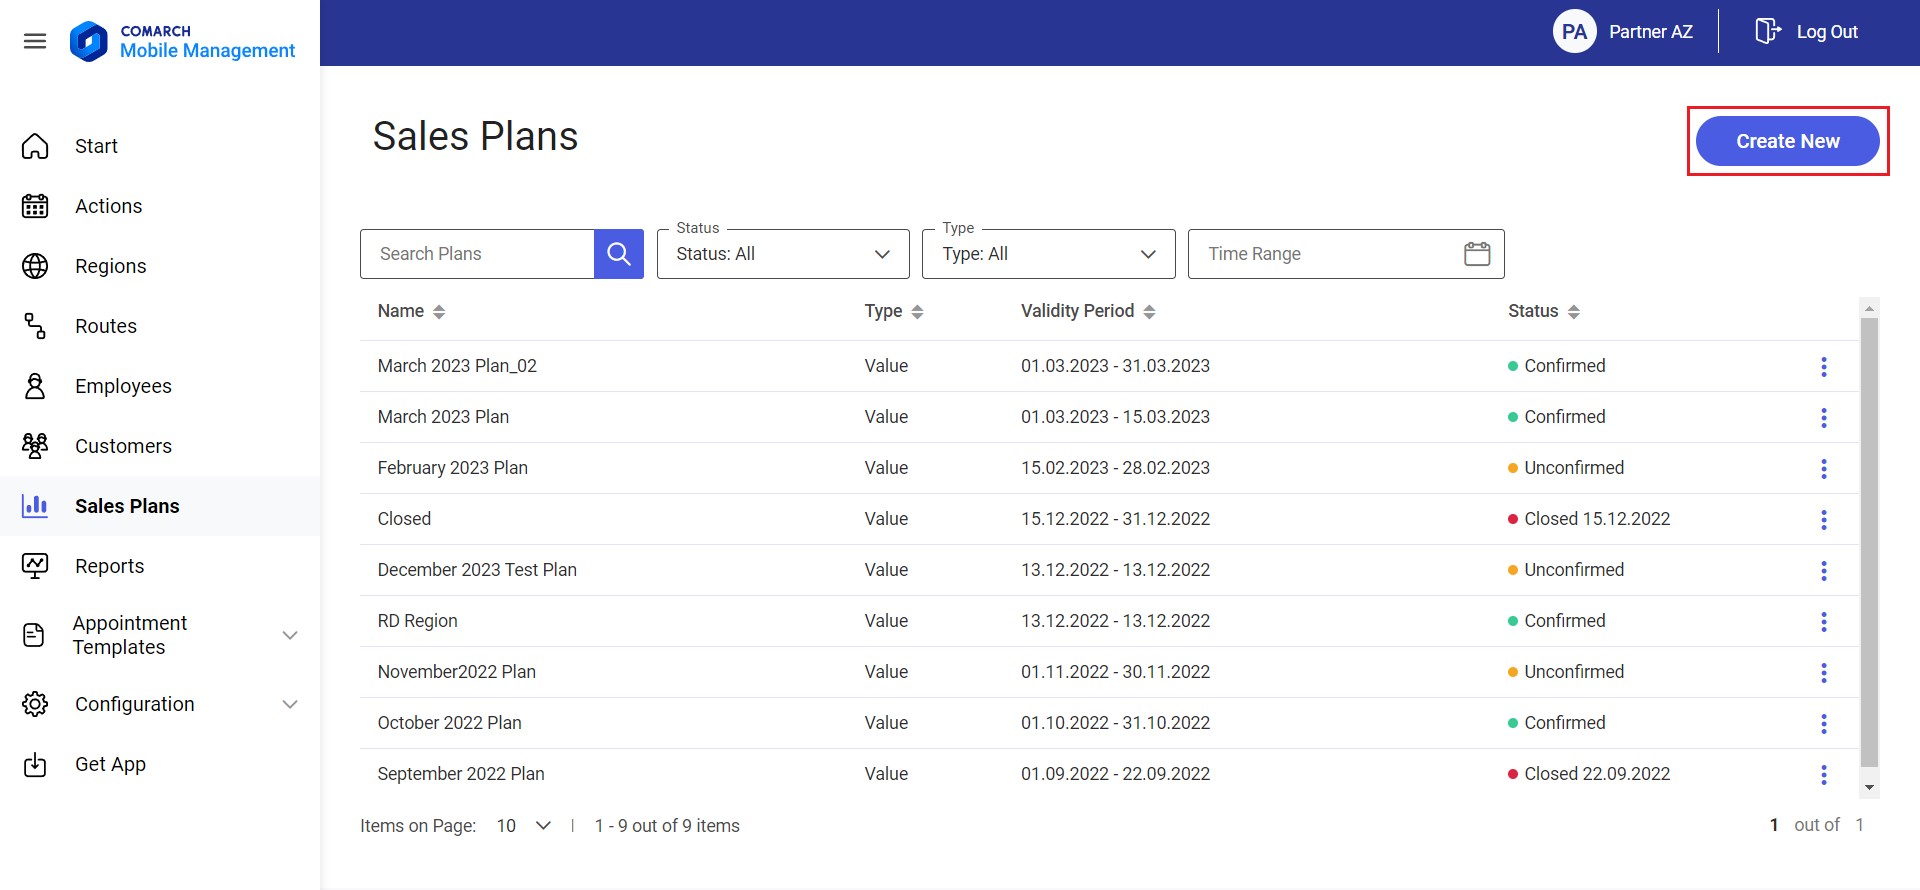
The Sales Plans screen enables the user to define a new sales plan.
1. General
General
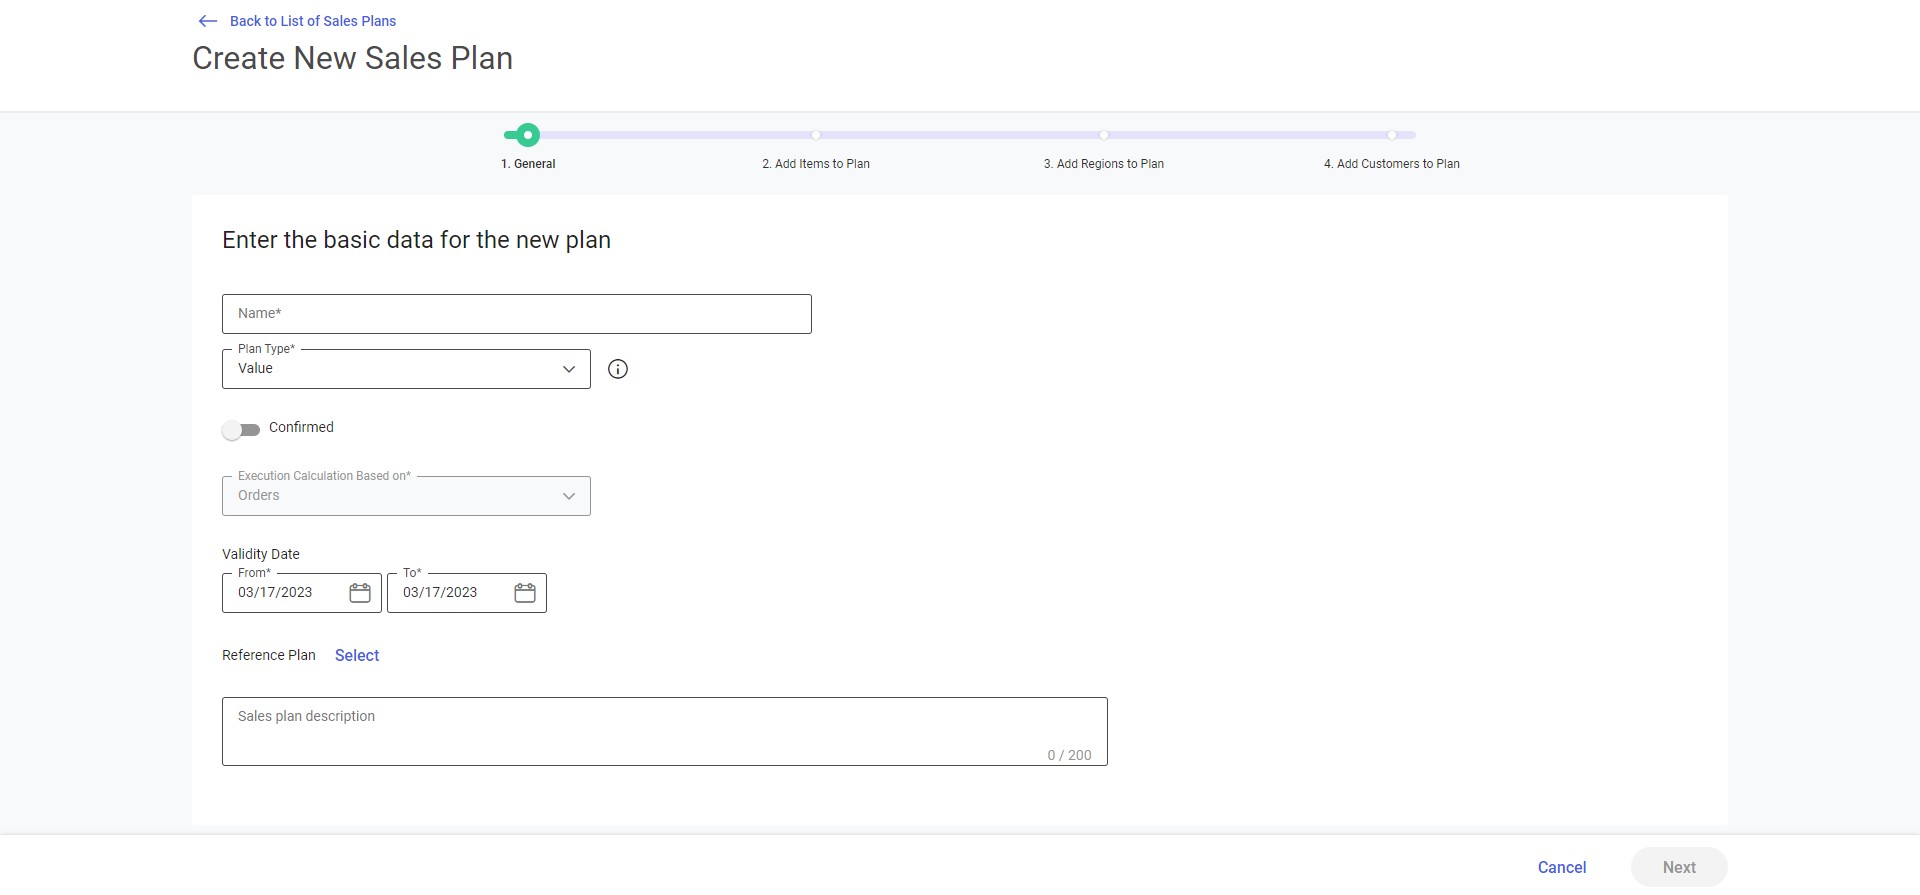
In the first step, the user can set the basic parameters of the sales plan:
- Name (required) – a text field
- Plan Type – a drop-down list containing available plan types:
- Value (default)
- Quantity
- Confirmed – a parameter specifying whether the plan should be saved as confirmed or unconfirmed. By default, the parameter is deactivated.
- Execution Calculation Based on: Orders
- Validity Date:
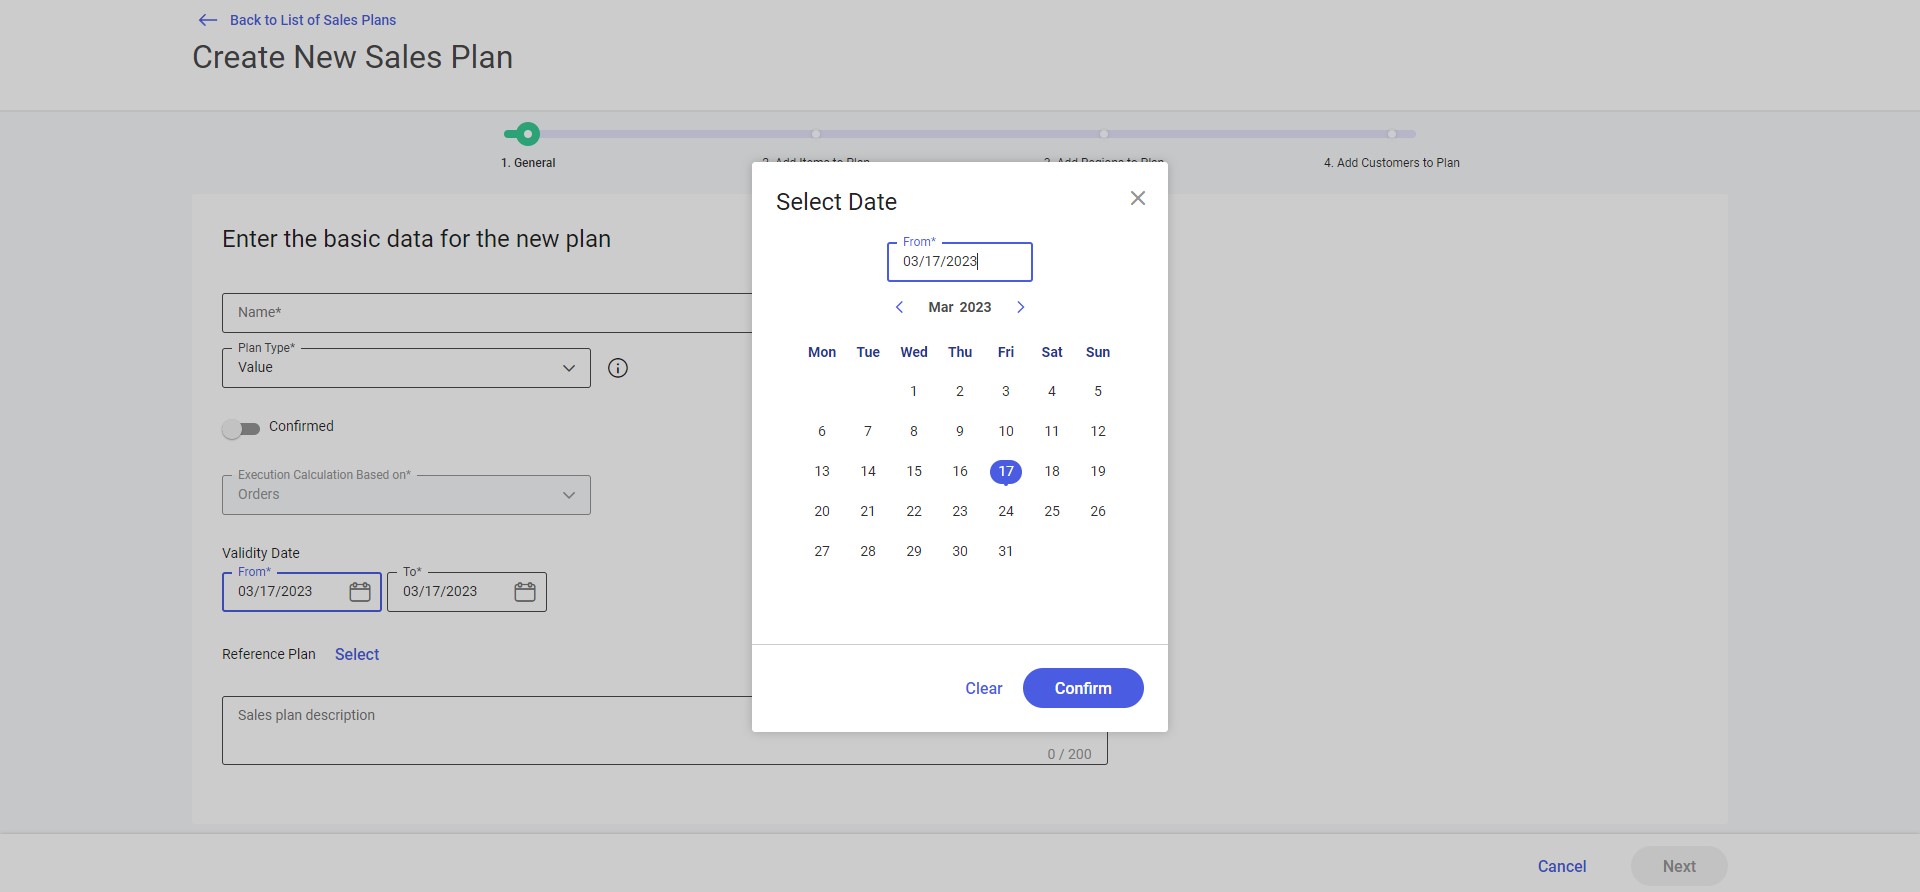
- From – the plan’s initial date of validity; once it is clicked, the application displays a calendar with the current date selected by default
- To – the plan’s end date of validity; once it is clicked, the application displays a calendar with the current date selected by default
- Reference Plan – it makes it possible to add a plan to be used to calculate reference values
- Description – a text field enabling the user to enter the sales plan’s description
The [Cancel] button can be selected to cancel changes made on the New Sales Plan screen and return to the previous screen.
Add Items to Plan
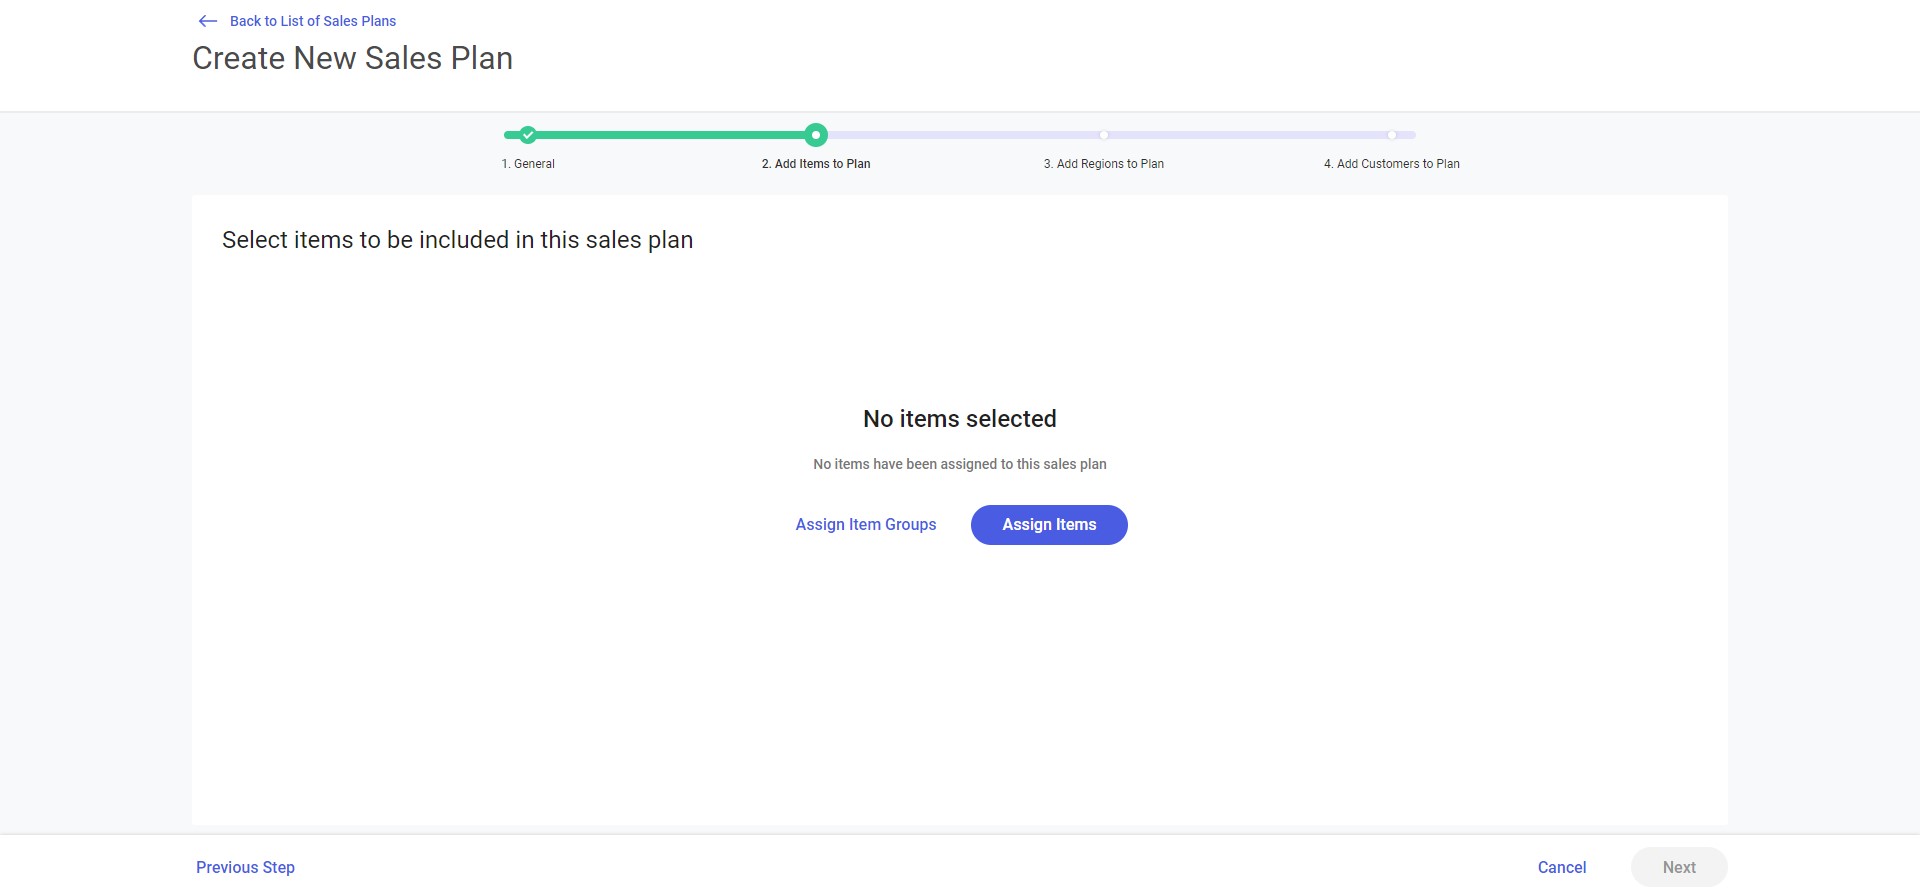
In the second step, the user can assign items and/or item groups to be considered in the sales plan:
- When no item or item group is assigned to the sales plan, the screen displays the notification: “No items selected. No items have been assigned to this sales plan”
- To add an item to the plan, select the option [Assign Items]
- To add an item group to the plan, select the option [Assign Item Groups]
The [Next] button is deactivated until at least one item/item group is assigned to the plan.
List of items and item groups
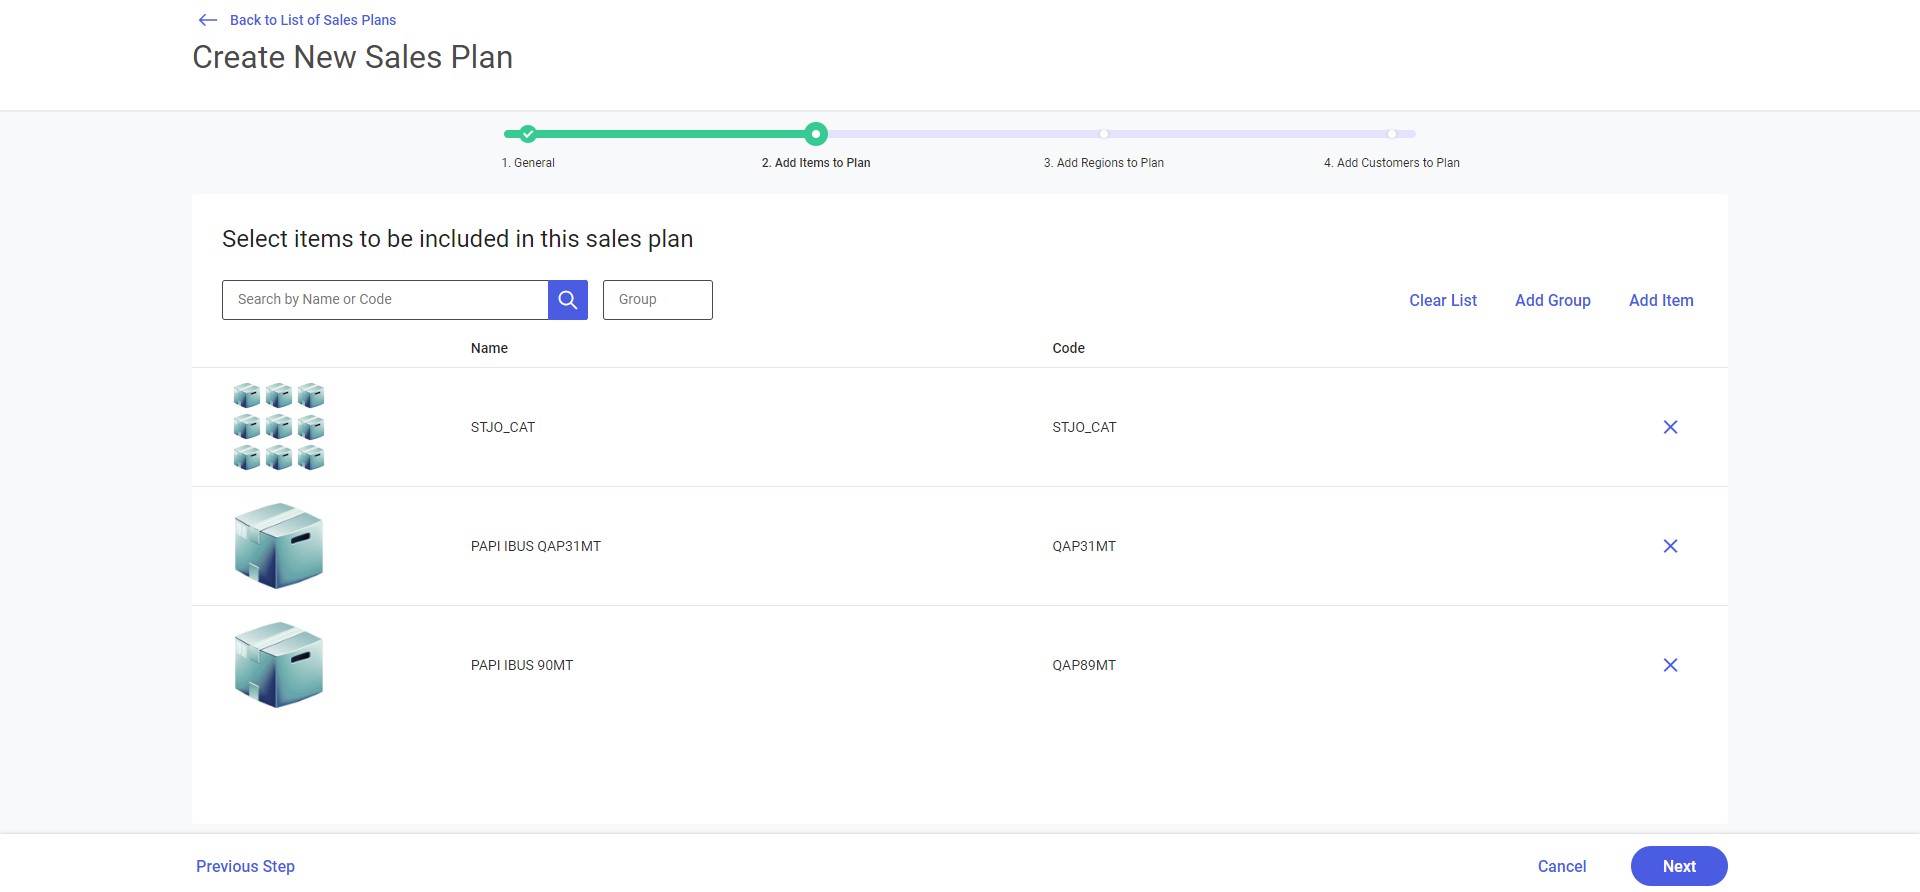
Once at least one item/item group has been assigned to the sales plan, the screen displays additional options:
- Filters:
- Search by Name or Code – a text field enabling the user to search by name or code
- Group – it opens a screen containing the list of item groups
- The [Add Group] button enables the user to assign an item group to the sales plan
- The [Add Item] button enables the user to assign an item to the sales plan
- The [Clear List] button enables the user to remove all the assigned items and item groups
- Selected items and item groups are presented in the form of a list:
- Thumbnail:
- an image thumbnail/item logo is presented by each item; if a given item has no logo added, the
 icon is displayed
 - the
 thumbnail is displayed for item groups
- an image thumbnail/item logo is presented by each item; if a given item has no logo added, the
- Name
- Code
- The user can detach each item/item group by selecting the
 option
- Thumbnail:
Adding item groups to the sales plan
Selecting the buttons [Add Group] or [Assign Item Groups] displays the additional screen Add Item Groups to Sales Plan. The screen presents the list of item groups as a tree structure sorted alphabetically. The list may be narrowed down to a specific group by entering its name or code in the Search Groups field.
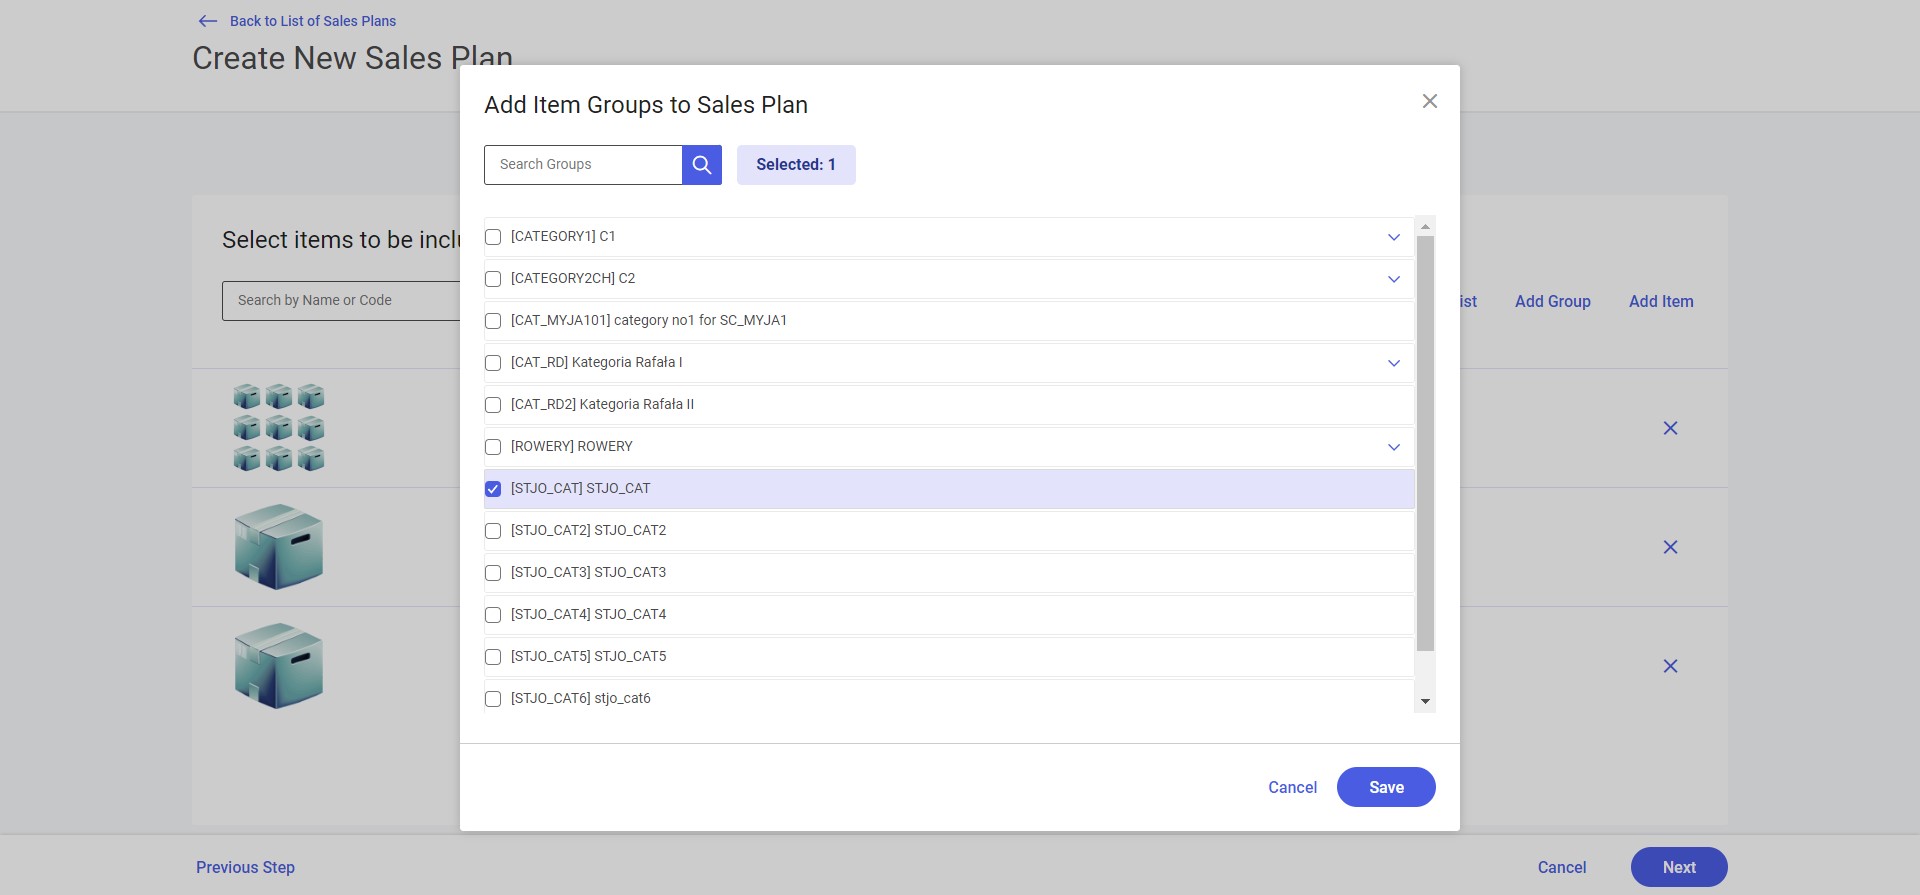
To choose an item group, select the checkbox next to its name. Groups selected by the user are marked in blue. To confirm the selection, click the [Save] button. Additionally, the screen contains the [Selected] button along with the number of currently selected item groups.
The list of item groups displays the following information:
- Group Name
- Group Code
To save changes made on the screen, click the [Save] button.
The [Cancel] button can be selected to cancel changes made on the Selected Item Groups screen and return to the previous screen.
Adding items to the sales plan
Selecting the buttons [+ Add Item] or [Assign Items] displays the additional screen Add Items to Sales Plan. The screen presents the list of items as a tree structure. The list may be narrowed down to a specific item:
- By entering an item name/code in the Search Items field
- By selecting the Item Group field that opens the Filter by Group screen, enabling the user to filter the list by an item group. Once a group is selected on the screen, the filter displays its name. The selection may be cleared by using the
 button. Clicking the button removes data in the filter but does not remove selected items.
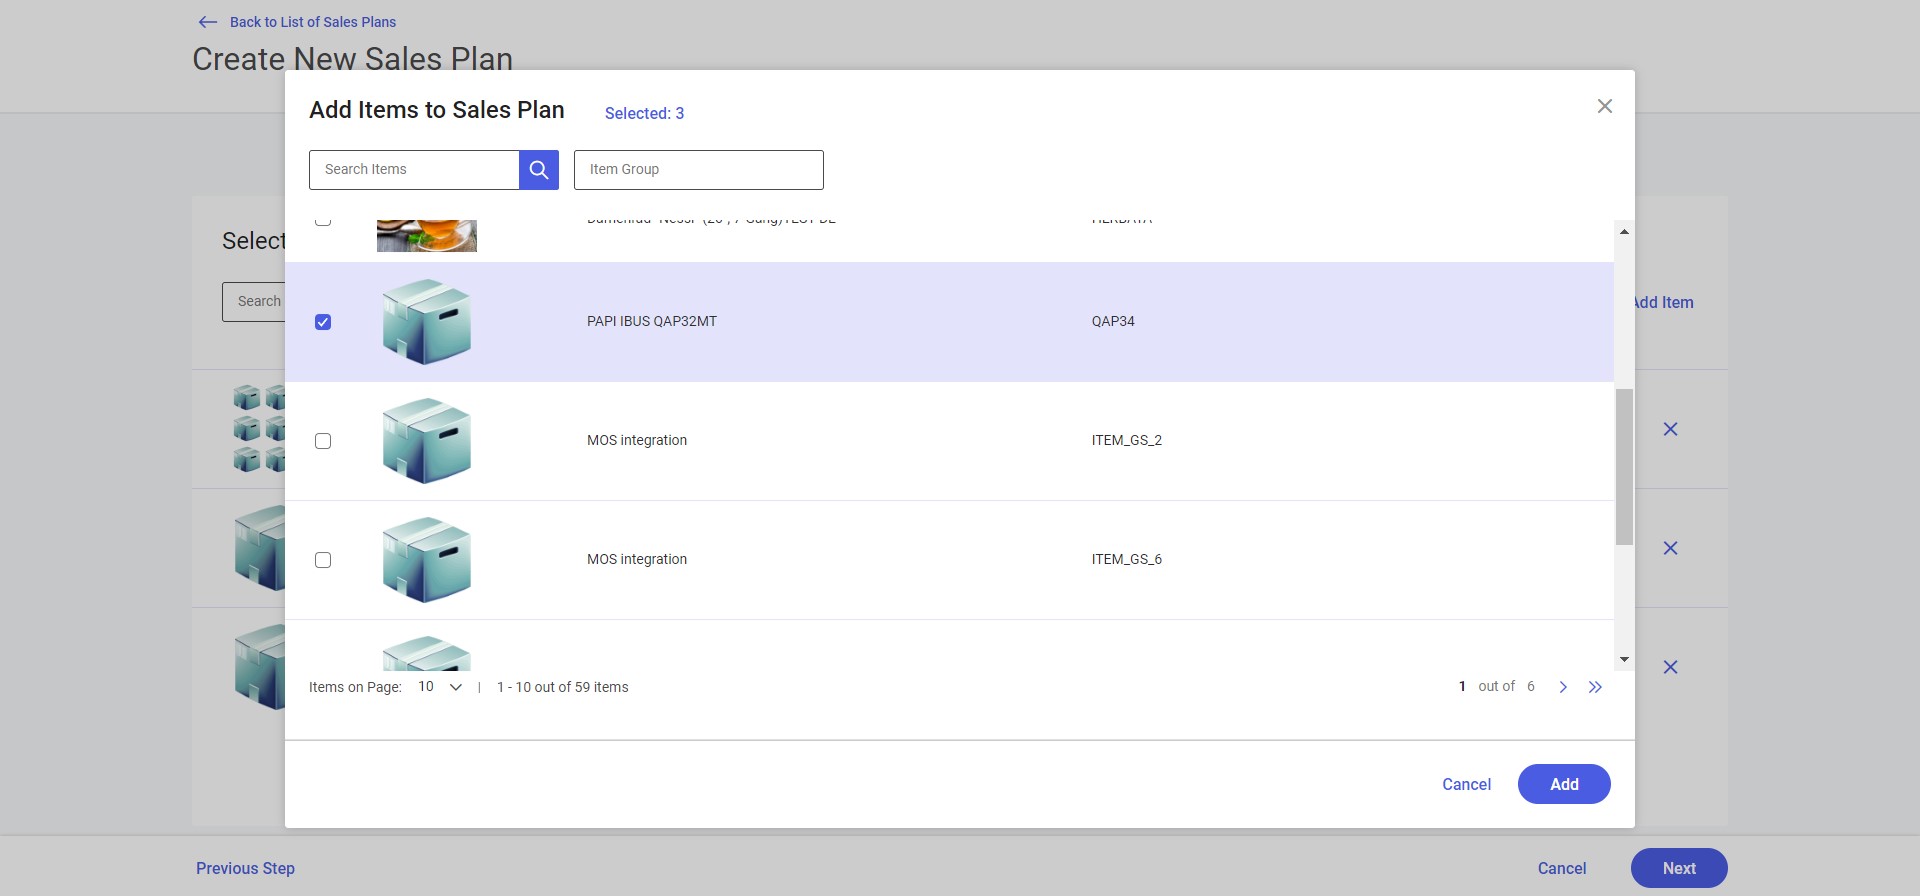
To choose an item, select the checkbox next to its name. Items selected by the user are marked in blue. To confirm the selection, click the [Save] button. Additionally, the screen contains the [Selected] button along with the number of currently selected items.
The list of items displays the following information:
- Item Icon
- Item Name
- Item Code
To save changes made on the screen, click the [Save] button.
The [Cancel] button can be selected to cancel changes made on the Selected Items screen and return to the previous screen.
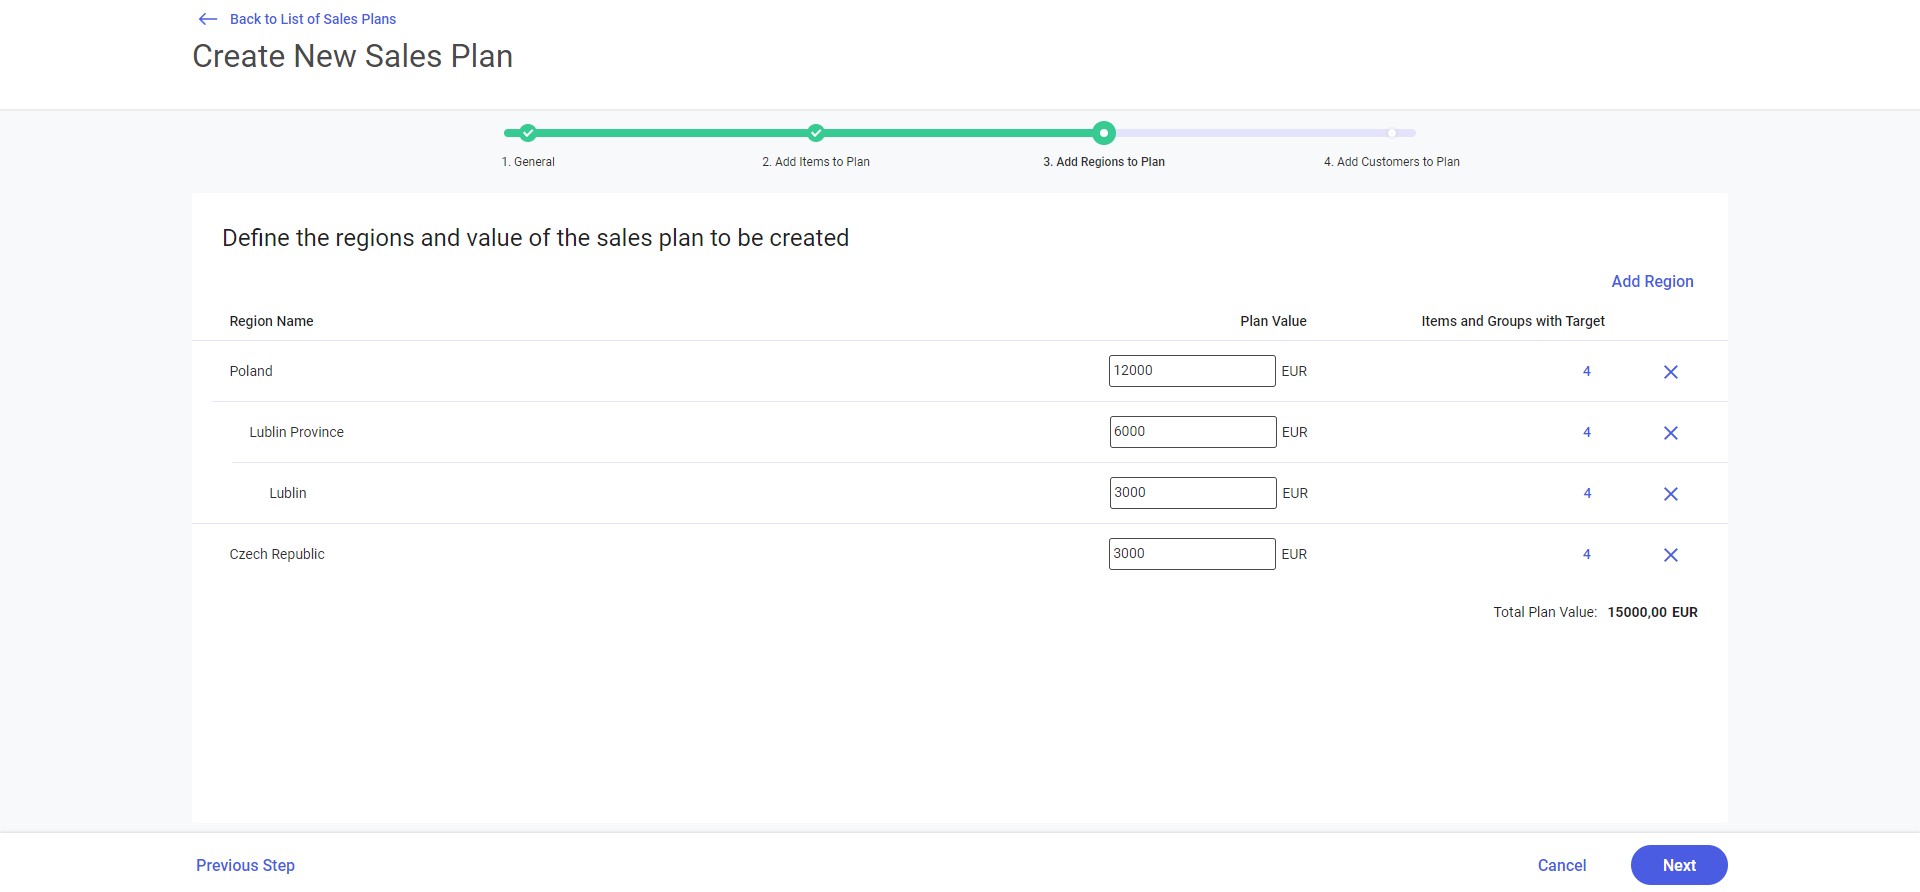
Add Regions to Plan
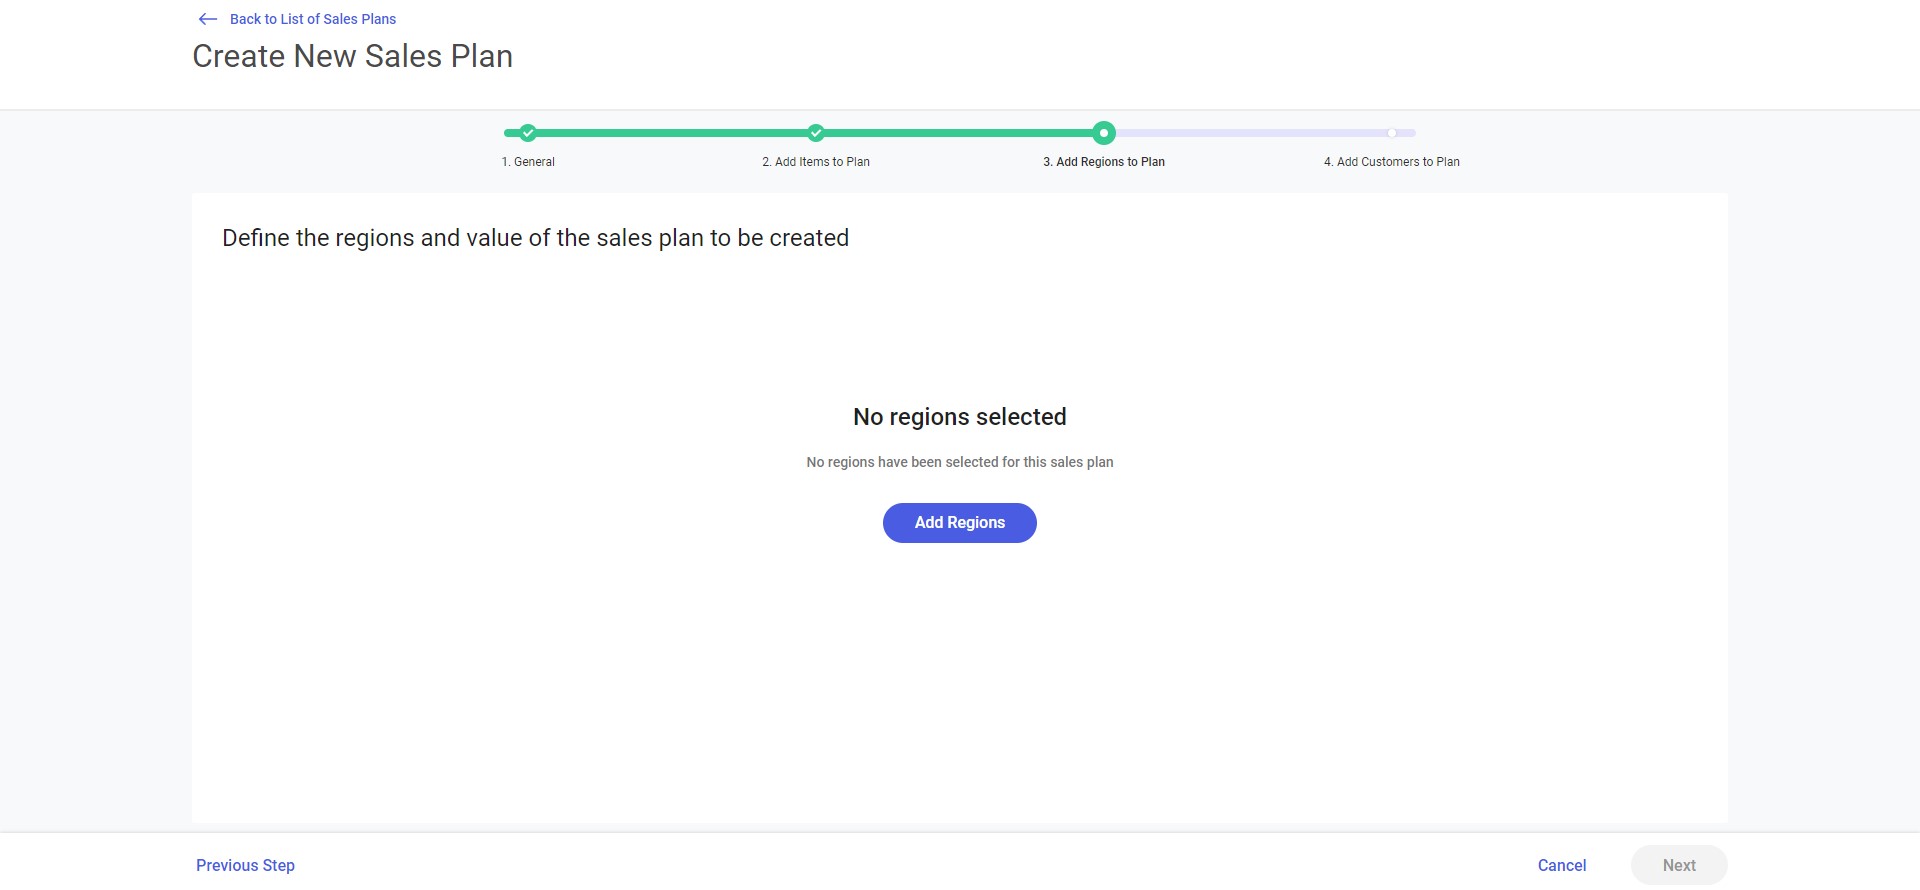
In the third step called Add Regions to Plan, the user can assign regions to the sales plan:
- When no region is assigned to the sales plan, the screen displays the notification: “No regions selected. No regions have been selected for this sales plan”
- To add a region to the plan, select the option [Add Regions]
The [Next] button is deactivated until at least one region is added to the plan.
List of regions added
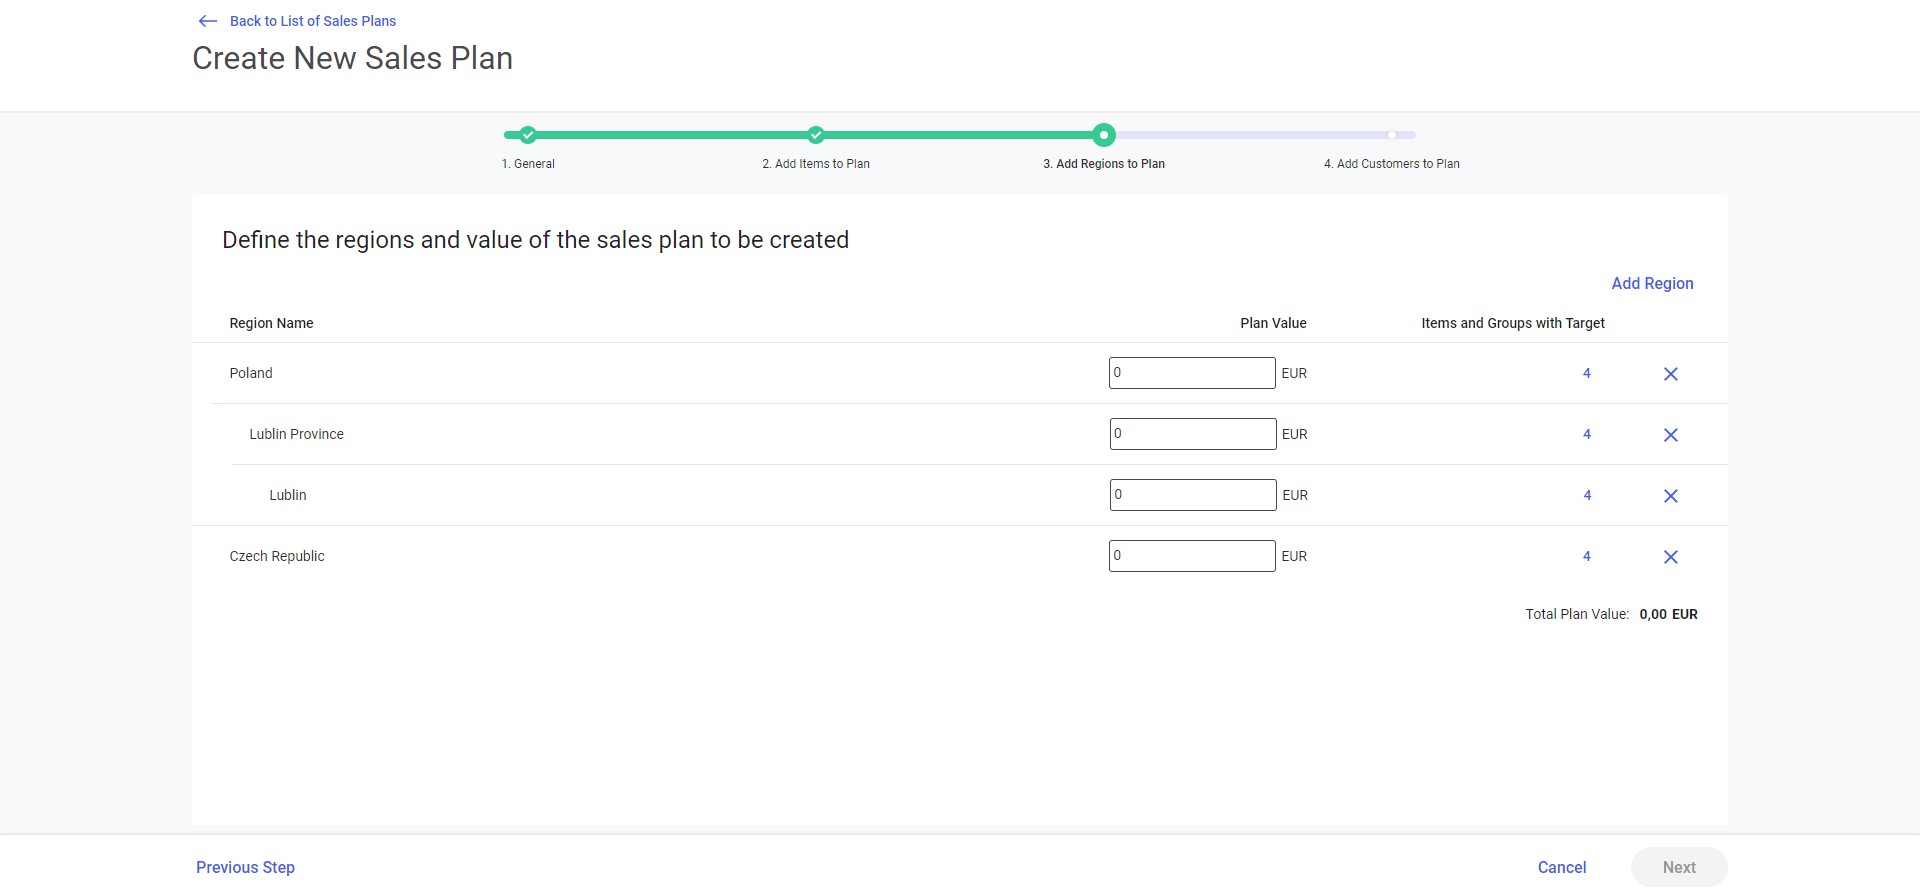
Once at least one region has been added to the sales plan, the screen displays additional options and information:
- The [+ Add Region] button enables the user to add a region to the sales plan
- Total Plan Value
- List of regions added:
- Region Name
- Plan Value – a text field enabling the user to enter a value
- Items and Groups with Target – the number of items and item groups
- The user can detach each region by selecting the option
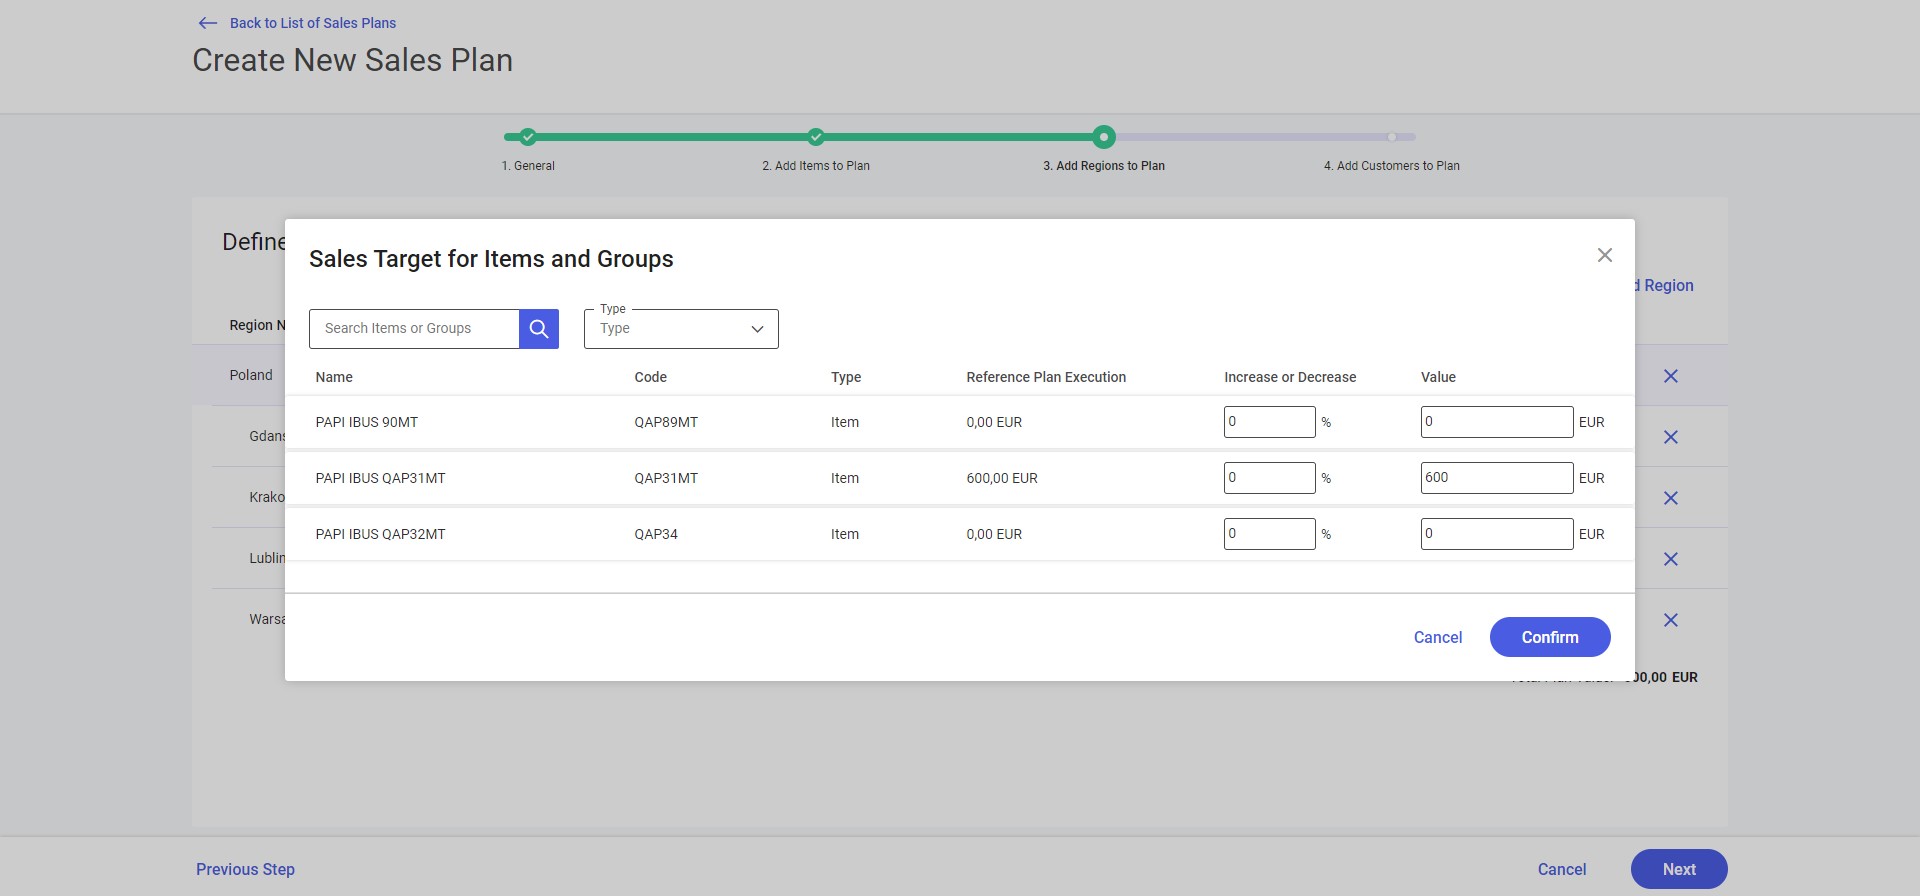
- The
 option makes it possible to edit items and groups; the option opens the screen Sales Target for Items and Groups. The screen presents the list of items and item groups assigned in the previous step. The user may:
- Filter results by entering an item’s or group’s name/code in the Search Items or Groups field
- Filter results by type using the drop-down list with the options Item and Group
- Enter values for an item or item group within a given region
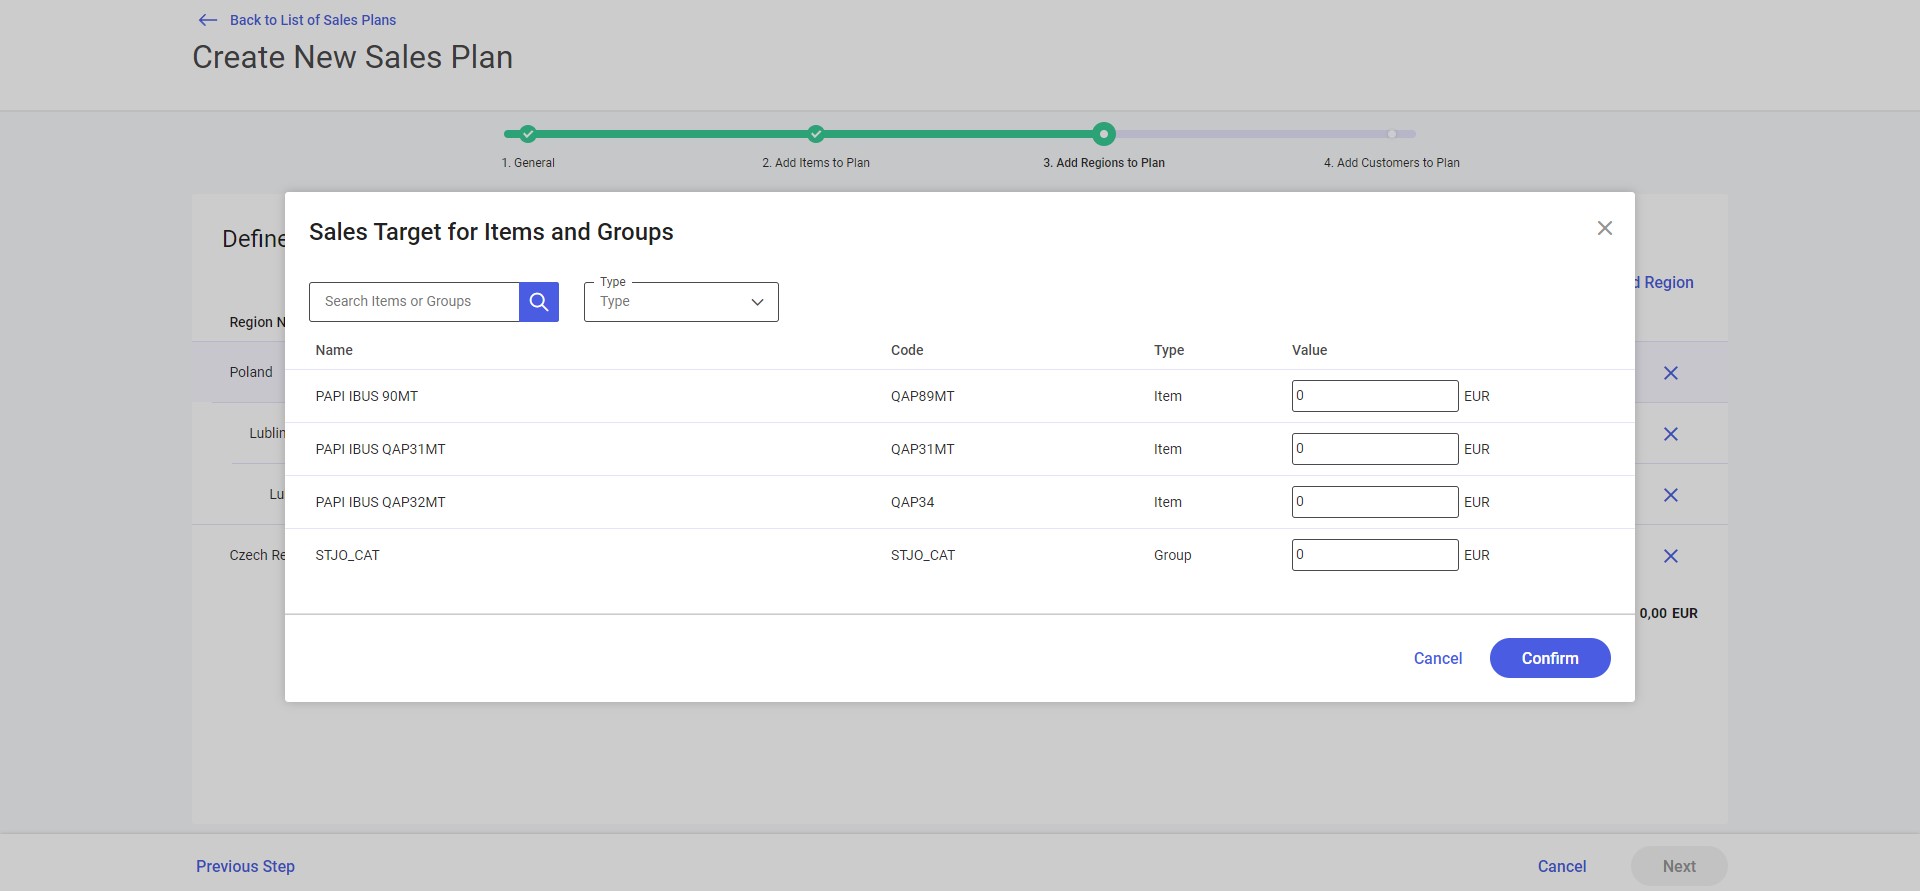
- To save changes made on the screen, click the [Confirm] button.
Adding a region to the sales plan
Selecting the buttons [+ Add Region] or [Add Regions] displays the additional screen Assign Regions to Sales Plan. The screen presents the list of regions displayed as a tree structure sorted alphabetically. The list may be narrowed down to a specific region by entering its name in the Search Regions field and makes it possible to select appropriate regions and subregions.
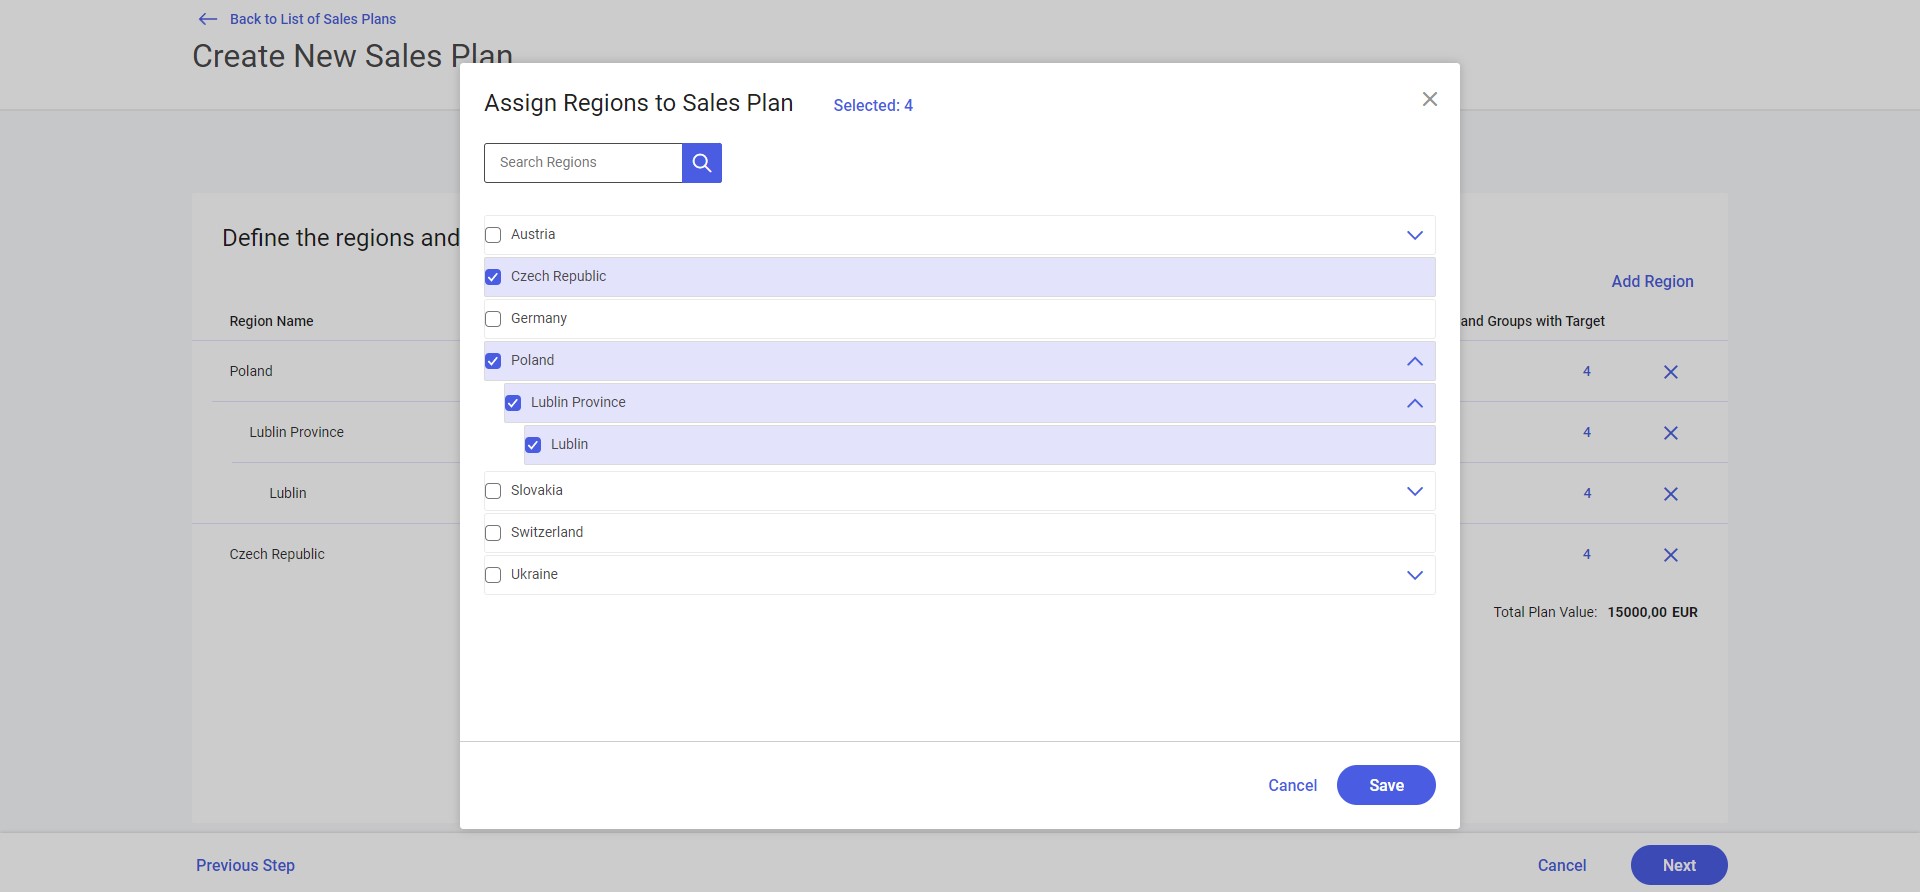
To choose a region, select the checkbox next to its name. Regions selected by the user are marked in blue. If a main region is selected, its subregions are also automatically selected (they can be unselected by the user, if necessary). To confirm the selection, click the [Save] button. Additionally, the screen contains the [Selected] button along with the number of currently selected regions.
The list of regions displays the following information:
- Region Name
To save changes made on the screen, click the [Save] button.
The [Cancel] button can be selected to cancel changes made on the Selected Regions screen and return to the previous screen.
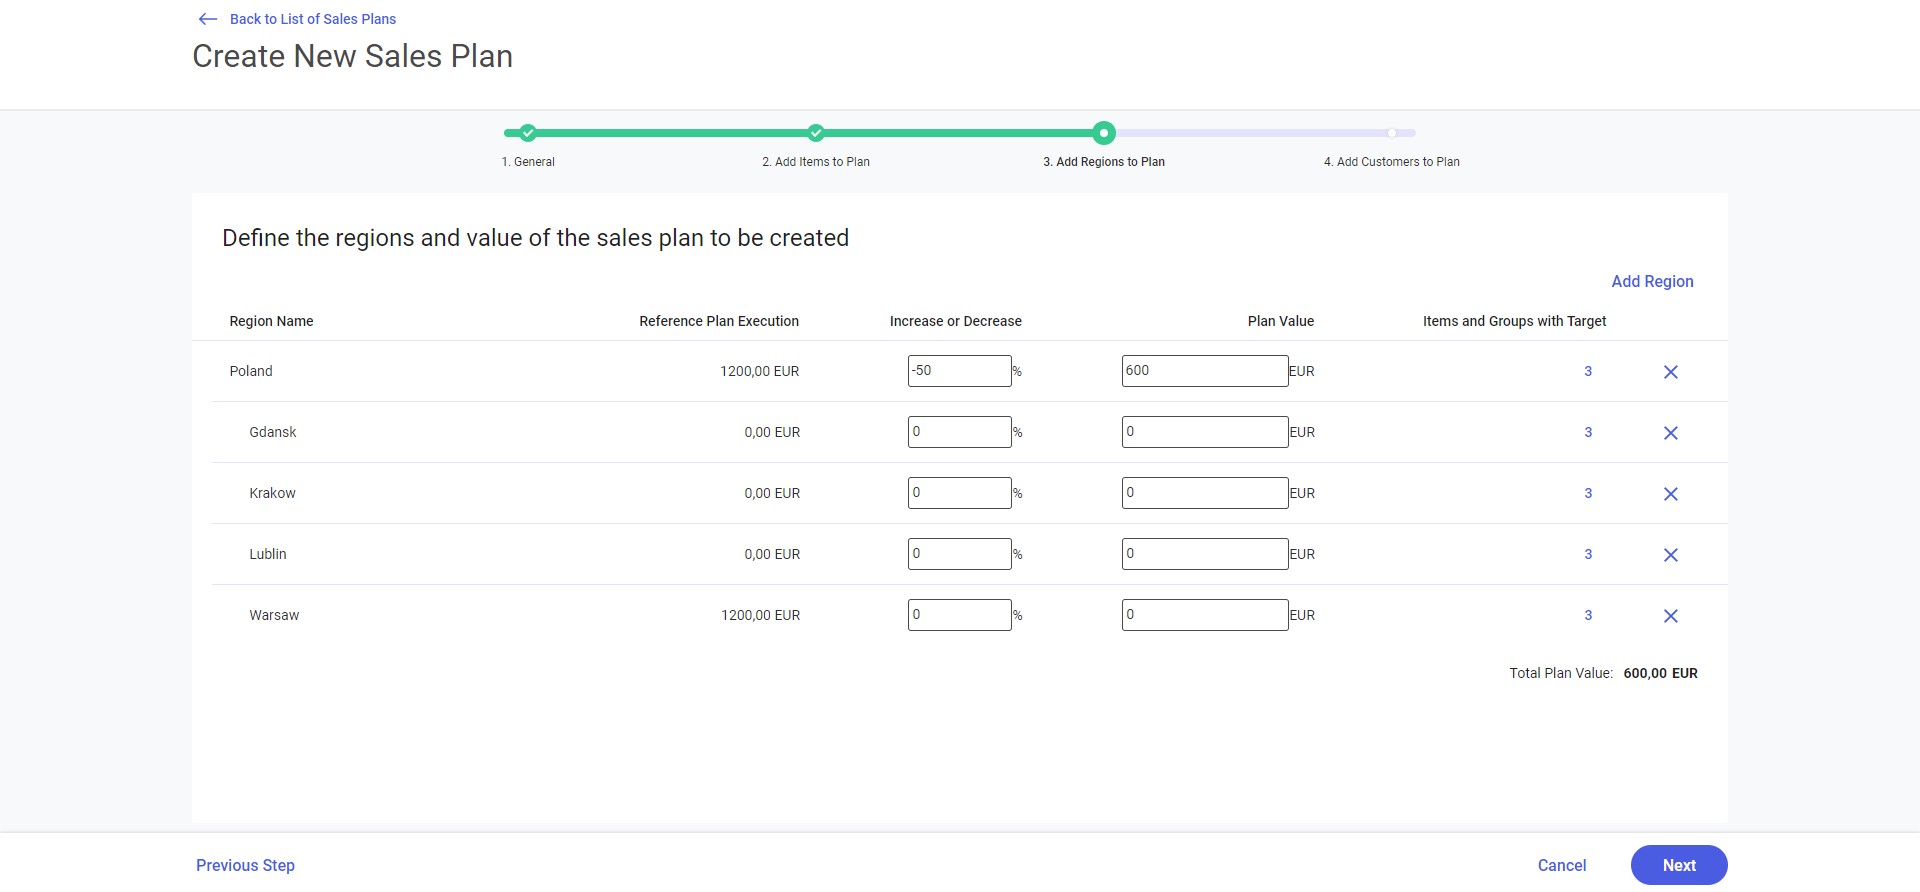
If a reference plan has been added to the definition of the plan currently being added/modified:
1. Additional columns are displayed on the screen Add Regions to Plan:
- Reference Plan Execution – it displays the execution value of the reference plan
- Increase or Decrease – it makes it possible to enter the percentage increase or decrease value in relation to the reference plan
2. Additional columns are displayed on the screen Sales Target for Items and Groups:
- Reference Plan Execution – it displays the execution value of the reference plan
If the user creates a new sales plan using a closed reference plan, the values of the executed plan are taken into account.
If the user creates a new sales plan using a reference plan whose execution has not started yet (no document has been issued), the planned values entered for that plan are taken into account.
- Increase or Decrease – it makes it possible to enter the percentage increase or decrease value in relation to the reference plan
Add Customers to Plan
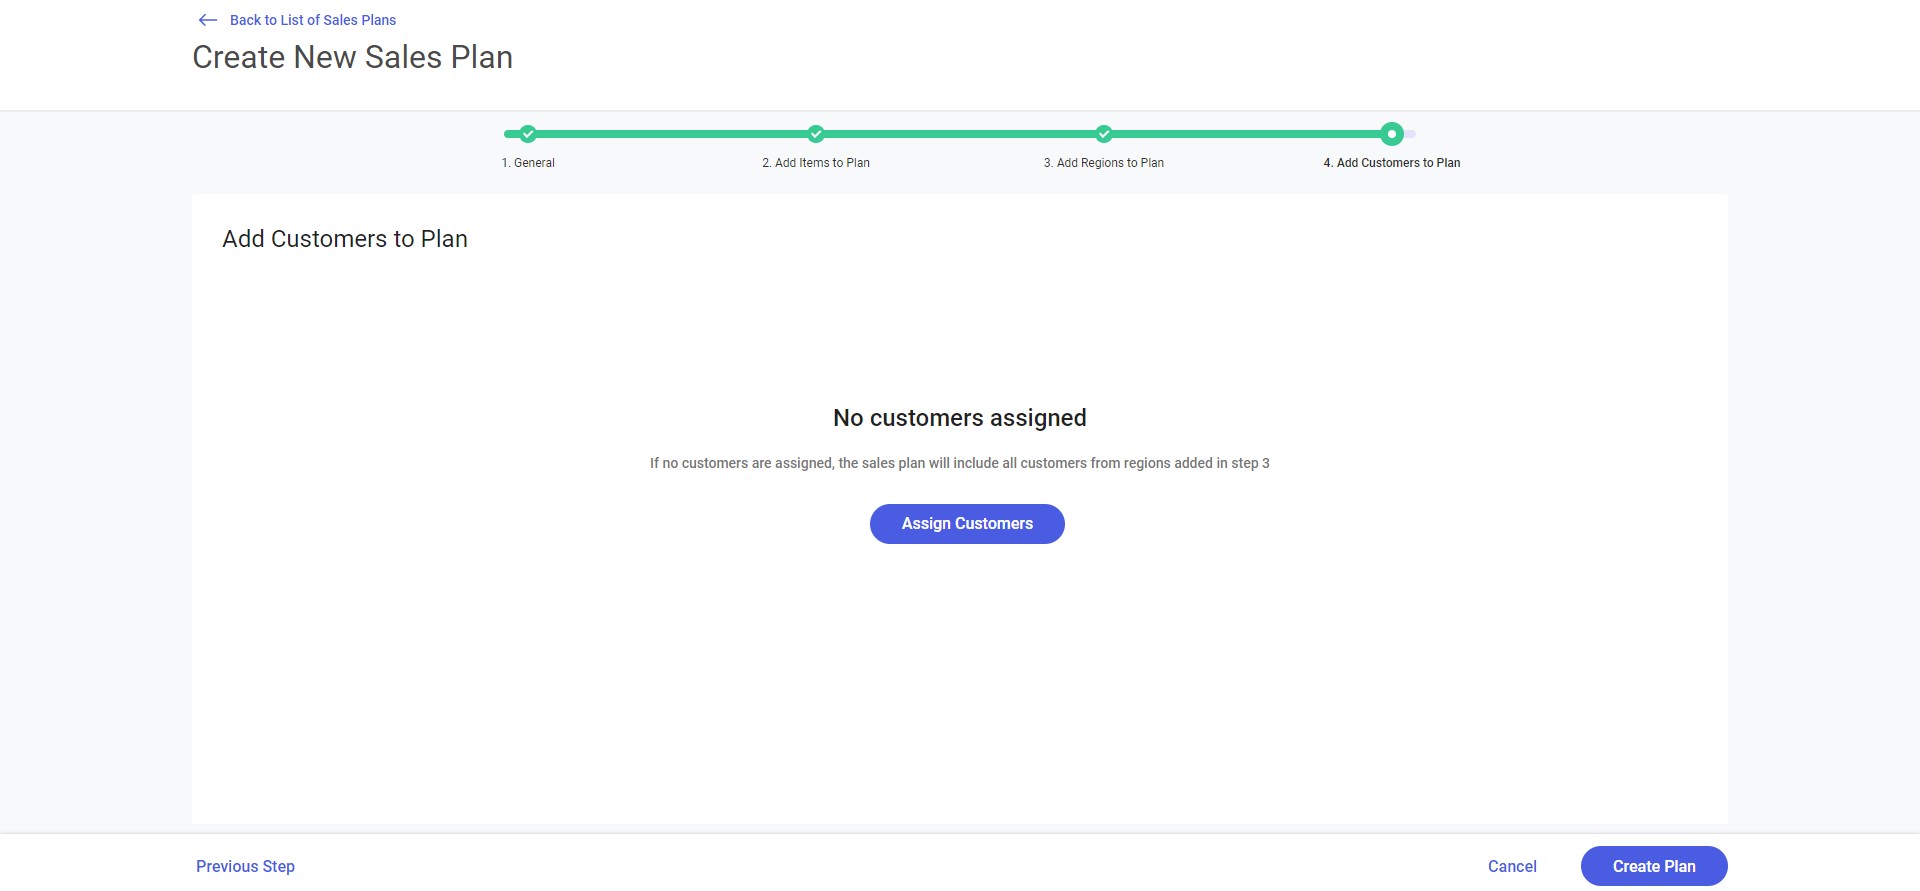
In the fourth step called Add Customers to Plan, the user can assign customers to the sales plan:
- When no customer is assigned to the sales plan, the screen displays the notification: “No customers assigned. If no customers are assigned, the sales plan will include all customers from regions added in step 3”
- To add a customer to the plan, select the option [Assign Customers]
List of customers added
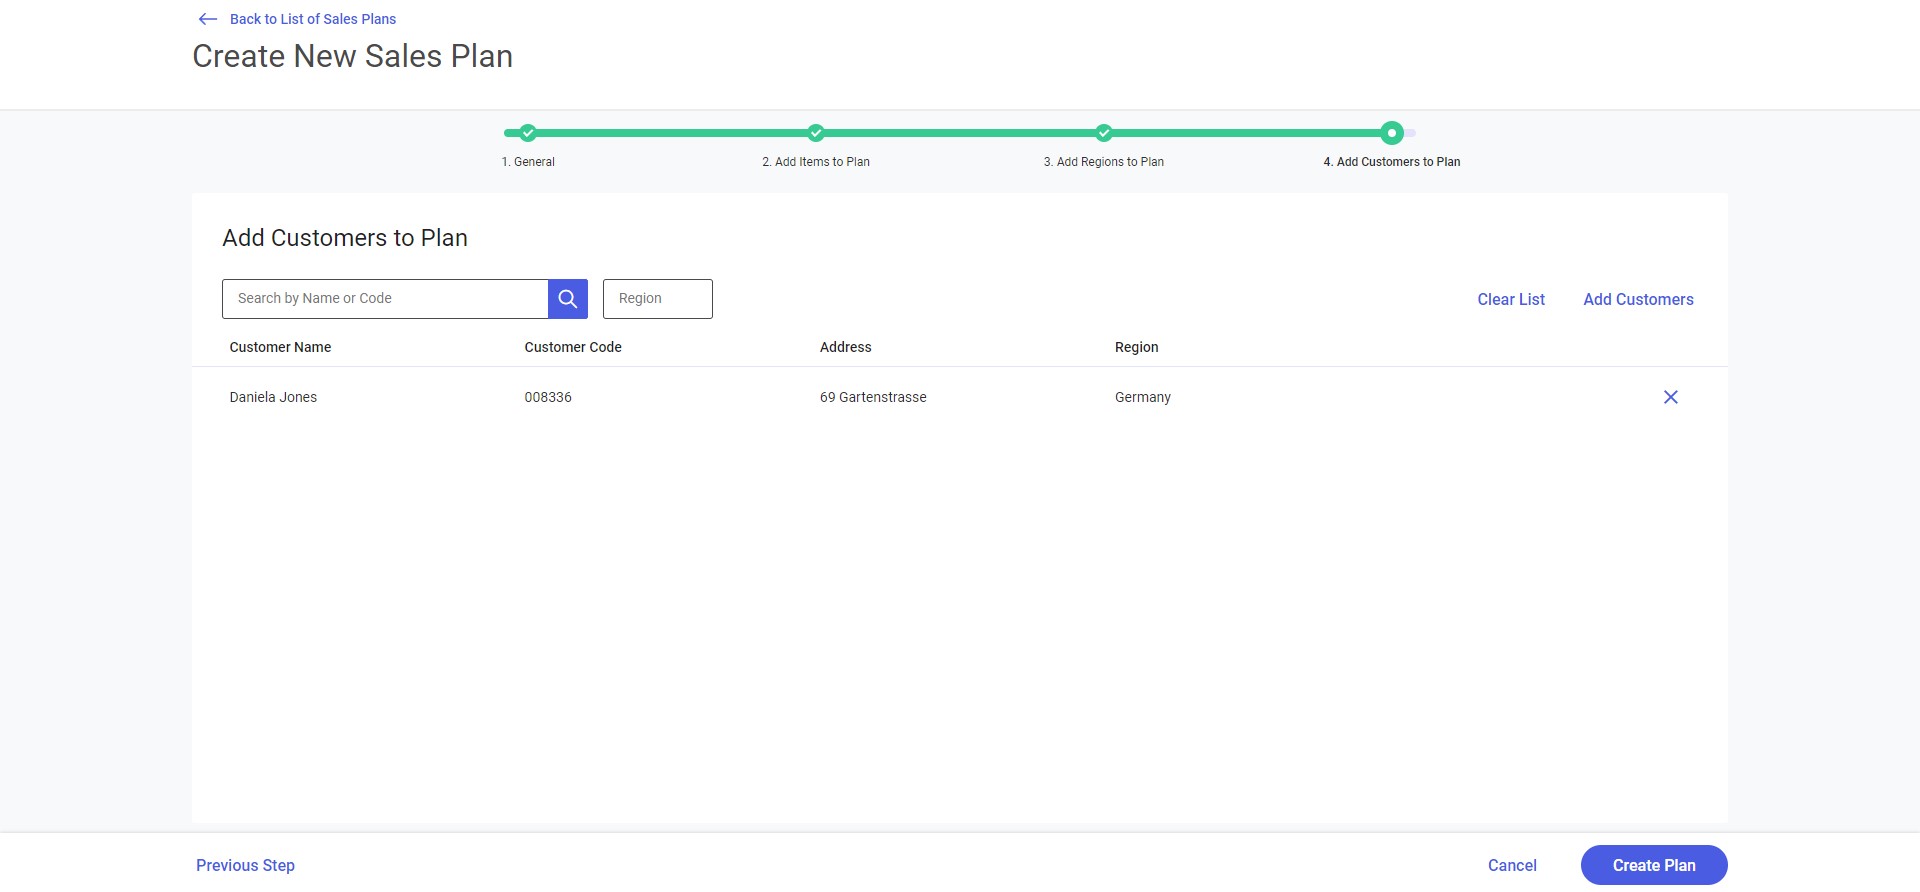
Once at least one customer has been added to the sales plan, the screen displays additional options and information:
- The [+ Add Customers] button enables the user to add a customer to the sales plan
- List of selected customers:
- Customer Name
- Customer Code
- Address
- Region
- The user can detach each customer by selecting the option
Adding customers
Selecting the buttons [+ Add Customers] or [Assign Customers] displays the additional screen Assign Customers to Sales Plan. The screen presents the list of customers. The list may be narrowed down:
- By entering a customer name or code in the field Search Customers by Name or Code
- By selecting the Region field that opens the Filter by Region screen, enabling the user to filter the list by a region. Once a region is selected on the screen, the filter displays its name. The selection may be cleared by using the button. Clicking the button removes data in the filter but does not remove selected customers.
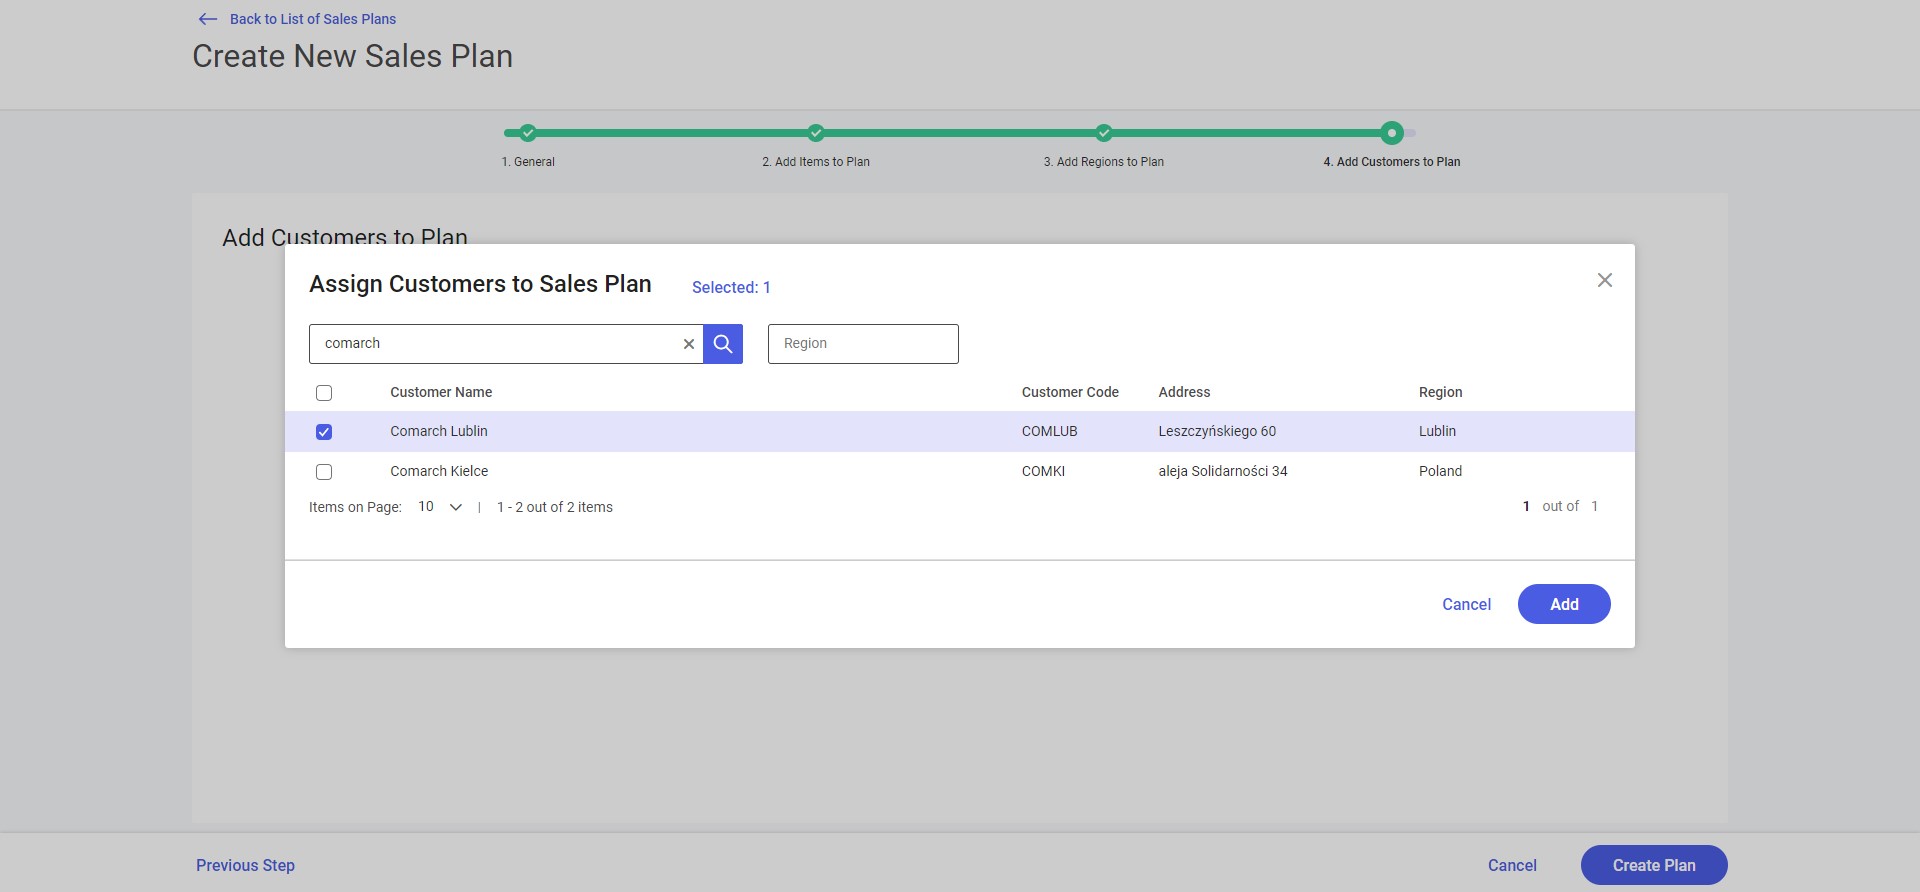
To choose a customer, select the checkbox next to the customer’s name. Customer selected by the user are marked in blue. To confirm the selection, click the [Add] button. Additionally, the screen contains the [Selected] button along with the number of currently selected regions.
The list of customers displays the following information:
- Customer Name
- Customer Code
- Address
- Region
To save changes made on the screen, click the [Save] button.
The [Cancel] button can be selected to cancel changes made on the Selected Regions screen and return to the previous screen.
Once the sales plan is ready, create it selecting the [Create Plan] button.