A contact is a type of action that is most often recorded after the fact. Contacts are always associated with threads that are related to a given customer.
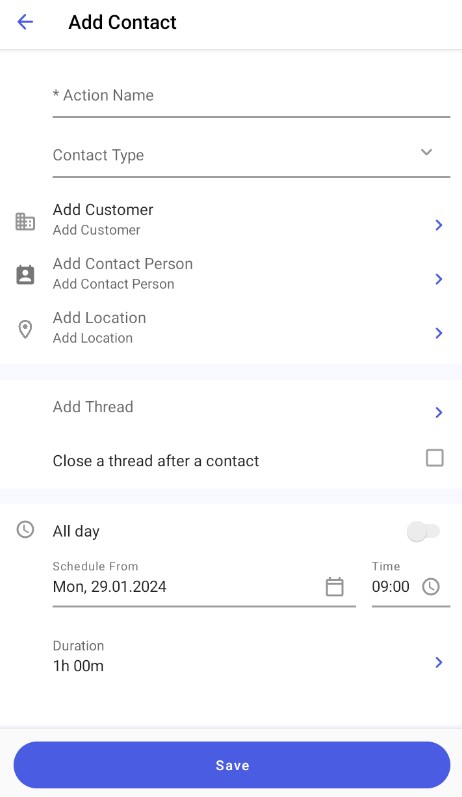
When scheduling a contact, you can fill in the following fields:
- Action Name (required)
- Contact Type – selected from a list (required). You can configure appropriate contact types in Comarch Mobile Management; to do so, select [Appointment Templates] → [Directories] → [Contact] → [Contact Types].
- Add Customer
- Add Contact Person
- Add Location (required)
- Add Thread (required)
- Close a thread after a contact
- Schedule From
- Time
- Add Description
To schedule a contact, enter its name and select its type. If you tap the [Add Customer] field, you will see the list of customers available in the application. Here, you can select a customer and add it to the task by tapping the [Save] button. Similarly, after tapping the [Add Contact Person] field, it is possible to select a contact person, as long as they have been added to the customer form. Also, you can tap the [Add Location] field to select the location of the contact. The list opened after selecting [Add Location] contains customer addresses.
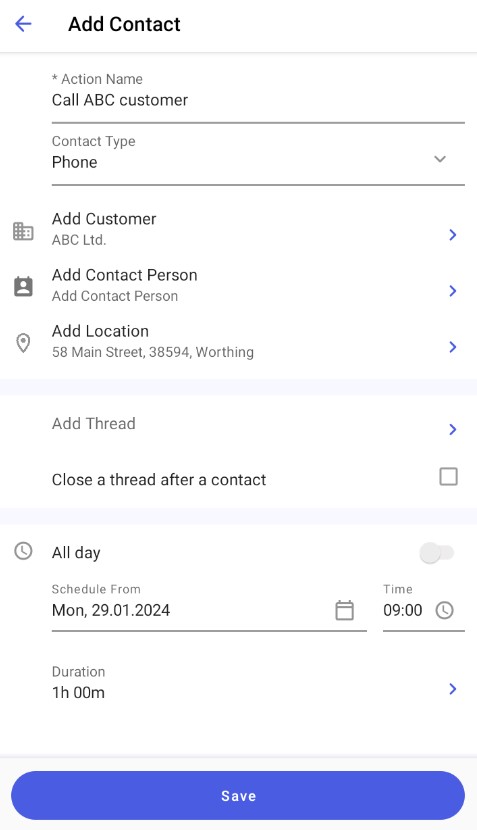
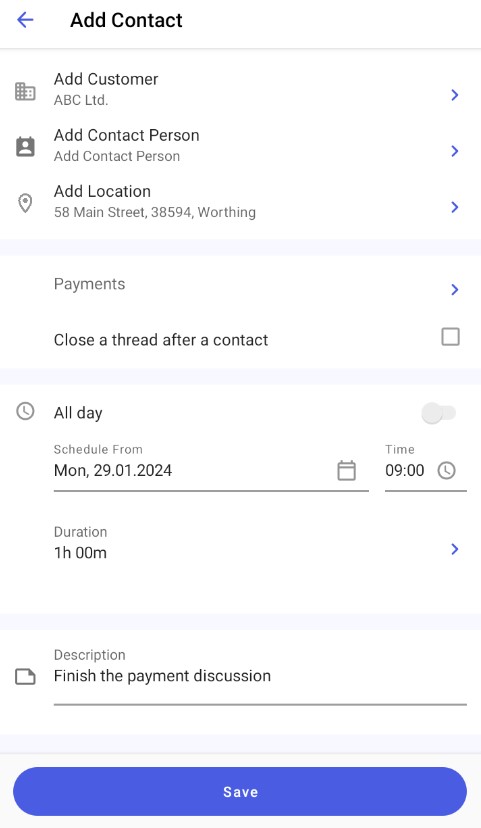
When you schedule a contact, you need to select a thread by tapping the [Add Thread] option. You can either select an existing open thread or add a new one by tapping the [Add new thread] button. To accept the selected thread, tap the [Save] option. If you want to close the thread right after the completion of the contact, select the option [Close a thread after a contact].
Next, you need to set the contact’s date, time, and duration. You can also enter a contact description.
After entering appropriate data, save changes using the [Save] button. Once saved, the contact will appear in your calendar.

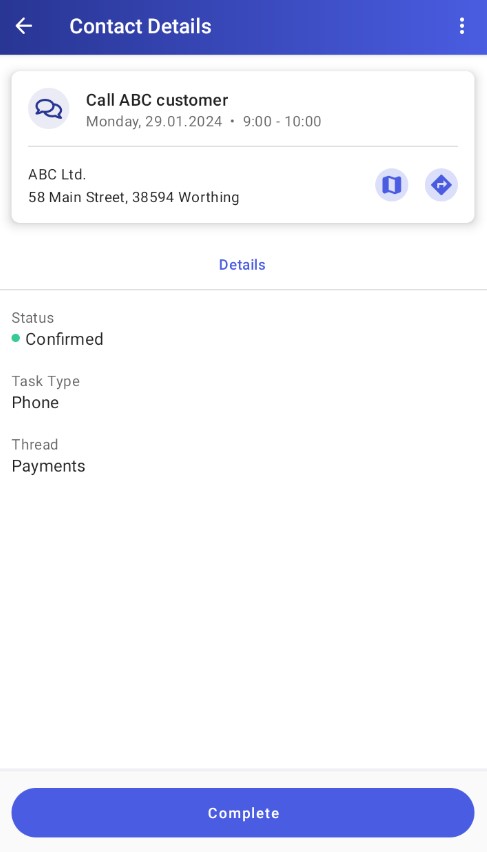
To preview the details of a contact, tap its name or select the [View Details] from the context menu of that contact.