To display the list of vehicles, select [Appointment] and then [Vehicles] from the main menu.
The list presents the following information:
- License Plate No. – a vehicle’s license plate number
- Driver – an employee assigned to a vehicle
- Brand – a vehicle’s brand
- Model – a vehicle’s model
- Year of Manufacture
- Inspection Expiration Date
- Insurance Policy Number– a vehicle’s policy document number
- Insurance Policy Expiration Date – a vehicle’s policy expiration date
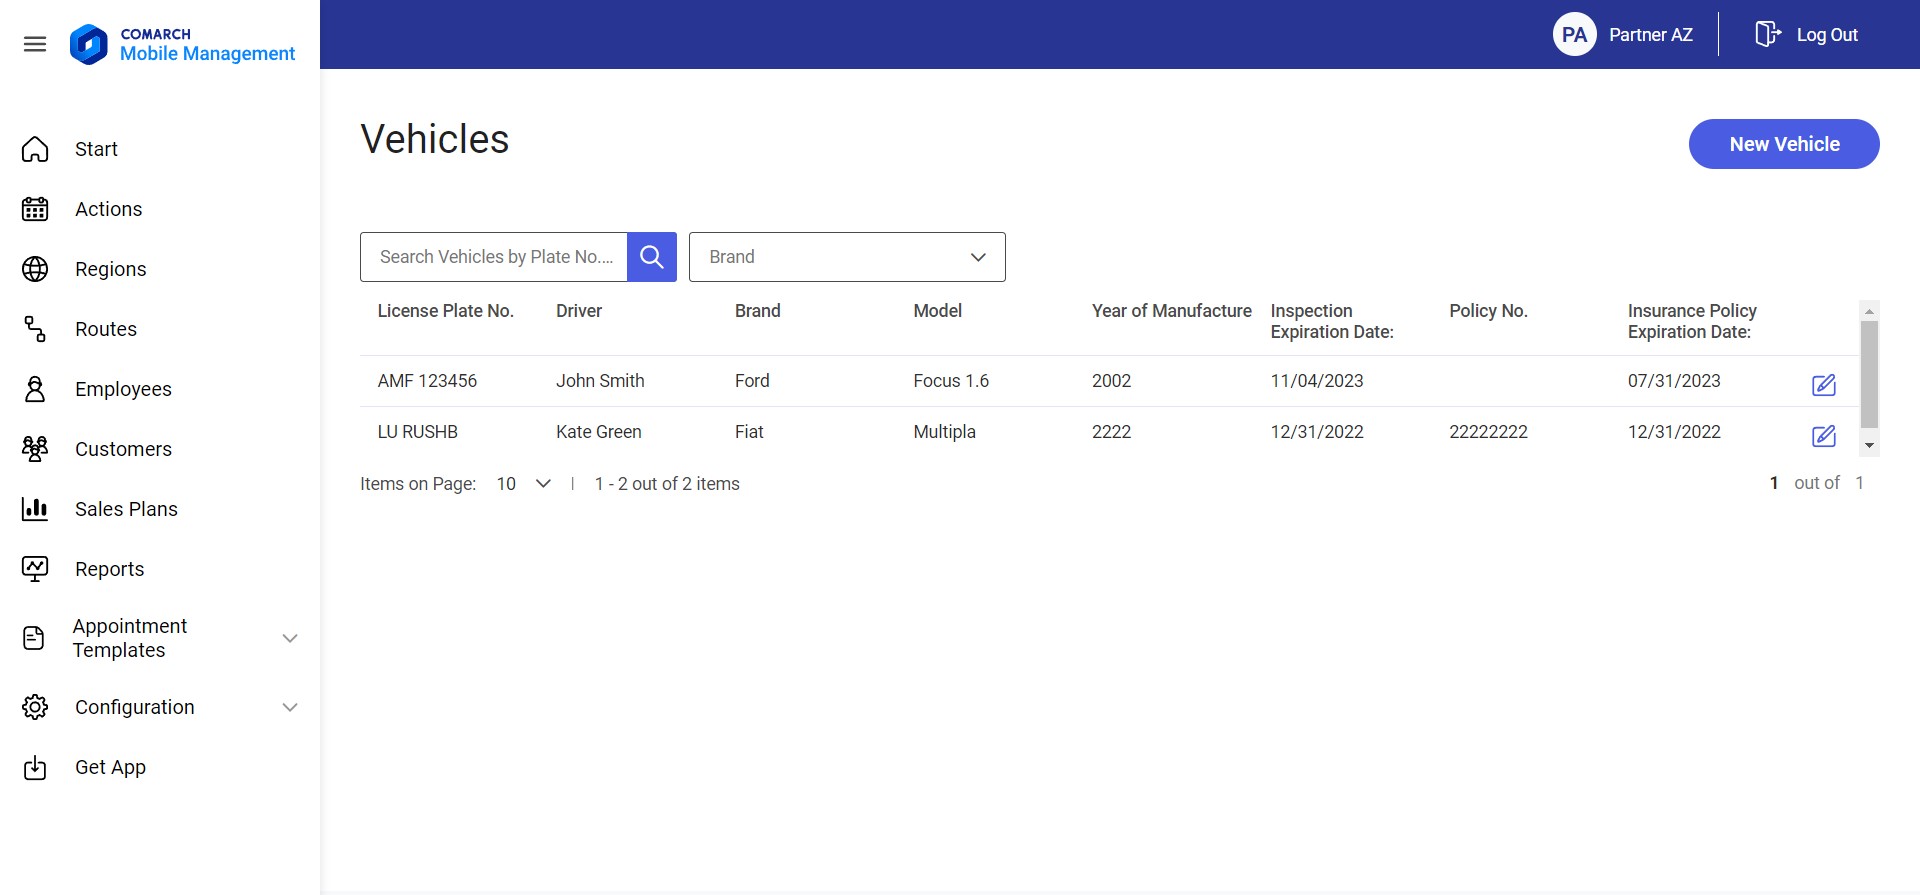
The list of vehicles may be filtered out by providing a license plate number, driver, or brand in the fields Search Vehicle by Plate No. or Driver or Brand.
Adding a new vehicle
In order to add a new vehicle, select the [New Vehicle] button in the top right corner.

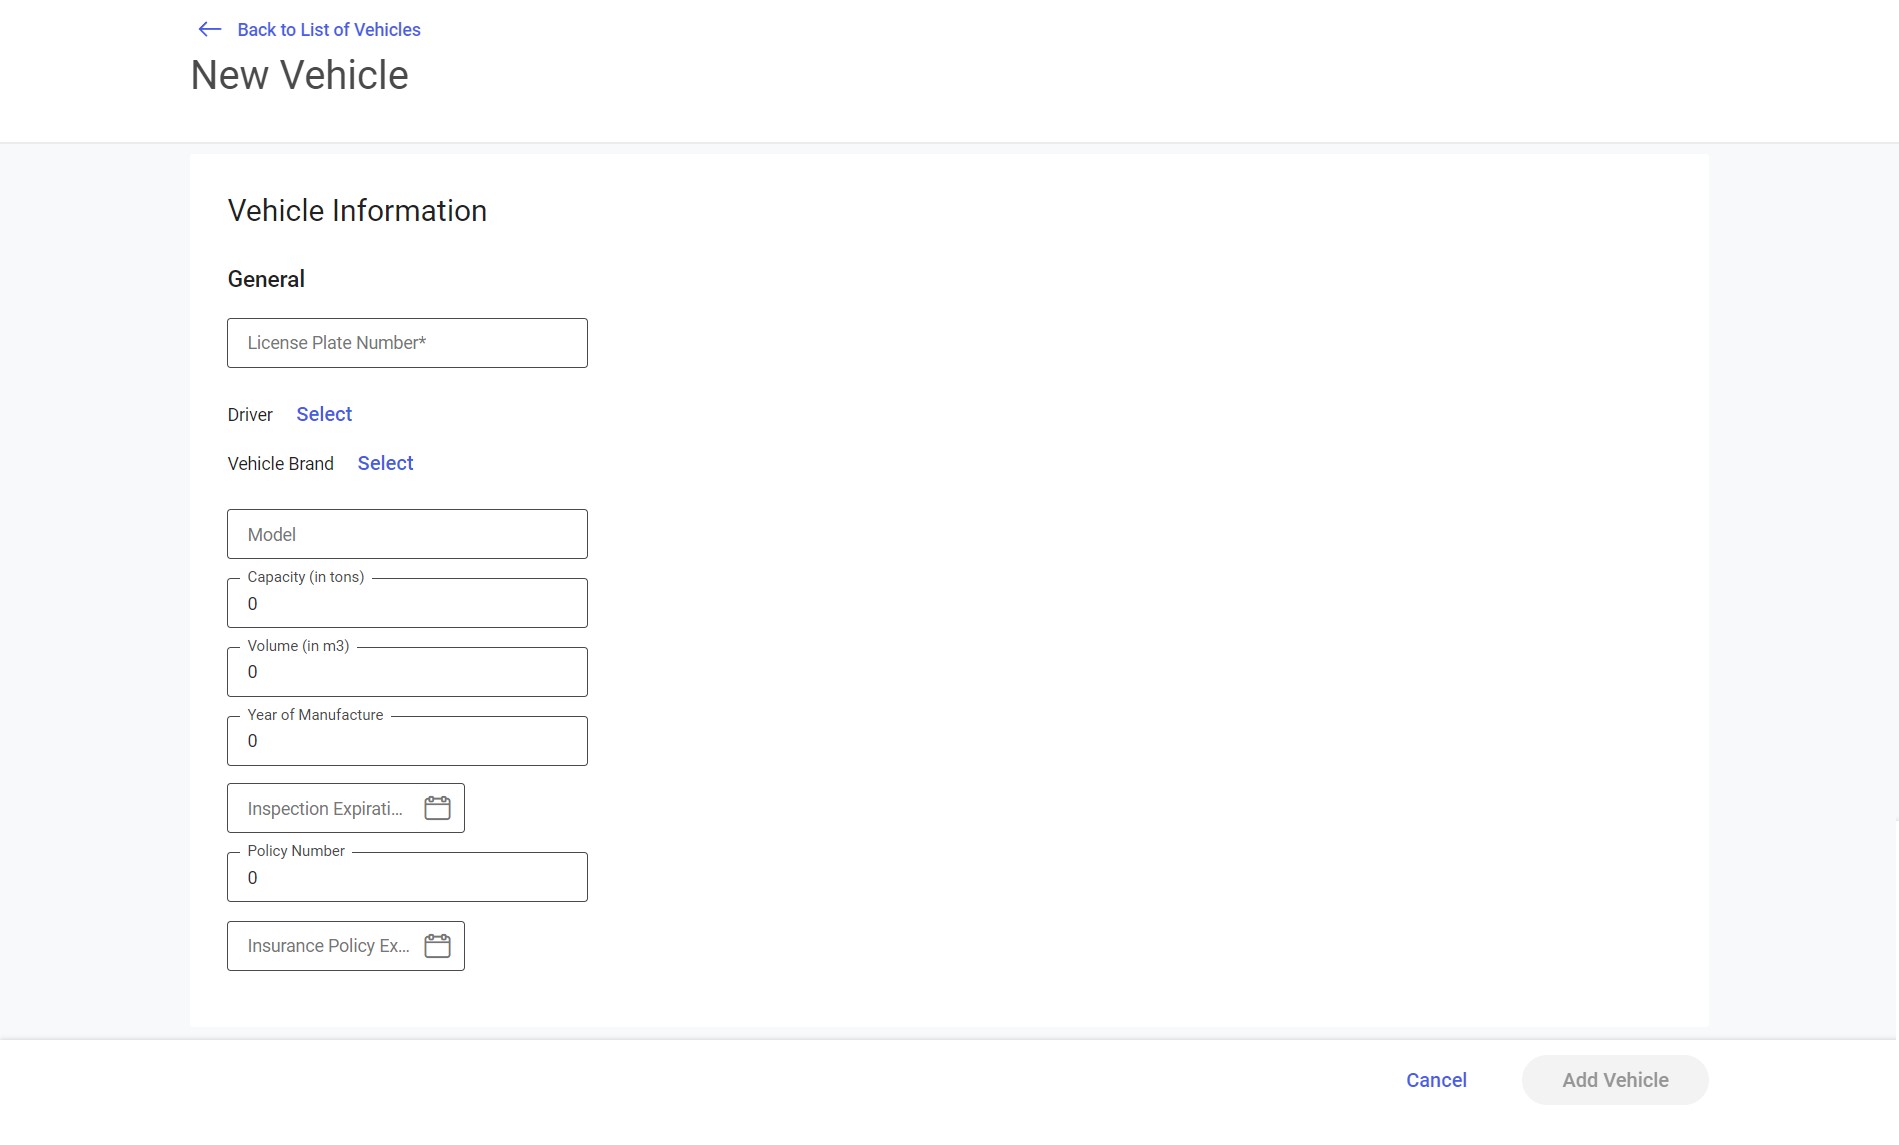
Information presented in the New Vehicle window:
- License Plate Number – a text field (required)
- Driver – it enables the user to assign a driver. Clicking the [Select] option displays a list making it possible to select one employee.
- Vehicle Brand – it enables the user to select a vehicle brand. Clicking the [Select] option displays a list making it possible to select a brand or add a new one.
- Model – a text field
- Capacity (in tons) – a text field; only numeric values are accepted
- Volume (in m3) – a text field; only numeric values are accepted
- Year of Manufacture – a text field; only numeric values are accepted
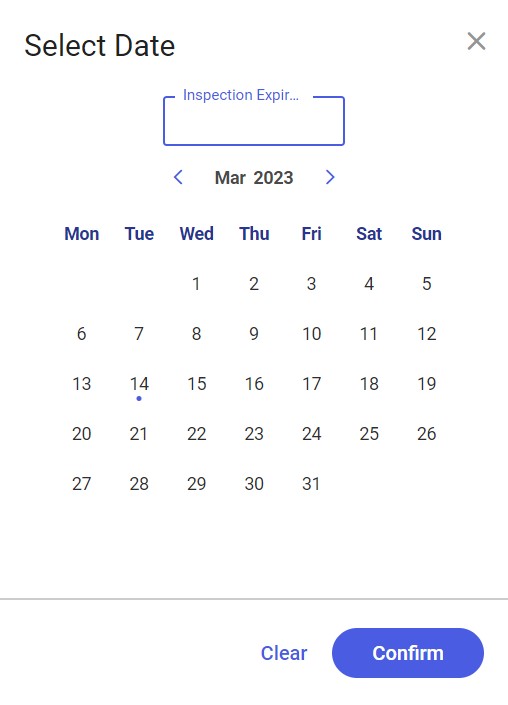
- Inspection Expiration Date – selecting the field displays a calendar window. By default, the current date is entered, with a possibility to change it.
- Insurance Policy Number – a text field; only numeric values are accepted
- Insurance Policy Expiration Date – selecting the field displays a calendar window, similar to the one displayed in the case of the inspection expiration date
After entering all information, it is necessary to confirm the addition of a new vehicle by selecting the [Add Vehicle] button.
Vehicles added in Comarch Mobile Management application are displayed in the mobile application on the list of vehicles when processing a Travel appointment element, discussed in the Sales appointment element – Travel article.
Editing a vehicle
The editing option ![]() enables the user to edit a vehicle. The process is similar as in the case of adding a new vehicle.
enables the user to edit a vehicle. The process is similar as in the case of adding a new vehicle.
Assigning an employee to a vehicle
Clicking the [Select] or [Edit] button in the Driver field displays the list of employees making it possible to select one employee.
The list of employees contains the following data:
- Employee – an employee’s full name; if it is not defined, then the employee’s acronym is displayed
- City – a city defined on an employee form
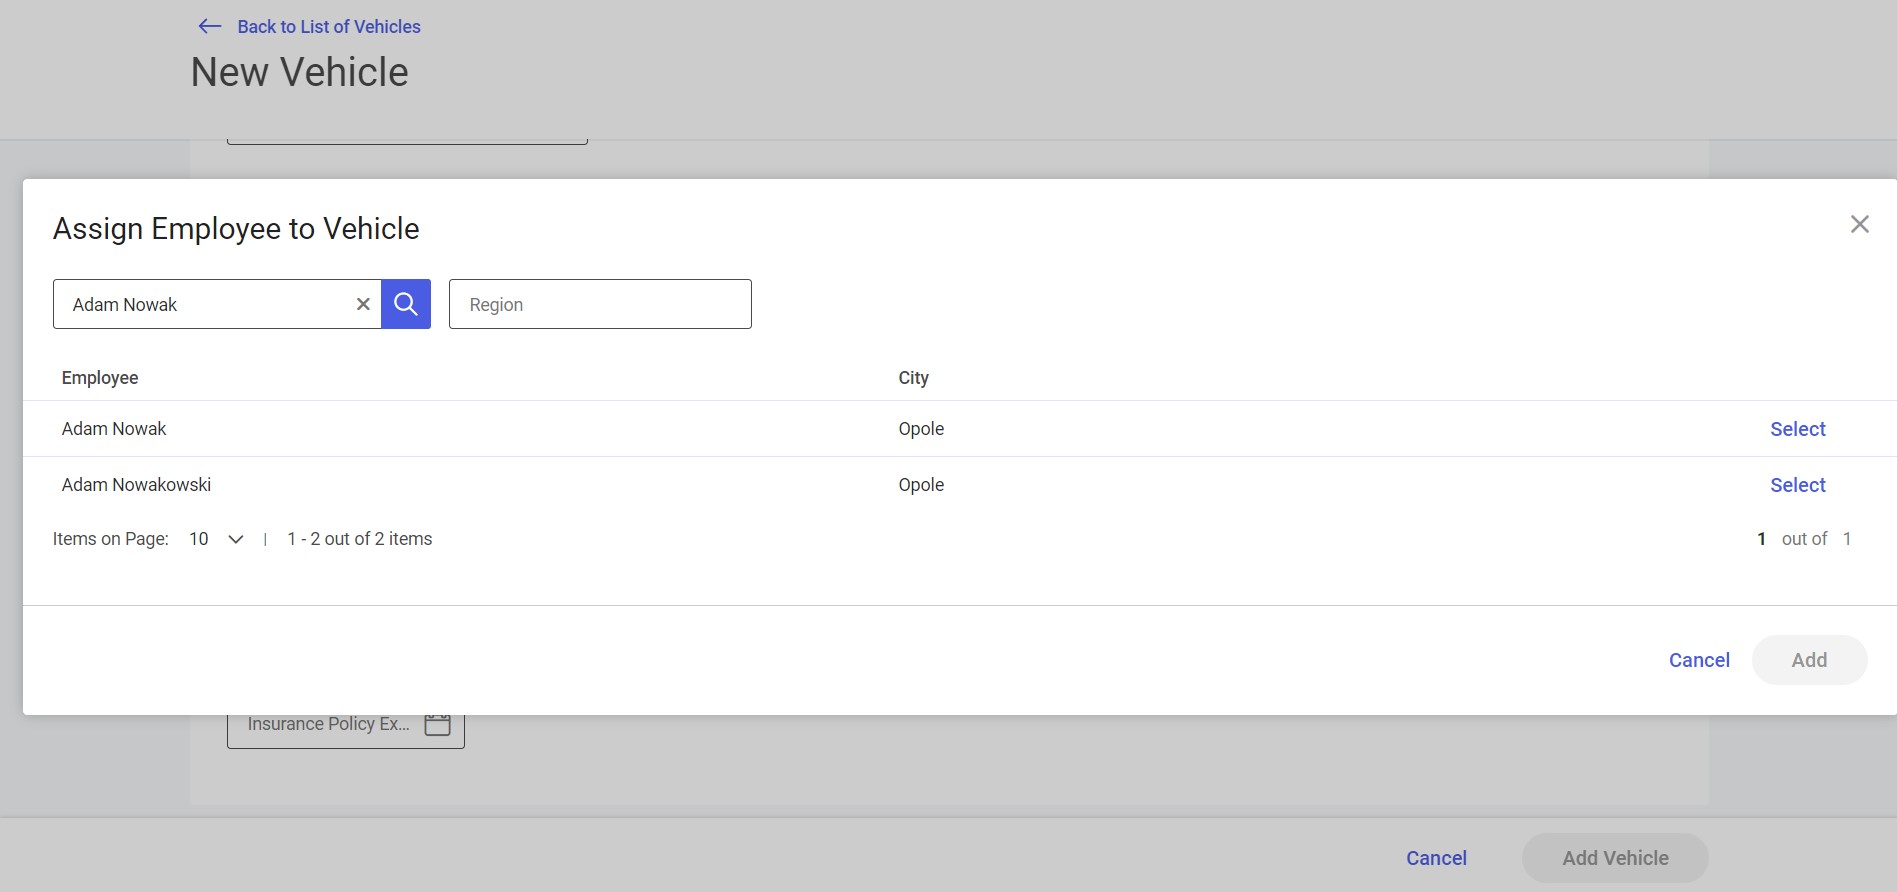
Available filters:
- Search Employees – a text field enabling the user to search an employee by first name, last name, acronym, and city
- Region – it makes it possible to select a region to which an employee belongs. The list of regions is displayed as a tree structure sorted alphabetically and can be narrowed down to a specific region by entering its name in the Search field or selecting it from the displayed list of regions and subregions.