Contents

The customer form is composed of three tabs:
- Dashboard
- Information
- Activities
By selecting Dashboard, Information or Activities you can proceed to the individual tab.
The top bar of each tab contains:
- The
 icon that returns to the previous screen in the application
 - Customer code and name
- The
 icon used to mark a customer as favorite
 - The
 icon that opens a context menu with additional options on customer form:
- [Add Note] – adds a note
- [Add Attachment] – adds an attachment
- [Add Document] – registers a sales document
- [Show Customer On Map] – displays a customer’s location
- [Get Directions] – gets direction to the specified customer’s address
- [Add To Favorites] – marks a customer as favorite
- [Edit Customer] – edits the entire customer form
Dashboard tab
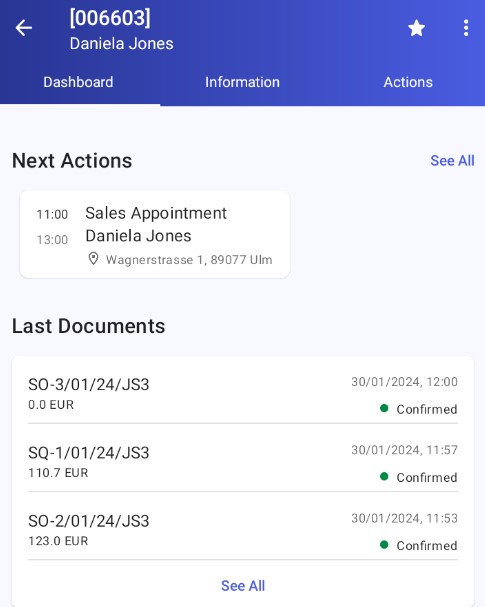
The customer dashboard is divided into two groupings:
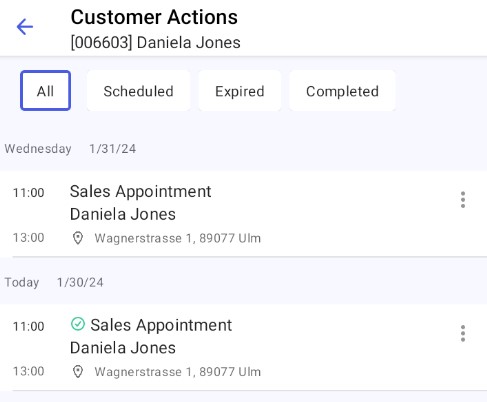
- Next Actions – presents the upcoming CRM action and the [View All] icon Selecting the [View All] icon redirects to the next window Customer Actions with a list of activities. Appointment time and name, customer name and address, as well as context menu are presented by each activity. You can change the window view by filtering activities to Scheduled, Expired, Completed.
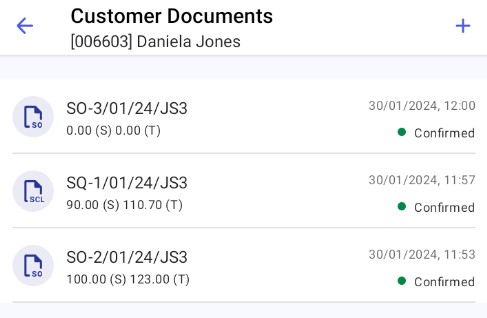
- Last Documents – presents the customer’s last three documents and the [View All] icon. Selecting the [View All] icon redirects to the next window Customer Documents with a list of documents filtered for the customer. Information such as document number, amount, document date and time of issue as well as status is presented by each document. Following icons are available on the top bar:
 returns to previous application screen
 opens a window with selectable types of document to issue. If you add a document from this level, the selected customer data is completed. For more information on how to issue documents, see the article Document registration.
Information tab
Customer information is presented under nine groupings:
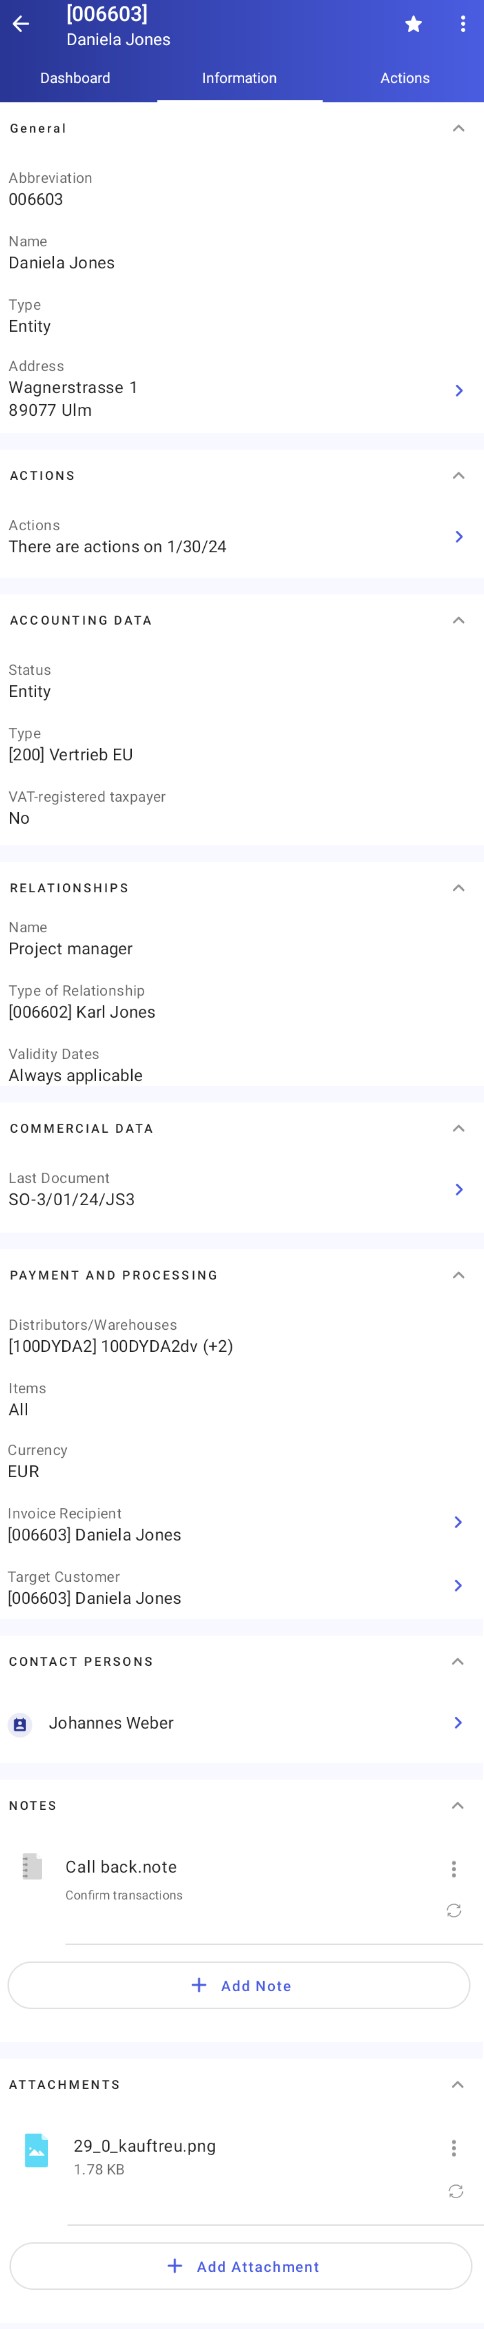
1. General
- Customer abbreviation (code)
- Customer name
- Customer’s NIP (if given)
- Customer type
- Customer’s main address
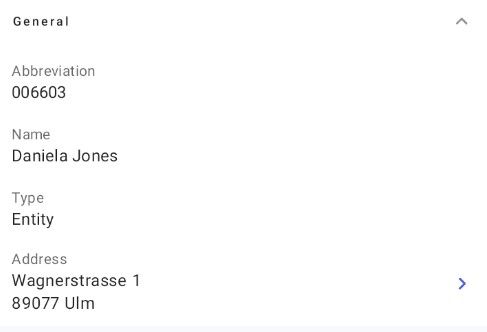
2. Actions
- Informs whether there are any actions planned on a current day
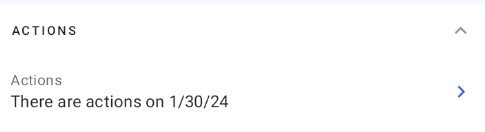
- Accounting Data
- Financial status
- Type
- VAT-registered taxpayer
4. Relationships
- Name
- Type of relationship
- Validity dates
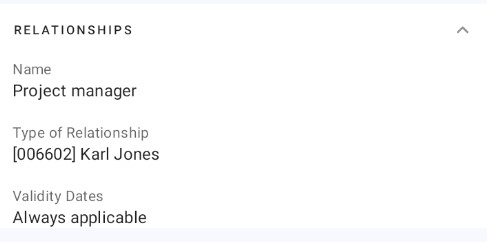
If more than one relationship is entered for a customer, the grouping will also contain a [View All] button. Selecting the button will redirect you to the window with a list of relationships assigned to the selected customer.
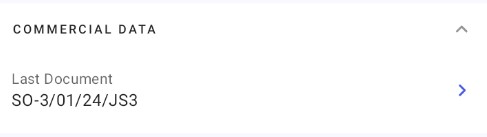
5. Commercial Data
- Last Document – number of document recently issued for the customer
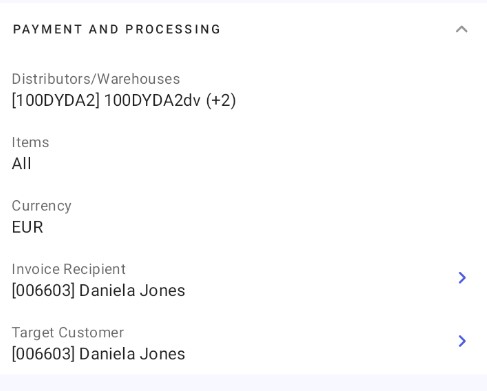
6. Payment and Processing
- Distributors/Warehouses – presents the list of warehouses made available on the profile of individual sales representative in Comarch Mobile Management
- Items – item group made available for the customer
- Currency
- Invoice Recipient
- Payer – payer information is presented when the following conditions are met:
- Payer field is completed on customer in the ERP system
- A sales representative associated with a mobile operator is selected on payer form in the ERP system
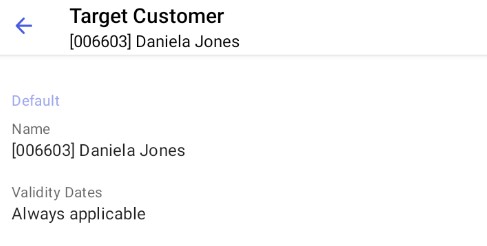
- Target Customer
- Forwarding Agent – agent information is presented when the following conditions are met:
- Forwarding Agent field is completed on customer in the ERP system
- A sales representative associated with a mobile operator is selected on forwarding agent form in the ERP system
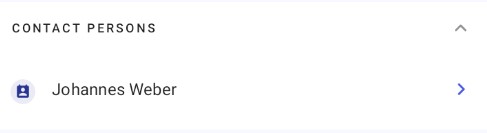
7. Contact Persons
- List of customer’s contact persons
- Notes
- The note list with an option of adding another note

Selecting [Add Note] opens the window presented below
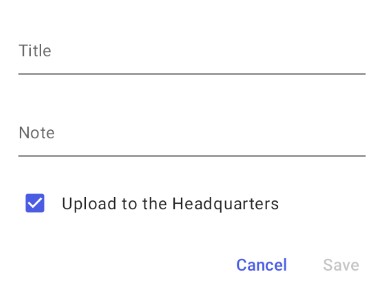
You can add a note by typing a title or note. Using the Upload to HDQ parameter, you can determine whether the note is to be uploaded to the Headquarters (the parameter is activated by default).
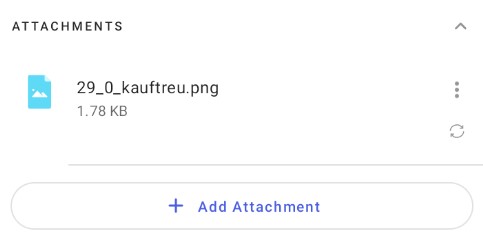
9. Attachments
- The attachment list with an option of adding another attachment
By each tab, there is an icon ![]() for expanding an individual tab. Each tab is expanded by default.
for expanding an individual tab. Each tab is expanded by default.
By certain fields, there is a button ![]() for proceeding to screens with an expanded tab:
for proceeding to screens with an expanded tab:
- Address
- Actions
- Last Document
- Invoice Recipient
- Payer
- Target Customer
- Forwarding Agent
- Contact Persons
Customer’s addresses
Selecting the arrow ![]() redirects to another window Addresses with a list of all addresses of a customer.
redirects to another window Addresses with a list of all addresses of a customer.
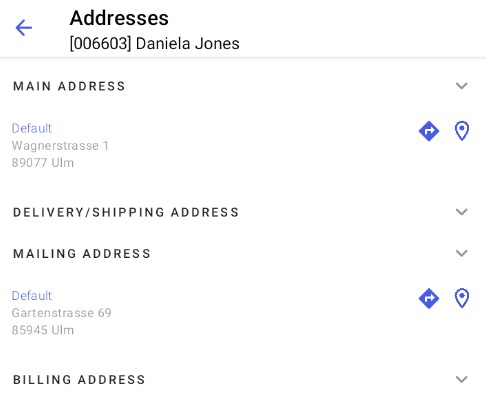
Options available on the address list:
 – shows address on the map
 – shows directions on the map
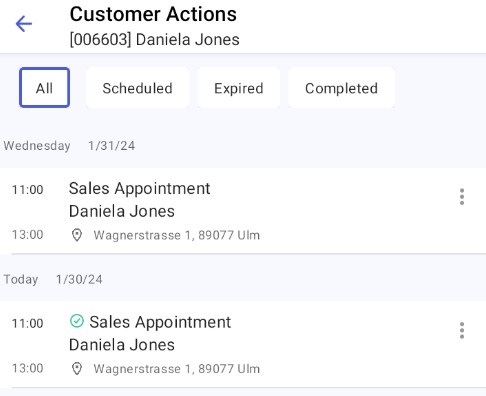
Customer’s actions
Selecting the arrow ![]() redirects to another window Customer Actions with a list of all actions of a customer. Appointment time and name as well as customer name and address are presented by each action. You can change the window view by filtering actions to Scheduled, Expired, Completed.
redirects to another window Customer Actions with a list of all actions of a customer. Appointment time and name as well as customer name and address are presented by each action. You can change the window view by filtering actions to Scheduled, Expired, Completed.
Customer’s documents
Selecting the arrow ![]() redirects to another window Customer Documents with a list of documents filtered for the customer. Information such as document number, amount, document date and time of issue as well as status is presented by each document. Following icons are available on the top bar:
redirects to another window Customer Documents with a list of documents filtered for the customer. Information such as document number, amount, document date and time of issue as well as status is presented by each document. Following icons are available on the top bar:
- returns to previous application screen
- opens a window with selectable types of document to issue. If you add a document from this level, the selected customer data is completed.
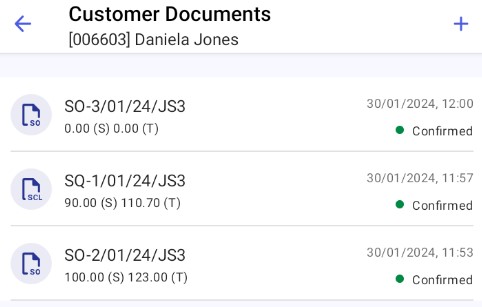
For instructions on how to issue documents in the application, see the article Document registration.
Invoice recipients/payers/target customers and forwarding agent
Selecting the arrow ![]() in the individual groupings redirects to the window presenting customer names, including the default customer, and relationship validity date.
in the individual groupings redirects to the window presenting customer names, including the default customer, and relationship validity date.
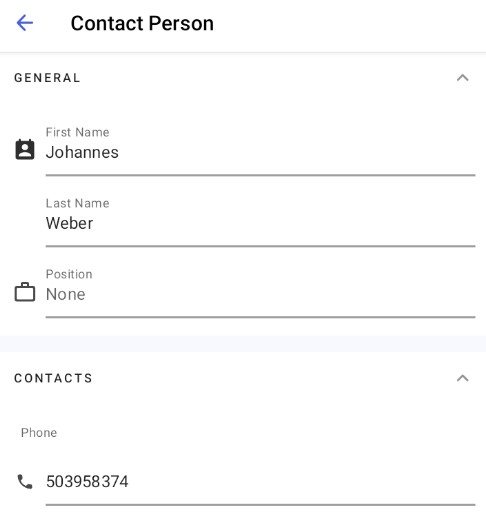
Contact person
Selecting the arrow ![]() by an individual contact person redirects to the Contact Person window presenting the contact person’s basic information and contact details.
by an individual contact person redirects to the Contact Person window presenting the contact person’s basic information and contact details.
Actions tab
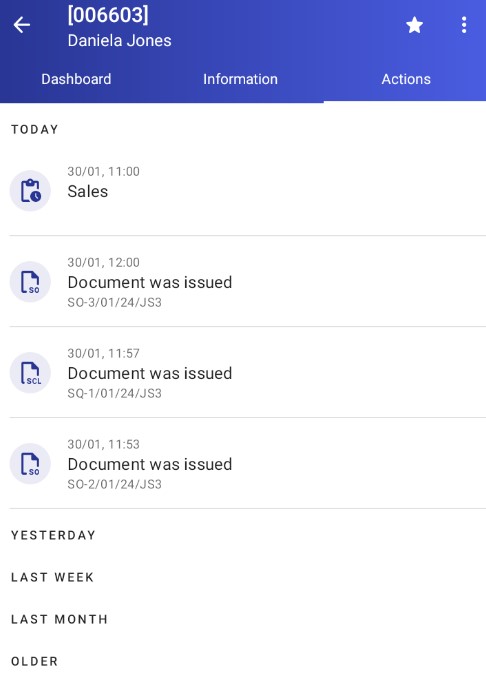
Customer’s actions are divided into into the following groupings:
- Today
- Yesterday
- Last Week
- Last Month
- Older
Information about issued sales documents, including document date, time and number is presented in individual groupings.
In case there are no actions for a customer, a screen with the message below is presented: