The Routes tab allows you to preview routes registered for employees on a given day.
The tab presents the following information:
- Filters:
- Search Employees – it allows searching employees by their first or last name
- Route Date – it allows selecting a date for which employee routes are to be presented on the map:
- Today
- Tomorrow
- Yesterday
- Any – it makes it possible to select a filter without any specific date; it presents all routes from all days
- Other Date – it allows selecting a date from a calendar
- View:
- List – it opens the list of employee routes on a given day
- Map – it opens the map of employee locations on a given day
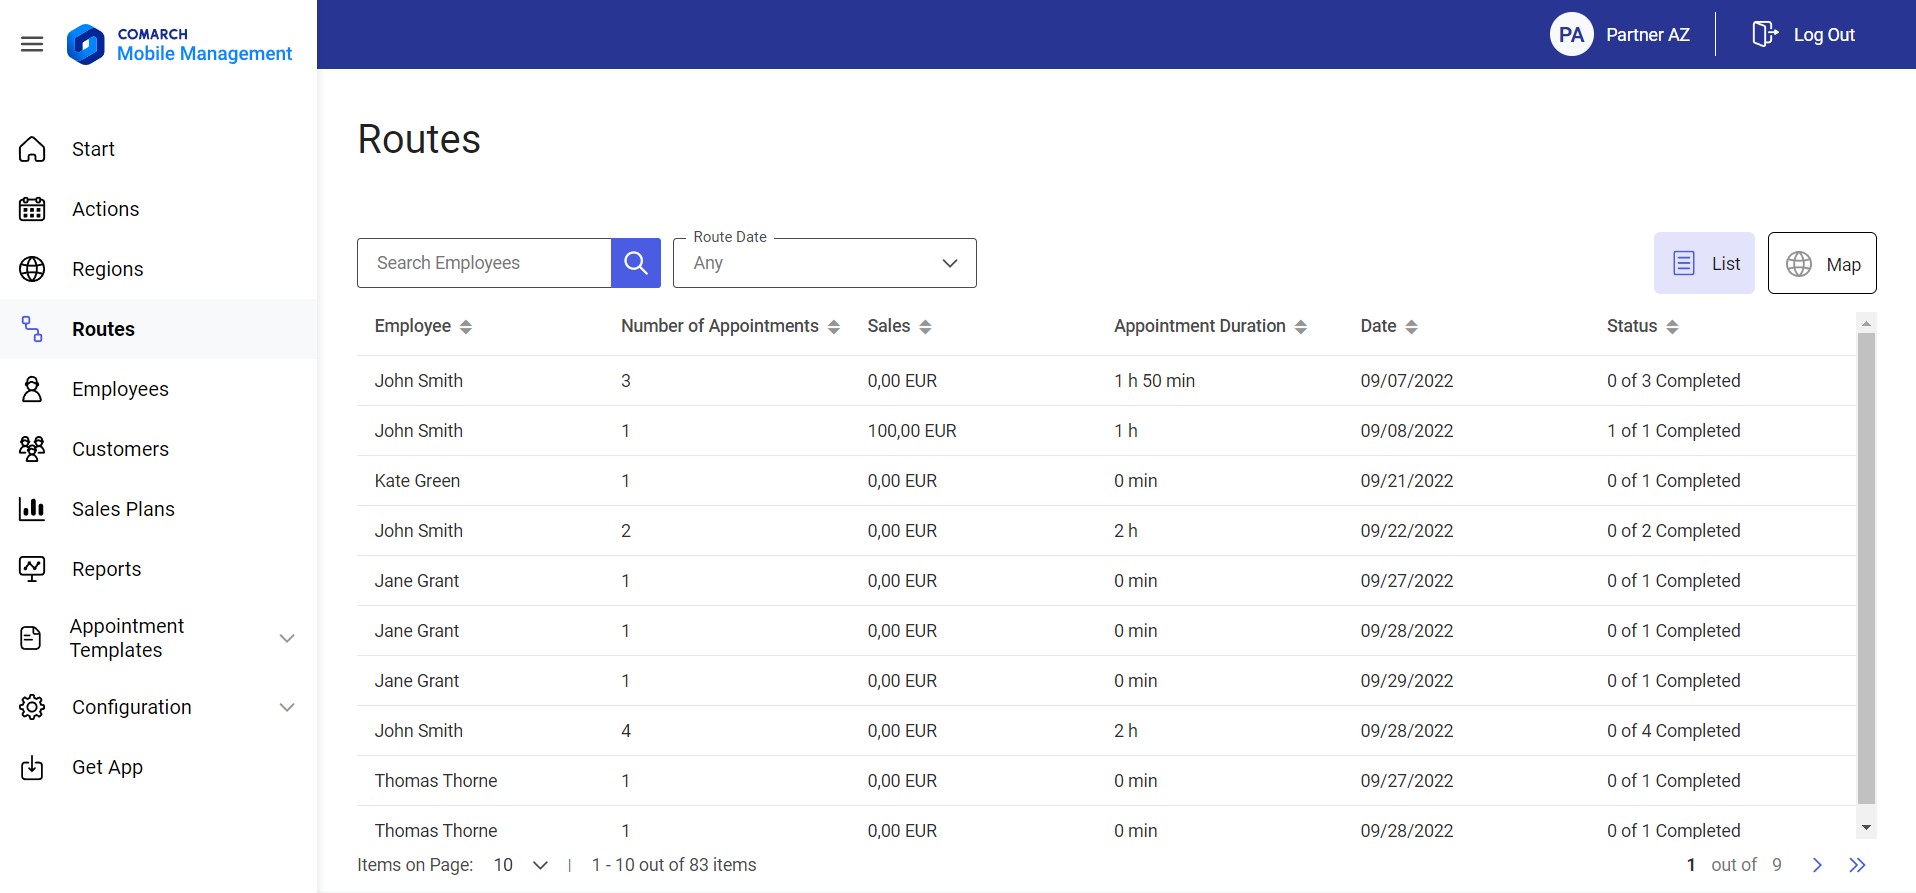
List view
The List option available on the Routes tab makes it possible to open the list of registered employee routes. The screen presents the following information about routes:
- Employee – it displays employees’ full names or acronyms if names have not been defined
- Number of Appointments – it displays the number of employee appointments scheduled on a given day
- Sales – it displays the subtotal/total value of documents issued on a given day. The value is calculated on the basis of issued documents. It does not include values from documents saved as unconfirmed.
- Date – it displays a route’s scheduled or execution date
- Appointment Duration – the time allocated for appointments (the sum of the duration of appointments scheduled on a given day)
- Status – it displays information on the total number of completed appointments:
- It is presented as the number of completed appointments as compared to the number of scheduled appointments on a given day (a completed appointment has the status Completed)
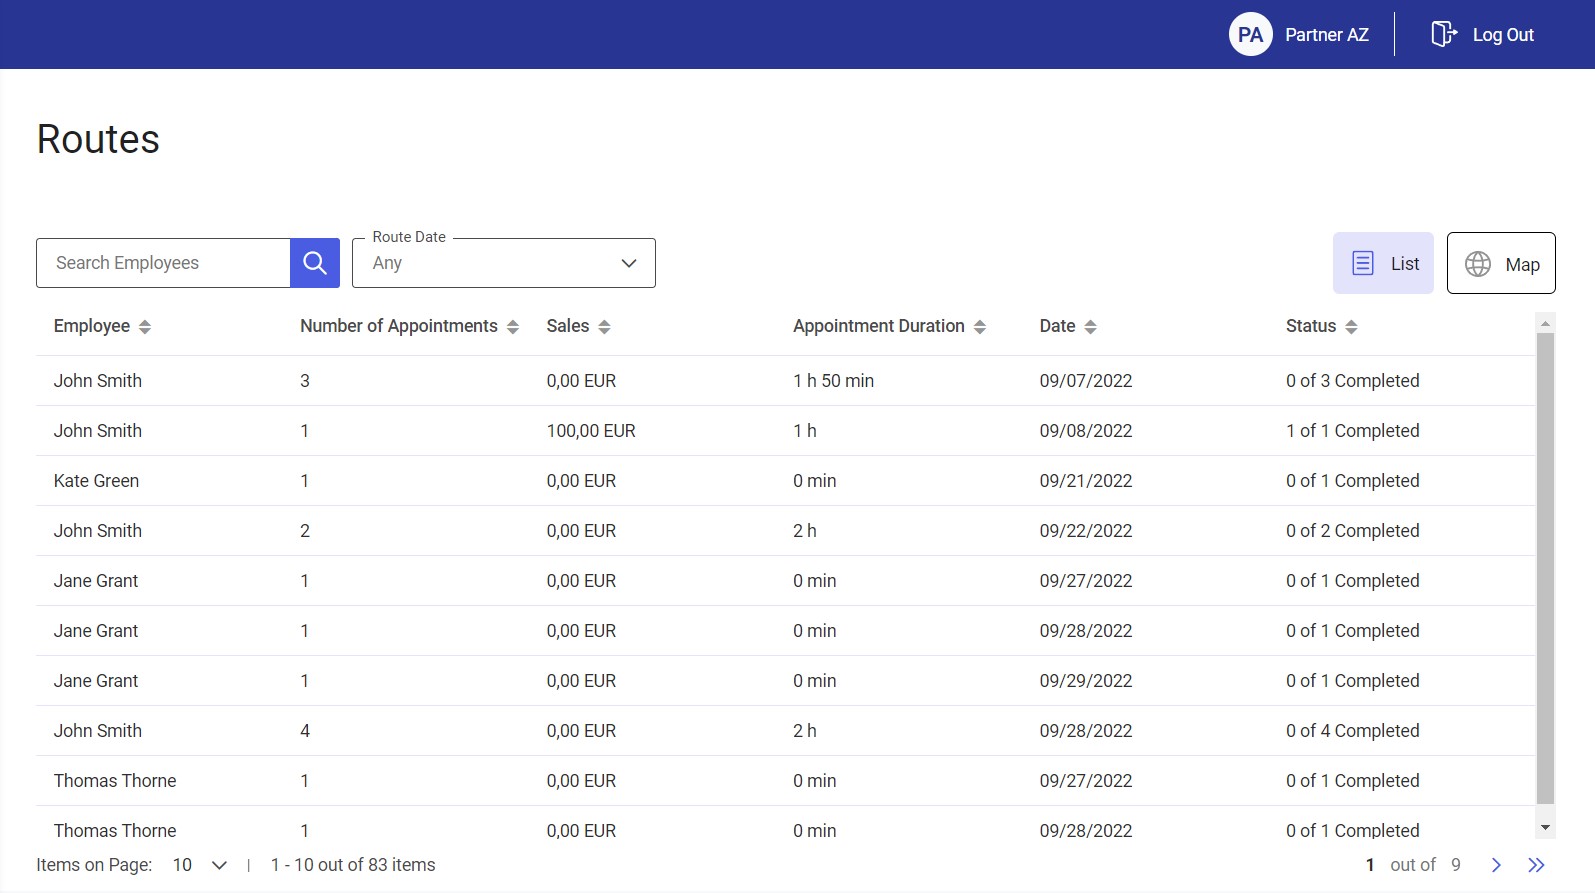
Selecting one of the routes displayed in the list opens the route’s details.
Map view
The Map option available on the Routes tab makes it possible to display a map with displayed employee locations. The map displays employees’ start addresses.
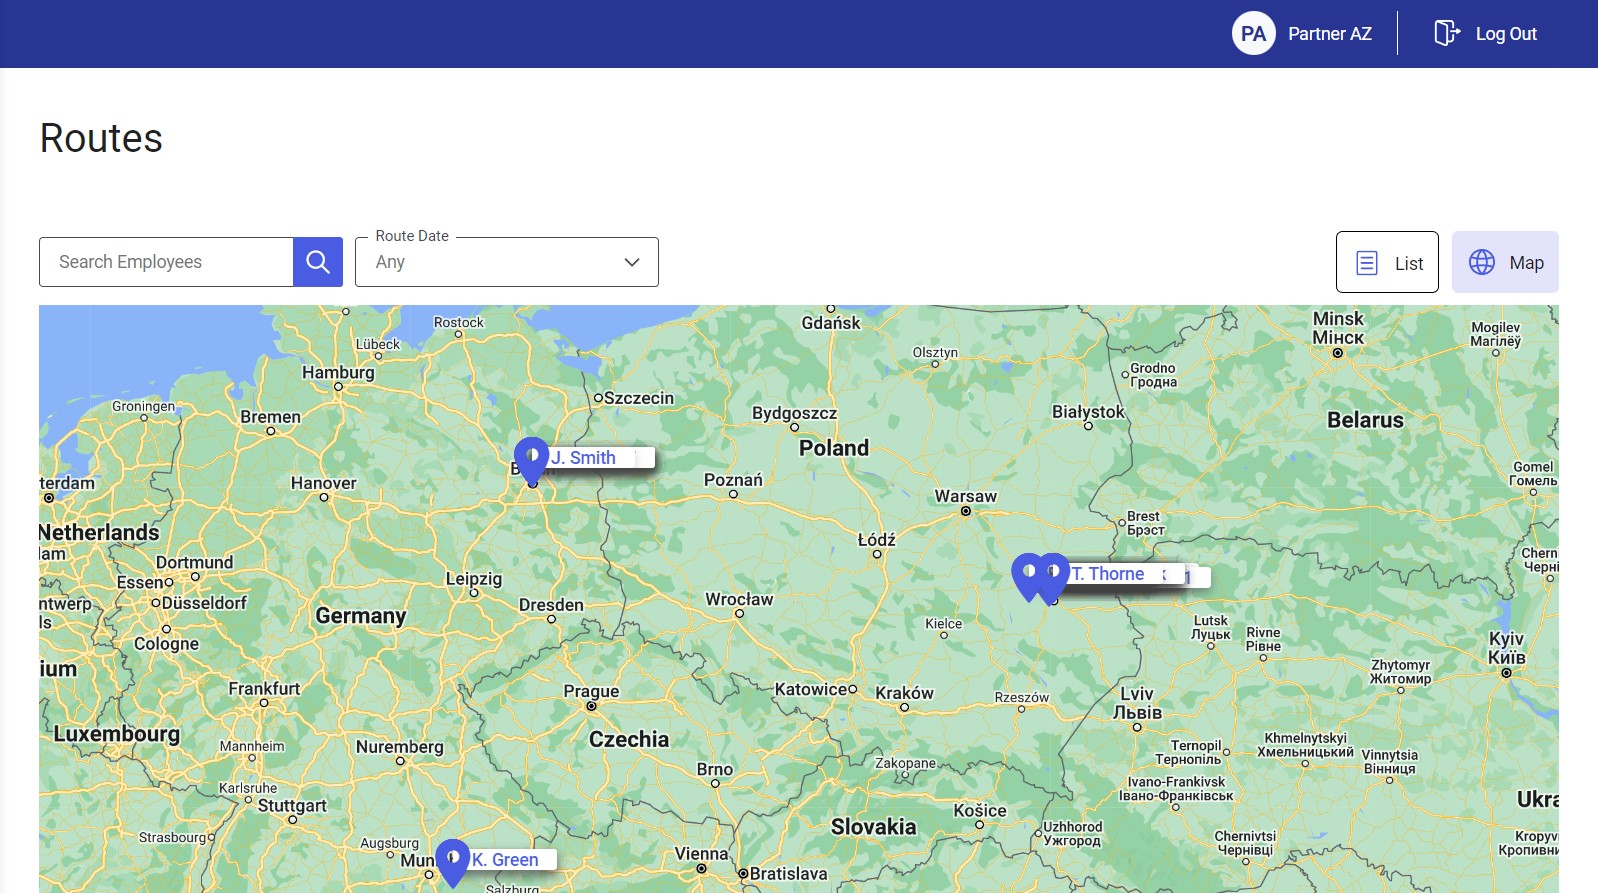
Selecting an icon with an employee name on the map opens the employee’s route details.
Employee route details
Employee route details may be opened in one of the two ways:
- By selecting an employee icon on the map
- By selecting a given route in the route list
Legend:
![]() Route Start – the beginning of a route; the starting place of a given employee
Route Start – the beginning of a route; the starting place of a given employee
![]() Completed Appointment – an appointment is marked on the map as completed after performing synchronization on the mobile device
Completed Appointment – an appointment is marked on the map as completed after performing synchronization on the mobile device
![]() Scheduled Appointment – a planned appointment that has not been completed yet or whose status has not been synchronized on the mobile device
Scheduled Appointment – a planned appointment that has not been completed yet or whose status has not been synchronized on the mobile device
![]() Uncompleted Appointment – a scheduled appointment that has been rejected or suspended for the time being; the status is only visible following synchronization on the mobile device
Uncompleted Appointment – a scheduled appointment that has been rejected or suspended for the time being; the status is only visible following synchronization on the mobile device
![]() or
or ![]() Appointment End – the last appointment registered on a given day
Appointment End – the last appointment registered on a given day
Completed appointments are marked on the map in green. The routes of scheduled appointments are marked with a blue line.
The left-hand side of the screen contains a list with detailed information about a given route, presenting all appointments scheduled or completed on a given day. Between the markers are determined travels. The first travel of a given day is determined from the start address (the starting place of a given employee).

Route details present information on a route’s distance and appointment start time and duration. In the case of scheduled routes, the application displays information on distance and the scheduled appointment start time and duration.
Below the route details, there is a route summary. Clicking the Route Details section collapses it and expands the summary.
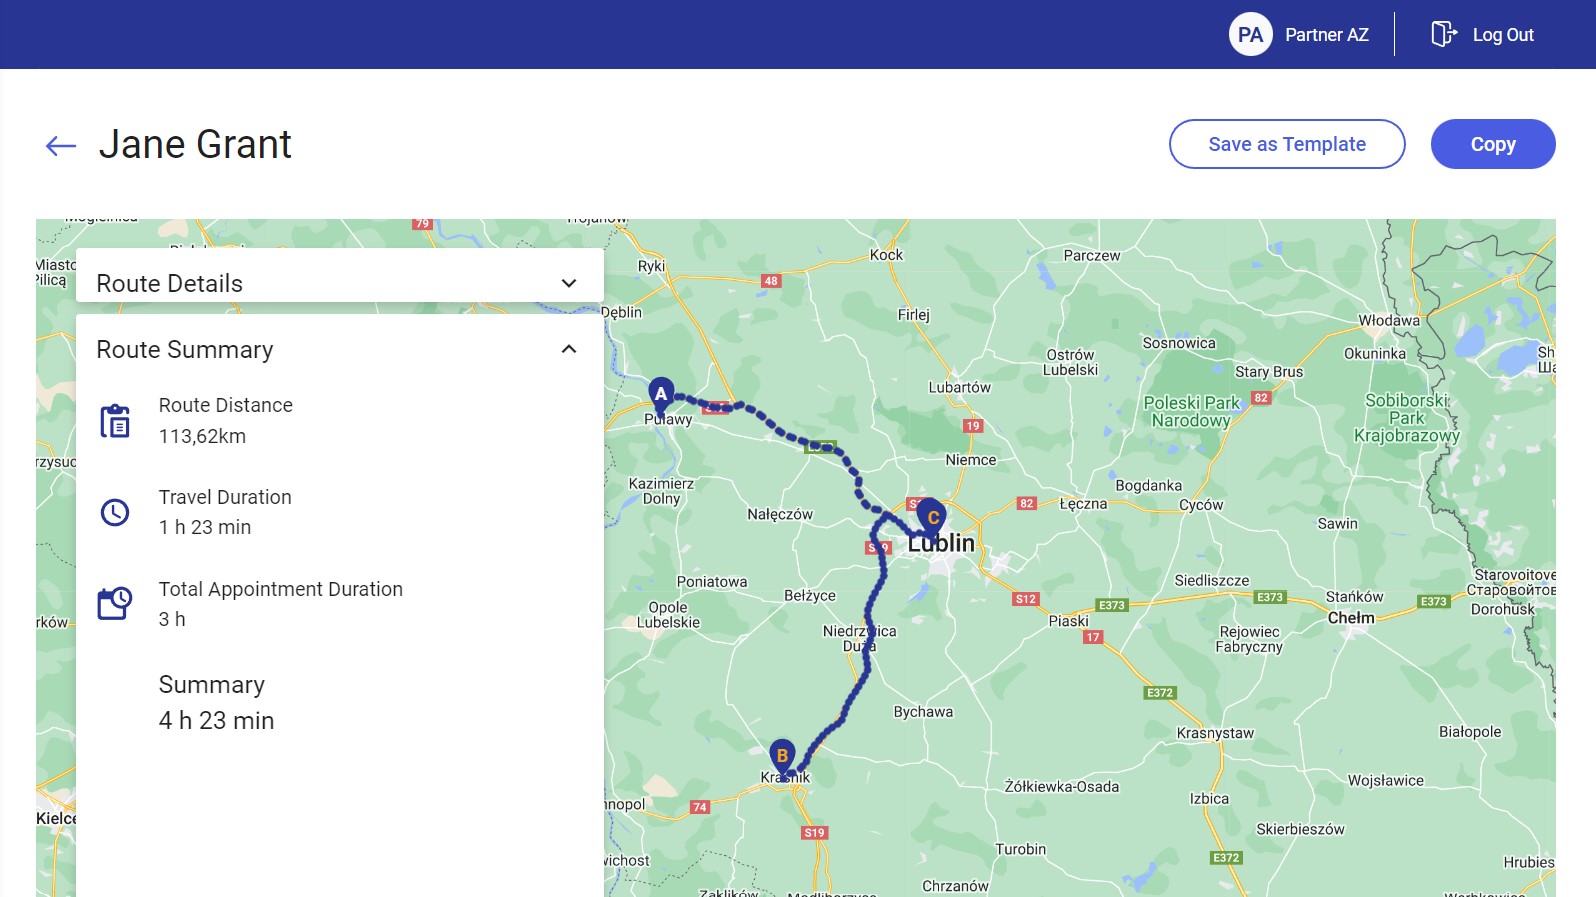
The upper part of the screen contains the data of an employee whose route has been selected and the buttons [Save as Template] and [Copy], that can be used to save a given route as a template for possible later use or to copy the selected route to another day.
The summary contains the following information:
- Route Distance – the total duration of all travels (concerning the scheduled route)
- Travel Duration – the total time of travel (concerning the scheduled route)
- Total Appointment Duration – the total time spent on appointments
Travel details provide information on the scheduled distance and appointment start and end time. For scheduled routes, the application displays information on distance and scheduled appointment start and end time.
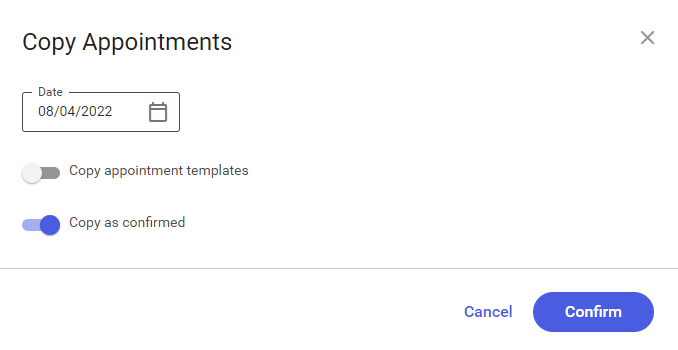
Copying an appointment
Selecting the [Copy] button displays a window enabling you to define a day to which an appointment is to be copied and to specify additional parameters:
- Copy appointment templates (unselected by default) – if the parameter is not selected, appointments will be scheduled without templates
- Copy as confirmed (selected by default) – if the parameter is selected, appointments will be scheduled with the status Confirmed; otherwise, they will be assigned the status Unconfirmed
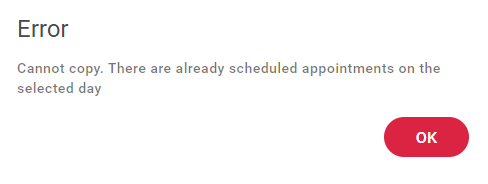
If there are any other appointments scheduled on a given day, the application displays the following notification:
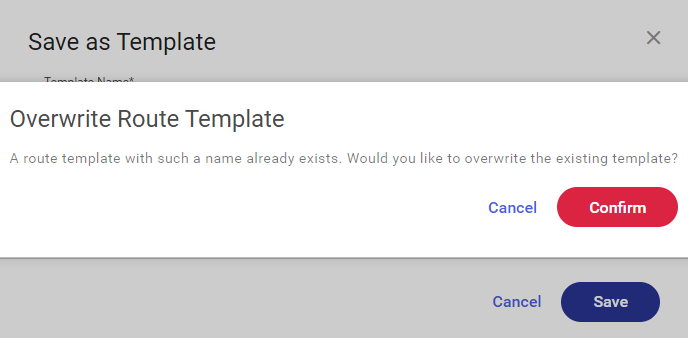
Saving a route template
The [Save as Template] button can be used to save all appointments of a given employee scheduled for a given day, regardless of their status, together with route templates saved. The option is available on the employee route details screen on the Routes tab.
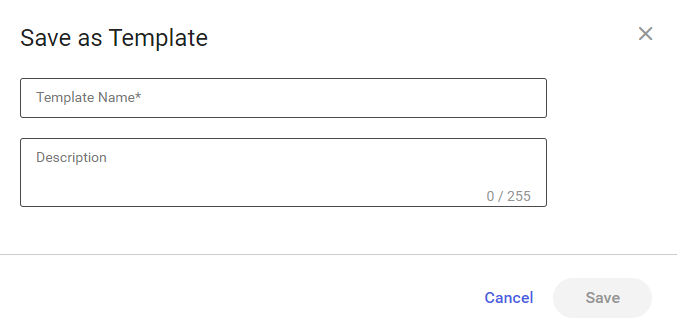
The Save as Template window contains the following fields:
- Template Name
- Description
If an entered route template name already exists, the following notification is displayed: