Contents
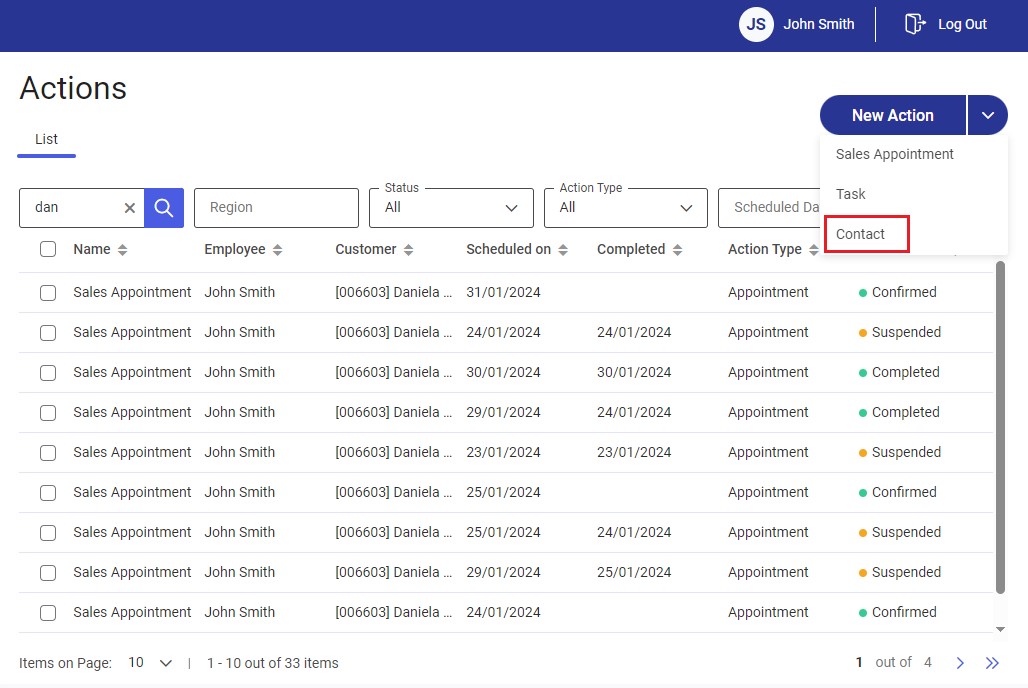
To start the process of scheduling a contact, select the [New Action] button in the top right corner of the Actions screen and choose the option [Contact].
The process consists of the following steps:
1. Select Customers
2. Contact Details
3. Configure Contacts
4. Select Supervisor
5. Summary
Step 1 – Select Customer
After you select the Contact action type, the application displays the first of five scheduling steps. At first, you can choose customers for whom you want to schedule the contact.
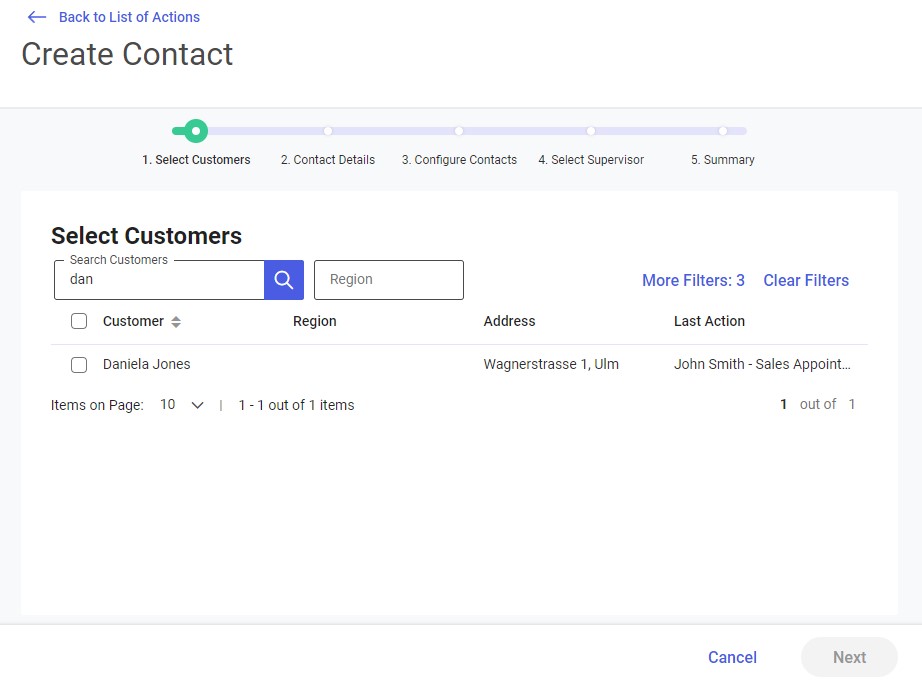
The list of customers displays the following information:
- Customer Name
- Region
- Address – street, street number, apartment number, city
- Last Action – employee full name, action name
You can narrow the customer list down using the search bar in the screen header:
- Search Customers – it allows you to search by customer name and city
- Region – it allows you to search by region to which the customer belongs. Select the field to display the list of regions as a tree structure sorted alphabetically. The list may be narrowed down to a specific region by entering its name in the Search Regions field and makes it possible to select appropriate regions and subregions.
- Last Action – it allows you to select the date range of the last action:
- Over 5 Days Ago
- Over Week Ago
- Over Two Weeks Ago
- Over Month Ago
- No actions
- Choose own date
- Settlement Period – it allows you to select an appropriate period within which transaction values should be verified. In order to activate the filter, select one of the available options:
- Last 7 Days – it displays customers with transactions completed within the last 7 days
- Last 30 Days – it displays customers with transactions completed within the last 30 days
- Last 60 Days – it displays customers with transactions completed within the last 60 days
- Last 90 Days – it displays customers with transactions completed within the last 90 days
- Choose own date – it allows you to set a custom date range
- Document Value – it makes it possible to select a transaction value. The transaction value should be understood as the sum of values entered in all sales order documents issued for a given customer. In order to activate the filter, select one of the available options:
- 0 – 1000 EUR*
- 1000 – 2000 EUR*
- 2000 – 5000 EUR*
- Choose custom value:
- From – entering only a From value searches for the sum of values of documents issued for a given customer from the amount entered in the field, with no upper limit
- To – entering only a To value searches for the sum of values of documents issued for a given customer up to the amount entered in the field, with no lower limit
*The currency should be consistent with the system currency selected for the sales channel in Comarch ERP Enterprise.
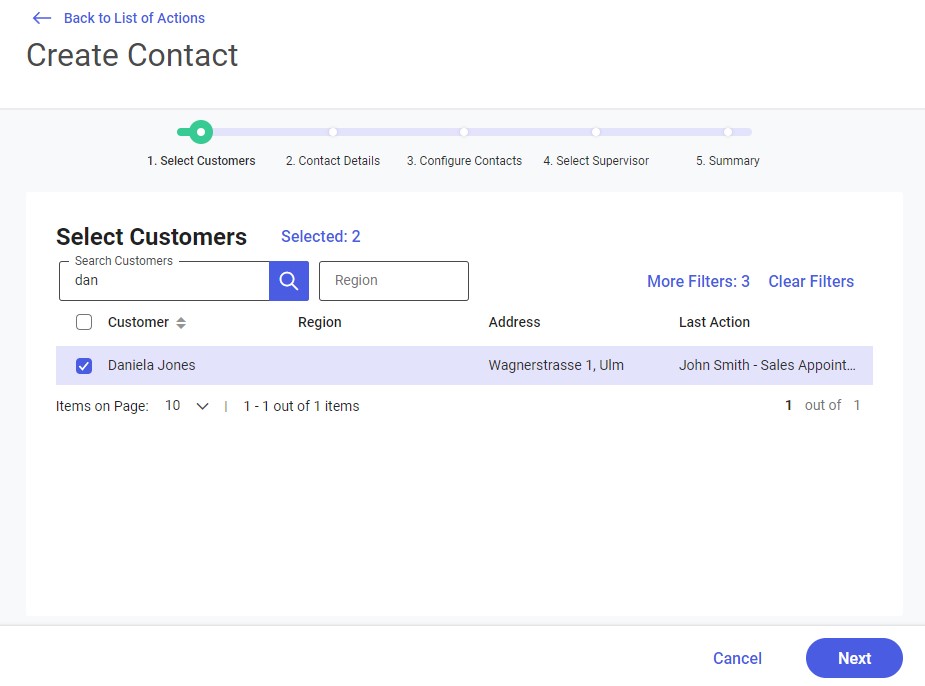
To select a customer for whom you want to create the action, select the checkbox next to that customer’s name.
After you select the customers, their row will be marked in blue and the [Selected] button will appear, presenting the current number of selected customers.
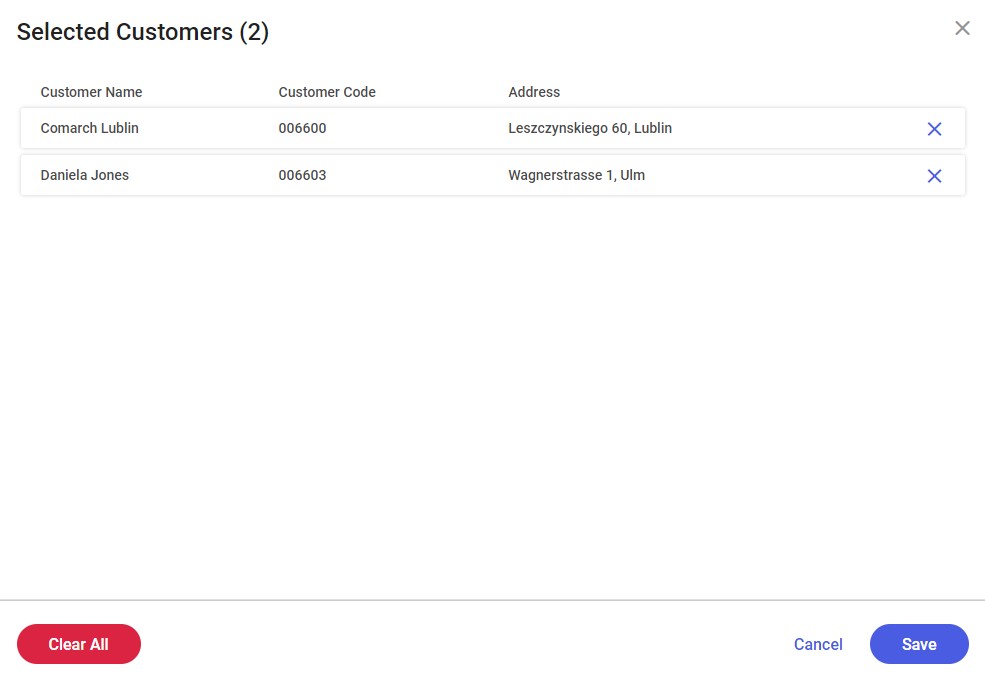
You can click the [Selected] button to open the Selected Customers window that displays the list of selected customers. The list is editable:
 – removes a single customer
 – removes all the selected customers
To save changes made in the window, select the [Save] button.
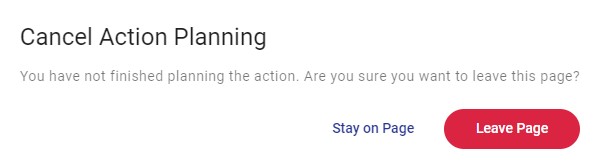
To cancel changes and return to the previous window, select [Cancel].
To continue to the next step, click [Next].
Step 2 – Contact Details
In the Contact Details window, you can enter information about the contact with selected customers.
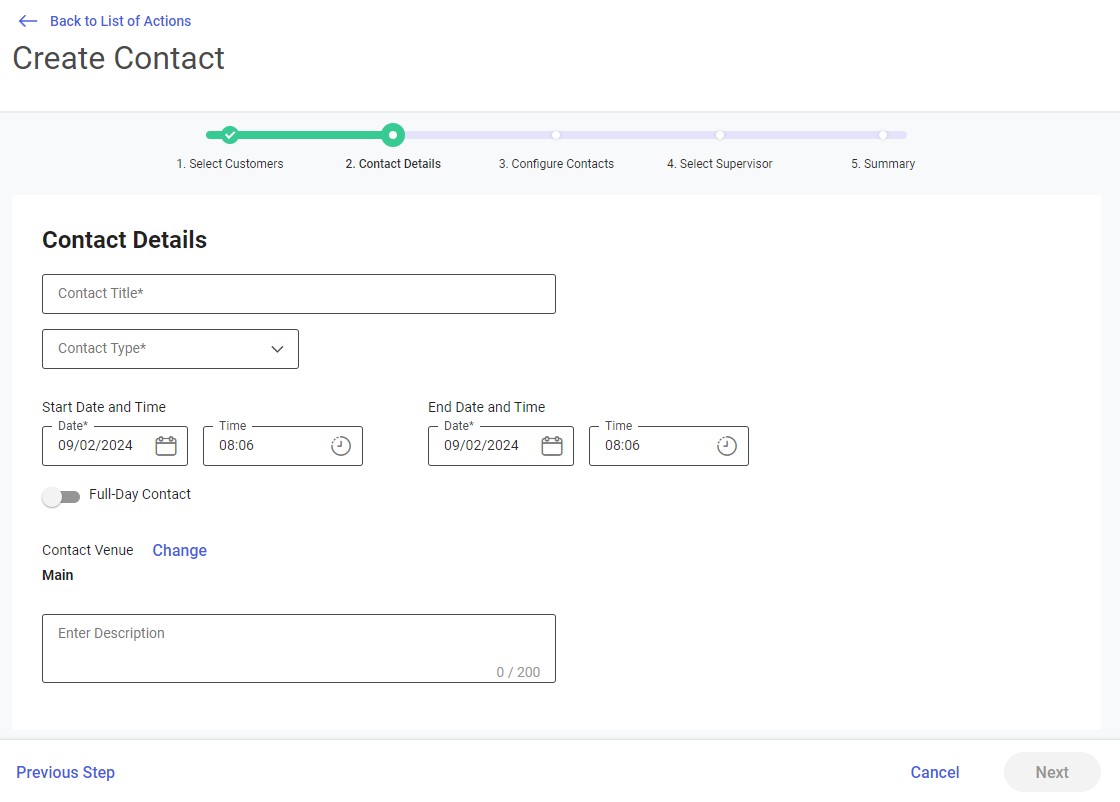
In this step, you need to fill in the basic information about the contact:
- Contact Title (required)
- Contact Type (required) – the field contains a drop-down list of possible values defined in Comarch Mobile Management directories
- Full-Day Contact – you can use this toggle switch to define if the action should be scheduled for the entire day. In the case of non-full-day contacts, you can also specify their start and end times.
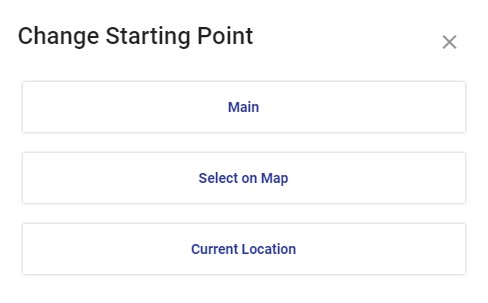
- Contact Venue:
- Main (address) – customer address (default)
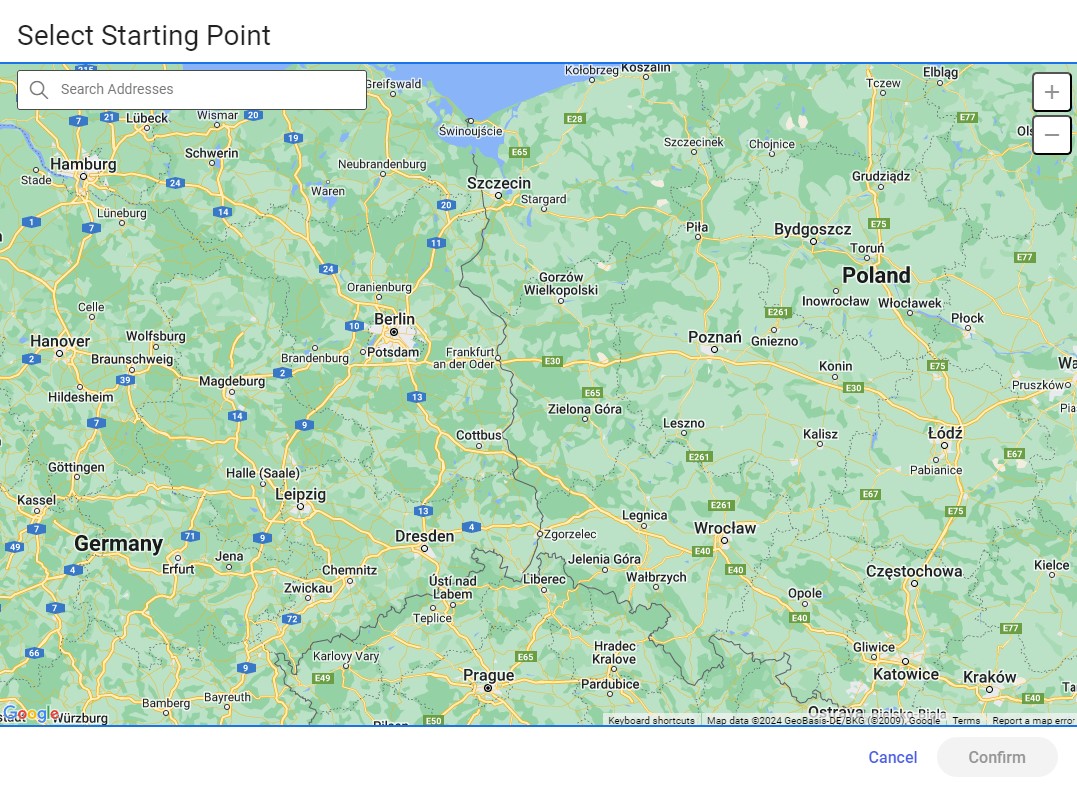
- Select on Map – it allows you to select the address on a displayed map
- Current Location – it uses your current GPS location
- Enter Description – here, you can enter additional information about the contact
After entering all the required fields, you can continue to the next step by selecting [Next].
Step 3 – Configure Contacts
In the Configure Contacts window, you can enter adjust separate contacts concerning the selected customers.
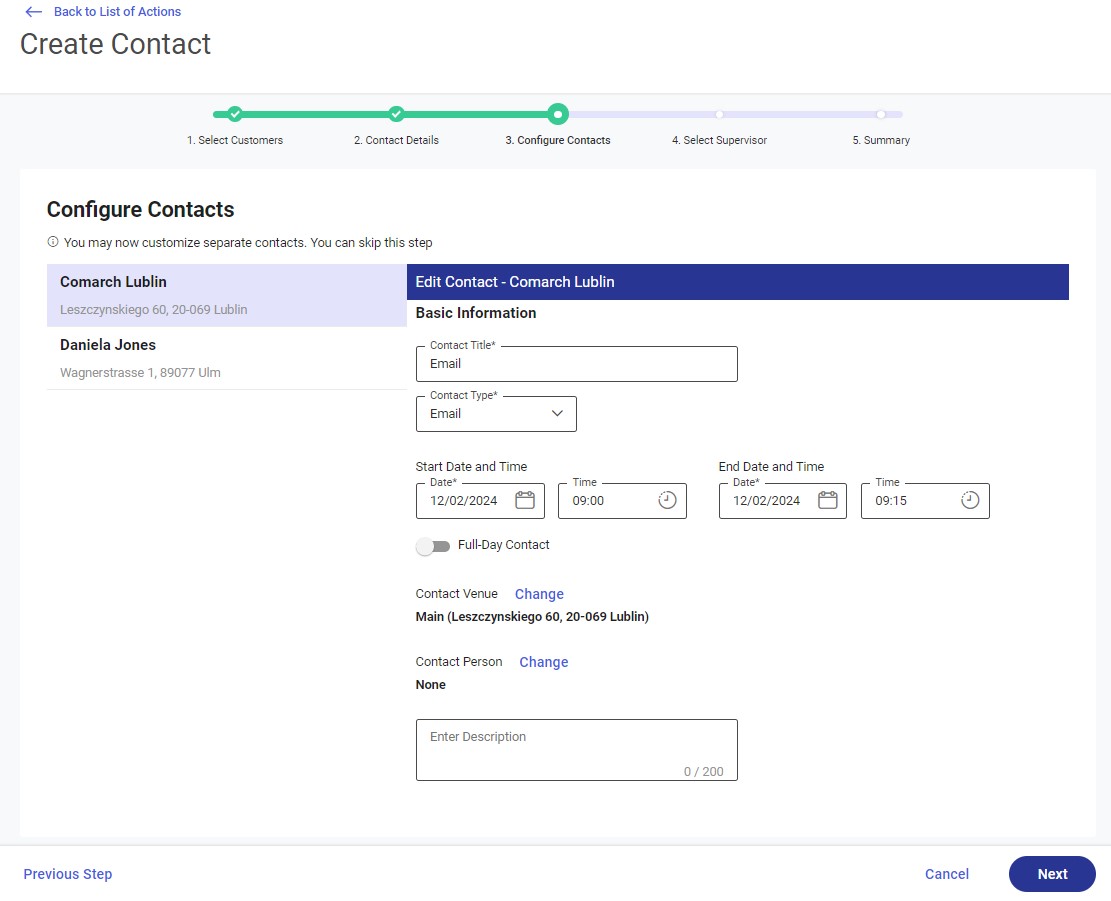
The left side of the window displays the selected customers:
- Customer Name
- Customer Address
By default, the first customer from the list is highlighted and the right side of the window displays editable fields with contact information for that customer:
- Contact Title (required)
- Contact Type (required)
- Full-Day Contact
- Contact Venue
- Contact Person
- Enter Description
To continue to the next step, click [Next].
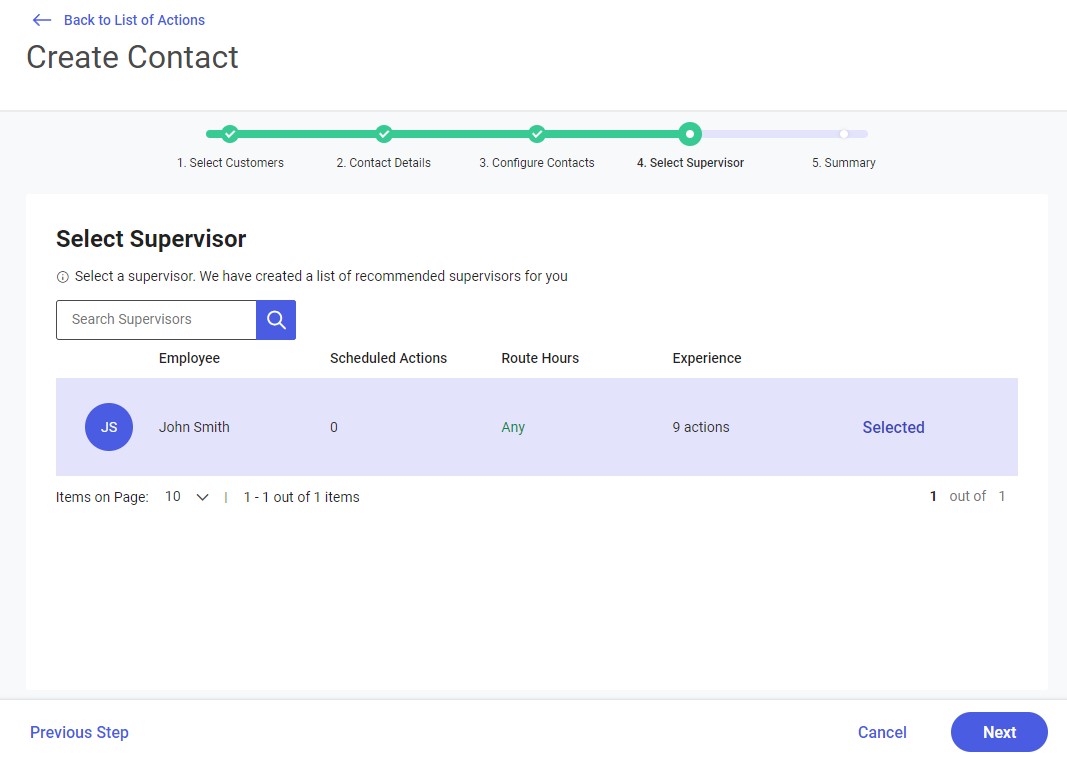
Step 4 – Select Supervisor
This window presents information about supervisors for whom the contact can be scheduled. By default, the application displays recommended supervisors who have no conflicts on a given date (specified when creating the task) and have the greatest experience.
The list of supervisors displays the following information:
- Employee – employee full name or acronym
- Scheduled Actions – the number of actions completed or confirmed for an employee on a given day
- Route Hours – it prompts the time when the new action can be scheduled:
- Any – if the employee has no actions scheduled on a given day
- Time range – the first free block of the employee’s time on a given day, taking into account the task’s duration
- No available hours – if the employee has tasks scheduled for a given day and cannot schedule another task
- Experience – the total number of actions completed by the employee
The window contains a Search Supervisors filter that allows you to search for a supervisor by their first or last name or acronym.
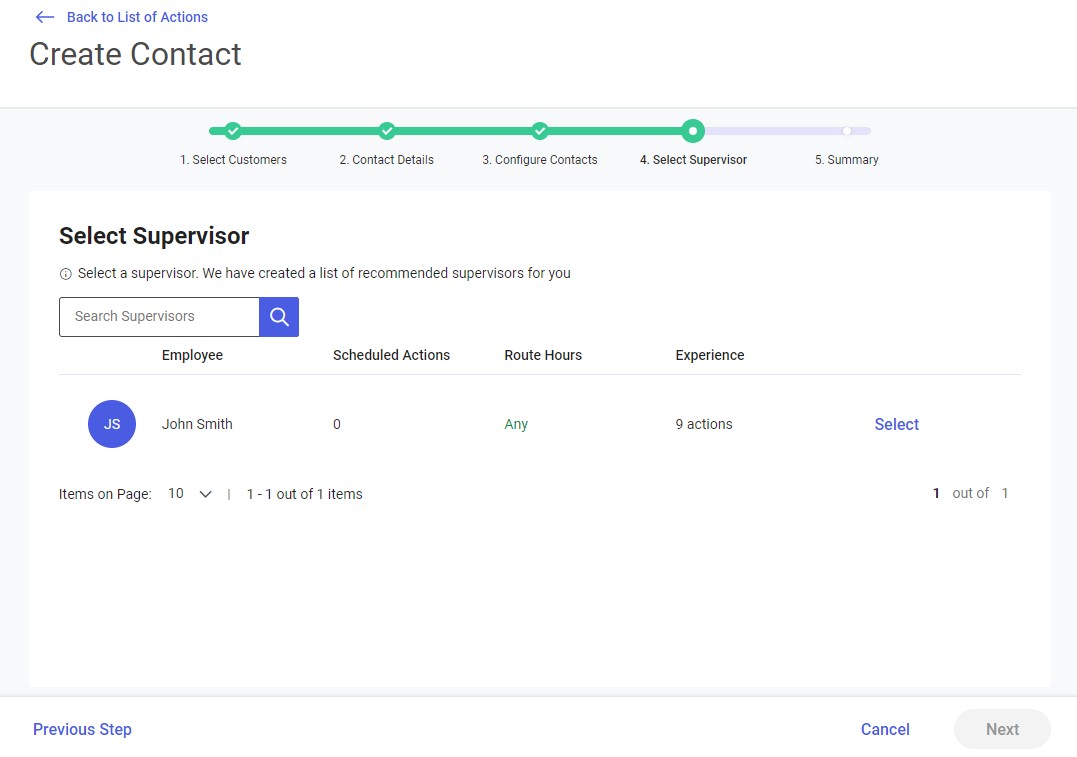
To choose a supervisor, click the [Select] button. The row with the selected supervisor will be highlighted in blue and the [Next] option will activate.
Step 5 – Summary
The last step displays the contact’s details:
- Customer Name
- Contact Type
- Start Date and Time
- End Date and Time
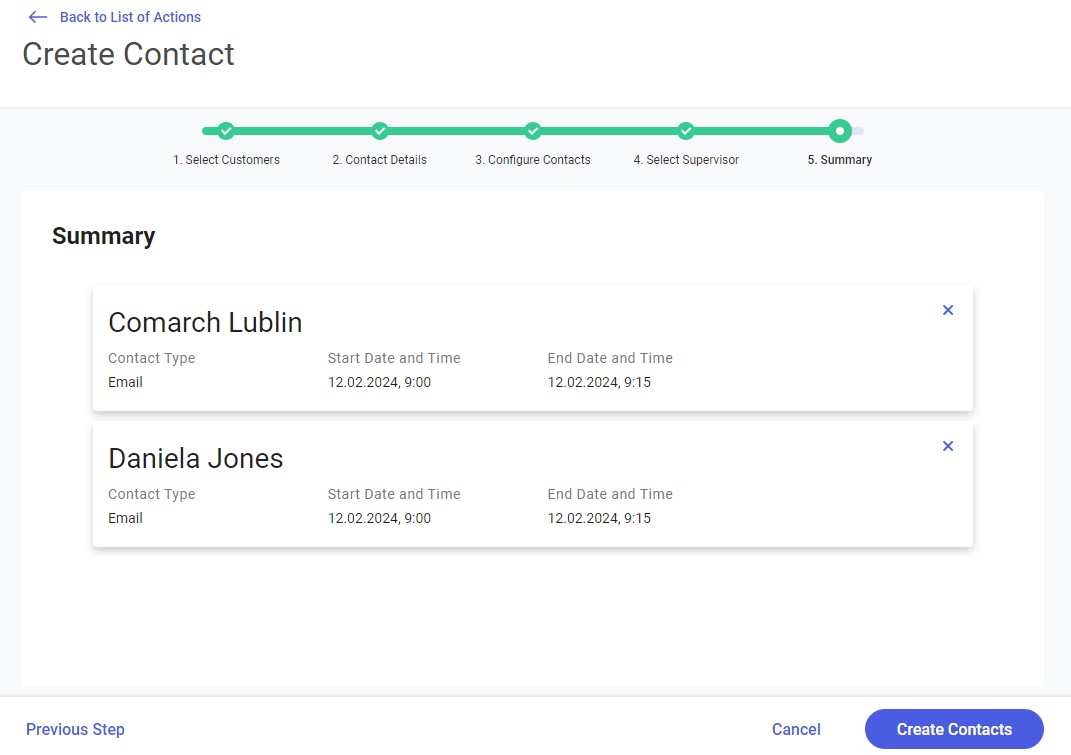
To finish creating the contacts, click [Create Contacts]. The contacts will then appear on the Actions tab.
You can also select the [Previous Step] button to return to the Select Supervisor window.
To cancel the scheduling altogether, select [Cancel].