Contents
The Application Parameters section of Comarch Mobile application settings is divided into the following subsections:
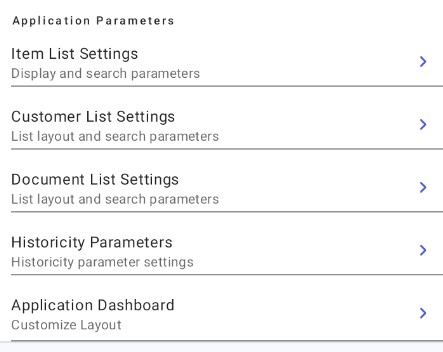
The ![]() button in each subsection allows you to open that subsection’s details and change the related parameters.
button in each subsection allows you to open that subsection’s details and change the related parameters.
Item List Settings
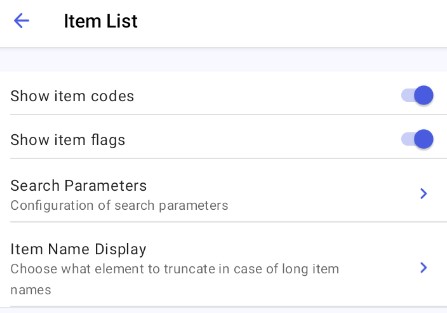
Parameters related to displaying and browsing the item list include:
- Show item codes – you can enable or disable this parameter using the toggle switch
 on the right. Enabling it displays item codes in the item list. By default, the parameter is enabled.
 - Show item flags – you can enable or disable this parameter using the toggle switch
 on the right. Enabling it displays item flags in the item list. By default, the parameter is enabled.
 - Search Parameters – selecting this option displays a new window containing search parameters:
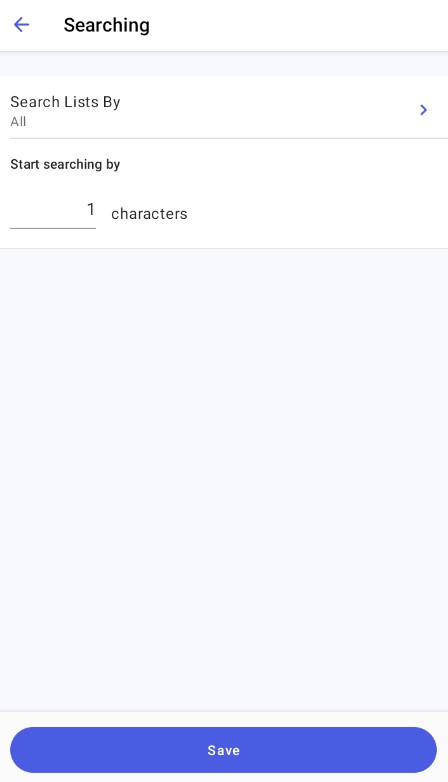
Item search parameters - Here, you can define criteria for searching items. The default option All allows you to search for items by their codes and names. You can also select the Search List By field to specify that items should be searched only by code or by name.
- In addition, you can adjust the Start searching by parameter to decide how many characters should be entered to start the search. By default, the application starts searching for an entered phrase right after the first character is entered. To change the value of this parameter, enter a different number in the text field. The field allows you to enter any number.
- To save data, select the [Save] button. The application then displays the notification “Changes have been saved”. To undo changes, select the [Cancel] button or return to the previous window.
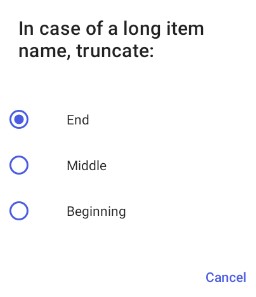
- Item Name Display – tapping this parameter opens a selection window. Here, you can specify which part of a long item name should be truncated: its beginning, middle, or end (set by default). Once you select an appropriate option, the application displays the notification “Changes have been saved”.
Customer List Settings
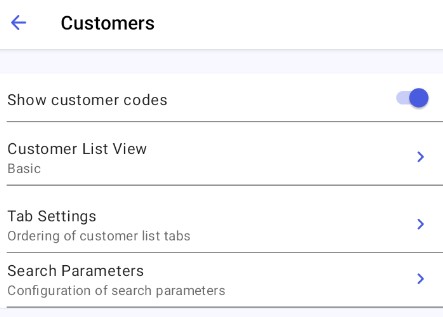
Parameters related to displaying and browsing the customer list include:
- Show customer codes – you can enable or disable this parameter using the toggle switch
 on the right. Enabling it displays customer codes in the customer list. By default, the parameter is enabled.
 - Customer List View – selecting this option displays a new window with the following options:
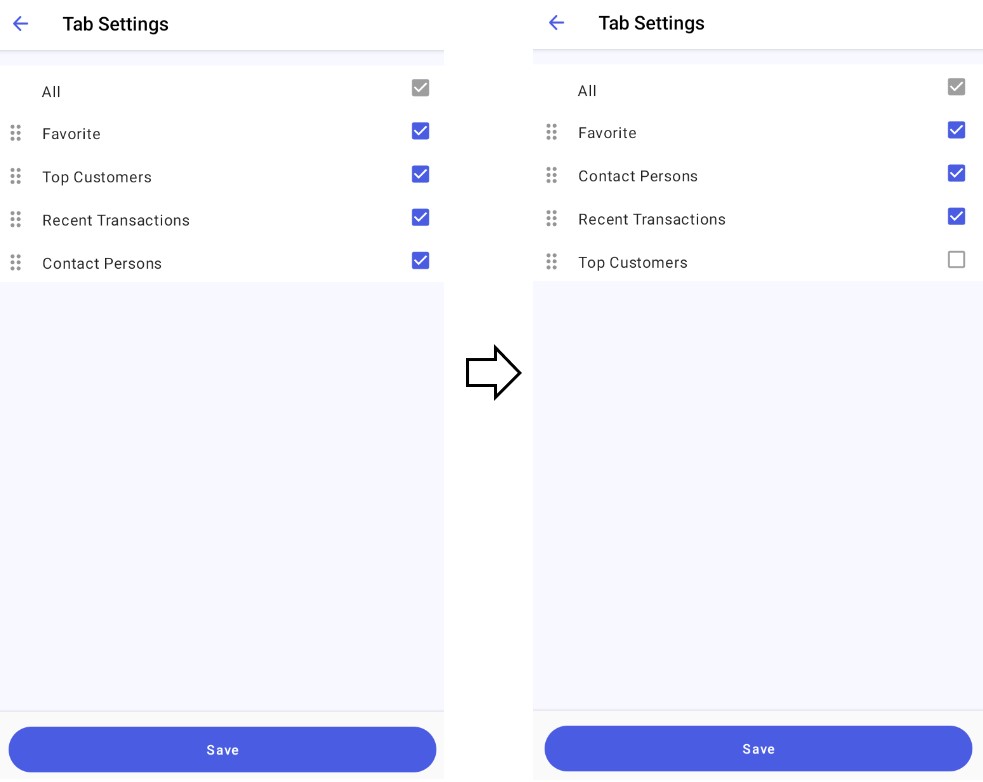
- Tab Settings – selecting this option displays a new window, where you can manage the visibility and ordering of tabs in the customer list. The All option is selected automatically.
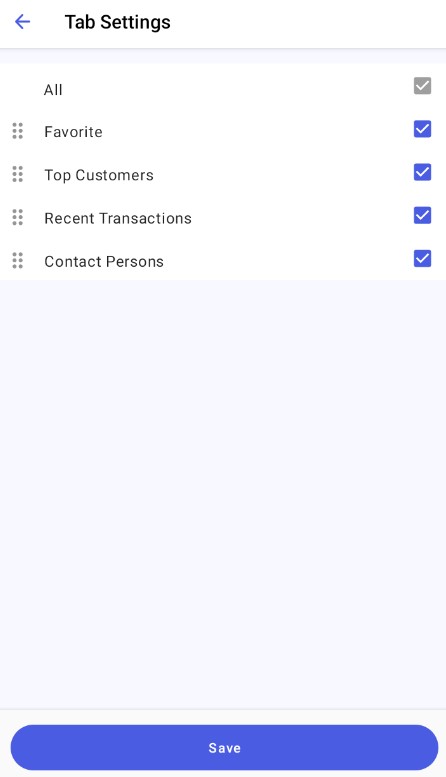
Tab settings - Using the drag-and-drop method, you can change the order of individual tabs that are displayed in the customer list.
- Deselecting a tab in the Tab Settings window removes that tab from the customer list.
- To save data, select the [Save] button. The application then displays the notification “Changes have been saved”.
- Search Parameters – selecting this option displays a new window containing search parameters:
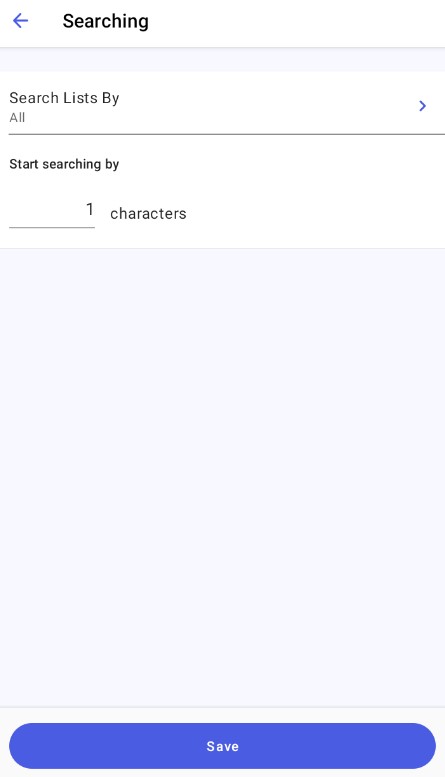
Customer search parameters - Here, you can define criteria for searching customers. The default option All allows you to search for customers by their codes, names, and numerators. You can also select the Search List By field to specify that items should be searched only by code, by name, or by numerator.
- In addition, you can adjust the Start searching by parameter to decide how many characters should be entered to start the search. By default, the application starts searching for an entered phrase right after the first character is entered. To change the value of this parameter, enter a different number in the text field. The field allows you to enter any number.
- To save data, select the [Save] button. The application then displays the notification “Changes have been saved”. To undo changes, select the [Cancel] button or return to the previous window.
Document List Settings
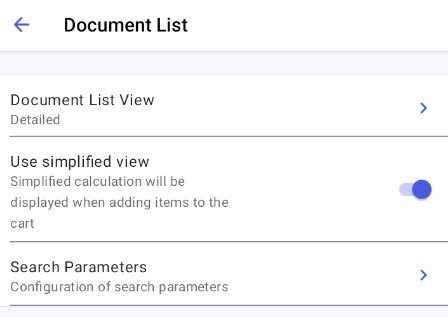
Parameters related to displaying and browsing the document list include:
- Document List View – selecting this option displays a new window with the following options:
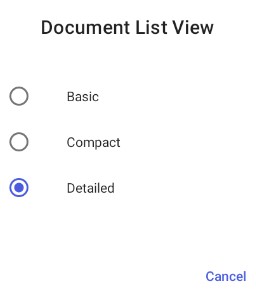
- Use simplified view – you can enable or disable this parameter using the toggle switch
 on the right. If this parameter is enabled, the simplified item calculation is used during document registration. Conversely, if this parameter is disabled, the full item calculation is displayed. By default, the parameter is enabled.
 - Search Parameters – selecting this option displays a new window containing search parameters:

Document search parameters - Here, you can define criteria for searching documents. The default option All allows you to search for documents by their codes, names, and numerators. You can also select the Search List By field to specify that items should be searched only by code, by name, or by numerator.
- In addition, you can adjust the Start searching by parameter to decide how many characters should be entered to start the search. By default, the application starts searching for an entered phrase right after the first character is entered. To change the value of this parameter, enter a different number in the text field. The field allows you to enter any number.
- To save data, select the [Save] button. The application then displays the notification “Changes have been saved”. To undo changes, select the [Cancel] button or return to the previous window.
Historicity Parameters
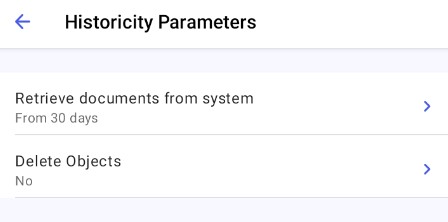
Parameters related to downloading and deleting documents include:
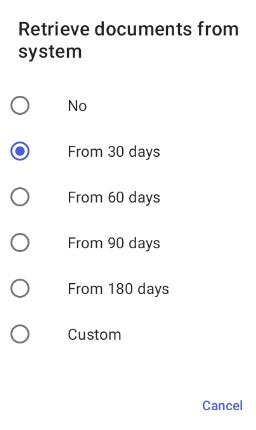
- Retrieve documents from system – this parameter allows you to transfer documents from Comarch ERP Enterprise. Currently, it refers to sales orders and quotes issued for customers supervised by users logged in to Comarch Mobile. For more information, see the article Downloading historical documents – Configuration. By default, the parameter is deactivated (set as No). To retrieve documents issued within a specified number of days, select the appropriate option and perform synchronization. If you select the Custom option, the application will display a new window, allowing you to enter the appropriate number of days. By default, the field is empty. You can enter a number in the range of 0-9999.
- Delete Objects – this parameter allows you to delete historical objects, such as documents you have issued, from Comarch Mobile database. You can individually specify the period after which objects should be deleted from the application. By default, the parameter is deactivated (set as No). To delete documents issued before a specified number of days, select the appropriate option and perform synchronization. If you select the Custom option, the application will display a new window, allowing you to enter the appropriate number of days. By default, the field is empty. You can enter a number in the range of 0-9999.
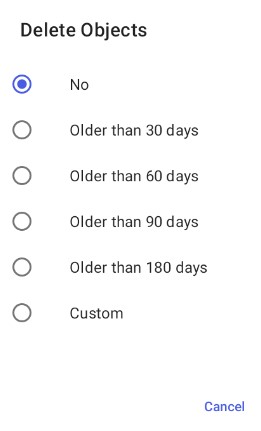
Once you select an appropriate option, the application displays the notification “Changes have been saved”.
Application Dashboard
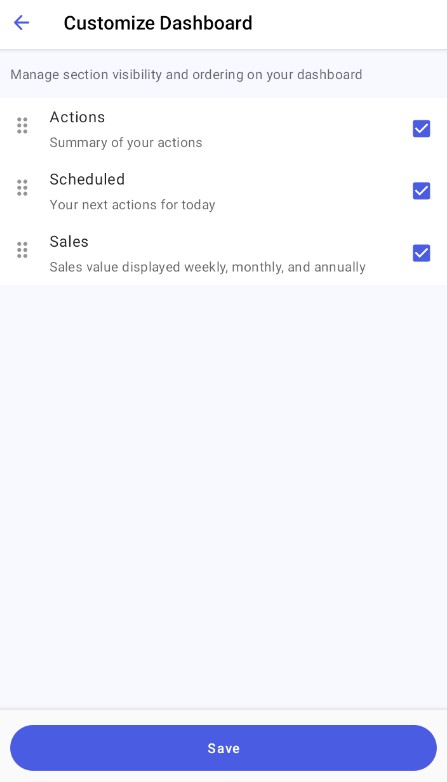
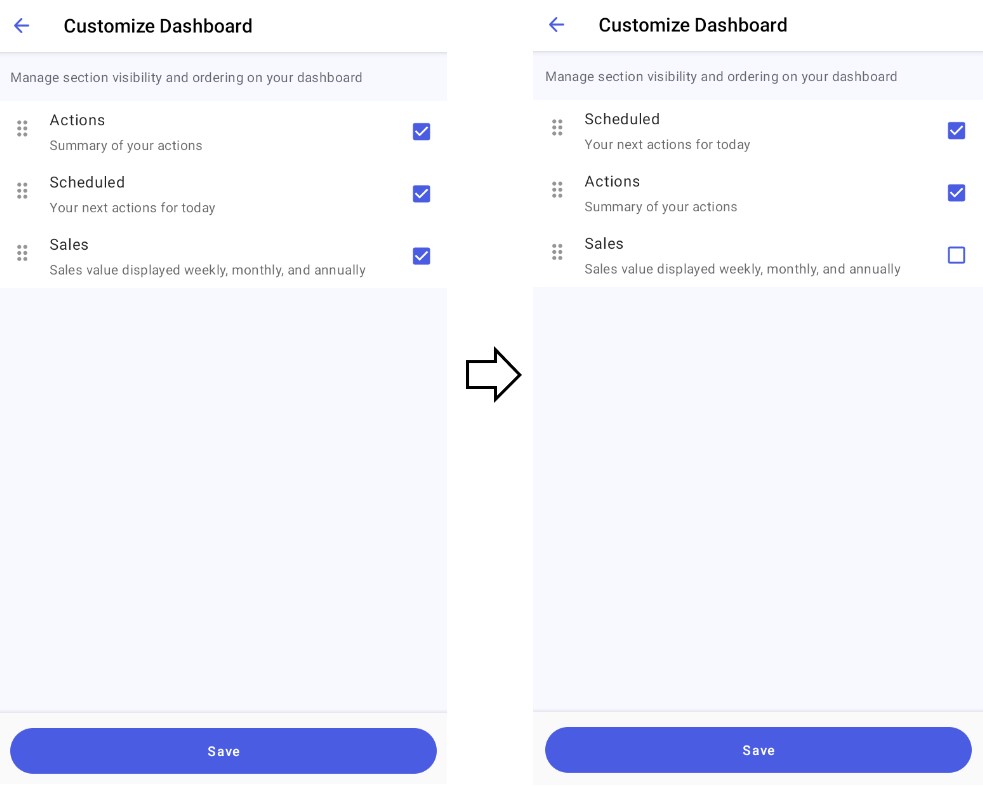
Selecting the Application Dashboard option in the Application Parameters section displays a new window, where you can manage the visibility and ordering of dashboard sections. By default, all the sections are enabled and arranged in the following order: Actions, Scheduled, Sales.
Using the drag-and-drop method, you can change the order of individual sections that are displayed in the application dashboard.
Deselecting a section in the Customize Dashboard window removes that section from the application dashboard.
To save data, select the [Save] button. The application then displays the notification “Changes have been saved”.
