Contents
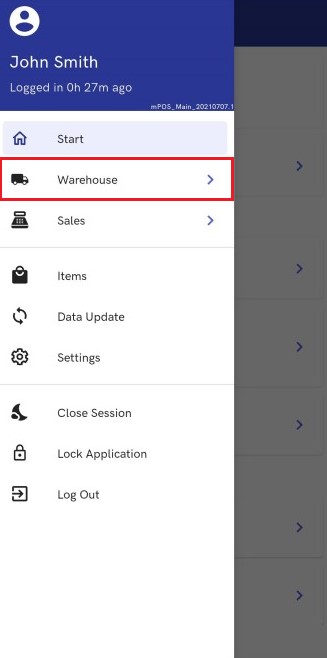
You can open the list of warehouse receipts in one of the two ways: The button is available in:
- The Start view (Warehouse section)

- The side menu (under the [Warehouse] button):
- WM- – sent from an external warehouse unavailable on the mPOS workstation
- PO – issued in the ERP system for the mPOS warehouse
- POR – generated from PO documents on the mPOS workstation
The list of warehouse receipts is divided into two tabs:
- Active – includes WM- and PO documents to be processed
- Completed – includes processed documents
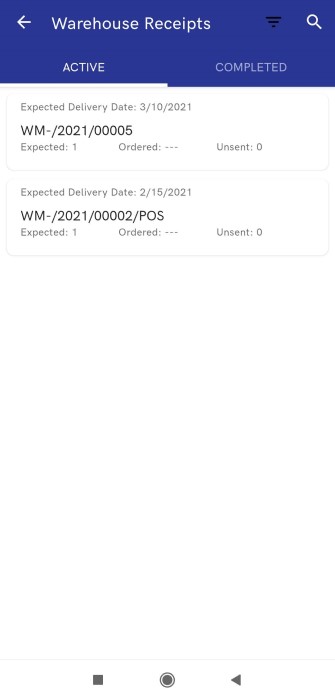
The top right corner contains the filter and search icons; their settings determine what results are displayed on both the tabs.
Filters
Filters allow you to narrow the list of documents displayed in the list of warehouse receipts. You can filter the list by:
- Expected Delivery Date: Newest first
- Expected Delivery Date: Oldest first
- Date of Issue: Newest first
- Date of Issue: Oldest first
- Status – available options include:
- Canceled
- Confirmed
- Unconfirmed
- Confirmed Quantity Total
- Pending
- Completed
- Closed
- Expected Delivery Date (as a date range)
- Date of Issue (as a date range)
- Document Type:
- All
- WM-
- PO
- POR
- Target Warehouse
- Vendor
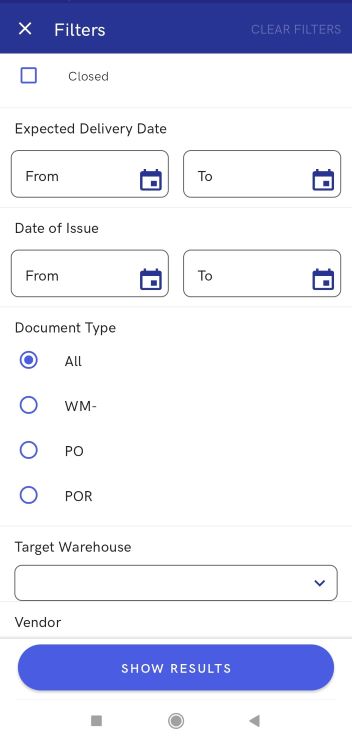
To cancel filtering, select the [Clear Filters] button in the top right corner. The [Show Results] at the bottom of the view allows you to confirm the selected filters and narrow the list of displayed warehouses according to them.
Receiving a PO document
A purchase order (PO) is a trade document containing items or services ordered from vendors/sellers. A purchase order receipt (POR) is a document confirming the receipt of items from a vendor into stock under certain purchase conditions. It results in an increase in the quantity of resources in stock.
The list of PO and POR documents is available as part of the list of warehouse receipts.
In the list of warehouse receipts, you can:
- Take receipt of a purchase order using the [Take Receipt] button
- Preview PO document items using the [Preview] button
- Open document details selecting the Details tab
The main document view displays the PO Receipt Status section with the following expandable subsections:
- New Document – shows the overall quantity of items added to the purchase order
- Delivery Receipt – shows the summary of received items:
- Expected – the quantity of PO document items awaiting receipt
- Missing – a missing item quantity
- Unexpected Received – an additional item quantity added to the PO document
- Total Received – the total item quantity received so far
In the PO document preview, you can also switch to the Details tab, which presents the following information about a given document:
- Status
- Expected Date
- Target Warehouse
- Vendor – selecting a vendor in the PO document details opens a view with the following information:
- Vendor details, including the full name and a loyalty card number
- Phone number
- Zip code
- City
- Street
- Street number
- Apartment number
- PO Receipt Documents – shows all POR documents associated with the PO document and allows previewing them. The POR document view contains the following information:
- Status
- Received date
- Order receipt summary, including:
- Ordered items
- Unexpected items
- Rejected items
- Total received items
- Received items – you can press [More] to open the details of the item list
- Associated Order Details – presents associated purchase orders from which the purchase order receipt has been generated.
Receiving a PO document
The [Take Receipt] button opens the PO Receipt window, where you can:
- Change item quantities
- Scan received items
- Add new items
- Park a document to complete it later
After you confirm the warehouse receipt, the new POR document is registered and the status of the purchase order changes to Completed or, if not all the order items have been received, to Pending.
Simultaneous receipt of several purchase orders
Dedicated settings have been introduced in Comarch ERP Enterprise system to support this functionality. In Customizing, Multi-channel sales function, Comarch Retail POS sub-function, you can find a parameter Reception: Send purchase order, including the options:
- Order status “ordered”
- Status “released” without order document
The field determines the configuration of purchase orders that are to be sent to mPOS workstations.
Also, in Comarch ERP Enterprise you can find a parameter “Receipt all” – button: purchasing reception. Activating the parameter allows displaying the [Receive All] button on the mPOS workstation, which makes it possible to take receipt of all purchase order items.
When creating a purchase order in Comarch ERP Enterprise, it is necessary to export data using the batch application POS update warehouse documents for the document to be sent to the POS workstation.
The list of PO and POR documents is available as part of the list of warehouse receipts.
PO receipts concern PO documents:
- Which have been generated in the ERP system
- Which have the Confirmed or Pending status
- Which do not have a generated POR document in the ERP system
- Whose target warehouse is available for PO documents in a center to which the mPOS workstation is assigned
After you select the [Receive Multiple Purchase Orders] button, the application displays the list of purchase orders where you can choose appropriate documents to generate the PO receipt document from.
To generate a single PO receipt associated with selected purchase orders, make sure the following properties are the same for those documents:
- Customer information
- Vendor information
- Target warehouse
- Transaction type
- VAT direction and aggregation method
After you select the [Take Receipt] button, the application opens a PO receipt window with all the items of the selected PO documents.
If the required properties of the purchase order documents, i.e. customer/vendor details, warehouse data, and transaction type, are not the same, several PO receipt documents will be generated.
For instance, if you select the [Receive Multiple Purchase Orders] and choose PO documents with different vendors, they will be received simultaneously but two PO receipt documents will be created.
Receiving a WM- document
The Active tab of the Warehouse Receipts view contains WM- documents to be processed. This includes documents:
- Which have the Confirmed status
- Which are associated with a generated but canceled WM+ document
- Whose target warehouse is available for WM-/WM+ documents and is assigned to the mPOS workstation
After you select a document, the warehouse receipt view will be displayed. It is divided into two tabs:
- Take Receipt – displays the current receipt stage. Expanding individual stages allows you to display statistical details, such as the expected item quantity, missing items, or unexpected items.
- Details – displays document details (number of expected items, source and target warehouses, and expected date)
The bottom part of the view contains the following buttons:
- [Take Receipt] – starts document processing. If you edit a parked document, the button’s name changes to [Continue Delivery Receipt].
- [Preview] – displays the list of expected items. The Search field allows you to search for selected items.
After you select the [Take Receipt] button, the application opens the list of expected items to receive.
Here, you can select an appropriate item and enter its quantity that you want to receive in stock. The top right corner of the view contains the following buttons:
- [Plus] button – adds an item not included in the list of expected items. Items added in this way can be removed from the warehouse receipt list.
- [More] button – it shows the [Receive All] button, which marks all the items as received in expected quantities. You will also be asked to confirm this selection.
At the bottom of the view, there is the receipt progress bar and the button:
- [Park] – it saves the document in the list of active documents. You can resume its completion at any time.
If you add an item that has not been originally included in the document or if the received quantities exceed the expected quantities, the application will display information about the extra items.
If the declared quantities are less than expected and you try to proceed to the next stage, the application will inform you that some items will be marked as missing.
Selecting [Next] displays the summary of the warehouse receipt:
- Shipped Items – the quantity of items declared as shipped
- Expected and Received Items – the received quantity of expected items
- Unexpected Items – items not included in the original list of document items
- Missing – the quantity of undelivered items (displayed if some items are missing)
- Received – the total quantity of received items
To confirm the warehouse receipt, press the [Confirm] button. You will then see a message confirming the receipt of the delivery. The warehouse movement document will be displayed on the Completed tab.
If you open a completed document, you will see the editing view, similar to when you open an active document. In this case, however, all the stages will be completed and the bottom part of the view will contain the following buttons:
- [Preview] – allows you to preview received items and their quantities
- [Cancel Delivery Receipt] – allows you to cancel the document
Canceling a warehouse receipt
A confirmed warehouse receipt can be canceled on the Completed tab. To do so, select an appropriate document and choose the option [Cancel Delivery Receipt] in the document preview. Next, confirm the cancellation in the displayed window.
Validation of the number of a new lot created on the mPOS workstation
Comarch mPOS uses a mechanism validating the entered lot numbers in order to avoid problems that may arise from incorrectly created numbers for new lots.
In the ERP system, in Customizing → Comarch Retail POS function, you can find a field Batches: Convert lot numbers letter case with the following options:
- No conversion
- To upper case
- To lower case
The field is to prevent a situation where there are two lots with the same number differing only in casing.
An option set in this field is synchronized by all devices where the application has been installed. Depending on the selected option, all letters are converted to lowercase, uppercase, or left as entered by the user.
It is also possible to define characters to be used when creating a new lot number and the allowable length of the number. This eliminates the risk of creating a lot number that contains characters not supported by the ERP system or that is of a wrong length.
Sound notification in the delivery receipt process
The sound notification functionality optimizes the task of scanning items. Thanks to the additional sound notification, it is possible to quickly find out how many items should be placed in the shop. The sound notification informs the user that it is necessary to look at the device’s screen.
The sound is played in the delivery receipt window if the shopping cart icon is displayed, indicating that there are items to be replenished in a given shop.
Item A is displayed in the delivery receipt window with the shopping cart icon, since its resources in stock are 2 pieces, and the quantity received so far is 0.
Item B is displayed in the delivery receipt window with the shopping cart icon, since its resources in stock are 1 piece, and the quantity received so far is 0.
The To Be Replenished field for item A displays the quantity of 10 pieces.
The To Be Replenished field for item B displays the quantity of 5 pieces.
Case 1: After scanning 10 items of item A:
Effect: the notification sound is played on the mPOS workstation and no shopping cart icon is displayed – since resources in stock are 2 pieces and the received quantity is 10 pieces, which gives the quantity of 12 pieces, while 10 pieces needed to be replenished
Case 2: After scanning 2 pieces of item B:
Effect: the notification sound is played on the mPOS workstation and the shopping cart icon is displayed – since resources in stock are 1 pieces and the received quantity is 2 pieces, which gives the quantity of 3 pieces, while 5 pieces needed to be replenished