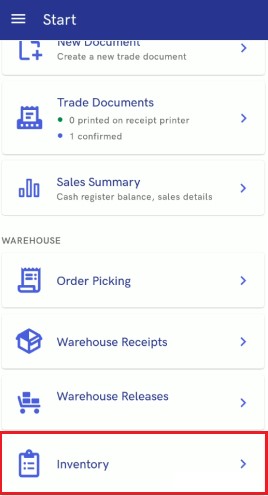
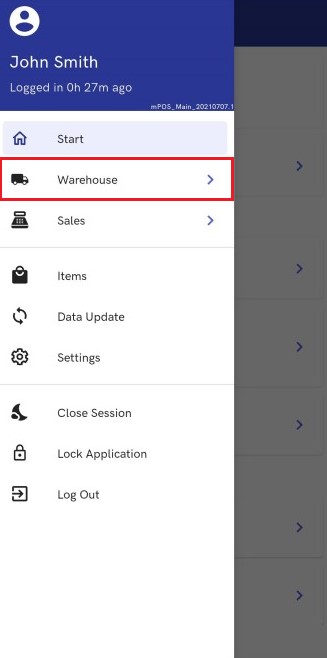
After selecting the [Inventory] button, it is possible to count the actual stock levels in order to verify potential discrepancies between the counted actual level and a level registered in the system. The button is available in:
- The Start view (Warehouse section)

- The side menu (under the [Warehouse] → [More] button)


The Inventory view contains the following options:
- [Warehouses]
- [Sheets]
- [Inventoried Items]
- [Scan Items]
Additionally, it is possible to start an inventory process by scanning an item.
Under the [Sheets] button, the application displays the summary of open, partially reported, and unclosed reported inventory sheets.

Warehouses
Selecting the button [Warehouses] opens the list of available warehouses.
The list includes a search field which limits displayed results according to a phrase entered.
By each warehouse, the application displays the number of awaiting documents related to that warehouse.
The top right corner of the view contains a filter with the following options:
- Sort By:
- Name: A-Z
- Name: Z-A
Sheets
By the [Sheets] button, the application presents the summary of opened, reported, and partially reported inventory sheets.
Selecting the button [Sheets] opens the list of inventory sheets.

The list’s items contain the following information:
- Sheet creation date
- Sheet number
- Inventory number
- Description fields
Additionally, in the top right corner of each item line, the application presents a red symbol with the code of a warehouse related to a given inventory sheet and the sheet’s status (e.g., Opened, Reported).
The top right corner of the view contains a filter with the following options:
- Sort By:
- Date of Issue: Newest first, Oldest first
- Warehouse: A-Z, Z-A
- Processing Status: A-Z, Z-A
- Type: A-Z, Z-A
- Date of Issue (as a date range)
- Warehouse
- Status – available options include:
- All
- Open
- Partially Reported
- Reported
- Count Method
Selecting a given open sheet displays the list of sheet items which are still to be counted.

Selecting the button [Count] opens a view Counting Sequence. The view displays an associated warehouse and the number of a sheet on which counted items are saved. The view also displays the list of items.
Additionally, the user may use the plus and bin icons (in the top right corner) to add or delete additional items to/from the sheet.

After selecting an item, the user may increase its quantity in one of the following ways:
- Scanning a barcode
- Selecting the plus or minus button
- Entering a relevant number in the dedicated field
- Selecting the pencil icon and choosing a new lot
The option to enter a negative quantity allows you to correctly enter quantities in inventory reports, for instance, in cases where incorrect quantities were added in the first or earlier confirmed report and items were released from the warehouse.

A counting process may be parked; in such a case, counted quantities are not reported, and the user will be able to resume the readout later on.
After the button [Report] is selected, the application displays the notification: “How to mark the items?”. If the user selects Report only, it will still be possible to make changes to this inventory sheet.
In turn, selecting Report and mark as closed reports the count and closes it. It will no longer be possible to count the selected item(s).

Once the user confirms their choice, the application displays a notification about the successful completion of the operation.
The button [Finish] redirects the user to the Back Office view, while the button [Start Next Counting] displays the last inventory sheet opened.

Inventoried items
Selecting the [Inventoried Items] button displays all items added to all inventory sheets in all warehouses.
The top right corner of the view contains a filter with the following options:
- Sort By:
- Sheet: A-Z, Z-A
- Sheet
- Warehouse
- Status – available options include:
- Created
- Open
- Reported
- Closed
Discrepancy report
Discrepancy calculation is based on the correctly calculated system quantity, taking shortages into account. A discrepancy is detected when the system quantity of an item (quantity – shortages) is different from the reported quantity.
Resetting shortages after an inventory
When an inventory sheet item is being closed, its shortages are always reset to zero. If an item being closed contains lots, shortages are reset to zero for all of the lots.
Blocking the receipt of outdated lots
During a delivery receipt process, the user cannot enter a past lot expiration date. If the user scans the EAN-128 barcode of an expired item, the application displays the following notification: “Expired items cannot be received at the shop’s warehouse”.
Handling attributes in an inventory process
Attributes are used to enter additional information about objects. On your Comarch mPOS workstation, you can handle attributes for documents issued in the course of an inventory process.
For the purposes of inventory counting, some shops are divided into specific areas. This helps to plan the inventory process, allowing employees to be assigned to such areas and avoiding the risk of double counting products. Attributes used in the inventory process additionally support shops in identifying and classifying documents.
