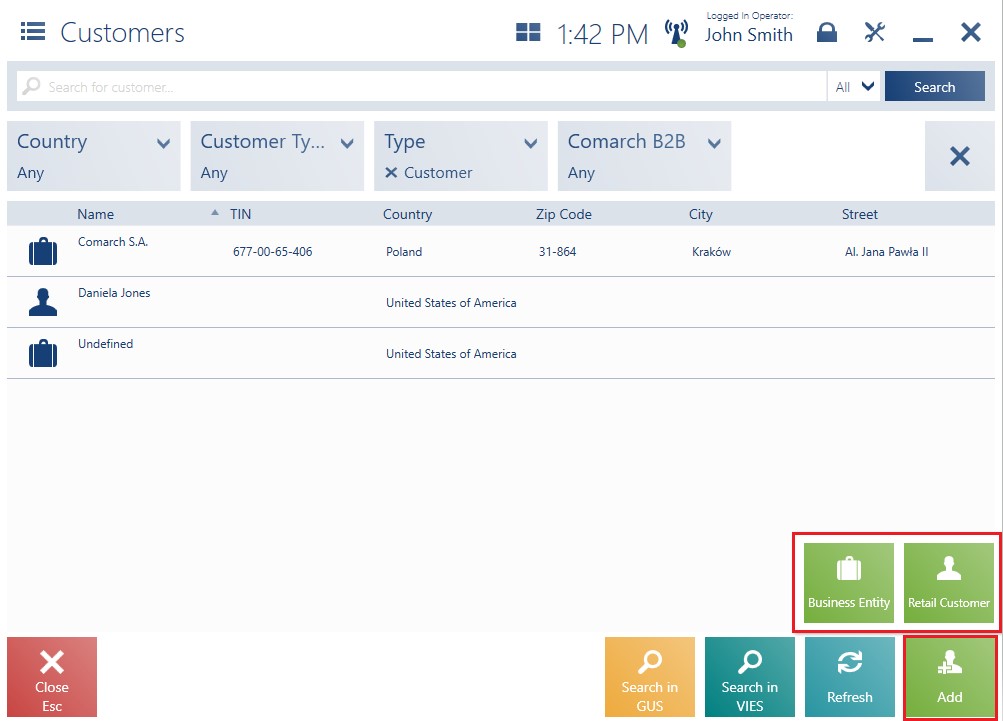
A new customer can be added on the customer list with the use of the button: [Add] → [Retail Customer]/[Business Entity].

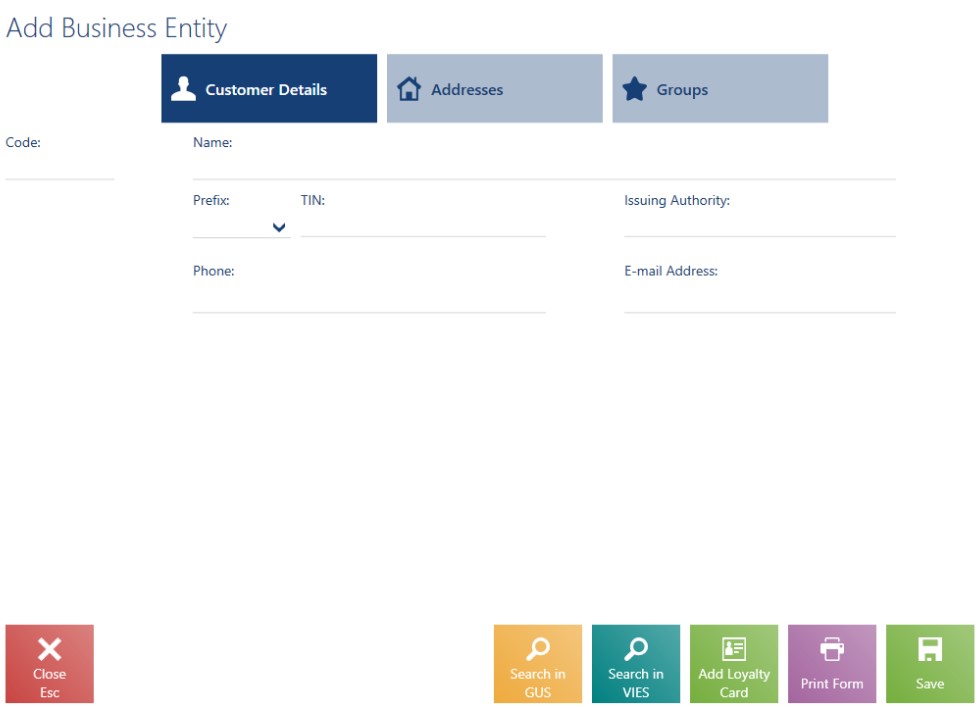
The new customer window presents the following fields on the tab Customer Details:
- Code – required
- Title – applicable to retail customers only
- Academic Title – e.g. Professor, PhD
- First Name – required. Applicable to retail customers only.
- Last Name – required. Applicable to retail customers only.
- Name – required. Applicable to business entities only.
- Collect invoices via KSeF – displayed if the support of the KSeF system has been enabled in the ERP system. Applicable to business entities only.
- Date of Birth – applicable to retail customers only
- TIN – applicable to business entities only. If the selected country code is PL, the application verifies the number’s checksum and uniqueness. If the database contains another customer with the same TIN, the user will be informed on that and will need to decide whether or not to save such a customer.
- Prefix – applicable to business entities only
- Issuing Authority – applicable to business entities only
- Phone
- Additional Phone
- E-mail Address
- Attributes
- Consents
- Reverse Charge – if an appropriate function has been activated in the ERP system
Hidden by default:
- Country Code
- NIN – if the selected country code is PL, the application controls the number of entered digits and the correctness of the number’s check digit
- EIN
- Identity Document – this field is required while generating a tax free document
- Description – additional information on the customer
The Addresses tab contains the following fields:
- Country
- Zip Code
- City
- Moniker
- Street
- Street No.
- Address – Continuation 1
- Address – Continuation 2
Hidden by default:
- Address Type
- District
- County
- State
- Apt/Unit No.
- Post Office
The Groups tab presents assigned customer groups. With appropriate permissions, the operator can assign relevant groups in the new customer window. Special discounts and bonuses can be associated with customer groups in Comarch ERP Enterprise system. In the system, it is necessary to specify which customer classifications and groups should be available on the POS workstation. To enable the user to add a customer to a group on the POS workstation, it is necessary to select the parameter Assign customer groups to customers. The parameter is available in the Comarch Retail POS operator rights application (in the Data access and modification section of the POS Permissions tab).
The company prepared special promotions for customers belonging to a Gold group -20% on the new collection. What is more, customers belonging to a VIP group are granted a -50% discount on the entire assortment. On the ERP system’s side, the company decides that the VIP group is to be managed by the headquarters only and that shop employees will only be able to assign customers to the Gold group. The VIP group can be read only.
| No. | Customer group name | Bonus |
|---|---|---|
| 1 | Standard | None |
| 2 | Gold | -20% on new collection |
| 3 | VIP | -50% on entire assortment |

The Add Business Entity/Add Retail Customer window contains the following buttons:
- [Search in GUS] (available for business entities) – it allows the verification of a customer based on a tax identification number and downloading address data from the GUS database
- [Search in VIES] (available for business entities) – it allows the verification of a customer based on a tax identification number and downloading address data from the EU VIES database
- [Add Loyalty Card] – it allows adding a loyalty card number
- [Print Form] – it prints a consents form
- [Save] – after filling in all required fields, selecting this button saves the new customer
In the application, it is not possible to select/deselect the parameter Lowest price for customer. The parameter’s default value depends on the type of a customer being added (business entity or retail customer) and parameters defined from the ERP system’s side as part of a center:
- Lowest price for a new business entity
- Lowest price for a new retail customer
If the operator does not fill in some of the required fields or another customer with the same code already exists, the application displays a relevant message and marks a given field in red.
Once changes are confirmed, the new customer is added to the list.
In the application, it is not possible to confirm SI if a customer has not been selected in a document.
At an XYZ shop, a customer wants to receive a sales invoice for a transaction. The operator verifies whether the customer’s account exists on the customer list. Since there is no such account, the operator clicks on [Add] → [Retail Customer], fills in the customer’s details and confirms the operation. The newly added customer’s form appears on the list and can now be selected in an SI document.
If a customer with a code existing in the ERP system’s database is added in the offline mode, after reestablishing connection with the data synchronization service, the customer’s code will be assigned a prefix (the POS workstation’s series).
