
Contents
New module
Start creating a new view by creating a new POS module. Open Visual Studio and select a new project WPF Custom Control Library. This project will automatically generate the necessary structure and you will be able to add quickly new elements. In the beginning, a new project will contain a Themes folder with Generic.xaml and CustomControl1.cs files which can be deleted.
Next, you need to create a Module.cs class that will register the new module in the POS application. This class must inherit from the primary class ModuleBase (Comarch.POS.Presentation.Core) and implement the Initialize method respectively. Inside this method, you will register own services, views and viemodels, register buttons in POS main menu as well as own development objects, manage the visibility of development object properties in the interface management, add (develop) the existing containers and data grids.
To make the future view manageable by the user during POS session, in the Themes folder add a new element of Resource Dictionary type (right click the Themes folder and then respectively select: [Add], [Resource Dictionary…] from the context menu). Name it as ModernUI.xaml and save. In this file, you will define the default properties for manageable interface elements (views, development objects) – for more information, see How to manage the layout and its elements. Finally, you need to register this resource. To do this, open the Module class builder and add the following line:
LayoutService.RegisterResources(typeof(Module));
(LayoutService is a static class stored in the Comarch.POS.Presentation.Core.Services namespace).
How to create a view
Start creating a new view by creating a Views folder, where you will store all project views, and a ViewModels folder for storing view models. In the Views folder, add a new element of User Control (WPF) type named OrdersView.xaml for instance.
Next, change the UserControl type to View from the Comarch.POS.Presentation.Core namespace.
<core:View x:Class="Comarch.POS.Presentation.Sales.Views.OrdersView"
           xmlns:core="clr-namespace:Comarch.POS.Presentation.Core;assembly=Comarch.POS.Presentation.Core"
In code-behind, remove inheritance from UserControl and implement the necessary View interface.
The Header property is a string displayed in the application heading – it is required only for the views that will be opened as primary views, as only they have a heading section. For other views (that is the modal and message views), String.Empty is sufficient. You can also create own section heading with any body – for more information, see How to add a custom heading.
The HeaderLayoutId property should, in turn, contain a unique name for layout id which is necessary for the view management to work properly. If the view is not be manageable, you can then set this property to String.Empty. For the purpose of this documentation, value “OrdersViewId” is set.
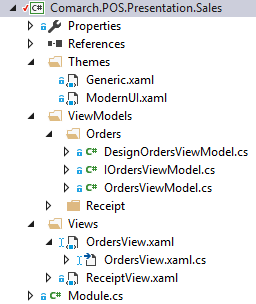
The base constructor requires an object of IViewModel type, therefore, you will now proceed to creating a viewmodel. In the ViewModels folder, create first a folder named Orders. In that folder, add a new class OrderViewModel and interface IOrdersViewModel. The interface should be public and should inherit from IViewModel. The OrdersViewModel class should also be public and should implement the base class ViewModelBase and the IOrdersViewModel interface.
By inheriting from ViewModelBase, you will need to implement an IsTarget method. It is called up during navigation and allows the viewmodel instance decide whether to activate it or not (for more information, see How to navigate between views) – for the moment, define it to return true.
If the view is to be manageable by POS user, then you need to add one more viewmodel class named DesignOrdersViewModel that will inherit from DesignViewModelBase and implement the IOrdersViewModel interface. A partial structure is presented in the figure aside.
Back to the code-behind of the OrdersView class (OrdersView.xaml.cs file), you need to parameterize the constructor so that it receives the parameter of IOrdersViewModel type named viewModel (note: this name is important and cannot be any different!). Next, complete the base constructor by passing the viewModel variable to it.
Finally, register the new view as described in chapter How to register navigation and layout management views.
A ready-made module template with an empty view can be found in the example Simple module with a new empty view (see Examples).
How to add a custom heading
For each base view, you can set a heading text that will be presented in the upper part of the POS application. By default, you can only add there a string defined in the view under the Header property. If you need to add a more complex structure in the heading, you can create a custom heading view.
To define own heading, start by adding a new element User Control (WPF) to the folder. For enhanced clarity, the element will be named after the view with a Header suffix (for OrdersView view, the element name will be OrdersViewHeader).
Finally, back to the code-behind of the OrdersView view, change the CustomHeaderType property in the constructor to your custom heading’s type. DataContext, referring to the ViewModel view, will automatically be assigned to the heading view. In this case, it will be OrdersViewModel. This way, in your heading you can use biding directly to a property in the viewmodel of the view.
public partial class OrdersView
{
        public OrdersView(IOrdersViewModel viewModel) : base(viewModel)
        {
            CustomHeaderType = typeof (OrdersViewHeader);
            InitializeComponent();
        }
…
…
How to register navigation and layout management views
After you create a view (implement properly the logic of the view in the view-model and its UI in xaml), you need to register it to ensure that it works. To do so, open the Module class created along with the project (see New module). In the Initialize method, add the following lines:
Register<IOrderViewModel, OrderViewModel>();
RegisterViews(new ViewStructure<OrdersView, DesignOrdersViewModel>("OrdersView", Resources.ResourceManager);
The first line registers your viewmodel in a container, so that an instance of the IOrdersViewModel interface will automatically be injected in the view constructor.
The second method is used to register a view when its interface is being managed by the POS user during the application session. This way, the user will see your view on the view list in the interface management view. The user can edit it and change the layout of all the elements defined as manageable (for more information, see chapter How to manage the layout and its elements). This method requires two parameters. The first parameter is a key name in the resources, whereas the second parameter is a resource manager instance. These parameters are used to present the name of the view on the view tree under POS application view management.
Alternatively, if you do not want to register your view in the interface management mode, use the RegisterForNavigation<TView >() method instead of RegisterViews.
RegisterForNavigation<OrdersView>();
How to add a view to the main menu
Each view can be added to the main menu as a tile (TileButton) to make it possible to open the view in the primary mode. By adding the view to the main menu, it is also added automatically to the collapsible sidebar menu which you can open in any base view.
To add the previously created view as tile to the menu, in the Initialize method of the Module class, register the view using the RegisterMenuTile<TView> method, where TView is the name of the view class. The parameters opening the tile are the key name in the resources and the resource manager, respectively. Optionally, you can also define delegate canExecute. If false is returned, the tile will be insensitive and non-clickable. You can also add the delegate to actions that are to be executed before opening the view or/and define the permissions necessary to open the view along with the key in the resources, where a relevant message will be saved. The message will be displayed in the permission modal view, if the permissions are insufficient (for more information, see Validation of permissions). The OrdersView will be registered as an example.
RegisterMenuTile("OrdersView", Resources.ResourceManager);
Once you register the view in the main menu, you can open it with a corresponding tile. The layout of the tile will, by default, be as defined in the global POS interface configuration. To change its visual properties, add relevant lines in the ModernUI.xaml file stored in the Themes folder. For instance, to set a new, default color for your new tile that opens the OrdersView view, you need to add the following line:
<SolidColorBrush x:Key="OrdersView.Default.Background" Color="Red" />
Each key in the ModernUI will have the following format:
[LayoutId or Name of development object type].Default.[Property name]
whereas the entire definition will have this format:
<[Property type name] x:Key=”[key according to the format above]” [attributes]>[value]</[Property type name>
Attributes and values are not necessary and depend strictly on the type of property.
LayoutId for the OrdersView view tile is defined in the first parameter of the RegisterMenuTile method. In your case, the LayoutId used in the key defining the tile color is OrdersView, because this is the value you earlier set when calling the method registering the tile-like view in the main menu. The properties, supported by the interface management, depend on the type of development object. For tiles, it is the TileButton. Properties supported for individual development objects are listed in the Supported properties chapter of the How to manage the layout and its elements article.
How to compile a module with POS application
Once the created module is compiled, the last step is to run it in the target environment, that is in the POS application. To do so, copy the module composed of a library (or libraries) into the setup folder of the POS application. Next, edit the POS.exe.config file, find the <modules> section and add the new module at the end of this section as follows:
<module assemblyFile=”[module_name].dll” moduleType=”[module_class_namespace].Module, [module_class_namespace]” moduleName=”[module_name]” />
If case of a larger number of libraries, register only the ones that have the Module class implemented.