Contents
The quick sales buttons make it possible to add items with no barcodes (or with illegible barcodes that cannot be scanned) to a trade document. The feature is an alternative method of handling sales, and is mainly directed to shops with a limited assortment, such as catering and service outlets.
The quick sales mode allows the user to add a specific item directly to a document, without having to scan or search for that item; it can be used for the following items:
- Items belonging to an appropriate group defined in the ERP system
- Items belonging to the group of favorite items (if such a group has been defined in the ERP system)
Configuration in Comarch ERP Standard and Comarch ERP XL systems
In the ERP system, it is necessary to select one of the two sales modes
- Standard – in this mode, the original trade document view is used
- Quick sales – in this mode, a simplified view with the quick sales buttons is used
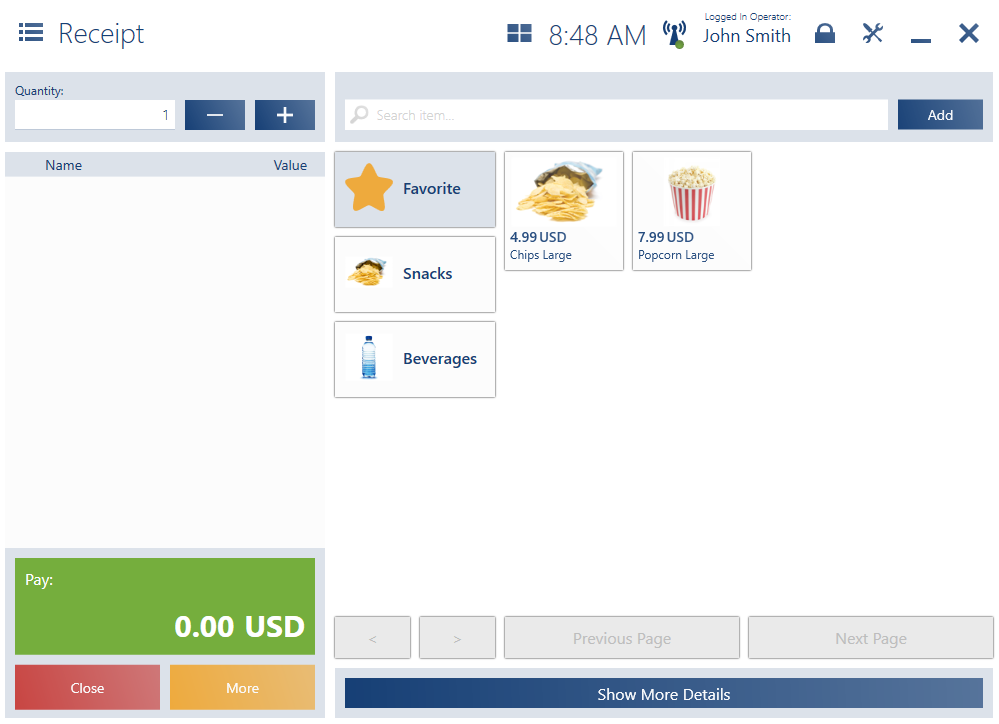
The selection of the quick sales mode affects the presentation of the interface for receipt and sales invoice documents. The main section of the sales view is composed of a panel with quick sales buttons; the panel allows the user to quickly select items to be added to the document with no need to use a barcode scanner or search for the items by their codes.
Configuration in Comarch ERP Enterprise system
In Comarch ERP Enterprise, the quick sales mode works by assigning sales channel item categories to a sales channel and specifying their display order in the Sales channel item categories application.
Document window in the quick sales mode
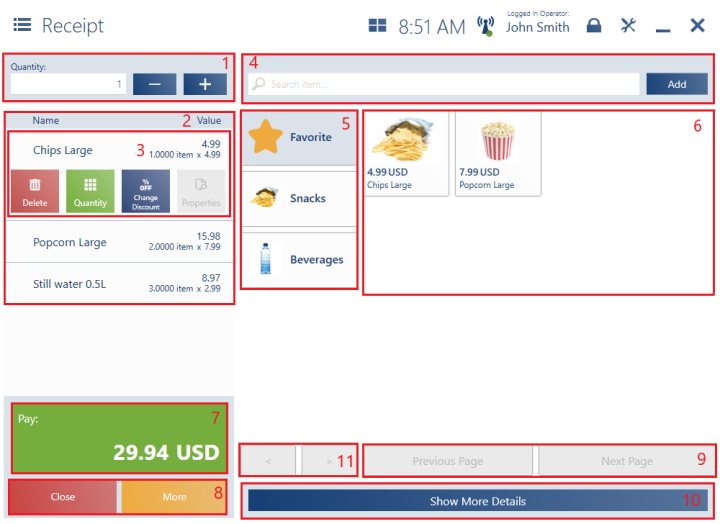
The form of a new R/SI document added in the quick sales mode contains the following fields (particular points correspond to areas marked in the figure above):
1. Quantity – it makes it possible to enter an item quantity before adding the item to the document
2. Item list – it contains the following columns:
- Name
- Value
Hidden by default:
- Price
- Quantity
- Base Price
- Regular Price
- No.
- Code
- VAT Rate
- Total Price
- Subtotal Price
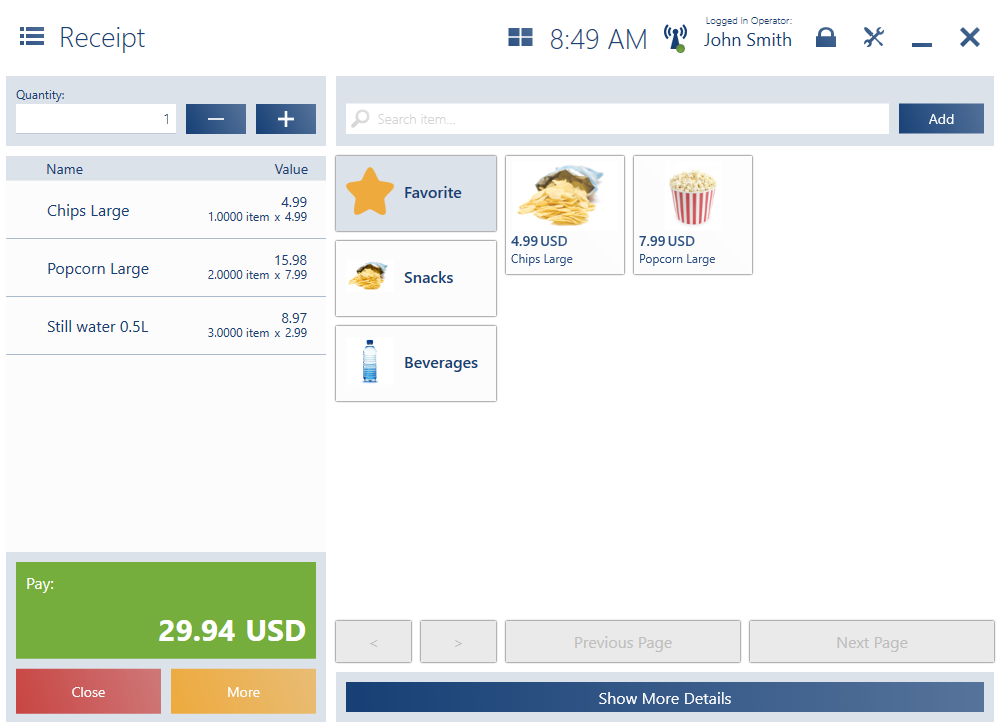
Additionally, the item list displays the following information:
- Quantity x Price – the row presents the price of a single item and its quantity in a simplified form
- Discount/Margin
3. Document item buttons – this area contains the same buttons as in the standard mode:
- [Delete]
- [Quantity]
- [Change Discount]
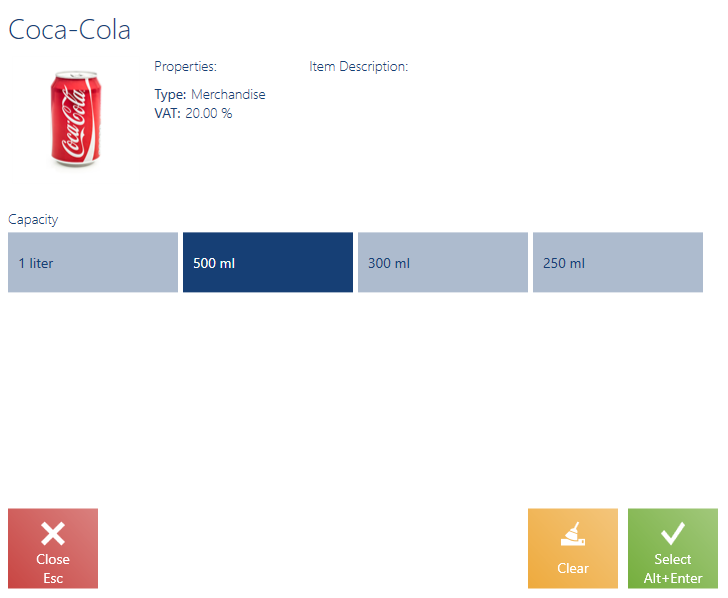
- [Properties]
4. Search item field – it makes it possible to search and add document items
5. Item categories – item groups defined in the ERP system. The user can also define a favorite items group containing frequently purchased items. If at least one item is added to the favorite items group, the group will be displayed first on the list of item categories.
6. Item buttons – items allowing the addition of a document item
7. [Pay] – this tile contains the summary of the document value. Selecting it opens the payment window.
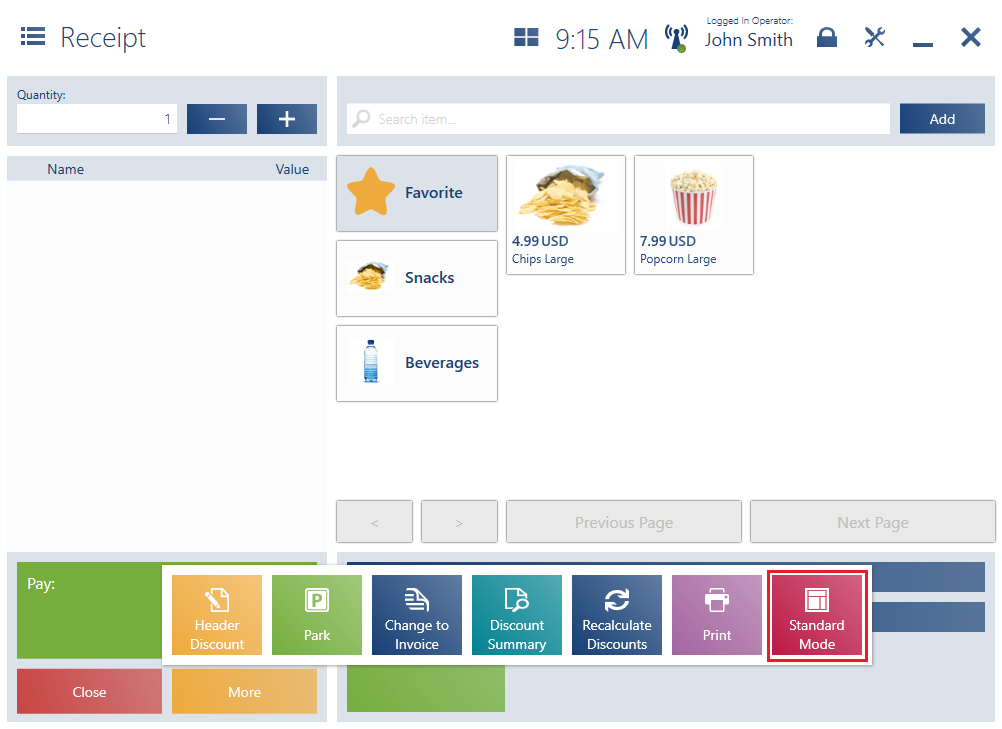
8. Document buttons – the basic view presents the following buttons:
- [Close] – it closes the document without saving it
- [More] – selecting this button displays buttons hidden by default
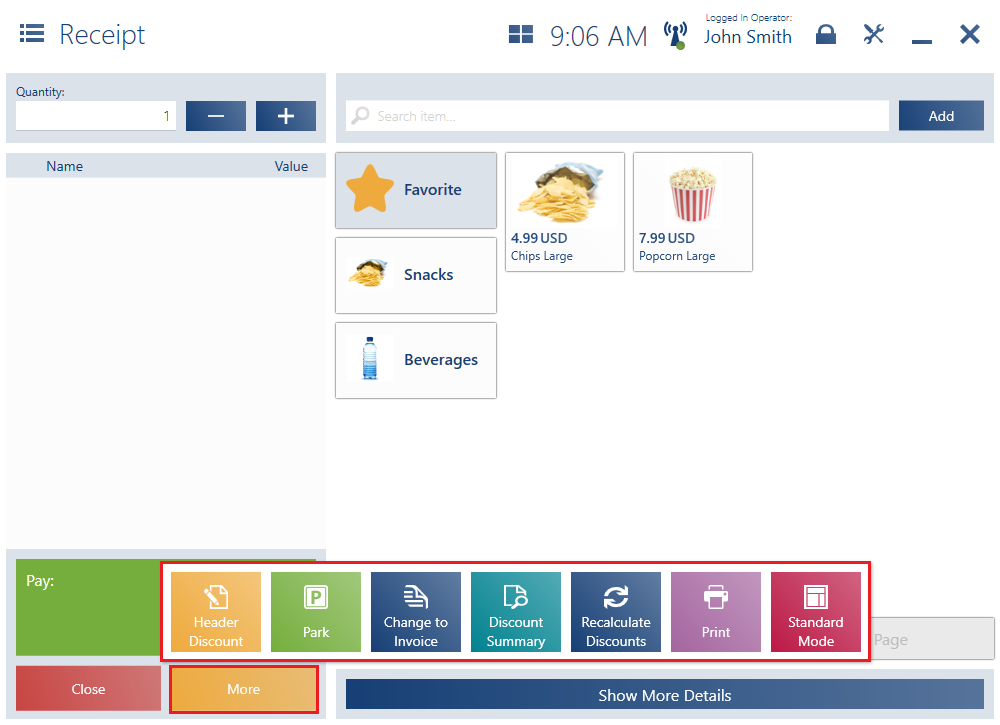
- [Header Discount]
- [Park]
- [Change to Invoice]
- [Discount Summary]
- [Recalculate Discounts]
- [Print]
- [Standard Mode]
9. [Previous Page]/[Next Page] buttons panel – it allows the user to navigate between subsequent pages with items belonging to a given group
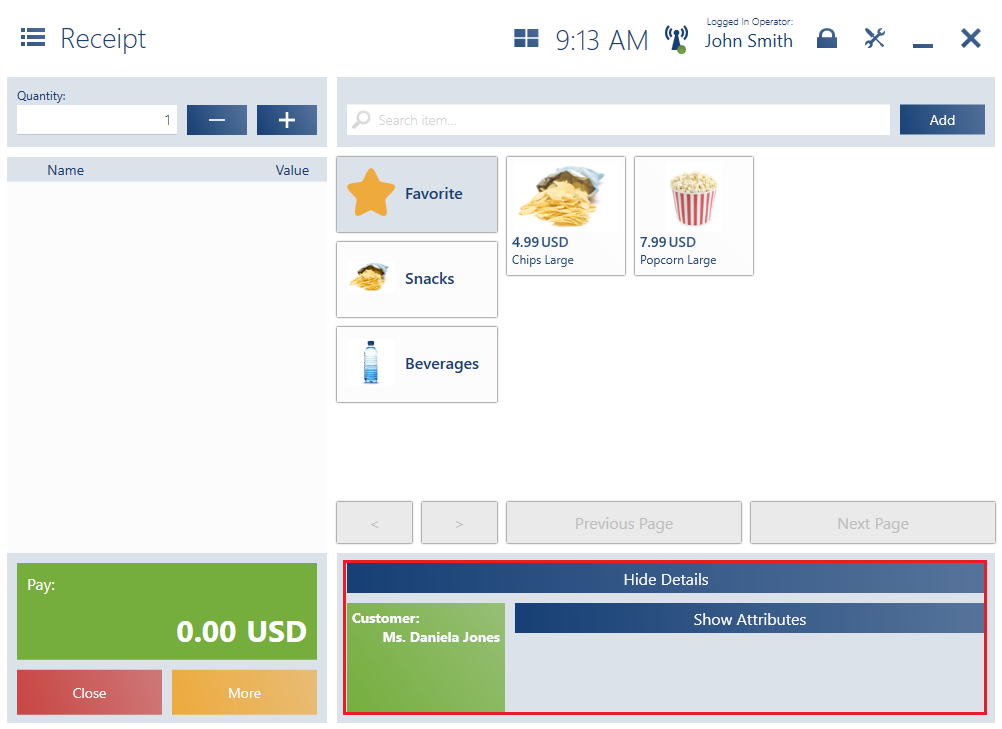
10. [Show More Details] – selecting the button expands a panel with the following details:
- Customer details
- Reverse charge (if activated)
- Attributes
- Split payment (if activated)
11. [Previous]/[Next] buttons – they make it possible to navigate between the pages of item categories
Switching between sales modes
In Comarch POS, it is also possible to switch between the sales modes if the mode button is made available in the layout management window.