Contents
Adyen terminals
Cooperation of Comarch POS with a payment terminal supplied by Adyen is possible after making appropriate changes in the text file POS2.exe.config available in the application installation directory. In the file, uncomment or add the following module:
<module assemblyFile="Comarch.POS.Terminal.Adyen.dll" moduleType="Comarch.POS.Terminal.Adyen.Module, Comarch.POS.Terminal.Adyen" moduleName="Comarch.POS.Terminal.Adyen" />
Also, comment the following module:
<!-- <module assemblyFile="Comarch.POS.Terminal.dll" moduleType="Comarch.POS.Terminal.Module, Comarch.POS.Terminal" moduleName="Comarch.POS.Terminal" /> -->
Configuration
Integration with Adyen payment terminals allows you to:
- Process card payments
- Reverse/cancel a payment made for a previous transaction
- Process returns of funds to a card
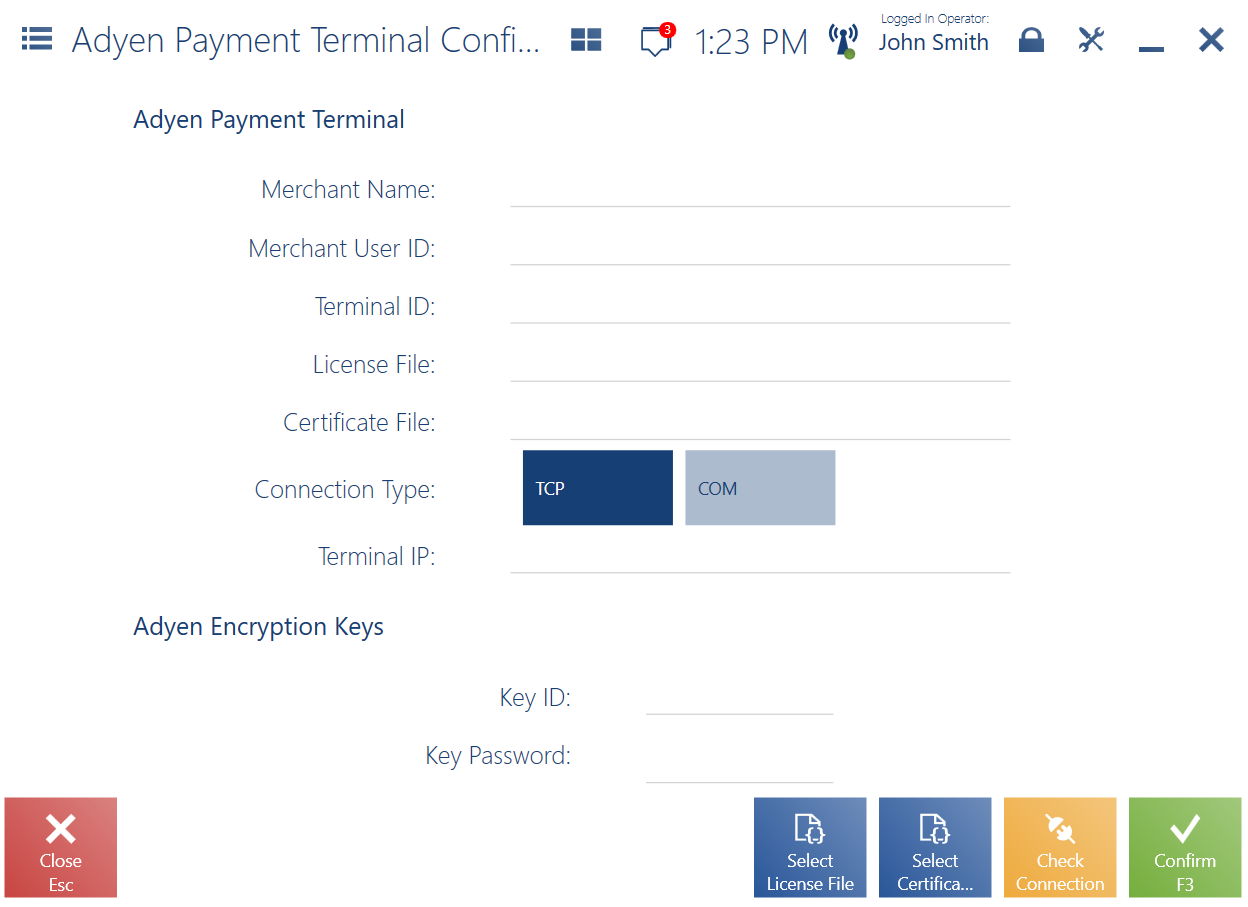
To configure an Adyen payment terminal, select the [Configuration] tile and press [Adyen Payment Terminal].

In the Adyen Payment Terminal Configuration window, you need to fill in the following fields:
- Merchant Name – the name of the seller (merchant) account in Adyen system
- Merchant User ID – the name of the user assigned to the seller account (Adyen Merchant Level → Level → Users)
- Password – password for the username (not for the seller account)
- License File – Pepper license file obtained from Pepper after purchasing the license
- Terminal IP – terminal address; you can check it on the terminal using the combination [5] + [Green]
Additional Settings section:
- Maximum Length of Printout Line – by default, it is set as 24
Matchbox File Settings section:
- Company ID
- Shop ID
Fields to complete are not required for card transactions – they affect the generated files for each transaction (saved in the same location as the POS workstation log files). If the entries made here are incorrect, you can correct the already generated files.
The bottom right corner of the window contains the following buttons:
- [Select File] – allows you to select a license file
- [Check Connection] – verifies connection with the payment terminal
- [Confirm] – saves the configuration settings
Supported connection types
The following connection types are supported in integration with Adyen:
- TCP/IP
Concardis terminals
Cooperation of Comarch POS with a payment terminal supplied by Concardis is possible after making appropriate changes in the text file POS2.exe.config available in the application installation directory. In the file, uncomment or add the following module:
<module assemblyFile="Comarch.POS.Terminal.Concardis.dll" moduleType="Comarch.POS.Terminal.Concardis.Module, Comarch.POS.Terminal.Concardis" moduleName="Comarch.POS.Terminal.Concardis" />
Also, comment the following module:
<!-- <module assemblyFile="Comarch.POS.Terminal.dll" moduleType="Comarch.POS.Terminal.Module, Comarch.POS.Terminal" moduleName="Comarch.POS.Terminal" /> -->
Configuration
Integration with Concardis payment terminals allows you to:
- Process card payments
- Reverse/cancel a payment made for a previous transaction
- Process returns of funds to a card
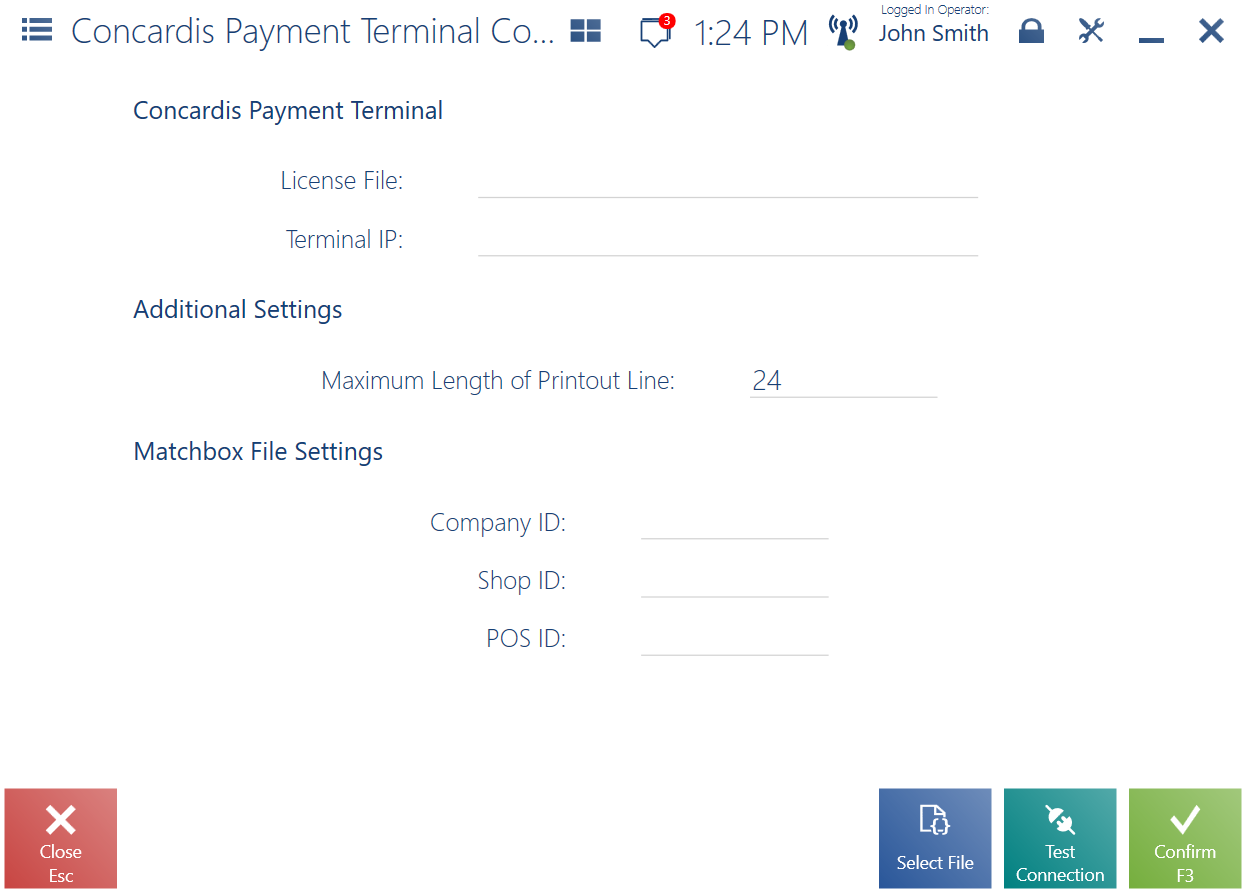
To configure a Concardis payment terminal, select the [Configuration] tile and press [Concardis Payment Terminal].

In the Concardis Payment Terminal Configuration window, you need to fill in the following fields:
- License File – Pepper license file obtained from Pepper after purchasing the license
- Terminal IP – terminal address; for CCV Q30 model, you can check or configure it in Menu (opened by selecting [Red] + [Yellow])
Additional Settings section:
- Maximum Length of Printout Line – by default, it is set as 24
Matchbox File Settings section:
- Company ID
- Shop ID
- POS ID
The bottom right corner of the window contains the following buttons:
- [Select File] – allows you to select a license file
- [Test Connection] – verifies connection with the payment terminal
- [Confirm] – saves the configuration settings
Supported connection types
The following connection types are supported in integration with Concardis:
- TCP/IP
ZVT-compliant terminals
Cooperation of Comarch POS with a payment terminal that is compliant with the ZVT protocol is possible after making appropriate changes in the text file POS2.exe.config available in the application installation directory. In the file, uncomment or add the following module:
<module assemblyFile=" Comarch.POS.Terminal.PepperZvtProtocol.dll" moduleType=" Comarch.POS.Terminal.PepperZvtProtocol.Module, Comarch.POS.Terminal.PepperZvtProtocol" moduleName=" Comarch.POS.Terminal.PepperZvtProtocol" />
Also, comment the following module:
<!-- <module assemblyFile="Comarch.POS.Terminal.dll" moduleType="Comarch.POS.Terminal.Module, Comarch.POS.Terminal" moduleName="Comarch.POS.Terminal" /> -->
Configuration
Integration with ZVT-compliant payment terminals allows you to:
- Process card payments
- Reverse/cancel a payment made for a previous transaction
- Process returns of funds to a card
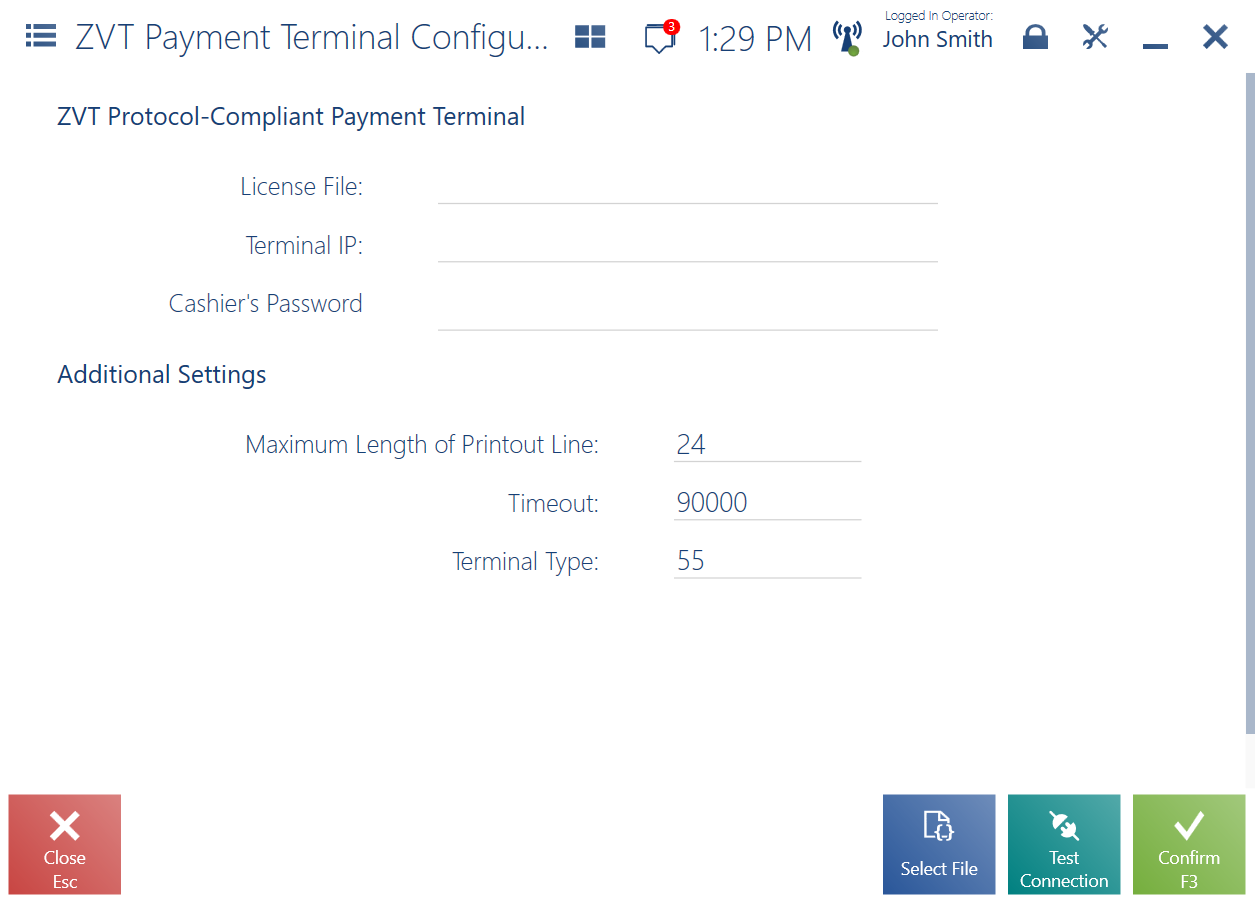
To configure a payment terminal, select the [Configuration] tile and press [ZVT Protocol-Compliant Payment Terminal].

In the ZVT Payment Terminal Configuration window, you need to fill in the following fields:
- License File – Pepper license file obtained from Pepper after purchasing the license
- Terminal IP – terminal address; you can check it on the terminal using the combination [5] + [Green]
- Cashier’s Password
Additional Settings section:
- Maximum Length of Printout Line – by default, it is set as 24
- Timeout – set as 90000 by default
- Terminal Type
The bottom right corner of the window contains the following buttons:
- [Select File] – allows you to select a license file
- [Test Connection] – verifies connection with the payment terminal
- [Confirm] – saves the configuration settings
Supported connection types
The following connection types are supported in integration with ZVT:
- TCP/IP
