Searching panel and filters

General information

The user can search and filter data by:

  • Using searching panel
  • Defining filter in column headers
  • Defining filter in filter builder

On lists of objects, filters have different applications and may refer to:

  • Values selected from a list
  • Values entered manually
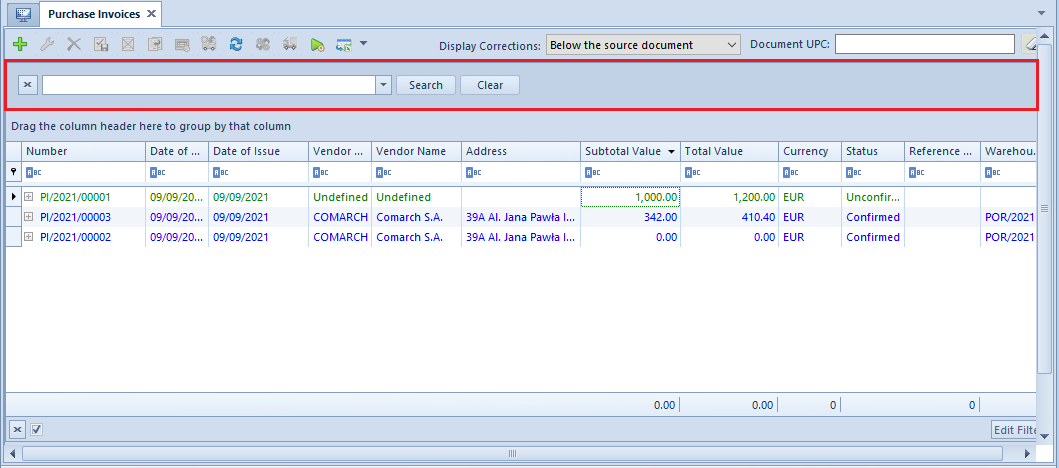
Searching panel

The functionality of searching panel is available upon pressing <Ctrl> + <F> key combination on a list of objects, e.g., on the list of items.

Searching panel above the list of items

With the use of the searching panel, the user can search values by:

  • Searching a single text – after entering one sequence of characters, all records containing the entered sequence in any column, will be displayed
  • Searching several sequences of characters – after entering sequences of characters, separated by spaces, records containing any of the entered sequences of characters (space is considered as a logical operator OR) in any column, will be displayed.
  • Searching text containing a space – sequences of characters placed in quotes are considered as a complex expression. In such case, those records which contain the expression placed in quotes in any column, are displayed.
  • Indicating the column in which a given sequence of characters should be searched – a sequence of characters should be preceded by the name of the column and colon.
  • Searching of records fulfilling many conditions – each subsequent condition must be preceded by “+” sing
  • Creating condition excluding displaying of a given record – such condition must be preceded by “-” sign

Note
Closing of a list of objects automatically closes searching panel.

In the table below, exemplary search criteria are presented

Search criterionDescription
shirtDisplays records containing expression "shirt" in any column
blue shirt 40Displays records containing expression "shirt" or "blue" or "40" in any column
"blue shirt"Displays records containing expression "blue shirt" in any column
"blue shirt" + 40Displays records containing expression "blue shirt" and "40" in searched columns
blue + shirt - 40Displays records containing expression "shirt" and "blue" and not containing expression "40"
blue shirt - 40Displays records containing expression "shirt" or"blue" and not containing expression "40"
Code: "40" + Name: "blue shirt"Displays records which, in the first column, beginning with "Code" expression, contain expression "40" and, in the first column beginning with "Name" expression, contain "blue shirt" expression
40 - Name: shirtDisplays records containing expression "40" in any column and not containing "shirt" expression in the first column, beginning with "Name" expression

Defining filter in column headers

Headers of columns on lists available in the system contain a button which allows the user to specify the criteria of filtering data within selected column. To edit filter, it is necessary to place the mouse cursors in a column header where funnel button, used for activating filter.

Filter symbol in a column header

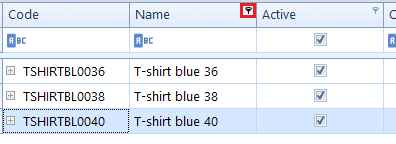
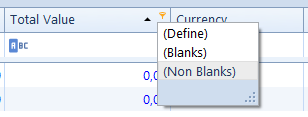
After selecting the funnel button, a list of options related to column filter edition, is displayed.

  • All – shows all items on a list (deletes filter from a column)
  • Define – opens Customize Filter window which allows an advanced filter configuration
  • Blanks – displays only those items on a list, which contain an empty value in a given column
  • Non-Blanks – displays only those items on a list, which contain a specific value in a given column

Defining filter in a column header

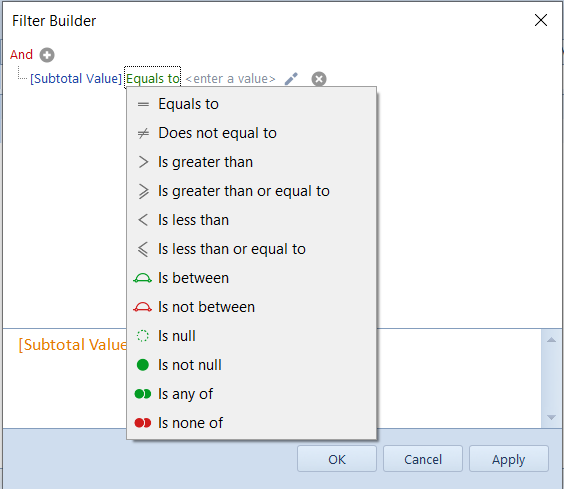
Thanks to the Customize Filter window, the user can select advanced logical operators, such as Equals to, Does not equal to etc.

Defining filter in a column header

Parameter Field, available in the Customize Filter window, allows for filtering data in relation to another column.

Example
In filter definition window of Quantity column, which is available on the list of items, the user sets the operator to Equals to, checks the Field parameter and selects Available Quantity column from the drop-down list. Upon confirming changes, the list presents only those rows, in which the value of the column Quantity equals to the value of the column Available Quantity.

Defining filter in filter builder

Thanks to the filter builder, it is possible to execute advanced configuration of a filter applied on a list. It also allows for constructing a complex filter, or by a visual construction of criteria, in a simple graphic form, or in a textual form. In the filter builder, it is possible to make reference to all standard columns available on a given list, also to columns hidden by default.

To edit filter, it is necessary to click the right mouse button on a column header and select Edit Filter option Edition of a filter is possible also after selecting [Edit Filter] button, placed in the right bottom corner of a list.

Builder window opened from the level of a column header

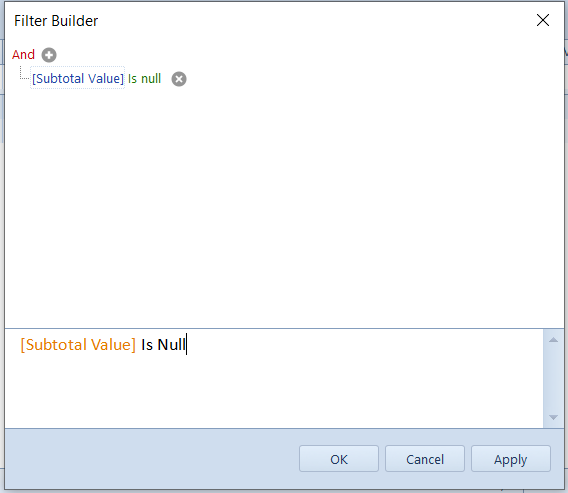
The filter builder window is composed of two tabs – Graphic and Textual – which allow for editing or creating filter in one of the two ways: The following description refers to the basic version, that is editing filter in the graphic version.

To create a filter, it is necessary to enter conditions in the following way:

  • Select parent logical operator (And, Or, And not, Or not)
  • Select column which is to be filtered

Selecting column in filter builder

Selecting logical operator in filter builder

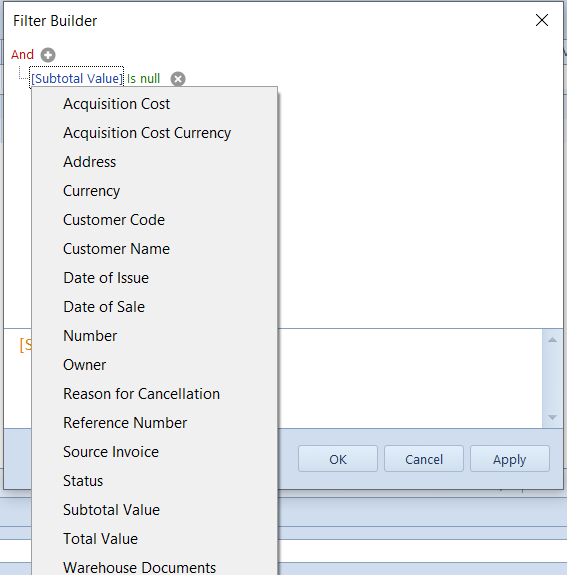
Values can be entered:

  • Manually
  • By selecting date from a calendar (in case of columns related to dates)
  • Indicating another column to which the selected column is to refer – to do so, it is necessary to select the symbol placed next to the field for entering values and select an appropriate item from the list of values (corresponding to columns available on the list)

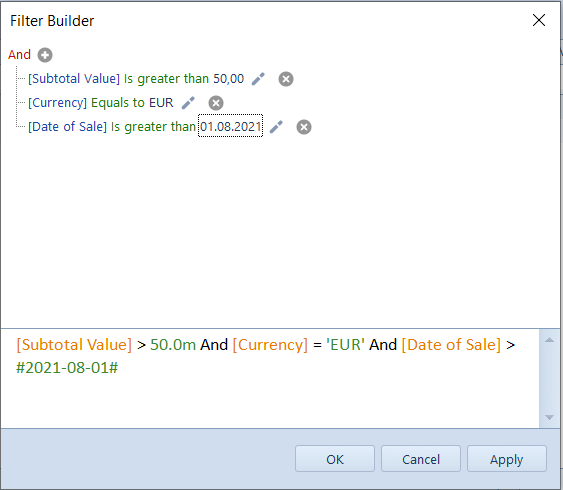
To build a filter composed of many conditions joined by one logical operator, it is necessary to add subsequent conditions by selecting the plus button.

Many filtering conditions

The filter builder allows for creating filtering criteria containing many logical operators joining simple filtering conditions. To build such criterion, firs, it is necessary to identify those condition groups, in which the groups is a set of simple conditions connected with the same logical operator.

To group conditions, it is necessary to select a field with logical operator and select Add Group option. Whereas, a group can be deleted by selecting option Remove Group, available after clicking on the operator of the group which is supposed to be deleted.

Example

On the list of items, only those items whose quantity and ordered quantity is equal to zero or quantity and reserved quantity is equal to zero. In this case, search criteria will be as follows:
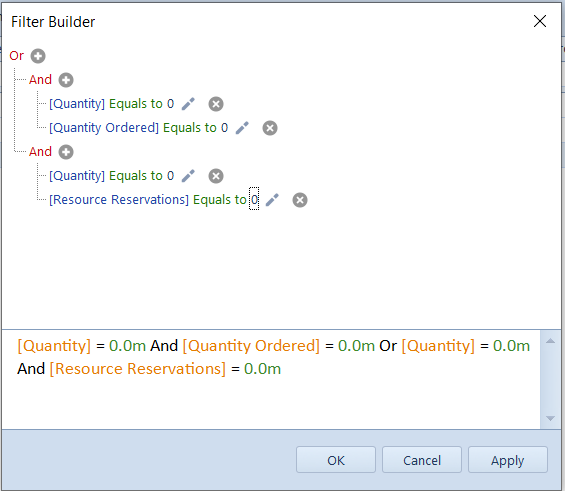
Filtering panel

Filtering panel is placed below lists of objects and is used for managing filters defined with the use of the locator, filter builder or filter defined in column headers.

Filtering panel


Search engine

Search engine is used for quick retrieval of key information present in the system. Contrarily to <<search panel>>, opened with the use of <Ctrl>+<F> keys, the search engine allows the user for searching whole system, not only a currently opened window.

The functioning of the search engine is based on two servers:

  • Search server – responsible for receiving and displaying  the results referring to a phrase being searched
  • Indexing server –  communicates  with  a  company  database,  browses  it,  and  creates  a  file  indexing  optimally  the   information so that answers to subsequent questions be displayed faster

Configuration of search engine in the system configuration tool

Before starting work with the search engine, it is necessary to configure it. To do so, open the system configuration tool (available in the system setup folder – fileNewAltumConfigurator.exe), check database configuration in Database Selection tab and open Search Engine tab.

Tab Search Engine in the system configuration tool window

In the Search Engine tab, the following sections and fields are available:

  • Configuration Database:
    • Server – name of SQL server where configuration database is stored
    • Integrated  security  –  if  checked,  the  system  enters,  itself,  the  username  and  password  integrated  with   Windows account
    • SQL Login
    • Password
    • Database – name of configuration database for which the search engine is to be configured
  • Certificate – allows for verifying the installation of the certificate for the search engine service
  • Search Server – allows for defining Http and TCP ports for the search server
  • Indexing Server  – allows for defining Http and TCP ports for the indexing server

After completing required fields and saving settings, it is necessary to check connection status. It should be Correct.  After that, open tab Services and start Search Engine service with the use of  button. Upon completing the above-mentioned steps, start Comarch ERP Standard system.

Started Search Engine service

Configuration of search engine in the system

After starting the system, open the menu System -> Configuration -< Search Engine, where it is possible to define parameters of servers responsible for global searching in the system.

[Alert]

To enable the search engine on ends, it is necessary to deactivate Windows firewall or add exceptions to the firewall for specific ports (on server and end).

Parameters of servers responsible for searching

Both for the search server and the indexing server, it is necessary to set reference to an appropate server by completing fields Host (name of the computer or IP address) and Port.

Indexing can be updated automatically through a schedule or manually by clicking on [Index Search] button. Detailed description of indexing configuration can be found in part <<Indexing configuration>>.

If a reference to the server is invalid or the service is not running, the following message is displayed:

Message informing the that there is no connection with the server

Indexing configuration

File  AEntities.xml, available in the system setup folder, is responsible for indexing frequency. Section <Jobs>, available in the file, contains the following parameters:

  • OptimizeIndex – optimizes the search indexes for the purpose of more efficient work of the tool
  • AltumFull – sets full indexing of data on company databases attached to a selected configuration database
  • AltumIncremental – indexing of incremented data, that is the data added since the recent indexing

Values of cycle types (Schedule Cycle Type) can be set to hourly, daily, weekly, and monthly.

[Alert]

If  there are several  company  databases  attached  to  a  configuration  database,  the   indexing  service  will  gain  data  contained  in  the  attached  company  databases.  Hence,  it  is   recommended to reduce the number of attached company databases for better operation of   the service.

Searching data

To start the search engine in the system, it is necessary to enter a given phrase in the search bar available on the ribbon and select the magnifying glass button or the <Enter> buutton on the keyboard.

Search bar

The system opens the searching engine window, composed of textual field in which it is possible to enter again the phrase to be searched and of search results field.

Search engine window

In the search engine window, on the right sight of the search bar placed on the ribbon and of the texutal field, there are two buttons:

– starts searching in company databases in terms of an entered phrase

–opens a window in which it is possible to define search area(s) with the use of one of the following options:

  • Search Entire System  – searching in all available areas
  • Ogranicz przeszukiwanie do wskazanych typów – wyszukiwanie w ramach obszarów wybranych przez użytkownika

Defining search areas Searching results limited to the Directories area


Sorting, grouping and summing data on lists

Grouping, sorting and summing up data on lists allows for incrementing their clarity in accordance wit user’s needs.

Sorting

By default, a list of items is sorted in alphabetical order according to a value displayed in the first column.  However, all displayed items can be arranged by value displayed in each of the columns presented in the list according to the user’s preferences, e.g. by code, name, etc. The list can be arranged by ascending or descending. In order to sort the list, click once on a column name with the left mouse button. A a little triangle presenting the items display direction appears. After clicking again on a column name, the direction will be rearranged.

List of warehouses sorted by ascending by the symbol with sorting icon marked

To sort data on a list, it is also possible to use Sort By Ascending and Sort By Descending options which are available in the context menu displayed upon clicking with the right mouse button on the header of a given columns.

To clear sorting, it is necessary to select option Clear Sorting (all columns), which is also available in the context menu displayed for the header of a column.

Sorting option in the context menu

Grouping

The system allows for grouping list by each column. Thanks to that, it is possible to easily distinguish data, in accordance with user’s preferences.

To group a list, it is necessary to indicate the header of the column by which the grouping is to be done and drag it to on the bar over the list, containing message Drag the column header here to group by that column.

[Example]

To group the list of internal orders by warehouses, it is necessary to drag the header of the list Warehouses over the bar placed above the list. For each warehouse the system will create a group of documents issued for that warehouse.

To group a list by columns, it is also possible to use Group By This Column option, which is available in the context menu displayed upon clicking with the right mouse button on the header of a given columns.

Context menu of a column header contains also Hide Grouping Panel option, thanks to which the user can hide the grouping panel displayed above the list.

Grouping option in the context menu

To clear grouping, it is necessary to select option Ungroup, which is also available in the context menu displayed for the header of a column, if the column was previously grouped. The user can also drag a given header out of the grouping bar and in such case the column will be hidden. To display it again, it is necessary to select it from the context menu with the use of Select Column option After ungouping, the standard layout of the list will be restored.

Other functions in the context menu available for a grouped list are the following:

  • Full expand – expands the list grouped by a given column
  • Full collapse – collapses the list grouped by a given column

Options for grouped list

Clicking on an arrow symbol placed next to an item related to the column according to which items were grouped, respectively expands or collapses the list of objects belonging to a given group.

Summing below a list

A user is provided with possibility to sum up all rows selected on a list by clicking on the icon . The summing  function is available for most lists in the system. The summed values are displayed in fields below the columns which present values.

Summary of values below list

t is possible to display the total of all selected rows or the value of a single row.

After grouping documents, a total value of the documents included in a given group is displayed on the list. Clicking on the summary button, instead, displays in the summary bar a total value of all documents on the list.

On lists where summary bar is not available, it is possible to add it by selecting option Show Summary Row, which is available in the context menu of the headers row.

Show Summary Row option

Moreover, for selected lists, the following options are provided in the context menu for the row with summar:

  • Total/Min/Max/Average – displays in the summary, depending on selected aggregation, the value of rows   according to setting of Aggregate Only Selected parameter. The option is available in selected lists with   columns displaying numerical values.
  • Count – displays number of rows depending on setting of parameter Aggregate Only Selected.  The option is   available in selected lists.
  • Aggregate Only Selected – this option is checked, by default and can be unchecked. The summary is updated   dynamically, depending on items marked on the list. To guarantee a better perform, it is recommended to leave the option checked.
  • None – deletes selected aggregation from below the list