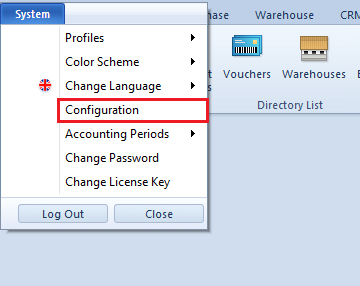
Option Configuration, available in the tab System, allows for determining of global parameters of Comarch ERP Standard.
Note
Permissions to the system configuration available from the level of System → Configuration are assigned with the use of the parameter Access to system configuration, which is available in the tab Other Permissions of the form of operator groups accessible from the level of Configuration → Company Structure → Operator Groups.
Access to the system configuration
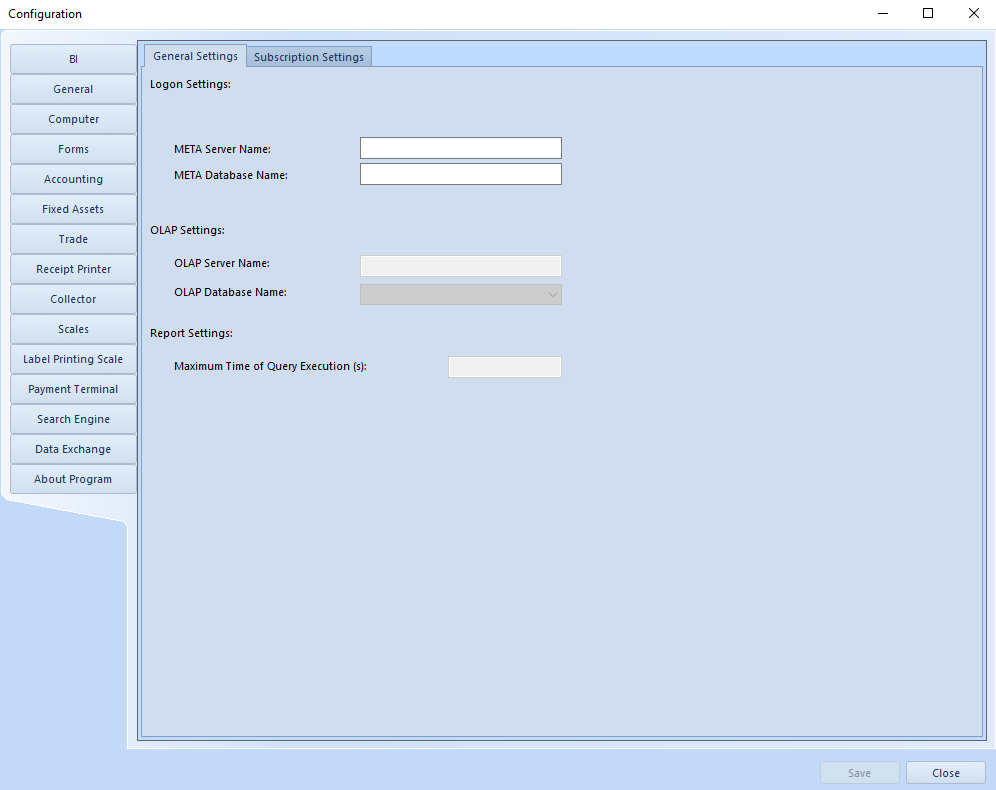
The system configuration window is divided into tabs dedicated to different areas of system parameterization.
Configuration window
The configuration window is composed of the tabs:
<<BI Module>>
<<General>>
<<Computer>>
<<Computer>>
<<Accounting>>
<<Fixed Assets>>
<<Trade>>
<<Receipt Printer>>
<<Collector>>
<<Scales>>
<<Label printing scale>>
<<Payment terminal>>
<<Search engine>>
<<Data exchange>>
About Program − information regarding Comarch ERP Standard system, e.g. program version, configuration and company database version, compilation number, date of production.
Collector
A data collector is a portable batch terminal equipped with a barcode reader. It is mainly dedicated to taking stock of a warehouse or a store Parameters presented in the tab Collector, available in the menu System → Configuration, allow for configuring a data collector with which Comarch ERP Standard must cooperate. Owing to that, data can be retrieved from the collector to an <<inventory sheet (IS)>> with the help of the button [Read from Collector]. The system cooperates with Zebez PDL20 and CipherLab 8300 data collectors.
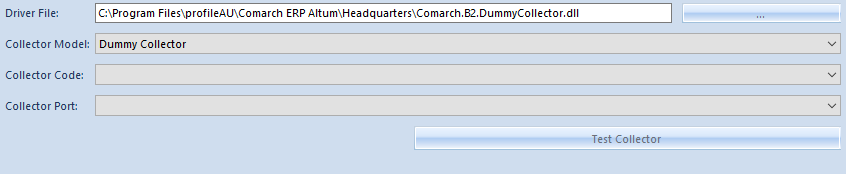
Tab Collector
Fields in this tab are the following:
Driver file – indicates a path to a file with .dll extension, responsible for connection with a data collector. In the system setup folder, there are the following files available by default:
B2.Collector.dll for Zebex PDL20 data collector
B2.Collector.CipherLab.dll for CipherLab 8300 data collector
Hint
It is possible to implement own assemblies supporting other data collectors.
Collector Model – in this field, it is necessary to indicate the name of collector model, depending on the selected driver file
Note
For test purposes, it is possible to use file Comarch.B2.DummyCollector.dll, which imitates a correct connection to a data collector.
Collector Code – enables the selection of a collector code from among the batch collectors defined in the system from the level of Configuration → General → External Devices
Collector Port – enables the selection of a port to which a collector is connected
Button [Test Collector] allows for testing the connection with the collector.
Scales
Scales or a scales–scanner is a device dedicated to weighing products of varying weight and hence the price. Parameters presented in the tab Scales, available in the menu System → Configuration, allow for configuring the scales with which Comarch ERP Standard must cooperate. Owing to that, it is possible to weigh a product (marked as weighed item) when adding it into a document.
The system cooperates with Taurus TP150/1 and Elzab Neptun 2 scales.
Hint
It is possible to implement own assemblies supporting other scales.
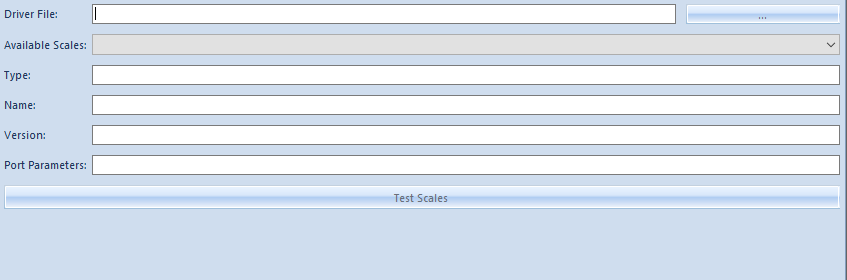
Tab Scales
Fields requiring completion to configure the scales are the following:
Driver file – indicates a path to a file with .dll extension, responsible for connection with the scales
Available Scales – in this field, a scale model is selected from the list of scale models available for driver file
Type, Name, Version – these fields are completed automatically after selecting a driver file
Port Parameters – in this field, it is necessary to specify the parameters of port to which scales is connected. After selecting a driver file, an information on how to specify the parameters will appear below. These parameters should be set in a similar way as they are set in Windows system from the level of Device Manager → Communication Port → Properties.
Here it is possible to test connection with the scales by clicking on the button [Test Scales]
Note
Because scales/scales-scanners are most often installed in a cash register counter and are used mainly at points of sale, they must be configured exactly on those workstations.
Label printing scale
A label printing scales is a device allowing for weighing a product and printing a label with the product’s barcode. A label printing scale which must cooperate with Comarch ERP Standard can be configured from the level of the tab Label Printing Scale, available in the menu System → Configuration.
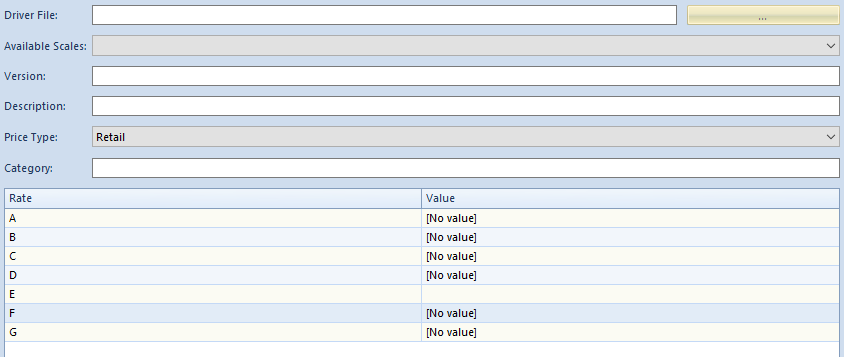
Tab Label printing scale
Fields requiring completion to configure the label printing scale are the following:
Driver file – indicates a path to the file B2.LabellingScale.dll, responsible for connection with the scale/
Hint
It is possible to implement own assemblies supporting other scales.
Available Scales – in this field, a scale model is selected from the list of scale models available for driver file. The label printing scale with which Comarch ERP Standard cooperates is Novitus Dibal L860DB.
Version, Description, Category– these fields are completed automatically after selecting a driver file
Price Type – field for selecting a price type, from among the price types available in the system, that will be applied when using a label printing scale
Below the scale configuration parameters, there is a table for mapping of VAT rates. It is used for determining the system rates and their corresponding values of scale rates.
Note
Because label printing scales are used for weighing products in a store individually by consumers and printing labels with product barcodes, there is no need to configure such scale to cooperate with Comarch ERP Standard system. Such scale does not need to be physically connected to the system. It is, however, necessary to provide weighed UPC codes, defined in the system for items, into the scale device. A UPC code, printed on a scale, can be read with a barcode reader into the system. The item will be recognized by the system based on its defined code and its price will be recalculated on the basis of item weight.
Payment terminal
A payment terminal is a mobile device used to accept payment cards when registering transactions at points of sale-service. A payment terminal which must cooperate with Comarch ERP Standard can be configured from the level of the tab Payment Terminal, available in the menu System → Configuration. Owing to that, transactions can be registered in the system with the use of charge card as payment form.
The payment terminals with which the system cooperates are the following:
Hypercom T4220 – Elavon (RS232)
Verifone VX 520 – Eservice (RS232)
Polcard (TCP/IP).
Tab Payment terminal
Fields requiring completion to configure the payment terminal are the following:
Driver file – indicates a path to a file with .dll extension, responsible for payment terminal control. In the system setup folder, there are the following files available by default:
B2.Terminal.Elavon.dll for Hypercom T4220
B2.Terminal.Eservice.dll for Verifone VX 520
Hint
It is possible to implement own assemblies supporting other payment terminals.
Connection Type – in this field, it is necessary to indicate a type of connection with payment terminal, that is Serial port orTCP/IP
In the case of the TCP/IP connection type, for the field:
IP address – it is necessary to insert IP address of the payment terminal
Whereas for the Serial port connection type, for the field:
Serial Port – it is necessary to insert COM port to which the payment terminal s connected.
Note
For test purposes, it is possible to use file Comarch.B2.DummyTerminal.dllwhich imitates a correct connection to a payment terminal.
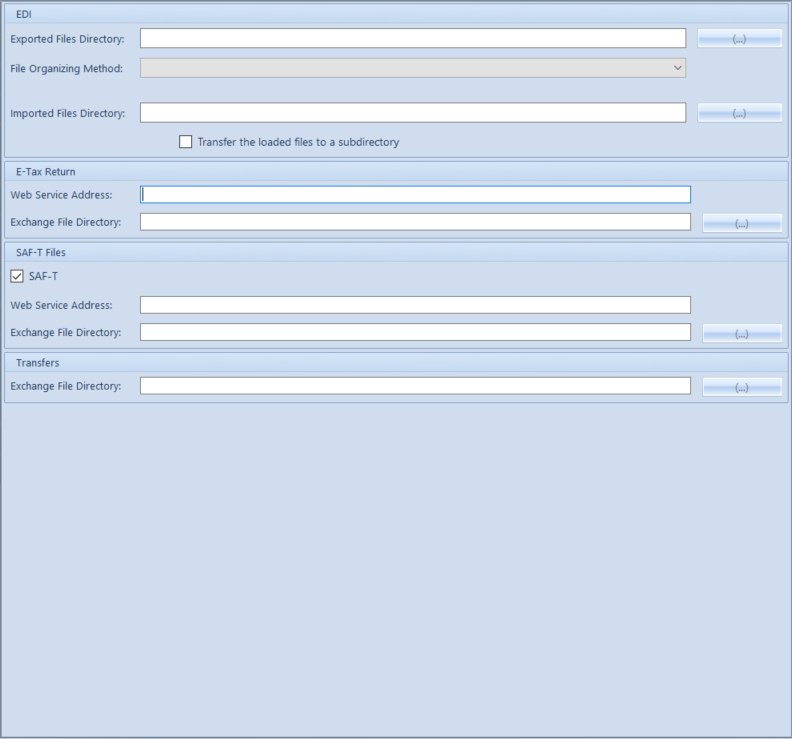
Data exchange
Tab Data Exchange, available in the menu System → Configuration, allows for specifying parameters necessary for sending information from Comarch ERP Standard to other platforms. Its area is divided into the following sections:
EDI
E-Tax return
SAF-T files
Transfers
POS
SENT
Data exchange tab
EDI
The section contains a mechanism for importing and exporting data to EDI platform.
Section EDI
The following fields are available in the section:
Exported Files Directory − in this field, it is necessary to select a location in which files exported from the system will be saved
File Organizing Method − in this field, it is necessary to select a structure of directories within which files will be saved. The following options are available:
DocumentType − organizes files by document types, by creating subfolders Orders and Invoices
CustomerCode − organizes files by customer/vendor codes, by creating subfolders dedicated to particular customers/vendors
DoicumentType_CustomerCode − creates subdirectories divided into document types and with the created name of directory assigned according to the key document type_customer code
DoicumentType_CustomerCode − creates subdirectories divided into customer code and with the created name of directory assigned according to the key customer code_document type
DocumentType\CustomerCode − creates subdirectories in a two-level structure, where parent directories group files by document types and then subdirectories divide grouped files by customer codes
CustomerCode\DocumentType − creates subdirectories in a two-level structure, where parent directories group files by customer codes and then subdirectories divide grouped files by document types
Imported Files Directory − in this field, it is necessary to indicate location of the folder of files imported to the system
Transger the loaded files to a subdirectory − if this option is checked, a subfolder Done is created in a given path to which EDI files imported by the user are automatically transferred.
Note
The above-mentioned options are available only for operators owing a license to use EDI platform. Otherwise, the section is not visible.
E-Tax Return
Section E-Tax Return
The following fields are available in the section:
Web Service Address − address to which e-tax returns are sent, the address set by default is https://bramka.e-deklaracje.mf.gov.pl/
Exchange File Directory – field allowing for specyifying a directory in which exported e-tax returns will be saved
SAF-T Files
Section SAF-T Files
Transfers
Section Transfers
The section Transfers enables the user to select an exchange file directory for the documents Statement of Remittance Orders and Statement of Payment Orders. In the field Exchange Data Directory, the user can choose a directory in which relevant files will be saved. Thanks to that, it is not necessary to enter a specific path for file export on each SRO or SPO document form.
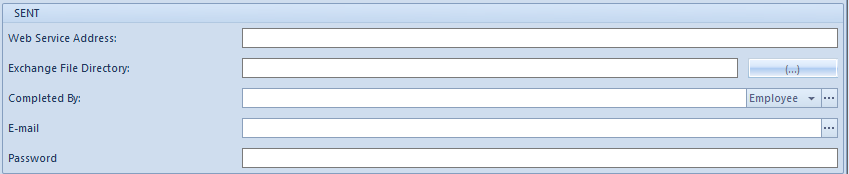
Sent
The SENT section allows the user to configure Web Service for the needs of registering .xml carriage notifications performed via Electronic Services Portal of the Customs Service (PUESC). Such notifications are compliant with technical specifications shared on the portal.
SENT section
Note
The above-mentioned options are available only after selecting the parameter Monitor SENT transport on the company form. Otherwise, the SENT section will not be visible.
Computer
General informartion
Tab Computer, available in the menu System → Configuration, allows for configuring parameters related to particular functionalities of the system and parameters enabling cooperation of the system with other applications.
The parameters are divided into the following sections:
General Parameters
Printouts
Attachments
Export to Spreadsheet
Password Policy
General Parameters
Section General Parameters
Section General Parameters contains the following parameters:
Cooperate with Comarch ERP Altum HR – allows the exchange of basic data of employees between Comarch ERP Standard and Comarch ERP Altum HR.
Note
The collaboration with the system Comarch ERP Altum HR is available only in Polish version of database.
Cooperate with WMS − this parameter is not available for editing and is checked automatically upon installing application Comarch WMS.
Automatically attach newly added center to objects available in the parent center − parameter checked by default
Data Formatting When Copied To Clipboard − Available options:
Keep source formatting − parameter checked by default
Keep text only
Timeout − Available options:
Global − default timeout value after which an operation is aborted, valid for all users. By default, the parameter is checked with value 60 seconds. This value can be changed only by a user belonging to the group
Operator’s − transaction time timeout for a logged-in user.
Message Timestamp − possibility of determining how long information messages will be displayed in Comarch ERP Standard system. Available options:
Global − allows for specifying default message timestamp for all operators. By default, the parameter is checked with value 10 seconds. Default timeout value for displaying messages can be changed only by a user that belongs to B2_admin
Operator’s – allows for specifying default message timestamp for a logged-in operator
Autofilter Delay Time − allows to specify a period of time since the modification of a filter field after which the system will start to search for new results. Available options:
Global − allows for specifying autofilter delay time for all operators. By default, the parameter is checked with value 750 ms. This value can be changed only by a user belonging to the group
Operator’s − allows for specifying autofilter delay time for the logged-in user.
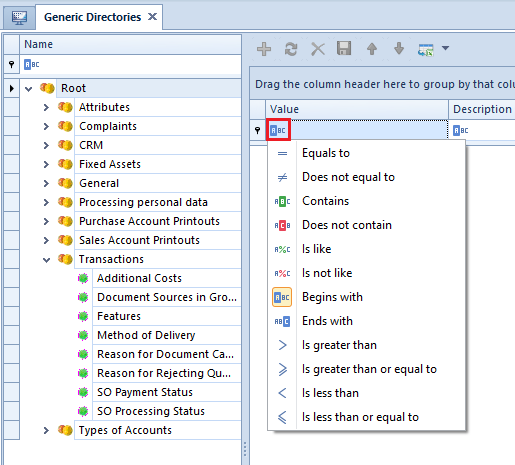
Autofilter Default Setting − parameter responsible for the filtering condition for all columns and lists. Available options:
Begins with – this parameter is checked by default. Lists in the system present search results beginning with a given expression entered by the user.
Contains – lists in the system present search results containing an entered expression
Additionally, if the option Allow modification is checked, it is possible to change the filtering condition for all columns and lists in the autofilter control. This option is available after selecting the autofilter control.
Example of a change of the autofilter on the list of generic directories
[Alert]If the Allow modification parameter is deselected, the icon of the filtering condition for columns and lists will not be displayed. [/alert]
Incremental Search Default Mode − parameter responsible for the condition of searching in columns of all lists. Available options:
Begins with − this parameter is checked by default. Lists in the system present search results beginning with a given expression entered by the user.
Contains – lists in the system present search results containing an entered expression
Example of incremental searching on the list of sales invoices
<<Column Autofit>>
Printouts
Section Printouts
In the group Printouts, the following parameters are available:
Default Editor for Crystal Reports − allows for selecting the program allowing for edition of Crystal Reports. The program is selected by clicking on the button located next to this field and indicating a file with .exe extension. That the file will be running the editor of Crystal reports.
Register printout execution in the system − upon checking this option, each time a printout is made, this operation will be logged in the system and will be available on the list of printouts.
Attachments
Section Attachments
The system makes it possible to store attachments in the database or in an external folder. In section Attachments, there are the following parameters for attachment configuration:
Attachment Folder − target location of attachments saved on a computer.
Limit the size for attachments in a database to: – possibility of specifying a maximum size in MB, GB or TB
Image thumbnail size on lists (in pixels) – enables defining the size of thumbnails for items on the list of items and document item lists
Export to Spreadsheet
Detailed description of fields presented in the section can be found in article <<Exporting data to a spreadsheet>>.
Password Policy
Section Password Policy
The section Password Policy enables managing passwords of non-domain users whose account is not integrated with Windows. Particular settings from this section are transferred to operator forms; in the case of administrative operator db owner, only the Enforce a strong password for non-domain user parameter is transferred.
Note
The parameters are deselected by default for databases which have been converted from previous versions of the system, while for newly created databases they are selected.
Note
Parameters Enforce recurring password change for non-domain user and Enforce a strong password for non-domain user are not taken into account for operators with the parameter Password policy specified in system configuration deselected – this parameter is available on the operator form. In this case, parameters must be changed directly on the form of a given operator; the user is informed about this upon an attempt to save changes made in configuration.
Forms
In tab Forms, available in the menuSystem → Configuration, it is possible to import and export changes made by operators in the layouts of forms (with the use of <<Interface Editor>>). The changes (for operator groups) are exported to a file which later can be imported on another workstation so that the settings of form layouts for workstations are the same.
Tab Forms
Receipt printer
The Comarch ERP Standard system cooperates with the following fiscal printer models:
Elzab Mera
Elzab Omega
Emar Printo 57T
Epson TM-T801 FV
Innova Market
Novitus
Posnet Thermal
Parameters presented in the tab Scales, available in the menu System → Configuration, allow for configuring the receipt printer with which Comarch ERP Standard must cooperate. Owing to that, documents can be printed in the system on a receipt printer.
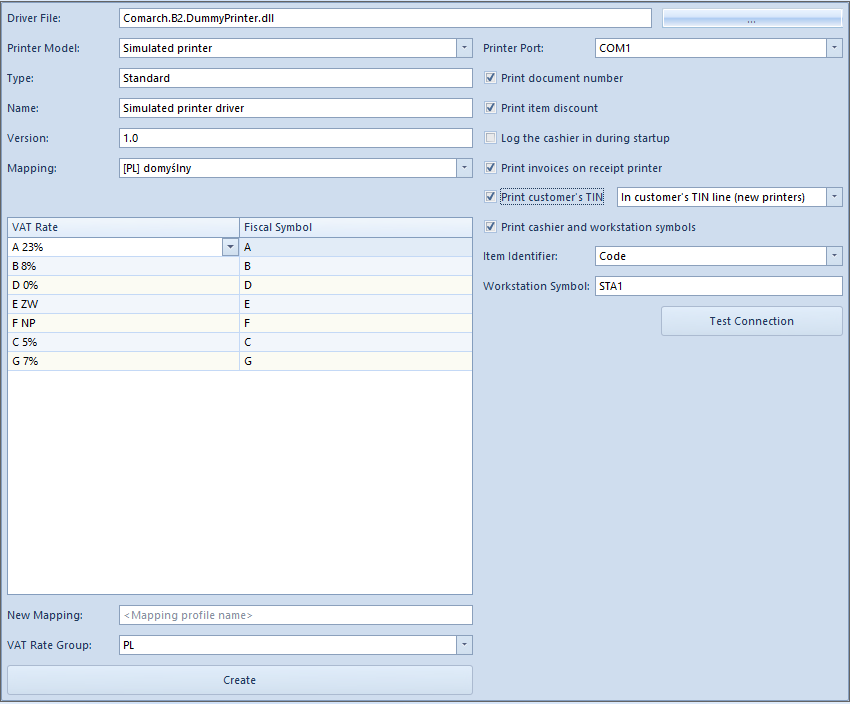
Tab Receipt printer
The following fields of the tab are mandatory:
Driver File – Comarch.B2.Printer2.dll containing drivers for receipt printers
Hint
For test purposes, it is possible to use file Comarch.B2.DummyPrinter.dll which imitates a correct connection to a receipt printer.
Printer Model – in this field, a printer model is selected from the list of printer models available for driver file
Printer Port – name of the port a printer is connected to
Type, Name, Version – in this field, general information about the specification of a driver supporting the available printer models is included
Mapping – this field contains a list of VAT rate mappings available in the system. The values of printer’s VAT rates corresponding to given system VAT rates must be set for the selected mapping in the table below. It is possible to create many VAT rate mappings for printers. To do so, in the fields New Mapping and VAT Rate Group below the table, it is necessary to specify a mapping name and to select a group for which VAT rates will be mapped (the VAT rate group that is set for the parent company is suggested by default). Upon clicking on the button [Create], a new value will be added to the mapping list and an empty field for specifying symbols will be added in the table.
Moreover, the user has a possibility to specify the parameters such as:
Print document number – this parameter enables printing system number of a receipt/invoice on a receipt printer
Print item discount – this parameter enables printing the amount of discount assigned to a given item of a receipt
Log the cashier in during startup – this parameter enables printing information about workstation number and operator’s number, when starting a printer
Print invoices on receipt printer – this parameter enables printing invoices on a receipt printer, if the receipt printer supports printing of invoices. Additionally, in the menu System → Configuration, in tab Trade, function Print invoices on a receipt printer must be checked. If the receipt printer does not support printing of invoices, a receipt will be printed instead.
Print customer’s TIN – this parameter enables printing the TIN number of a customer selected in a receipt.
In customer’s TIN line (new printers) – provided that a given printer model supports such functionality
In cashier line (old printers) – if a printer does not handle printing of TIN number.
The tin number is retrieved from customer’s form – customer indicated in a document and in the case of Undefined customer, directly from the printed document, from TIN field presented in section Customer in Customers tab.
Print cashier and workstation symbols – cashier symbol is retrieved from Receipt Printer Sumbol field, which is available on the form of the logged-on operator. After selecting the option In cashier line (old printers) for the parameter Print customer’s TIN, the parameter is checked and it is not possible to uncheck it.
Item Identifier – depending on a selected parameter value: Name or Code and if the handling of print names is deactivated or if an item has no print name, the name or code of an item will be sent to a receipt printer upon printing documents on that receipt printer.
Workstation Symbol – this parameter enables printing on a document a symbol entered in this field (specifying the workstation on which sales with printing on receipt printer is processed)
Button [Test Connection] allows for testing connection with a receipt printer.