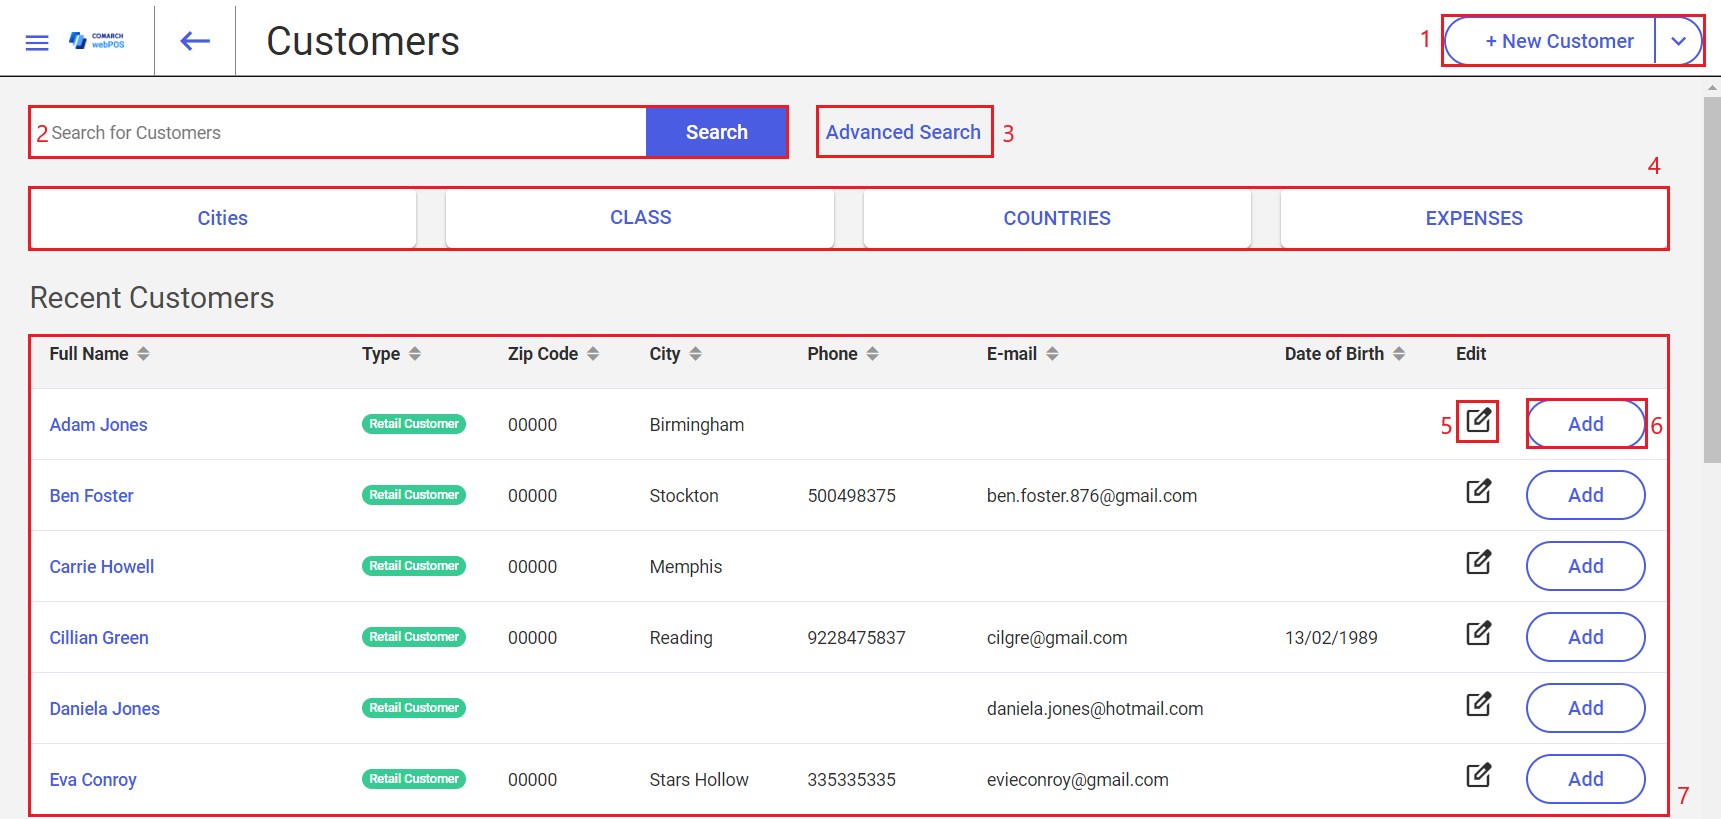
In order to open the list of customers, select the [Customers] tile in the main panel of the application or the [Customers] button in the side menu.


The customer list contains the following fields, buttons, and areas (particular points correspond to areas marked in the screenshot above):
1. [+ New Customer] – allows you to add a new retail customer or business entity. After you select the button and choose the customer type, the application opens the New Customer window.
2. Search for Customers field – allows you to search for customers or narrow the list based on the default columns. Pressing the [Search] button starts the search.
3. [Advanced Search] button – allows you to enter non-standard search criteria, such as a customer’s date of birth, description, or tax identification number (TIN)
4. Below the text filter, you can find other available filters, that allow you to search for customer based on their groups
5. [Edit] button – allows you to modify customer data
6. [Add] button – adds a customer to a new receipt document
7. Customer list, consisting of the following columns:
- Full Name
- Type (retail customer or business entity)
- Zip Code
- City
- Phone
- Date of Birth
- [Edit]– you can use the button in this column to edit the data of a selected customer
- [Add] – you can use the button in this column to add a selected customer to a new receipt document
Selecting a customer’s name in the Full Name column enters the preview of this customer’s data.
