Messenger
In version 2018.2.1 of the system, a tool allowing for communication between operators was introduced. In addition to the possibility of sending simple text messages, the functionality of sending links to system objects has been made available.
The messenger is available for a given operator after selecting the new parameter Use messenger on his/her card (tab [Parameters] [Permissions]). The parameter is available for all operators related to employees.
An additional configuration of the messenger is the possibility to select the server for communication (System/ Configuration/ General/ Parameters2):
- SQL server or
- any other server, for which the address and incoming and outgoing ports must be entered.

An operator for whom the use of instant messaging was “enabled” will have an instant messaging window available in each system module on the right-hand side, collapsed by default into two tabs: [Recent] and [Contacts]. After selecting one of them, a full window will be shown with the setting on the selected tab.
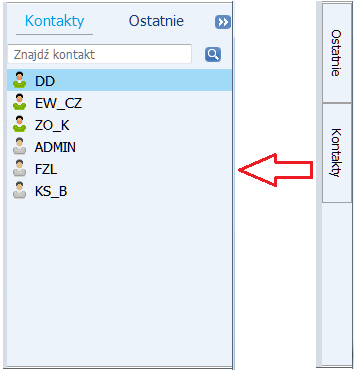
In the [Contacts] tab there are displayed acronyms of all the operators who have the use the messenger enabled. In green – operators currently logged into the base, in grey – those not logged in. At the top of the list there is a search engine, automatically narrowing the list of records to the string entered.
After selecting a person from the list with a double-click, the conversation window opens, where at the top of the window there are buttons:
![]() – the acronym of the person with whom one exchanges messages with the colour indication of their availability
– the acronym of the person with whom one exchanges messages with the colour indication of their availability
![]() Add participants – allows increasing the number of persons with whom one exchanges messages by selecting multiple records from the displayed list.
Add participants – allows increasing the number of persons with whom one exchanges messages by selecting multiple records from the displayed list.
![]() – if more operators are involved in the conversation, then the number of operators is displayed instead of the person’s acronym.
– if more operators are involved in the conversation, then the number of operators is displayed instead of the person’s acronym.
After selecting the button with the number of participants, they are displayed as in the example:

![]() – allows to set the view of historical messages, with the possibility of indicating a specific number of recent messages or the date backwards from which they should be displayed.
– allows to set the view of historical messages, with the possibility of indicating a specific number of recent messages or the date backwards from which they should be displayed.
![]() – pinning (leaving on the screen) the conversation window
– pinning (leaving on the screen) the conversation window
![]() – collapsing (hiding) the conversation window.
– collapsing (hiding) the conversation window.
At the bottom of the conversation window, there is a space for typing the message with the ![]() Send message button.
Send message button.
To copy the content of the sent message highlight the given fragment of the conversation and select from the context menu the command Copy message. Pasting of copied text is possible both from the context menu and using the shortcut <CTRL>+<V>.
Besides text messages, it is also possible to send system objects, for example a product/contractor card or a specific document. To do so, drag the respective object from the system list to the bottom of the conversation window into the text box.
By default, the conversation window is collapsed when working in the program. If the user needs to leave it open (for example, when adding an attachment), then use the pin.
Such attachment will be automatically sent to the sender, which in the conversation window will be presented in blue (like a link to the object). The recipient of such a message will be able to open the sent object for preview in any window of the system, regardless of the module.
The [Recent] tab shows the entire list of conversations in which the logged-in operator participated. The list can be searched by typing in the search string in the search line, and then selecting the magnifying glass button. Then, the full list of conversations containing the searched phrase will be displayed. In the list, the specific fragment of the conversation will be immediately displayed.
A flashing icon ![]() next to the name of this tab indicates the arrival of a new message.
next to the name of this tab indicates the arrival of a new message.
If a given operator loses rights to use messenger (the Use messenger parameter is automatically unchecked), then he/she will no longer be visible in the contact list for other operators. The user will also be blocked from sending new messages to that operator by deactivating the Send message button in the window of historical conversations with this operator. This also applies to those conversations held with multiple persons, one of whom has been excluded from the list of messenger users.
Virtual assistant
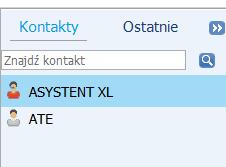
Virtual Assistant is a new feature of version 2019.0 available from the messenger window as a saved contact. Assistant XL will execute simple commands that can be executed in the system, such as issuing an invoice, displaying a document or adding a new contractor. When the messenger service for a particular operator is activated, there is also a shortcut to the Assistant XL contact. In the messenger, the Assistant XL contact is always displayed as the first one. Commands can be given from the keyboard or by voice after installing the Microsoft voice recognition libraries (the request to install the libraries will appear after clicking the microphone button in the chat window).
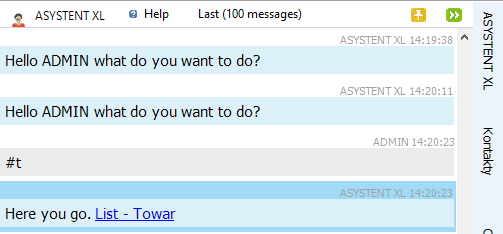
After opening the conversation window with the Assistant XL contact, an automatic welcome message will be displayed: “Hello [acronym of the logged-in operator], Tell me what you want to do?”. In the upper part of the window there is a Help button, where the user can find sample commands that can be executed by the automated system. After sending a valid query, the operation assigned to the phrase, for example opening the product card, will be executed, and the conversation window will display a message about the command execution. If the command (written or spoken) is not available in the assistant’s command resources, then one of several available automatic responses will be sent.
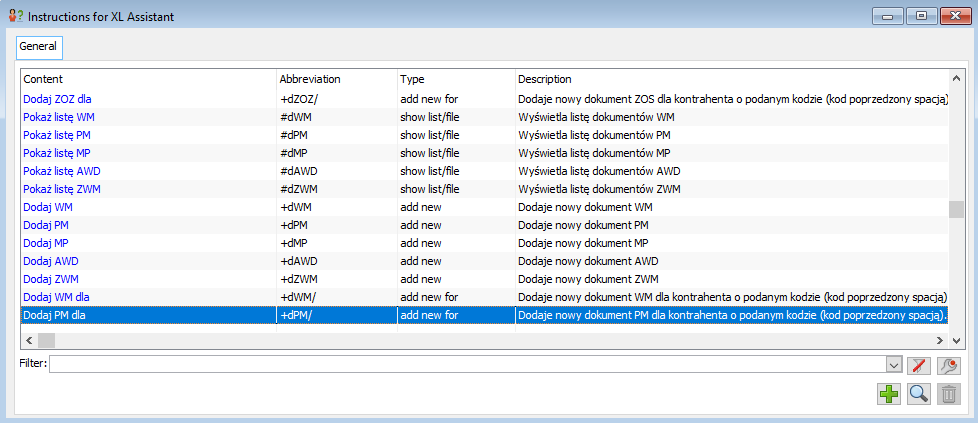
The ability to define one’s own commands for the Virtual Assistant has also been added. In the Administrator module, there is a button for Assistant XL in the Tools tab. The Commands option opens a new window created for editing and adding new commands for Assistant XL. In the list, defined commands are marked in blue – for these items the user will not be able to change the basic content of the question. The magnifying glass button allows viewing and editing the defined commands. The plus button opens a new window for adding a command. Additionally, the user will be able to add own commands to the dictionary, which will consist of performing a specific SQL function.
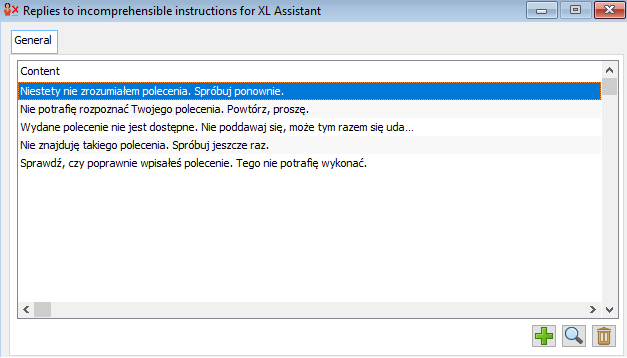
After selecting the option Answers from the Assistant XL button, a window will open with ready-made answers, which are displayed in the messenger in case of entering an incorrect command. In the opened window by means of plus button the user can add new answers.
