List of contractors – Functions common to the window: Contractors
The list of contractors is displayed in several modes, which correspond to the tabs displayed in this window.
There are buttons in the window active on all tabs:
![]() [Contractor’s equipment] – the button opens a window with a list of equipment assigned to the contractor’s equipment. A detailed description of the window can be found in the module documentation: Service.
[Contractor’s equipment] – the button opens a window with a list of equipment assigned to the contractor’s equipment. A detailed description of the window can be found in the module documentation: Service.
![]() [Convert loyalty points to budgets] – this button opens the [Calculate discount budget] window, where it is possible to convert loyalty points to budgets. The window contains the following parameters:
[Convert loyalty points to budgets] – this button opens the [Calculate discount budget] window, where it is possible to convert loyalty points to budgets. The window contains the following parameters:
- Discount budget:
- Create new budget – a new budget will be created for the indicated contractors, on which the suggested name LOYALTY POINTS will be set with another number not yet existing in the given database.
- Select budget – option to select an existing discount budget of a contractor
- Increase the value of the budget allocated to the contractor (active only when Select budget option is selected)
- if selected, this parameter indicates that the calculated amount will be added to the already existing amount on the budget
- parameter not selected will not allow recalculating points for a contractor already existing in the budget.
- Points conversion rate:
- The indicated number of accumulated points will be converted into the indicated value
- The method of calculating the value: threshold (after exceeding the number of points set in the calculator, a specific value or multiple thereof is calculated) or proportionally (the value is calculated down to the grosz for each accumulated point).
- Mark recalculated points as received – with this parameter selected, the number of recalculated points will be marked as Received (CRM/Loyalty programme tab) and will automatically reduce the number of points accumulated by the customer.
![]() [Attach contractors to CRM campaign] – enables adding the contractors selected in the list to the selected CRM campaign (specifically to the selected stage of the campaign). Pressing the button opens the window: A list of campaigns to choose from. In the window, indicate the campaign and then the stage to which the contractors are to be assigned. Once the chosen stage has been selected, click:
[Attach contractors to CRM campaign] – enables adding the contractors selected in the list to the selected CRM campaign (specifically to the selected stage of the campaign). Pressing the button opens the window: A list of campaigns to choose from. In the window, indicate the campaign and then the stage to which the contractors are to be assigned. Once the chosen stage has been selected, click: ![]() [Select]. Contractors will be assigned to the stage. Details of the campaign and its stages are available in the module: CRM.
[Select]. Contractors will be assigned to the stage. Details of the campaign and its stages are available in the module: CRM.
![]() [Change] – opens a window with the data of the highlighted contractor or a window: Contractor’s template for the group, depending on which panel the cursor is set in.
[Change] – opens a window with the data of the highlighted contractor or a window: Contractor’s template for the group, depending on which panel the cursor is set in.
Contractors, tab: Groups
In this mode, the window is divided into two panels. The left one displays a list of contractor groups with a multi-level structure, shown as a “tree”. The right one displays a list of contractors belonging to the group indicated in the left panel.
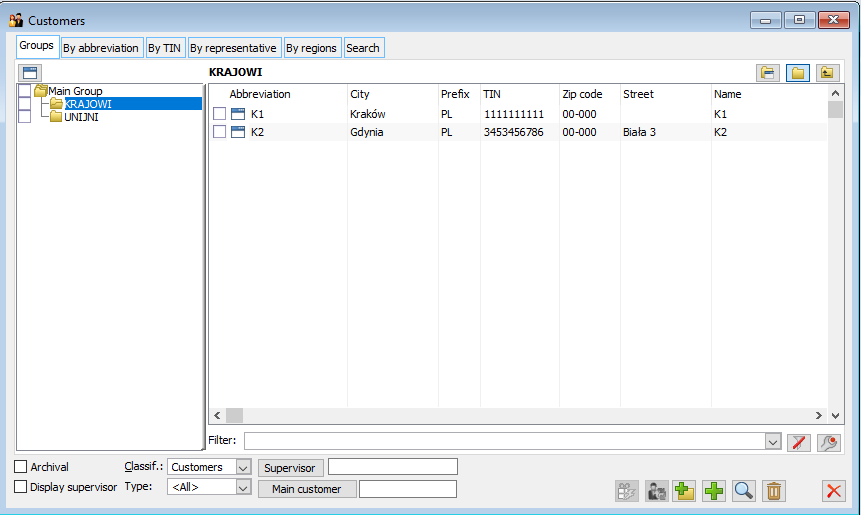
The following buttons are available:
![]() [Show also items] – switch. If pressed, the left panel additionally displays, apart from groups, the contractors belonging to each group.
[Show also items] – switch. If pressed, the left panel additionally displays, apart from groups, the contractors belonging to each group.
![]() [Show items from subgroups] – switch. If pressed, contractors in subgroups are displayed in the right panel in addition to those in the group.
[Show items from subgroups] – switch. If pressed, contractors in subgroups are displayed in the right panel in addition to those in the group.
![]() [Show also groups] – switch. If pressed, the right panel displays groups belonging to the one indicated in the left panel, in addition to the contractors.
[Show also groups] – switch. If pressed, the right panel displays groups belonging to the one indicated in the left panel, in addition to the contractors.
![]() [One level up] – pressing will display a list of contractors belonging to a group that is on a higher level of the group structure. Button inactive if the main group is selected.
[One level up] – pressing will display a list of contractors belonging to a group that is on a higher level of the group structure. Button inactive if the main group is selected.
![]() [Add group] – adds a group of contractors belonging to the one indicated in the left panel. Pressing will display the contractor’s template window, in which the name of the created group should be entered. Each group has its own contractor’s template, i.e. a set of default data assigned to a newly created contractor belonging to this group. The template is discussed in detail in the next section.
[Add group] – adds a group of contractors belonging to the one indicated in the left panel. Pressing will display the contractor’s template window, in which the name of the created group should be entered. Each group has its own contractor’s template, i.e. a set of default data assigned to a newly created contractor belonging to this group. The template is discussed in detail in the next section.
![]() [Add] – opens a window with a new contractor’s card.
[Add] – opens a window with a new contractor’s card.
![]() [Delete] – deletes the contractor’s card (after confirmation). A contractor can be deleted if no transactions have been registered with it.
[Delete] – deletes the contractor’s card (after confirmation). A contractor can be deleted if no transactions have been registered with it.
By default, the list does not display contractors marked as: Archival. They can be added to the list by checking the option: Archival.
On the list of contractors in the filter area, the Main Contractor button has been added, along with a control displaying the acronym of the selected contractor. This button calls up a list of contractors with the possibility of selecting one record. After selecting it, the list narrows down to those contractors that are assigned to the selected main contractor
There is a placeholder on the list of contractors, i.e. the cursor is placed using a string of characters entered from the keyboard. The entered string is displayed below the description of the column on which it operates. In Group mode, the placeholder operates on a column: Acronym. Right-clicking on a column header opens an auxiliary window, from which you can select “_” to replace any character, “%” to replace any string or space character that cannot be typed.
The placeholder’s operation depends on the parameter setting: Use a limiting placeholder, set individually for each operator. The standard operation is to position the cursor on the first line starting with the string entered. The limiting placeholder acts as a filter, i.e. only those lines that start with the specified string are displayed.
Contractors, tabs: By Acronym/By NIP
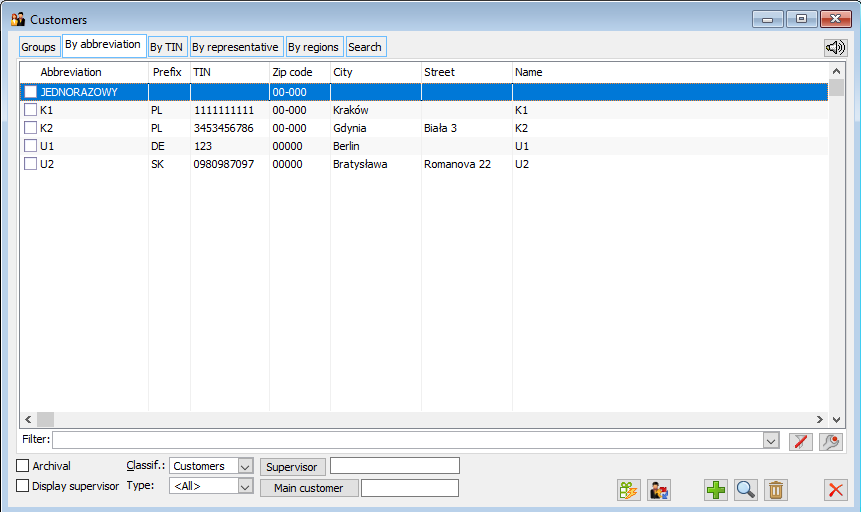
In these modes, the groups list is not displayed, and group functions are not available. The two modes differ only in the order in which the contractors are displayed and the column on which the placeholder operates.
On the By NIP tab, there is a placeholder for the NIP prefix and for the NIP number. The placeholder for the NIP prefix will be inserted if, on the opened tab, letters are entered (from the keyboard) first. Entering digits will place the placeholder on the NIP column. A placeholder operating on a NIP number ignores separators, so entering the digits alone is sufficient.
Contractors, tab: By acquirer
In this mode, the contractors to which the selected acquirer has been assigned are displayed. The acquirer can be selected from the list of contractors opened with the button: ![]() or from the list of employees, opened by selecting the appropriate option from the drop-down menu by the arrow next to the button.
or from the list of employees, opened by selecting the appropriate option from the drop-down menu by the arrow next to the button.
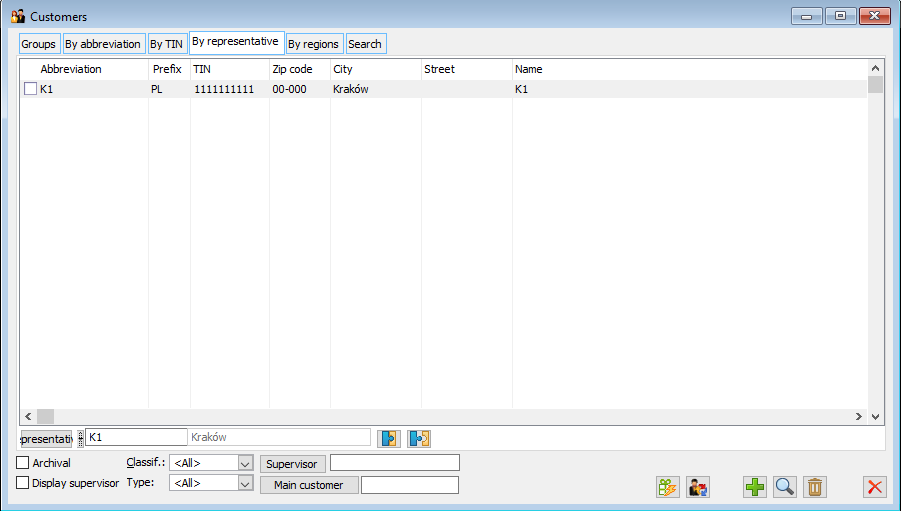
Additional buttons are available in this mode:
![]() [Add to supported] – opens the list of contractors on the Find tab (description below). Selecting a contractor from the list will result in assigning a selected acquirer to it (change in the contractor’s card) and attaching it to the displayed list.
[Add to supported] – opens the list of contractors on the Find tab (description below). Selecting a contractor from the list will result in assigning a selected acquirer to it (change in the contractor’s card) and attaching it to the displayed list.
![]() [Delete from supported] – deletes the assignment of the acquirer to the contractor (change in the contractor’s card) and removes the contractor from the displayed list.
[Delete from supported] – deletes the assignment of the acquirer to the contractor (change in the contractor’s card) and removes the contractor from the displayed list.
Contractors, tab: By region
On the tab of the contractors list by region, it will be possible to define a multi-level structure of trading regions. The left panel will present a tree of regions defined in the system, while the right panel will present a list of the contractors belonging to the region indicated in the left panel.
After selecting the “Display supervisor” parameter, an additional column will appear on the list of contractors: Supervisor. In the window, it will also be possible to filter those contractors who have a supervisor assigned.
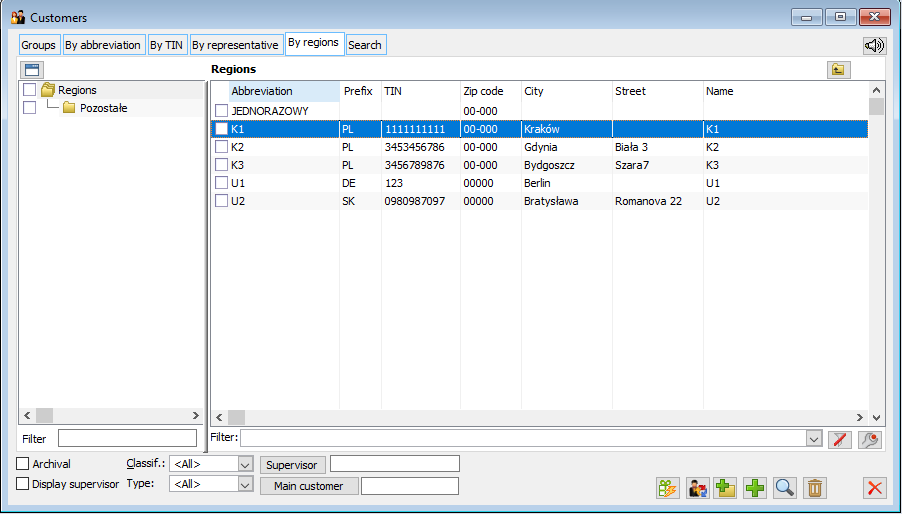
For defined regions, the following options are available in the context menu:
- Add region,
- Change region,
- Remove region,
- Cut
- Paste
- Expand all,
- Collapse all,
- Mark/Unmark Space,
- Select all with ctrl+A,
- Reverse all with ctrl+R.
- For contractors opened from the Contractors list, Regions tab, the following options are available in the context menu:
- Select,
- Add,
- Change,
- Delete,
- Conversation,
- History,
- Check NIP with VIES,
- Assign to region,
- Detach from region,
- Set default region,
- Assign a temporary supervisor,
- Managing branch contractors.
Use the button ![]() [Add region] to define new regions.
[Add region] to define new regions.
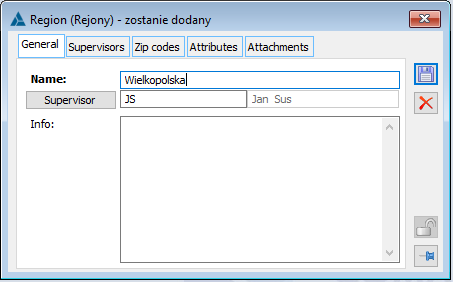
In the Region window, on the General tab, the name of the region must be entered, and a supervisor can be assigned from the employee list.
In the Region window on the Supervisors tab, it is possible to assign several supervisors to a given region from the employee list. There are three types of Supervisor:
Principal – there can be only one such supervisor assigned to a region, they cannot be separated from the region, they are marked in bold on the Supervisor tab.
Temporary – there can be several temporary supervisors assigned to a region, and you can specify the period through which they can act as a region supervisor.
Non-temporary – there can be several non-temporary supervisors assigned to the region; this is a supervisor who does not have the principal and temporary parameters checked.
There are the following buttons on the Supervisors tab:
![]() [Assign supervisor] – this option allows assigning a Supervisor to the region from the list of employees.
[Assign supervisor] – this option allows assigning a Supervisor to the region from the list of employees.
![]() [Preview] – this option allows editing the Supervisor assigned to the region.
[Preview] – this option allows editing the Supervisor assigned to the region.
![]() [Detach supervisor] – this option allows detaching the Supervisor from the region.
[Detach supervisor] – this option allows detaching the Supervisor from the region.
Jan Kowalski has been assigned to the Greater Poland region without specifying the dates – he cannot be re-assigned to the list of supervisors for the Greater Poland region – it is possible to edit the employee’s connection to the region and to check the parameter: Temporary and set the period – after this operation it will be possible to add them again to the list of supervisors – he can be assigned to another region’s card 2) Jan Kowalski has been assigned to the Greater Poland region for the period from 01/10/2011 through 31/10/2011 – he can be assigned to the list of supervisors as a supervisor in any period – he can be assigned as a non-temporary supervisor – and from then on, Jan Kowalski cannot be added as a temporary supervisor – it is possible to edit the supervisor assignment sheet and set it as non-temporary – he can be assigned to another region’s card
In the Region window, the Postal codes tab displays a list of postal codes assigned to the region. There are the following buttons on the tab:
![]() [Assign] – this option allows assigning a postal code to a region.
[Assign] – this option allows assigning a postal code to a region.
![]() [Detach] – this option allows detaching the postal code from the region. The button is inactive when the postal code is the default for the region.
[Detach] – this option allows detaching the postal code from the region. The button is inactive when the postal code is the default for the region.
In the Region window, on the Attributes tab, you can add an attribute, and on the Attachments tab, you can add any attachment to this window.
Contractors, tab: Find
Tab: Find/General
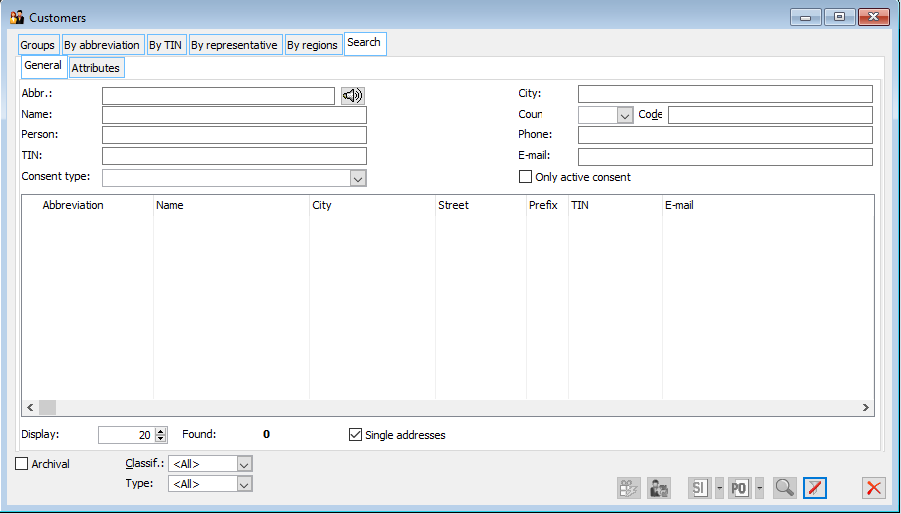
Many list filtering parameters can be specified on this tab. The NIP can be entered without separators, these are ignored. The name or surname of the person representing the contractor can be used as a filtering parameter.
Searching by phone number works similarly. The phone can be entered without or with separators such as space, hyphen, and round brackets.
It is also possible to search for records by type and validity of consent. The records which are assigned active consents of the indicated type on a given day are then found.
On the tab, the User can apply a mandatory filter for contractors. The filter narrows the list of found contractors according to the criteria specified in the mandatory filter.
It is possible to select the country prefix as the criterion or the option “Any”, in which case all countries will be taken into account.
The search is by address.
There are two contractor’s addresses – one is “Warsaw” and the other is “Wrocław”, with the first being the current address. If in the field: City, the word is entered: Wrocław, the contractor will be found
.
The system searches for the entered sequence of characters as a fragment of the whole, placed arbitrarily, e.g. entering “Sp. z o.o.” as the searched name will result in searching for all contractors who have this term in their name. Letters are not case-sensitive.
Available buttons:
![]() [Include the wording in the filter] – enables the function to search by the wording, instead of the sequence. It allows finding a company with the acronym “Marteks” if “Martex” is entered as a filter parameter.
[Include the wording in the filter] – enables the function to search by the wording, instead of the sequence. It allows finding a company with the acronym “Marteks” if “Martex” is entered as a filter parameter.
![]() [Find contractors] – should be pressed after setting filtering parameters to display a list of contractors meeting the set conditions.
[Find contractors] – should be pressed after setting filtering parameters to display a list of contractors meeting the set conditions.
![]() [Add sales invoice] – allows issuing a sales invoice for a contractor. After pressing the button:
[Add sales invoice] – allows issuing a sales invoice for a contractor. After pressing the button: ![]() , a menu will be expanded which allows generating also:
, a menu will be expanded which allows generating also:
- External release,
- Warehouse release,
- Purchase invoices,
- External receipt,
- Warehouse receipt.
![]() [Add purchase order] – creates a new purchase order to the contractor.
[Add purchase order] – creates a new purchase order to the contractor.
![]() [Preview] – allows previewing the selected contractor on the found list.
[Preview] – allows previewing the selected contractor on the found list.
![]() [Add contractors to CRM campaign] – allows adding contractors selected on the list to a selected CRM campaign.
[Add contractors to CRM campaign] – allows adding contractors selected on the list to a selected CRM campaign.
![]() [Convert loyalty points to budgets] – opens the [Calculate discount budget] window
[Convert loyalty points to budgets] – opens the [Calculate discount budget] window
Other parameters:
Archival: by selecting it, contractors and archival addresses will be included in the search results.
How many to display: once the indicated number of contractors has been found, the search will stop and the result will be displayed. Selecting a small number speeds up the search.
Single addresses: if checked, a contractor that has multiple addresses will be displayed once in the list. Otherwise, the contractor will be listed as many times as it has different addresses.
Found: the number of contractors meeting the specified conditions. No more than specified in the field: How many to display.
Tab: Find/Attributes
The Attributes tab is used to indicate search criteria in the form of attributes used in the module.
After indicating the attributes, select the General tab and start the search process.
The tab contains the following functions:
![]() [Change] – used to change the value for a given attribute.
[Change] – used to change the value for a given attribute.
![]() [Restore] – restores the value of the attribute.
[Restore] – restores the value of the attribute.
On the tab: Attributes, there is a placeholder that makes it easy to select the attributes that are the search criteria
Contractor’s card
Functions common to the window: Contractor’s card
There are buttons in the window active on all tabs:
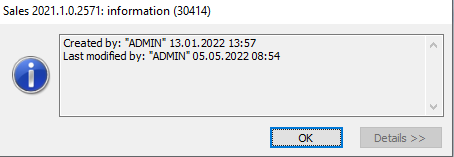
![]() [History] – the button opens the window with information on the Operator and the date when the contractor’s card was created, additionally the information on the last card modification is presented.
[History] – the button opens the window with information on the Operator and the date when the contractor’s card was created, additionally the information on the last card modification is presented.
![]() [Check contractor’s NIP number in GUS] – a feature that allows, on the basis of the entered NIP number, verifying the contractor’s name, address data, Telephone, Fax, E-mail, URL, and other available information related to the entity’s activity such as incorporation date or PKD number. The National Official Register of National Economy Entities REGON, maintained by the Polish Central Statistical Office, serves as a model. It is possible to download only a part of data, i.e. those, which are also displayed in Comarch ERP XL System. In addition, the user can edit individual data already from the REGON database download window.
[Check contractor’s NIP number in GUS] – a feature that allows, on the basis of the entered NIP number, verifying the contractor’s name, address data, Telephone, Fax, E-mail, URL, and other available information related to the entity’s activity such as incorporation date or PKD number. The National Official Register of National Economy Entities REGON, maintained by the Polish Central Statistical Office, serves as a model. It is possible to download only a part of data, i.e. those, which are also displayed in Comarch ERP XL System. In addition, the user can edit individual data already from the REGON database download window.
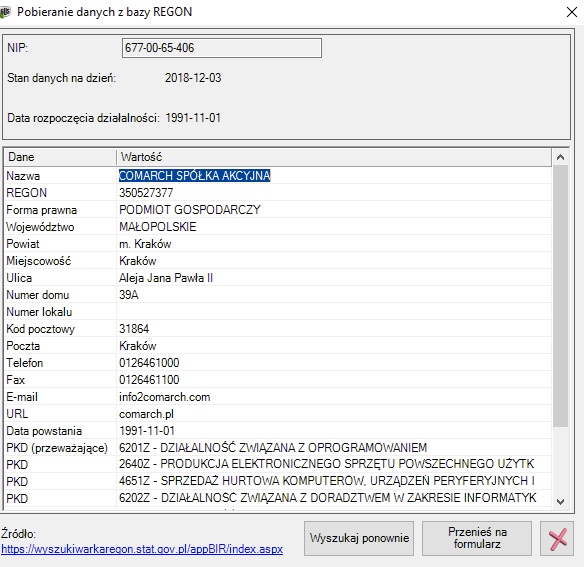
Using the button: [Transfer data to form] it is possible to transfer data from the visible table to the contractor’s card. If data has already been entered on the card, it will be updated and the current address will be archived.
Downloading data from GUS is only available for programmes under warranty.
![]() [Check the entity’s VAT status] – a feature enabling querying the tax website whether the contractor with the given NIP number is registered as a VAT taxpayer. The result of the check will be displayed on the screen. The result of the check can be printed. The button also triggers a check of the entity on the so-called white list and also retrieves a list of its reported bank accounts.
[Check the entity’s VAT status] – a feature enabling querying the tax website whether the contractor with the given NIP number is registered as a VAT taxpayer. The result of the check will be displayed on the screen. The result of the check can be printed. The button also triggers a check of the entity on the so-called white list and also retrieves a list of its reported bank accounts.
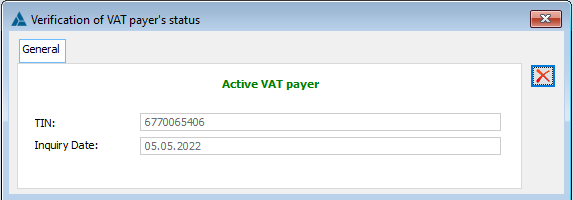
The option to check the VAT status is also available on documents. If the commercial document is marked as an intra-community transaction, then this button will trigger the action of checking the taxpayer in the VIES database.
Each time the contractor status is verified, it is recorded in the database in connection with the contractor’s address. The relevant entry can be found by opening the Contractor’s address on the Accounting tab. A corresponding printout is also included in the list.
If the current taxpayer status (according to the system date) is stored in the database, it is also visible on the Contractor tab of the opened Document.
It is also possible to automatically verify the taxpayer’s status. For this purpose, the parameter “Automatically check contractor’s VAT status” should be selected in the System configuration on the Accounting/Parameters 2 tab.
After selecting it, the system, when issuing a new commercial document, will check whether the contractor has appropriate entries in the VAT/VIES database and notify you of any irregularities.
Automatic verification on the MF tax web applies to:
- Purchase documents – FZ, A’FZ, S(FZ), s(FZ), FZL and their adjustments.
- Sales documents in transactions Domestic / Taxpayer is the buyer – FS, A’FS, FSE, S(FS), s(FS), FSL and their adjustments.
In turn, automatic verification in the VIES system applies to:
- Sales documents for intra-community transactions – FS, A’FS, S(FSE), s(FSE), FEL and their adjustments.
While issuing any of the above-mentioned documents, Comarch ERP XL system checks in the database of MF or VIES tax website, whether a given contractor is registered as an active VAT taxpayer. Verification is run in the background, while the fields of the document are being completed, and if verification is successful no message is returned. This behaviour should not increase the time spent to issue the document due to additional control activities.
The Ministry of Finance has not provided a dedicated interface for verifying taxpayer status. Comarch ERP systems use a solution that simulates manual entry of NIP on the Tax Portal website. Due to the increasing number of programmes based on this solution, there may be a significant load on the MF’s servers and, consequently, an increase in the waiting time for the Tax Portal’s response.
If it is determined during a VAT/VIES check that a contractor is not an active VAT taxpayer, their acronym on the document will be highlighted in yellow. Apart from that, an additional warning message is displayed when saving the document.
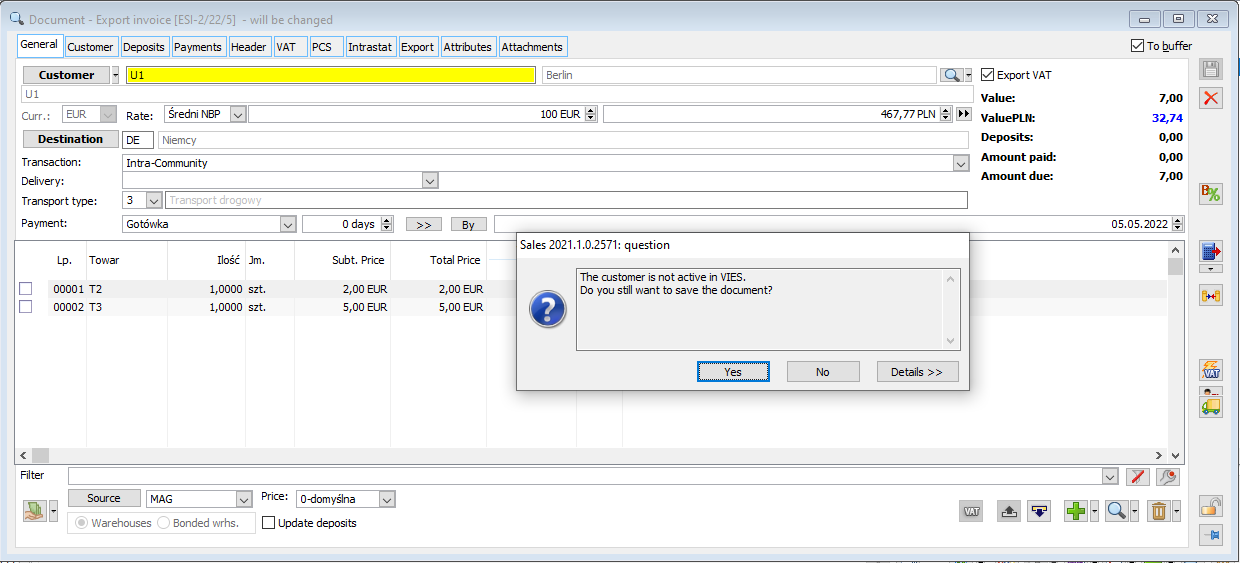
Contractor’s card, tab: General
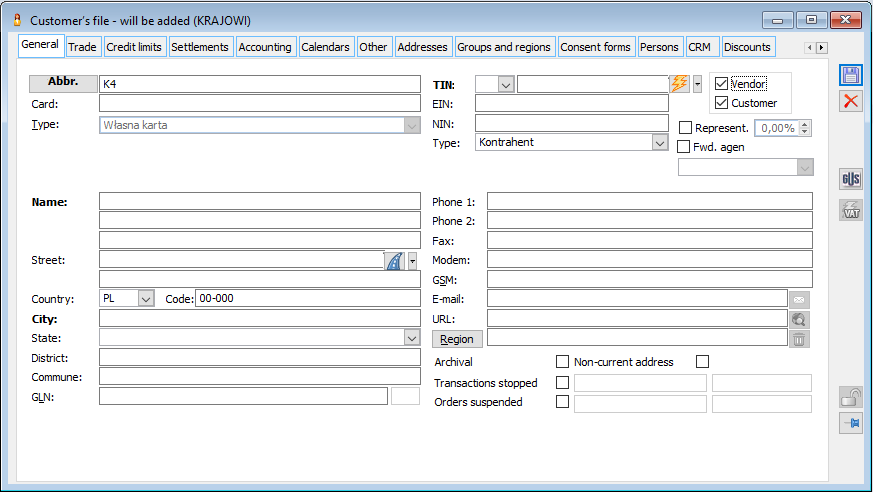
The tab contains the following fields:
Acronym: abbreviated name of the contractor (up to 20 characters). Basic parameter for searching and identifying the contractor. It should contain the most commonly used, abbreviated, easy-to-remember name. The acronym is the password-like name associated with the contractor and must be unique. It is not recommended to use consecutive numbers as acronyms.
Mask: the acronym template of the contractor. If it is defined in the contractor’s card template, it will be possible to enter an acronym only compatible with the mask. The character “#” means a digit, the character “?” means a letter, e.g. if acronyms are to be numeric, nine digits long, with groups of digits separated by two separators, the mask will look like this: @K###-###-###K 116688 “K”, (where “K” is a start and end character of the alphanumeric mask).
Card, Type: number and type of customer’s card. The customer can be identified by a card, e.g. a magnetic one. This can be either a domestic or a foreign card. A card number of up to 13 characters can be stored. The type is selected from a list defined in the configuration.
Name: consists of 3 segments of 50 characters each. Their completion is not controlled when adding a contractor, but the first line of the name must be completed in order to approve the sales invoice.
Country: prefix of the contractor’s country of residence, selected from a predefined list not available for editing.
Currently, when creating a contractor’s card, after selecting the country code GB, the Contractor type will automatically be set as Non-EU on the [Accounting] tab.
Code: the postal code of the contractor’s city.
Address: the contractor’s main address. Multiple addresses with different status can be assigned to a contractor (tab: Addresses). Field: City, must be filled in to be able to approve the sales invoice. If the country code of the address is different from PL, instead of the fields: Voivodeship, County, Municipality there are Region A, Region B, Region C fields, in which any character strings can be entered. However, in the case of country code PL, it is not possible to enter a different province name than the names available in the drop-down list. If data for a selected postal code have been completed, then by default, after entering the postal code, fields will be completed on a new contractor’s card: City, Voivodeship, County, and Municipality. A component has been added to the names of urban municipalities: (m.), e.g. instead of Kraków it is Kraków (m.). This addition applies to those records where the name of the municipality matches the name of the town. The change is important for the correct operation of reports in BI.
Next to the street field is the [Show on map] ![]() button. Two options are available from the drop-down list next to the button: Show on map and show route (Google Maps), which launch the web browser.
button. Two options are available from the drop-down list next to the button: Show on map and show route (Google Maps), which launch the web browser.
After changing or entering a new postal code – in a situation where regions have been defined – the question arises: Update the assignment of the contractor to the regions?: – There will be up to two options to choose from: All currently assigned regions will be unpinned and All regions from the new postcode will be pinned, – if at least one check is checked and the Execute button is selected – the selected actions will be executed, – if the Cancel button is selected – no action will be performed.
In a situation where the postal code is not entered on the contractor’s card (postal code 00-000), only the city is filled in, then after entering the postal code the system searches for the postal code in the list of codes. If the code is found, the process of changing the city and updating the area is started. If the code is not found, the city is left unchanged.
In a situation where both the postal code and the city are filled in on the contractor’s card, after entering the postal code, the system searches for the postal code in the list of codes. If the code is found, the process of changing the city and updating the region starts. If the code is not found, the city is reset.
If neither the postal code nor the city is filled in on the contractor’s card, then after entering the postal code, the system searches for the postal code on the list of codes. If the code is found, the process of changing the city and updating the region starts. If the code is not found, the system remembers the code itself and the city field is left blank.
GLN: Global Location Number in the EAN/UCC system. The number is structured according to the EAN/UCC-13 structure, i.e. it consists of 13 characters. 12 of these are available for editing (the first 3 are country prefixes). The thirteenth character is a check number and is only displayed (alongside).
Version 9.0 introduced a GLN numbers uniqueness check. The GLN number shall be checked when saving the product sheet if the field for GLN number is filled in, and when saving the address added/modified from the Addresses tab of the product sheet. This will result in a message that the GLN number entered already exists.
NIP: The NIP section includes:
NIP prefix – indicates the contractor’s country.
NIP number – will be displayed and printed in the form entered in the edit field (13 characters for a domestic contractor and up to 20 characters if the contractor is other than domestic). However, the system additionally stores it in a form without separators, which makes it possible to search independently of the form in which the NIP was entered. The NIP may only contain digits and separators. Otherwise, the contractor’s data may not be saved. Registration of contractors with identical NIP numbers is permitted, but requires additional confirmation, as the system will display a warning to this effect.
Extension of the NIP field – Modification of NIP number check
Due to the fact that not every domestic contractor is required to use the prefix “PL”, the number entered is checked if the prefix “PL” is selected or if it is missing. Due to the need to extend the NIP number for non-domestic contractors, i.e. those who use some other prefix (different from “PL”), but also those who do not, the current operation has been changed, i.e. it cannot be locked to enter a longer NIP number in case the prefix has not been selected. Therefore, the basis for determining whether the NIP number is to be checked for correctness has been amended. There is currently no check based on the prefix next to the NIP number, for the type of contractor.
If the contractor has the Domestic type selected, then the NIP number is checked for correctness. On the other hand, if the contractor has the EU or Non-EU (not Domestic) type selected, then there is no NIP check (regardless of the prefix next to the NIP number). Checking the correctness of the NIP number for PL prefixes can be disabled by unchecking the parameter Check NIP correctness in the Configuration/Sales/Parameters2 path.
- Contractor’s NIP
If the contractor’s type is other than Domestic, then an extended NIP number can be entered, i.e. up to 20 of any characters (digits, letters, space, dash, dot, slash, other).
In the case of a contractor’s NIP in the Retail module, so far the check has consisted of verifying the presence of the correct number of digits and dashes. The option to enter more characters has now been made available for this feature, and the previous control (warning) has been retained but can be ignored. Checking the NIP number correctness for domestic contractors can be disabled by unchecking the parameter Check NIP correctness in the Configuration/Sales/Parameters2 path.
- NIP on address
Verification when entering the NIP number is now based on the type of the contractor to which the address relates. If the contractor associated with a given address has a type set other than: Domestic, in which case it is possible to enter a maximum of 20 characters for the NIP number. Checking the number correctness for Domestic contractors can be disabled by unchecking the parameter Check NIP correctness in the Configuration/Sales/Parameters2 path.
- Company NIP number on the stamp
On the company stamp, similarly, it has been made possible to enter an extended NIP number, i.e. a maximum of 20 characters for a contractor other than Domestic. Checking NIP correctness for domestic company stamp can be disabled by unchecking the parameter Check NIP correctness in the Configuration/Sales/Parameters2 path.
- Employee’s NIP
Until now, the check of an employee’s NIP has consisted only of verifying the presence of the correct number of digits and dashes, without any specific format or check of uniqueness. Therefore, for this feature, the possibility to enter more characters has been made available, i.e. as in the case of NIP being not PL, but the existing control (warning) has been retained. Checking NIP correctness for PL prefixes can be disabled by unchecking the parameter Check NIP correctness in the Configuration/Sales/Parameters2 path.
- An icon [lightning bolt] used to check whether the NIP number entered is in VIES (VAT Information Exchange System). If, after checking, it appears that the NIP is active, it reads: Name and Street are transferred to the contractor’s card. If the searched NIP number is active, but its data (name and street) are reserved (presented as “—”), then the data are not updated on the contractor’s card.
Contractor type – option to select a contractor type from the list defined in the category dictionary. When adding a contractor to a document (FZ, PZ, FRR, FAI, FWS, FWZ, FS, FW, WZ, PA, WKA, PKA, RW, PW, FSE, WZE), the correspondence between the contractor type defined in the document definition in a given company structure centre will be checked.
Supplier, Recipient: parameters for categorising contractors. Checking when adding a new contractor will automatically create an appropriate analytical account for settlements, provided that synthetic accounts for settlements with recipients and suppliers have been defined in the configuration (System -> Configuration -> Accounting -> Contractor accounts). If the parameter is checked in the configuration: Separate lists of suppliers and customers, at least one of these parameters must be checked. A contractor may belong to the categories of suppliers and customers at the same time. A condition is introduced in this area: at least one of the above parameters must be checked. For example If only the following item is checked: Recipient, then the parameter: Recipient is inactive and vice versa.
Acquirer, Forwarder: additional parameters for the categorisation of contractors. For contractor type: Acquirer, a percentage of their commission is available for editing. Distinguishing the type of contractors: Forwarder is used to handle the shipment of goods.
if the contractor’s e-mail address is entered, the button next to it is active: ![]() [Send message]. Pressing it will create a new message in the default mail handling program (the system’s default mail software can be chosen). On the list of contractors, the e-mail is displayed as a link. Clicking on the link opens a message window with the e-mail address set.
[Send message]. Pressing it will create a new message in the default mail handling program (the system’s default mail software can be chosen). On the list of contractors, the e-mail is displayed as a link. Clicking on the link opens a message window with the e-mail address set.
URL: address of the contractor’s website. If it is entered, the button next to it is active: ![]() [View page]. Pressing it will launch the default browser and attempt to display the page with the address entered.
[View page]. Pressing it will launch the default browser and attempt to display the page with the address entered.
Region: the main region to which the contractor is assigned. Pressing the button ![]() displays a list of regions. If the operator selects a region from the list, then the contractor is detached from the region to which he was previously assigned, while the newly selected region is set as the default one.
displays a list of regions. If the operator selects a region from the list, then the contractor is detached from the region to which he was previously assigned, while the newly selected region is set as the default one.
Archival: if checked, it will not be possible to issue any document for this contractor. When selecting a contractor from within a document, archival contractors are not visible. In addition, the contractor with the selected parameter: Archival, will not be able to log into the module: Contractor’s Dashboard.
Outdated address: informative parameter, to be used when sending serial correspondence. Its setting does not affect the operation of the system.
Transactions suspended: if checked, it will not be possible to issue any sales document for this contractor, nor to register an order from it. The acronym of such a contractor is highlighted in red in the list.
Contractor’s card, tab: Commercial
The tab contains parameters:
Commercial:
- Price – type of sale price, selected from the list defined in the main group of the product sheet. Indicates the price list (price type) from which the base price for the contractor will be taken when adding items to the sales document. All discounts will be calculated from it.
If a sales price type unavailable for the current centre has been assigned to a contractor, the operator cannot change it (the price type selection field is unavailable for editing) and a default price is displayed instead of the actually assigned price type.
- Discount – general percentage discount for the contractor. It will be taken into account when calculating the discount for each transaction (document item) according to the algorithm defined in the configuration. This field allows entering a negative value.
- Delivery – the method of delivery of the goods, selected from the list (dictionary: Delivery modes) or entered manually.
- Booking priority – allows selecting one of the booking priorities defined in the window: Categories, in the group: Other (module: Administrator). This setting will be automatically transferred to the documents issued to the given contractor.
- Transaction feature – possible selection of one of the defined transaction features. The features are defined in the configuration of Comarch ERP XL System, tab General/Dictionaries.
- Main contractor – allows assigning a main contractor to each contractor. This will apply to the handling of retail chains and warehouse documents. In the commercial document, it will be possible to select the target contractor first, which will result in the corresponding main contractor being substituted. In warehouse documents, the contractor will only be the target. When generating a commercial document, the relevant main contractor will be taken from the warehouse. An example of a document generation path using this feature is: ZS -> WM -> WZ -> FS and MW -> PC.
Defining the priorities will be possible only for the operator, who has the permission to change the booking priorities (module: Administrator, window: Operator, tab: Parameters/General, parameter: Changing the booking priority).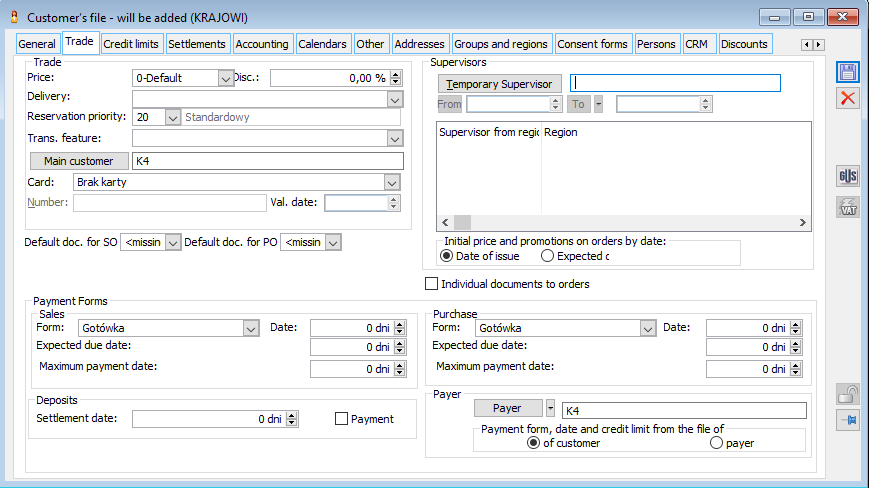
Card – expiry date, number – type, expiry date and contractor’s credit card number. The type is selected from a list (dictionary: Credit cards). This list can be expanded from the contractor’s card level; typing in a card name that is not on the list will prompt you whether to add a new type to the list. The card number is entered without separators and may contain up to 16 characters.
Default document from ZS – after expanding the list, you can define the default document to be generated from the ZS document on the given contractor. FS, FSE, PA, WZ, WZE documents can be selected from the list.
By default, the <none> option is defined on the contractor’s card. It is possible to change the default document for a contractor or to opt out by selecting the <none> option.
Default document from ZZ – after expanding the list, you can define the default document to be generated from the ZZ document on the given contractor. You can select FZ, FAI, FRR, PZ, PZI documents from the list.
By default, the <none> option is defined on the contractor’s card. It is possible to change the default document for a contractor or to opt out by selecting the <none> option.
Supervisors – the table displays a list of supervisors assigned to the region to which the contractor is assigned. The button ![]() allows assigning a temporary supervisor from the employees list directly to the contractor’s card and define the period for which he/she is to be active.
allows assigning a temporary supervisor from the employees list directly to the contractor’s card and define the period for which he/she is to be active.
Single documents for orders – checking this parameter will change the way of generating documents from orders issued for this contractor so that when generating documents for multiple orders, a separate pair of documents will be created for each order (commercial + warehouse). This parameter applies to the creation of documents on both the purchase and sales sides.
Payment methods – the payment method and date can be specified separately for 2 types of transactions with the contractor: sale and purchase. Payment terms are assigned by default to sales and purchase documents. The maximum payment term that can be entered is 9,999 days.
Deposits – this section specifies the data that will be transferred to the deposit document issued for the contractor:
Settlement date – specifies the settlement date for the deposit document issued to the contractor. This is the deadline after which deposits must be returned or invoiced.
Payment – if checked, the deposit document issued to the contractor will generate a payment.
Payer – this section is used to select the contractor’s payer. By default, the current contractor will be entered in this field, but it is possible to define another payer for the contractor. The payer is selected by pressing the button: ![]() [Select from list] and selecting, from the list thus opened, the appropriate contractor. The payer field is inactive if the contractor is already a payer for another contractor.
[Select from list] and selecting, from the list thus opened, the appropriate contractor. The payer field is inactive if the contractor is already a payer for another contractor.
After expanding the list next to the Payer button, there is a choice: Payer from the contractor’s list, Payer from the banks list, Payer from the public authorities list, Payer from the employees list, Assign head office as payer.
Selecting “Assign head office as payer” option causes the Contractor that is its head office to be selected for the Contractor in the Payer field. If a given Contractor does not have a head office selected (the contractor is a head office itself), the Contractor from which the option was activated will be selected as the payer.
Payment method, date of payment and card credit limit – depending on the indication of the entity, the defined payment method and date of payment will be transferred to the document issued for the contractor:
on the card of the edited contractor – if the option: contractor is selected
on the card of the edited payer – if the option: payer is selected. For more information about the payer, see: Payer on documents.
Contractor’s card, tab: Credit limits
It is possible to add multiple credit limits for a Contractor.
Credit – if the balance of receivables from the contractor exceeds the set limit, then upon an attempt to register the transaction (confirmation of the sales document) of sale, the system will respond in accordance with the User’s authorisation, and more specifically with the settings in the document definition: it will prevent the registration of the transaction or will display a warning (window: Document definition, tab: General). This takes into account the settings in the document definition for the permission structure centre to which the logged-in operator belongs. Liabilities to the contractor and outstanding deposits are included in the calculation of the balance compared to the limit. An operator can assign a contractor a limit no greater than the value set individually for each operator in his card (module: Administrator, window: Operator, tab: Parameters).
Credit limits
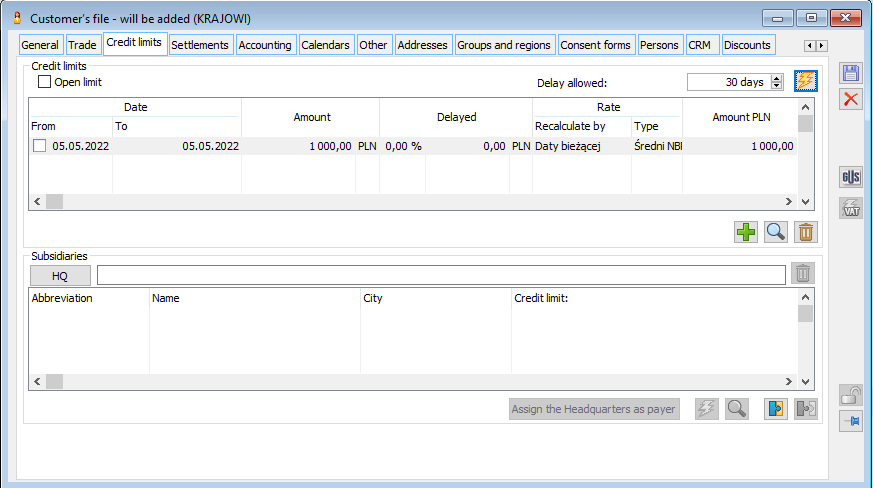
Unlimited credit limit – checking this box means that the Contractor’s credit is unlimited.
Allowed overdue – this parameter allows controlling the maximum possible overdue. It is based on the fact that if a payment is overdue by more than the specified number of days, then the system will behave as if the credit limit had been exceeded (the parameter will allow recording but will prevent approval of the transaction (or will display a warning)).
When calculating overdue credit, in addition to the global payment term tolerance (Configuration/Sales/Payment methods), the Allowed overdue from the Contractor (Credit limits tab) is also taken into account.
![]() Check contractor’s limit utilisation – the button opens the window: Utilisation of the credit limit. All information displayed in the window is unavailable for editing.
Check contractor’s limit utilisation – the button opens the window: Utilisation of the credit limit. All information displayed in the window is unavailable for editing.
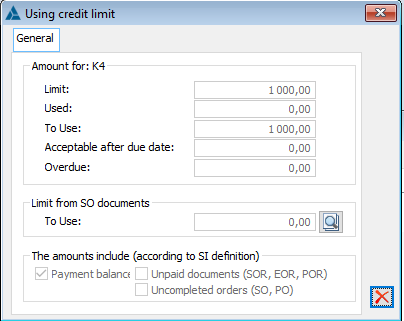
The window shows the following Amounts:
Limit – reflects the amount of credit granted
Utilised – reflects the amount of credit utilised. It is calculated as follows: Limit amount – amount: Available for use.
Available for use – reflects the amount of credit available for use. If the amount is negative, a red exclamation mark will be displayed next to the amount.
Allowed after the deadline – reflects the amount allowed after the deadline.
Overdue – reflects the amount of overdue payments. If the overdue amount is greater than the amount allowed after the deadline, a red exclamation mark is displayed next to this amount.
From version 2017.1, information related to limits granted directly on ZS documents is available. On the window of credit limit utilisation, the section Limit from ZS documents has been added. This section presents the total limit from the ZS documents of this contractor that has not yet been utilised. After selecting the magnifying glass icon, it is possible to go directly to the list of ZS documents, which will present only those documents on which there is any limit amount available for use. An additional column, Available limit, shows the amount of the remaining limit for each document. The Available limit column is available by default in the list of ZS documents.
Parameter group: The amounts taken into account (according to the FS definition) are rewritten from the parameter settings in the group: Include in the credit limit, from the FS document definition from the tab: General. Parameters are not available for editing.
- The Credit limits tab shows a table with a list of limits, with columns:
- From-To date – limit validity date for the Contractor.
- Amount – the amount of the credit limit.
- After deadline – the amount of the after-deadline limit expressed as a percentage and in value.
- Rate:
- Convert by – specifies the exchange rate from which date the amount of the limit in the foreign currency is converted.
- Possible options to choose from:
- Date from, conversion at the rate of the relevant type from the date which is the start date of the relevant limit;
- Current date, conversion at the rate of the appropriate type from the current date;
- Previous day, conversion at the rate of the relevant type on the previous day;
- Set, conversion at the rate manually set on the limit definition.
- Type – types of the rate at which the amount of the limit in a foreign currency is converted.
- Rate value column – rate converter.
- PLN amount – limit amount in PLN.
Buttons:
Add ![]() – this button allows adding a credit limit. After pressing it, a window appears:
– this button allows adding a credit limit. After pressing it, a window appears:
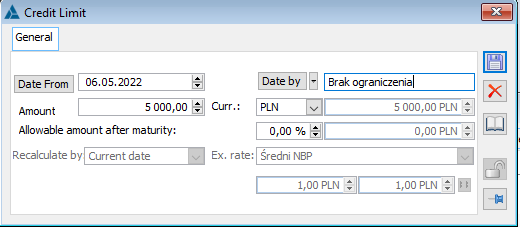
All fields are described above. Additionally, after clicking on the Date from/Date to button, the calendar will be displayed. Next to the “date to” button, there is a drop-down menu with options to choose from: Select from calendar, No limit. The No limit option means that the limit is indefinite.
If an indefinite limit is added, a new limit cannot be added until a specific date to is entered.
It is not possible to define limits that apply in the same period. If the Operator selects a date that overlaps with another period, a message will be displayed: “The defined period is invalid”. When the message is acknowledged, the previous value of the last changed date will be restored.
The “add” button is only active if the Unlimited credit parameter for this Contractor has not been selected.
![]() [Change] – the button is active if the Unlimited credit parameter for this Contractor has not been selected, there is at least one credit limit in the list.
[Change] – the button is active if the Unlimited credit parameter for this Contractor has not been selected, there is at least one credit limit in the list.
![]() [Delete] – the button is active if the Unlimited credit parameter for this Contractor has not been selected, there is at least one credit limit in the list.
[Delete] – the button is active if the Unlimited credit parameter for this Contractor has not been selected, there is at least one credit limit in the list.
Branches
Head office button with text field – is used to specify which Contractor is the head office of the edited Contractor. The Contractor’s acronym is displayed in the text field.
Detach from head office ![]() – its selection causes the Contractor to be detached from the existing head office (the Contractor becomes the head office, with no branches attached).
– its selection causes the Contractor to be detached from the existing head office (the Contractor becomes the head office, with no branches attached).
Table with a list of Contractors, with columns:
- Acronym – the acronym of the Contractor that is the branch;
- Name – the name of the Contractor that is a branch;
- City – the city of the Contractor that is a branch;
- Credit limit – the credit limit in force on the current date, together with the foreign currency.
The table displays the list of Contractors who are currently assigned to the given head office.
Assign head office as payer – this button causes that for the contractors (branches) selected in the list, the Contractor being the head office will be selected as the Payer. If a given Contractor already has a Payer which is a head office, then the system skips it and moves on to the next of the selected branches.
![]() [Check contractor’s limit utilisation] – the button opens the window: Utilising credit limit, for the selected branch.
[Check contractor’s limit utilisation] – the button opens the window: Utilising credit limit, for the selected branch.
![]() [Change] – the button is active if a given Contractor is not a head office, there is at least one branch.
[Change] – the button is active if a given Contractor is not a head office, there is at least one branch.
![]() [Attach branch] – the button is used to connect branches to a given head office. The button is active if the given Contractor is a head office.
[Attach branch] – the button is used to connect branches to a given head office. The button is active if the given Contractor is a head office.
![]() [Detach branch] – button is used to detach branches from a given head office. The button is active if the given Contractor is a branch.
[Detach branch] – button is used to detach branches from a given head office. The button is active if the given Contractor is a branch.
Multi-branch contractor registration
Defining the structure of a multi-branch contractor consists in indicating for the Contractor (branch) another Contractor which will be its head office or indicating for the Contractor (head office) other Contractors which will be its branches.
After selecting the Contractor with the “Head office” button, the list of Contractors opens. The operation of the system is different depending on the place of the edited Contractor in the structure:
If the selected Contractor is a head office, then a message is displayed: “The head office for the selected contractor and all contractors that are its branches will be changed. Do you want to continue?”, with options to choose Yes, No. When the option Yes is selected, the edited Contractor will be assigned as the head office. When No is selected, the head office is not changed.
If a Contractor is selected from the list of Contractors, which is a branch assigned to another head office, a message will be displayed: “The selected contractor is a branch and will be detached from the existing head office. Do you want to continue?”, with options to choose Yes, No. If you select Yes, the selected Contractor will be assigned to the Head office field
After selecting a Contractor with the button “Attach branch”, the system operation is different depending on the place of the edited Contractor in the structure.
If the selected Contractor is a branch (attached to another head office), a message is displayed after selecting from the Contractor’s list (which is to become a branch): “The branch will be detached from the existing head office. Do you want to continue?”, with options to choose Yes, No. When “Yes” is selected, the selected Contractor is detached from the existing head office and attached to the edited one. After selecting “No”, the branch is not connected to this head office.
If the selected Contractor is a head office, a message is displayed when the Contractor is selected from the list: “The head office for the selected contractor and all contractors that are its branches will be changed. Do you want to continue?”, with options to choose Yes, No. When the option Yes is selected, the edited Contractor will be assigned as the head office. When No is selected, the head office is not changed.
Additional control of credit limit and overdue payment limit when generating documents from ZS
An additional possibility of informing about exceeding a credit limit or a limit of overdue payments already at the stage of generating a document to a ZS order has been introduced. Overdue information will appear when the document is generated and in the log before it is created.
In order for such a message to appear, it is necessary to set appropriate parameters on the Operator form, which are responsible for the appearance of logs in the programme. On the Operator card, on the [Parameters] tab, in the System log section, select Display errors, warnings, and information option and uncheck the parameter: Close when there are no errors.
Information about the exceeded limit will appear when the following documents are generated from the order: FS, PA, WZ, FSE, WZE, WM, ZWM, if on the definition of these documents the option Warn or Lock was selected in the section Approval of documents after exceeding the credit limit. Regardless of whether Warn or Lock is selected, a message (warning) will appear in the log. It will not be possible to lock a document before it is generated. The full lock will appear when the document is approved.
Utilisation of the credit limit
Utilisation of the credit limit for a Contractor that is a head office is calculated as follows:
The credit limit utilisation for the head office is calculated according to the general rules (as in the case of a branch) with the difference that if the Main contractor balance parameter is checked (on the document definition), payments to documents on which the head office is the Main contractor and the head office is the payer or a branch of this head office is the payer are not taken into account.
The calculation of the credit limit utilisation for each branch which is connected to this head office follows the general rules with the difference that if the Main contractor balance parameter is selected (on document definition), payments to documents on which the given branch is the main contractor and the branch is the payer or the head office of this branch is the payer are not taken into account.
The calculated limit utilisation for the head office and individual branches is summed up, the resulting sum will be the credit limit utilisation for the head office.
If the Contractor is the head office when checking the credit limit, the system takes the relevant credit limit, calculates the credit limit utilisation as described above and then compares the two amounts and depending on the parameter setting: Approval of documents after exceeding the credit limit, on the definition of the document, performs the corresponding action: Allow/ Warn/ Lock.
If the Contractor is a branch, the credit limit check is performed according to the general rules. If the credit limit has been exceeded and the parameter has been selected in the document definition: Approval of documents after exceeding the credit limit – lock the issuance of the document is locked. If the credit limit has not been exceeded or has been exceeded, but the parameter has been checked in the document definition: Approval of documents when the credit limit has been exceeded – Allow/Warn then it is checked whether the Contractor has a head office selected. In the absence of a head office, the document is approved. If the Contractor has a selected head office, the system checks whether the limit of this head office has been exceeded.
Fields related to the term loan are entered by default for a new contractor according to the values defined in the contractor template (group to which the contractor belongs) and from the value defined for the operator (window: Operator, tab: Parameters/Permissions).
Contractor’s card, tab: Settlements
The tab has three sections: “Contractor’s bank accounts”, “Assigned bank registers” and “Settlements”.
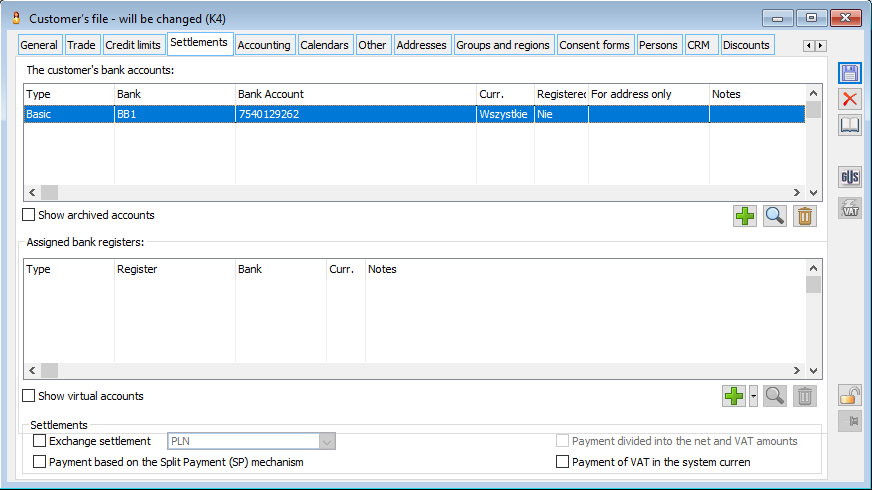
In the section: Contractor’s bank accounts, the following buttons are available:
![]() [Add] Allows adding a new contractor’s bank account
[Add] Allows adding a new contractor’s bank account
![]() [Change] Edits the added account
[Change] Edits the added account
![]() [Delete] Deletes the contractor’s bank account.
[Delete] Deletes the contractor’s bank account.
Show archived accounts: checking it will make archived accounts visible on the list of the contractor’s bank accounts.
After pressing ![]() [Add] a window appears: Contractor’s bank account
[Add] a window appears: Contractor’s bank account
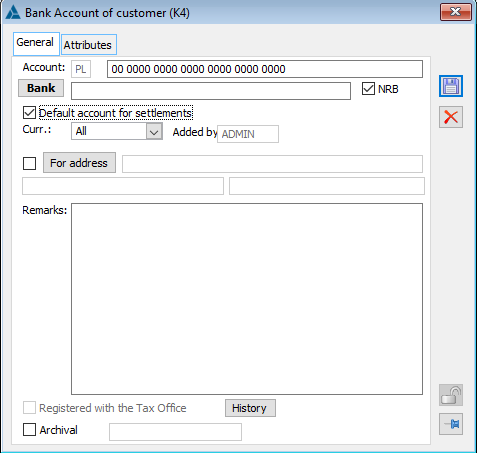
Account: prefix and account number of the contractor
Bank: press to open the list: Banks from which the appropriate contractor’s bank can be selected
NRB: checking it will check if the number entered meets the NRB conditions.
Default settlement account: whether the account is to be prompted by default on the contractor’s payments
Currency: currency of the account
Added by: acronym of the operator adding the account
For address: assigning the account to the indicated contractor’s address. When pressed, a list of the contractor’s addresses appears.
Notes: comments concerning the account to be added.
Notified to the tax office: this parameter is not editable. It is checked or unchecked automatically after the account number is verified on the so-called white list.
History: allows viewing a list of past queries to the Ministry of Finance along with the result received.
Archival: archiving of the account; when checked, the exact date and time of archiving also appear
In the section: Assigned cash registers standard buttons ![]() [Add],
[Add], ![]() [Change],
[Change], ![]() [Delete] are available for adding, editing, and deleting bank registers
[Delete] are available for adding, editing, and deleting bank registers
Show virtual accounts: checking it allows seeing the contractor’s individual accounts. In addition, when it is selected, another parameter is activated: Show archived. When checked, the list shows the contractor’s archived individual records.
Next to the button ![]() [Add], there is a drop-down list from which you can select whether you are adding a settlement register or an individual one, Selecting: Add settlement, a window appears: Contractor’s bank register
[Add], there is a drop-down list from which you can select whether you are adding a settlement register or an individual one, Selecting: Add settlement, a window appears: Contractor’s bank register
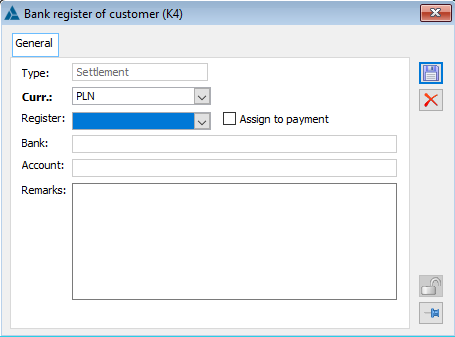
Type: is determined automatically depending on whether the option is selected: Add settlement or Add individual
Currency: selection of register currency
Register: a drop-down list with available bank registers. When adding an individual register, the list is narrowed down to bank registers with the “Identification of virtual account numbers” option checked
Assign to payment: field visible only for the settlement register. Specifies whether the register is to be used for contractor’s payments
Bank: name of the bank taken automatically from the bank register indicated
Account: bank account number
Notes: Comments on the register
For individual registers, there is also the possibility to archive the register
Section: Settlements:
Foreign exchange settlement – when this parameter is selected, the field with the choice of currency will be activated. The selected currency will be entered by default on the header of the document generated per contractor.
Payment with the use of the split payment mechanism (MPP) – when this parameter is selected, the “Split payment (MPP)” check will be automatically selected on payments of newly-added documents, allowing the VAT amount to be separated.
Split payments with separation of the VAT amount – if this parameter is selected, payments to the contractor will be automatically divided into two items – one for the net value of the document and the other for the VAT value.
VAT payment in the system currency – if checked, the VAT payment will be converted to the system currency when splitting the payment with a separate VAT amount.
Contractor’s card, tab: Accounting
The tab contains the following fields:
Contractor status:
Business entity – when issuing a sales offer and sales order to a contractor with this parameter selected, the software will set the method of charging VAT from net.
Retail recipient – when issuing a sales offer and sales order to a contractor with this parameter selected, the software will set the method of charging VAT from gross.
The way VAT is charged on documents: The Sales offer and Sales order can be modified manually on the current document. However, conditions must be met: – no items on the document, – change to gross is possible in the case of a domestic order.
Contractor type:
- Domestic – transactions with a domestic contractor will be set as domestic by default.
- EU – transactions with an EU contractor will be set as intra-community by default
- Non-EU – transactions with a non-EU contractor are set by default as other foreign (non-EU)
- Flat-Rate Farmer – if this parameter is selected, a special document will be issued to a contractor who is a flat-rate farmer – a VAT RR invoice (FRR) documenting the purchase from this category of entities. When the parameter is selected, the following fields will be activated: Identity card, Date, Authority (issuing the document), which are necessary for the correct issuing of the FRR if the flat-rate farmer is a natural person. For more information, see chapter: Flat-rate farmer VAT invoice (VAT RR).
- Related unit – a parameter mainly useful when constructing a filter. Indicates a contractor relationship, e.g. contractor: ABC S.A. is related (through participation) to the contractor XYZ
- VAT payer – if checked, it will be mandatory to enter the contractor’s NIP when issuing a VAT invoice. Parameter: VAT payer, does not check NIP number correctness
- Taxpayer is the Buyer – parameter active for the contractor type: domestic and VAT taxpayer. If this parameter is selected, after adding a contractor to the FS sales invoice document, the {VAT} tab will be populated as the transaction type: Taxpayer is the Buyer.
- In liquidation/bankruptcy – parameter for entities in liquidation, bankruptcy.
- Cash method – parameter active if the parameter is checked: VAT payer and/or Flat-rate farmer. If the parameter is selected, when issuing purchase documents for this contractor, the parameter will be automatically selected on the VAT tab of the issued document.
VAT registration date – the date of registration or deletion to be filled in when verifying the VAT status of an entity.
Document series – in this field, you can indicate the default series that will be entered on the document issued to the contractor.
Foreign exchange settlement – when this parameter is selected, the field with the choice of currency will be activated. The selected currency will be entered by default on the header of the document generated per contractor.
Split payments with separation of the VAT amount – if this parameter is selected, payments to the contractor will be automatically divided into two items – one for the net value of the document and the other for the VAT value.
VAT payment in the system currency – if checked, the VAT payment will be converted to the system currency when splitting the payment with a separate VAT amount.
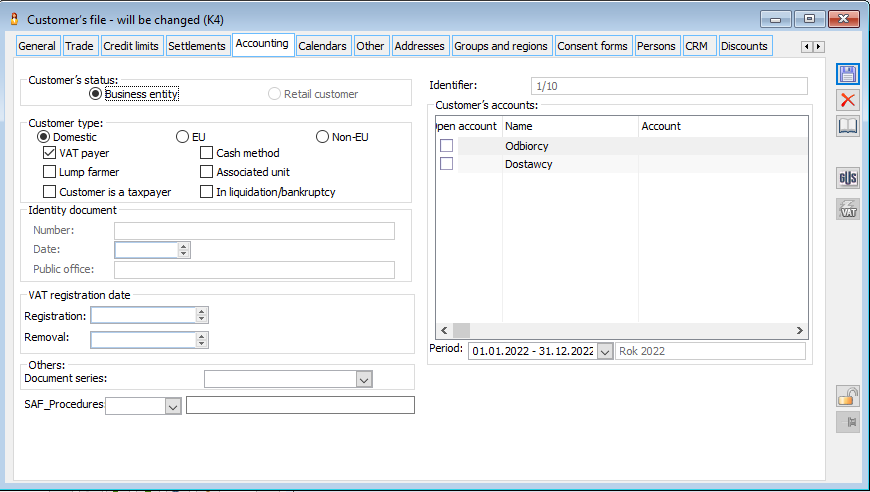
Identifier – internal, system identifier of the contract, not editable.
Contractor’s accounts. This part of the window contains information about the contractor’s accounts in the indicated accounting period. They are displayed in columns:
- Name – indicates the type of account.
- Account – indicates the account number, with a graphic presentation of the account. When adding a contractor’s card:
- if the account exists in the chart of accounts of the analysed period, its number will be displayed in black.
- if the account does not exist, it will be displayed in green. The field with the account number will then be available for editing – for example, to change the suggested number.
When editing a contractor’s card, if the account does not exist, the proposed account number will be displayed in green when the box in the column is checked: Create account.
Checking the box in the column: Create account, causes the creation of the indicated account (when saving the contractor’s card).
Two types of accounts are predefined in the system: supplier and recipient.
These will be automatically set up (check box in column: Create account) on the card of the added contractor if:
- in the configuration, on tab: Accounting/Contractor’s accounts, the following parameter has been selected: Automatic account creation,
- on the tab: General, of the added contractor’s card, the parameters are checked: Supplier/Recipient.
- an entry has been made in one of the fields on the contractor’s card, respectively to the selected type of analytics in the configuration, on the tab: Accounting/Contractor’s accounts.
The type of analytics was selected in the configuration: By acronym. Accounts: Suppliers/Recipients will be selected when their acronym is entered on the contractor’s card.
If parameters have been selected in the configuration: For suppliers with payment “Cash” or: For recipients with payment “Cash” and an account number has been specified for them, this number will be entered on the new contractor’s card.
It is also possible to select accounts directly on the tab: Accounting.
In addition to supplier/recipient accounts, other accounts defined by the User will be displayed on the newly added contractor’s card. Whether these accounts will be displayed as selected is determined by their selection on the template of the group in which the contractor will be defined.
However, it is possible, as with accounts: Recipients and Suppliers, to select them directly on the Accounting tab of the specific contractor’s card.
Period – the accounting period, for which the list of accounts is displayed, is selected in this field.
JPK_Procedury – a field enabling binding a contractor’s card with a special procedure defined in the dictionary of categories, Transactions – JPK_Procedury. Binding possible in a 1:1 relationship.
Fee on foodstuffs /Recipient, Charge when selling – Enabling this parameter means that a fee on foodstuffs is to be applied to sales made to this contractor. This parameter should remain enabled on the cards of domestic contractors who are retailers or entities engaged in retail or mixed sales, as only sales to such contractors under the Act are subject to the fees on foodstuffs.
Contractor’s card, tab: Calendars
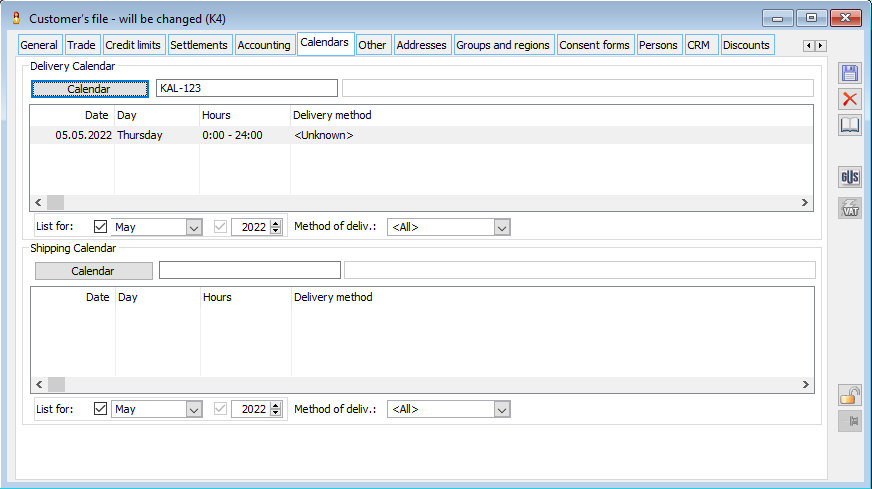
The tab is divided into two sections: Delivery calendar, Dispatch calendar. In the Delivery calendar section, a list of delivery calendars can be opened via the Calendar button. Below, you can see the list of days resulting from this calendar. In the Dispatch calendar section, a list of dispatch calendars can be opened via the Calendar button. Below, you can see the list of days resulting from this calendar.
Contractor’s card, tab: Other
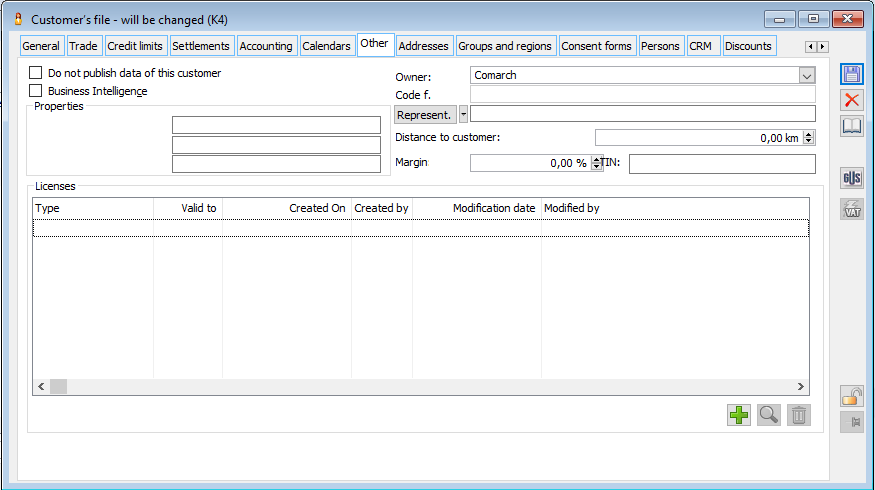
The tab contains the following fields:
Do not publish the data of this contractor: information parameter.
Business Intelligence: When this option is selected, it is possible to narrow down the list of target contractors, according to this criterion, on the analytical description of the divider and payroll (in the module: Accountancy).
Acquirer: selected from the list of employees or contractors marked as: Acquirers. The list of contractors is opened with the button: ![]() . Button:
. Button: ![]() , expands a menu with options: From the list of contractors and From the list of employees. After selecting the acquirer from one of the lists, their acronym is displayed.
, expands a menu with options: From the list of contractors and From the list of employees. After selecting the acquirer from one of the lists, their acronym is displayed.
Owner: the centre of the permissions structure within which the contractor’s card has been created.
PIN: contractor’s PIN number.
Fpp code: displayed if the contractor’s card was created by import from Firma++.
Margin: a parameter to be used by the User. Its value is not used by the system.
Distance to the contractor: as above.
Properties: 3 additional attributes can be assigned to a contractor. If an attribute class has been defined in the contractor’s card template (selected from the Contractor properties list), the attribute value of this class can be entered in the contractor’s card (max. 255 characters). It can be selected from a list or entered manually, according to the setting of the attribute class parameters. Attribute classes, their parameters and values are defined in the module: Administrator (Lists -> Contractor properties).
If a change to the contractor’s card has been made by the template, in the field: Modifying operator, the modifying operator will be displayed.
Concessions: the table displays the list of concessions assigned to the contractor along with information: Type: option to be selected from the drop-down list defined in the Dictionary of categories
Valid until: editable expiry date of the concession
Creation date: date of creation of the given concession for the contractor, the data is not editable
Created by: the operator who created the concession for the contractor, the data is not editable
Modification date: date of last modification of a given concession for the contractor, the data is not editable
Modified by: the operator who last modified the concession for the contractor, the data is not editable
Adding, editing, and deleting concessions using the standard buttons: ![]() [Add],
[Add], ![]() [Change],
[Change], ![]() [Delete].
[Delete].
Contractor’s card, tab: Addresses
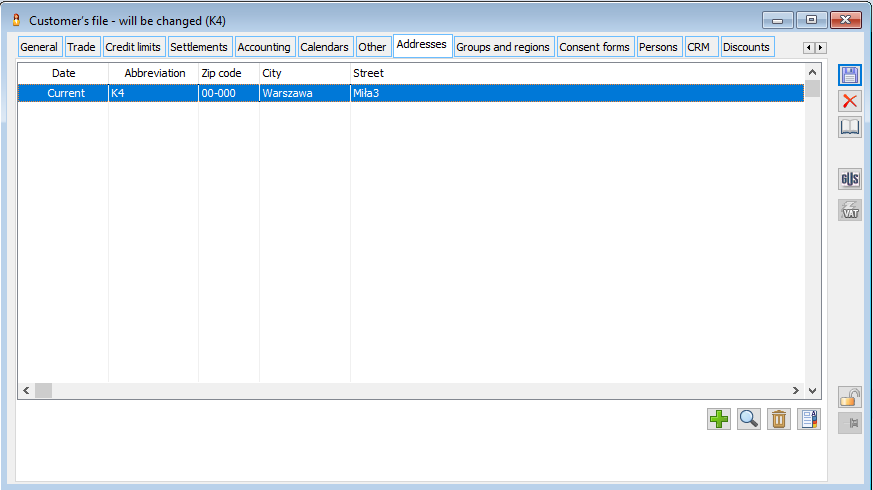
Multiple addresses can be assigned to one contractor. The address could be:
- Current,
- Shipping,
- Correspondence,
- Other.
Address: Current, is edited on the General tab, other addresses are edited and added on the Addresses tab. Any change to any address will save the address before the change as an archive address, as long as it occurred on any document. Addresses are also archived if you manually select the parameter for them: Archival. Archived addresses can be seen in the list by pressing the button: ![]() . In the column: Date, the status of the address or the date it was archived (replaced by another) is displayed. Archived addresses cannot be modified. It is also impossible to delete addresses that have already appeared on a document.
. In the column: Date, the status of the address or the date it was archived (replaced by another) is displayed. Archived addresses cannot be modified. It is also impossible to delete addresses that have already appeared on a document.
Address: Current, is automatically added to the list of addresses when saving the details of a new contractor. It is copied onto the sales documents as the buyer’s address.
If the country code of the address is different from PL, instead of the fields: Voivodeship, County, Municipality there are Region A, Region B, Region C fields, in which any character strings can be entered.
After pressing the button: ![]() [Change], a window will be displayed: Contractor’s address. This window contains the contractor’s address data, booking accounts for the indicated address, and it is possible to assign attributes to a given address. Field: Phone, on the General tab, allows entering up to 30 characters. On the tab: Accounting, it is also possible to enter data identifying the identity document. These data apply to flat-rate farmers.
[Change], a window will be displayed: Contractor’s address. This window contains the contractor’s address data, booking accounts for the indicated address, and it is possible to assign attributes to a given address. Field: Phone, on the General tab, allows entering up to 30 characters. On the tab: Accounting, it is also possible to enter data identifying the identity document. These data apply to flat-rate farmers.
The settings from the accounting tab of the contractor’s card concerning the type of entity and the cash accounting method are also transferred to the address accounting tab:
![]()
Selecting the parameter: Do not publish, located in the window: Address, on the General tab, is used in the module: Izam. If this parameter is selected, the indicated address will not be visible in this module.
Parameter: Archived is used to manually mark an address as archived. Selecting this parameter is possible for all shipping addresses or for other addresses. The current address cannot be set as an archive address. Once an address has been archived, it cannot be modified.
In the panel: Routes, displayed routes are those in which the point is the contractor’s address and by which the shipment will be dispatched. These routes are available for editing from the window: Goods delivery route (more information in the chapter: Goods delivery route).
The route will be automatically assigned to the parcel if the address that is the point of the route has the parameter checked: Shipping. However, it is not possible to select this parameter on the current address. To register a shipping address, you can add a new address where the parameter: Shipping, will already be active.
On the contractor’s card, in the window: Contractor’s address next to the street name is the [Show on map] button. There are two options in the menu next to the button: Show on map, Show route (Google Maps). When the function is activated: Show on map will launch the Google browser, which will show the location on the map. When the function is activated: Show route also launches the Google browser, which shows the route added to the location on the map. The route to the address is plotted from the starting point, which is the address on the centre stamp of the logged-in operator.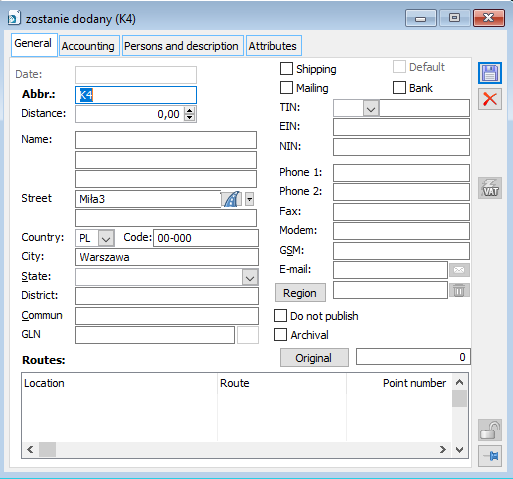
For the purposes of working with Comarch Mobile Sales version 2017.0, a tab has been added on the contractor’s address: People and description where you can define people associated with a given contractor’s address. You can also specify a default person for this address. This tab also provides a field for entering a description of the address.
Contractor’s card, tab: Groups and regions
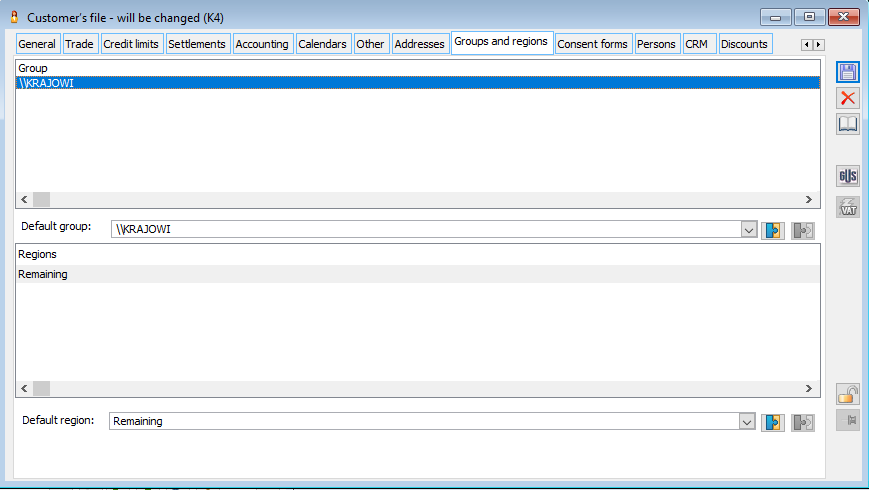
A contractor can be assigned to many groups, one of them must be selected as the default. To assign a contractor to a group, click: ![]() and select a group from the list. To remove an assignment, indicate (highlight) the group and click:
and select a group from the list. To remove an assignment, indicate (highlight) the group and click: ![]() . You cannot remove an assignment to a default group, but you can change the default group by selecting it from the list of groups. Distinguishing the default group is applicable in analyses, it eliminates duplication of data. The groups in the list are displayed in full path mode, that is, with membership to all higher-level groups.
. You cannot remove an assignment to a default group, but you can change the default group by selecting it from the list of groups. Distinguishing the default group is applicable in analyses, it eliminates duplication of data. The groups in the list are displayed in full path mode, that is, with membership to all higher-level groups.
A contractor can be assigned to many regions, one of which must be selected as the default. To assign a contractor to a region, use the button ![]() and select the region from the list. Using the button
and select the region from the list. Using the button ![]() , it is possible to disconnect a contractor from a region.
, it is possible to disconnect a contractor from a region.
Contractor’s card, tab: Consents
From the tab level, it is possible to add consent to the processing of personal data.
The consent form has been described in detail in the documentation for the module: GDPR.
Filtering the consents on the list is done using the following tools:
- Simple filter and filter builder – allow narrowing the displayed list according to the indicated criteria,
- Filter [valid currently] – allows searching for valid consents according to the status for a given day,
- Consent type – allows narrowing the list to the selected type of consent
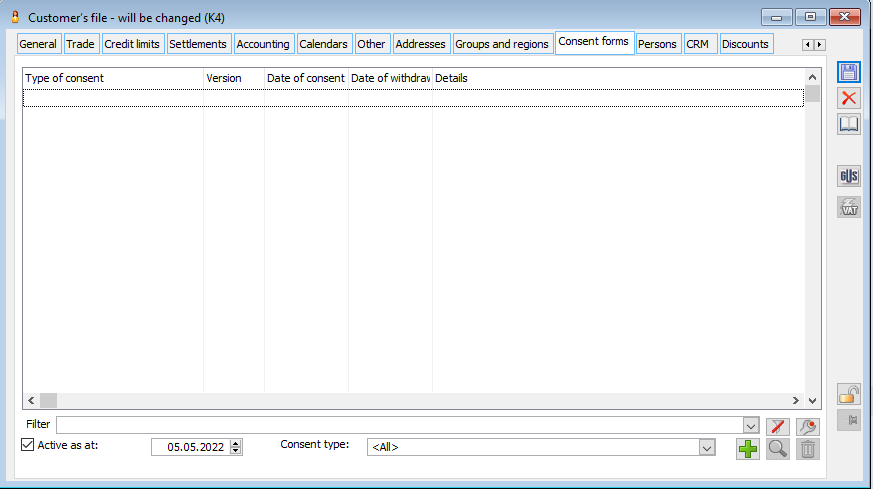
Contractor’s card, tab: People
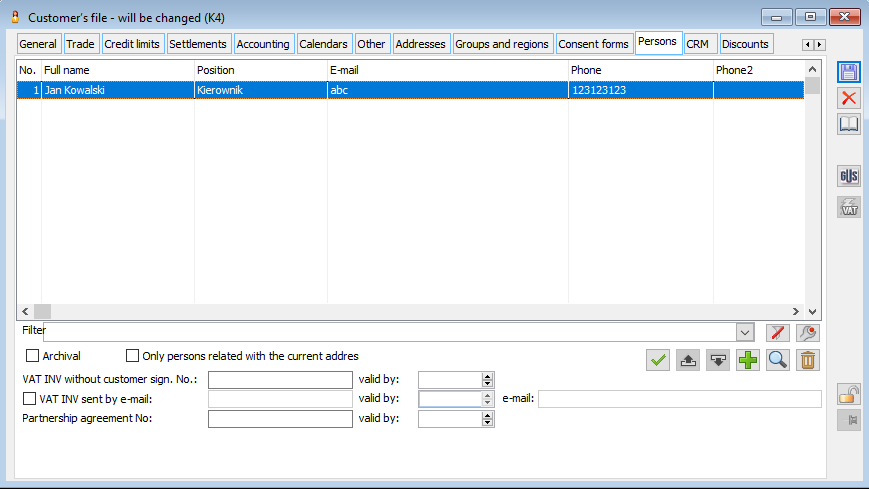
The contractor’s data may contain information about the people representing him. From among the people in this tab, you can select a person from the contractor’s side on commercial documents and orders (tab: Contractor, field: Person).
On the People tab, you can filter people by name (first and/or last name) and create your own filter.
In addition to basic data such as name, surname, position, department, telephones, decision-making role (selected from a predefined list), e-mail, the person’s data can include the following parameters:
Person authorised to receive the VAT invoice – if checked, when issuing a VAT invoice for this contractor, this person will be on the list from which you can select the person authorised to receive the invoice.
Person authorised to place orders – applies to orders placed via the Internet in the module: iZam.
Authorised contact person – parameter informing that a given person is authorised to receive and send information.
Archived – the function of this parameter is supported in module: iZAM. People with this parameter selected cannot issue an order.
Only people associated to the current address – after selecting the parameters, only people related to the account card being viewed will be displayed.
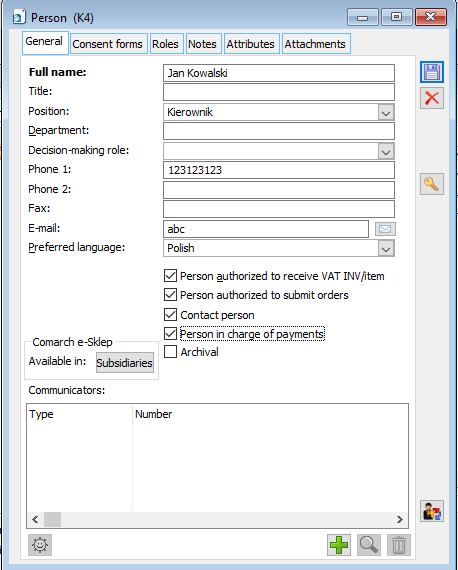
If the person’s e-mail address is entered, the button next to it is active: ![]() [Send message]. Pressing it will create a new message in your default e-mail software.
[Send message]. Pressing it will create a new message in your default e-mail software.
In the section: Messengers, there is a table displaying the data used to contact a person via the messenger.
There are the following buttons under the list:
![]() [Add] – opens the window: Messenger, where you can define the type and number of the messenger. The types of messengers are defined in the corresponding category dictionary.
[Add] – opens the window: Messenger, where you can define the type and number of the messenger. The types of messengers are defined in the corresponding category dictionary.
![]() [Preview] – for the selected table row, the following window opens: Messenger, where you can change the type or number of the messenger.
[Preview] – for the selected table row, the following window opens: Messenger, where you can change the type or number of the messenger.
![]() [Delete] – removes the selected row from the table.
[Delete] – removes the selected row from the table.
![]() [Contact] – starts a conversation through the messenger selected from the list.
[Contact] – starts a conversation through the messenger selected from the list.
On the tab: Roles, a role is introduced, which includes the permissions to use Izam. functionalities. Assigned roles are defined from within the module: Administrator (in the window: Employees roles).
It is also possible to enter notes on the person’s card – on the tab: Notes and assigning attributes to a person – on the Attributes tab. Attributes are assigned according to general rules.
Each person can be assigned a password, which is used to log the specific person into the module: Izam (after logging in to the contractor, using the password provided on the contractor’s card, on the tab: Contacts) and allows confirming an order in this module. To do this, click: ![]() on the person form, enter the password twice and save it by pressing the button:
on the person form, enter the password twice and save it by pressing the button: ![]() .
.
The order of the people in the list can be determined using the buttons: ![]() [One up] and
[One up] and ![]() [One down]. Using the button:
[One down]. Using the button: ![]() , you can set one of the persons authorised to receive a VAT invoice as the default person. The same button is used to cancel this setting. If a default person has been set, this person will appear as authorised to receive when the invoice is issued.
, you can set one of the persons authorised to receive a VAT invoice as the default person. The same button is used to cancel this setting. If a default person has been set, this person will appear as authorised to receive when the invoice is issued.
In addition, the tab has the following fields:
Archival – checking this parameter will cause the list to also include people with this parameter checked: Archival.
VAT invoice without recipient’s signature no.: number (any string) of the authorisation to issue VAT invoices without recipient’s signature, signed by the contractor. If the authorisation number and its expiry date are entered, the text “Declaration No…” will appear on the sales invoice printout instead of the name of the person authorised to receive it. When creating an invoice, this parameter is taken into account first, if the authorisation is valid, the default authorised person will not be assigned to the invoice.
VAT invoice sent electronically: a parameter which will allow the Operator to select the consent to send invoices electronically and to fill in the e-mail address. When sending by e-mail, the address from the field: e-mail will be suggested by default for the following documents: sales invoices, export sales invoices, VAT RR invoices, internal invoices, sales invoices adjustments, export sales invoices adjustment, VAT RR invoices adjustments, internal invoices adjustments, advance sales invoices, advance export invoices. If this parameter is not selected and the e-mail address has not been filled in, the e-mail address from the General tab will be used when sending documents by e-mail. However, if the parameter is selected and the date of sending the e-mail is greater than the expiry date or the e-mail address has not been completed, the following message will be displayed: The expiry date for electronically transmitted VAT invoices has been exceeded, or the e-mail address has not been specified correctly, the e-mail address has been taken from the General tab of the contractor’s card.
Partnership agreement: an informative parameter, without consequences for the operation of the system.
Contractor’s card, tab: CRM
Activity: the legal form of the activity, selected from a predefined list.
Industry: selected from a predefined list.
Priority: selected from a predefined list.
Source: selected from a predefined list.
Partner role: selected from predefined lists.
Outlook URL: location and name of the Outlook folder where correspondence with the contractor is stored. By pressing the button next to it: ![]() you can open the specified folder.
you can open the specified folder.
In the Loyalty programme section, it is possible to enrol a business partner for participation in the programme for accrual of points and their use as prizes or discount budgets.[1]
For the documents to be credited with the points, the date of joining the programme (date From) and optionally the loyalty card number must be filled in. After withdrawal from the programme, the To date must be filled in, i.e. documents issued after this date will no longer accrue points to such a contractor.
Apart from participation in the programme, the points assigned to the contractor are presented in the same place:
- Accumulated – the current number of accumulated points (value calculated from documents using the SQL function),
- Positive or negative points correction (field to be filled in manually),
- Received – the number of points received in the form of rewards or discount budgets (value calculated from documents using the SQL function),
Total – calculated on the basis of the above quantities, represents the number of points to be used for participation in the programme
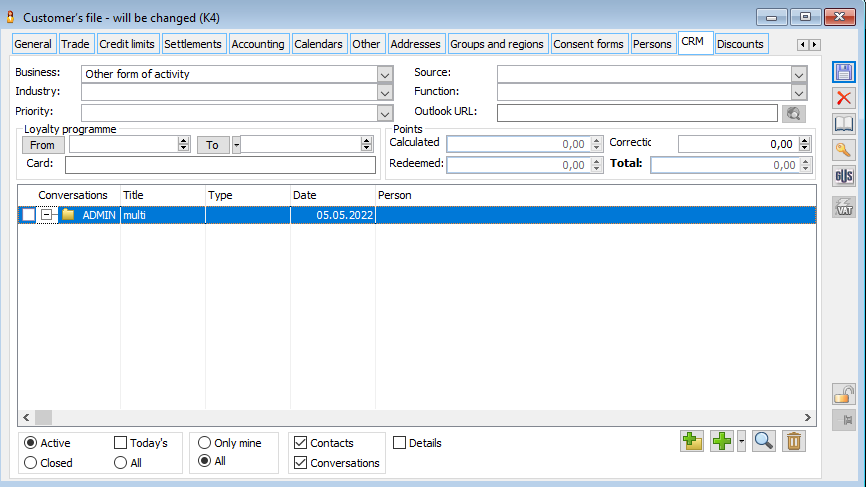
The list is a schedule of contacts, conversation threads, conversation items, and tasks with the contractor. Each contact has a specific set of parameters and a note text. The parameters are deadline, priority, person representing the contractor (selected from a list of persons), frequency in the case of periodic contact and operator code. The contact can be marked as ended.
The contact list is sorted by date and priority. It can be filtered by selecting contacts: Active or Ended, All or Only mine (logged in operator), Today only. Checking the Details parameter will cause that on the list of contacts there will appear an additional column Description, in which the following values will be presented: note for the contact, description for the conversation and conversation item.
Contacts can be added automatically when recording sales of selected goods if the parameter is set accordingly: Customer contact, on the product sheet and Save contractor’s contacts, in the configuration. All entries that were added before Comarch ERP XL 10.0 were grouped into a thread named “Contacts”. The line of this thread is not editable. Under the contact list, the user has the following buttons available:
![]() [Add thread] – opens a form for adding a conversation thread. Icon only active when the logged-in operator has a CRM licence.
[Add thread] – opens a form for adding a conversation thread. Icon only active when the logged-in operator has a CRM licence.
![]() [Add] – opens one of the following forms depending on what position the cursor is set on. When the cursor is placed on the item from the “Contacts” group, the form for adding a contact will open, when on another type of contact the system will open the form for adding a Customer Conversation item. The operator can also manually select, by clicking the button
[Add] – opens one of the following forms depending on what position the cursor is set on. When the cursor is placed on the item from the “Contacts” group, the form for adding a contact will open, when on another type of contact the system will open the form for adding a Customer Conversation item. The operator can also manually select, by clicking the button ![]() , the type of form to be opened.
, the type of form to be opened.
![]() [Change] – opens the highlighted item in edit mode.
[Change] – opens the highlighted item in edit mode.
![]() [Delete] – deletes the highlighted item.
[Delete] – deletes the highlighted item.
![]() [Change password] – used to set the password for the Customer’s access to the module: IZam.
[Change password] – used to set the password for the Customer’s access to the module: IZam.
Contractor’s card, tab: Discounts
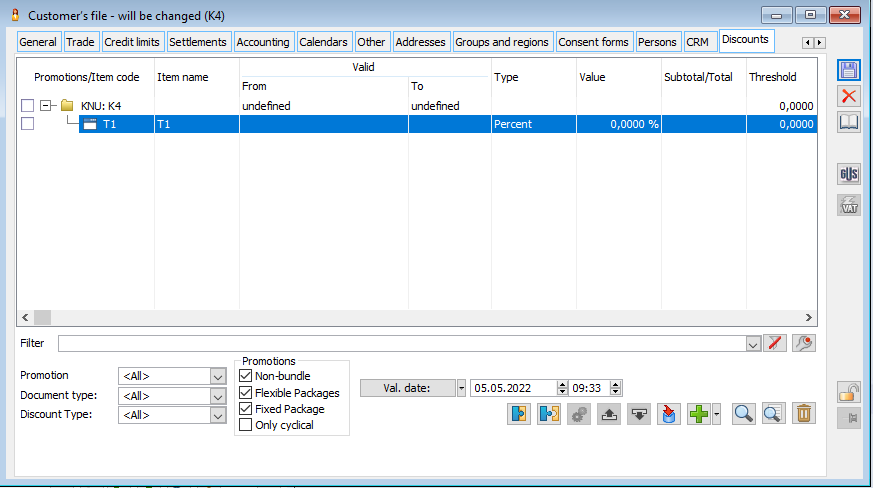
The list is a summary of discounts and prices for the contractor. It may contain:
- a percentage discount on a group of goods, applied to all goods in the group,
- a percentage discount on selected goods,
- a fixed price for the selected goods, given as net or gross, in the selected currency,
- mark-up on the purchase price,
- Fixed package promotions,
- Flexible package promotions,
- Budget discounts,
- Retrospective discounts.
If the product belongs to more than one group and discounts for these groups have been defined, the discount for the group that appears first in the list shall be taken into account for the price calculation. The order in the list is therefore important. It can be changed using the buttons: ![]() [One up] and
[One up] and ![]() [One down]. If a fixed price has been defined for the product, the item in the list is not relevant. A fixed price has a higher priority than a discount. If specified, no discounts will be calculated from it, including the general discount for the contractor. Similarly, a discount on a product has a higher priority than a discount on a group. If discounts have been given for a product and for the group to which it belongs, the discount for the product shall be taken into account, regardless of their order in the list.
[One down]. If a fixed price has been defined for the product, the item in the list is not relevant. A fixed price has a higher priority than a discount. If specified, no discounts will be calculated from it, including the general discount for the contractor. Similarly, a discount on a product has a higher priority than a discount on a group. If discounts have been given for a product and for the group to which it belongs, the discount for the product shall be taken into account, regardless of their order in the list.
Document type – a drop-down list enabling promotion filtering by document type: all, incoming, outgoing.
Discount type – a drop-down list allowing filtering promotions by discount type: all, percentage, value, fixed price, initial price, percentage mark-up, value mark-up.
Validity date – allows filtering promotions by date: specific date, no restriction.
Promotions – by checking or unchecking the following parameters: non-packaged, flexible packages, fixed packages, only cyclical, promotions of a given type will be visible or not in the list of promotions on the product sheet.
There is also a standard filter below the list along with a filter builder.
![]() [Created by] – when pressed, the information relating to the creation of the sheet will be displayed: the date on which it was created and the operator who created it, as well as information on the operator who last modified it.
[Created by] – when pressed, the information relating to the creation of the sheet will be displayed: the date on which it was created and the operator who created it, as well as information on the operator who last modified it.
![]() [Promotion preview] – when this button is pressed, the promotion window will be displayed for viewing.
[Promotion preview] – when this button is pressed, the promotion window will be displayed for viewing.
![]() [Import goods from spreadsheet] – when the button is pressed, the Select file window containing goods for promotion will be displayed.
[Import goods from spreadsheet] – when the button is pressed, the Select file window containing goods for promotion will be displayed.
Each discount can be described with a note. In order to view and edit the discount for the selected product or group, the button ![]() [Change] shall be used to launch the Product window where the discount settings are stored.
[Change] shall be used to launch the Product window where the discount settings are stored.
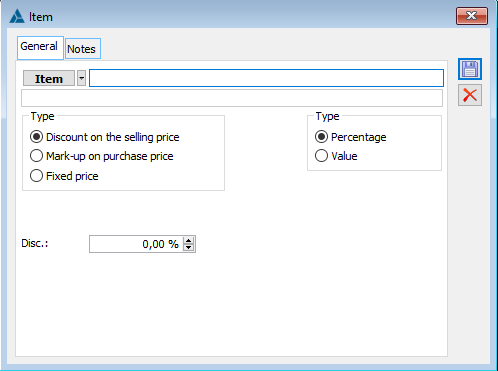
The button ![]() , next to which there is the button
, next to which there is the button ![]() from which the option can be selected, is used to add discounts for products: Add or Add list.
from which the option can be selected, is used to add discounts for products: Add or Add list.
Option: Add opens the window: Product for adding a discount for one product or a group of products. To add a discount or fixed price for a single product, in the window: Product, enter its code in the edit field or select it from the drop-down list with the button: ![]() . To add a discount for a group, expand the menu with the down arrow to select a group of products or a single product, select the option: Add a group and indicate the group in the list.
. To add a discount for a group, expand the menu with the down arrow to select a group of products or a single product, select the option: Add a group and indicate the group in the list.
Option: Add list will display a list of products, with multiple selections on it. After indicating the list of products, a window will open: Discount parameters, where discount settings will be specified for all products selected from the list.
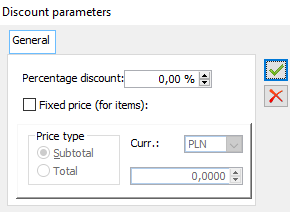
![]()
On the tab: Discounts on the contractor’s card also include a [Delete] icon, which can be used to delete one or more items from the list of discounts. Deleting several discounts at once is possible by selecting ![]() for them in the list. An option is also available: Discounts alphabetically, which, when selected, will display the list in order by group and product codes.
for them in the list. An option is also available: Discounts alphabetically, which, when selected, will display the list in order by group and product codes.
Contractor’s card, tab: Notes
Additional information related to the contractor is entered in the tab.
Contractor’s card, tab: Interest
A table of values used to calculate interest when creating reminders and debit notes can be individually defined for the contractor. The general table is defined in the configuration. Individual settings are taken into account first. The table entry consists of the date, percentage, and type of interest. The end date of the value is the date of the next item. For each day the debt is overdue, interest will be charged at the rate applicable on that day. The list is always sorted by date.
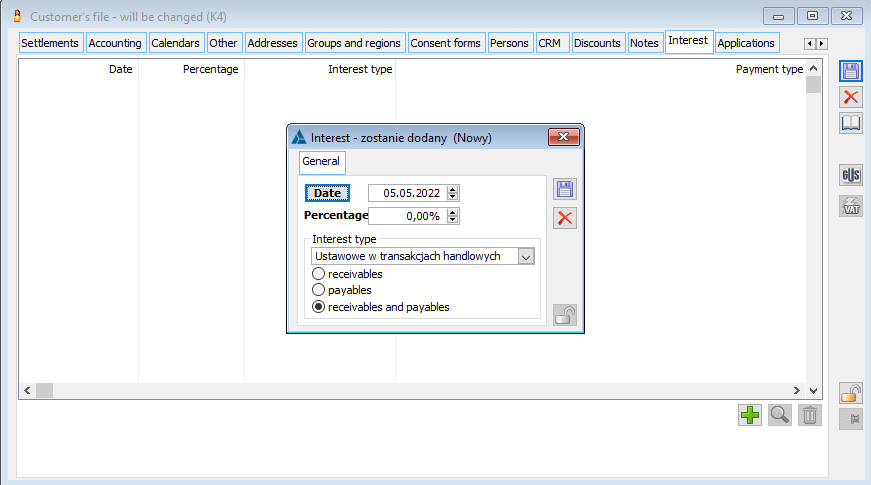
After pressing the button: ![]() [New], a new window will open: Interest, where you define the date, percentage, and type of interest. You can indicate the date by selecting it from the calendar, opened by the button:
[New], a new window will open: Interest, where you define the date, percentage, and type of interest. You can indicate the date by selecting it from the calendar, opened by the button: ![]() . Save the defined interest rate by pressing the button:
. Save the defined interest rate by pressing the button: ![]() [Save].
[Save].
Contractor’s card, tab: Applications
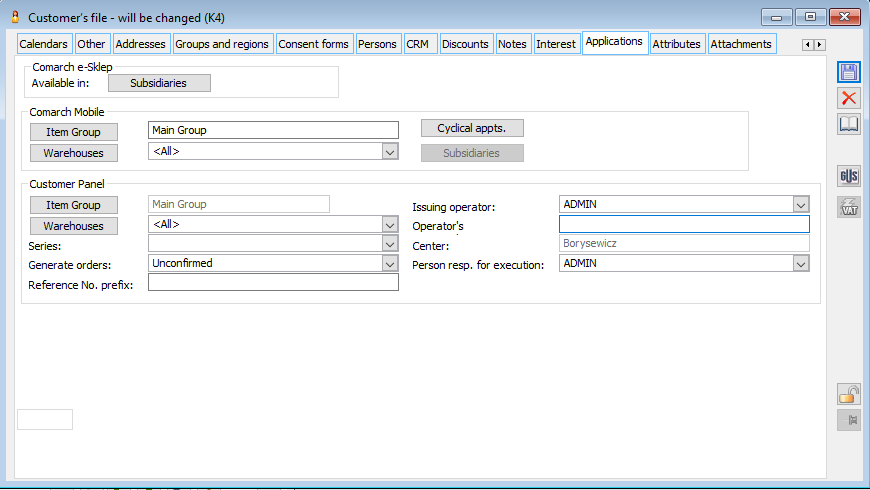
e-Store: the parameters apply to e-Store only
Branches – the button enables the selection of e-Store branches to which the contractor is to be sent Mobile Sales: the parameters apply only to Mobile Sales
Group of products – the button that allows indicating a group of products to which a given contractor is to have access in mobile sales.
Branches – the button allows selecting the branches of Mobile Sales to which the contractor is to be sent
Contractor’s dashboard – the parameters concern only the Contractor’s dashboard
- Group of products – the button that allows indicating a group of products to which a given contractor is to have access in Contractor’s dashboard
- Warehouse – please refer to the “Contractor’s dashboard” documentation for details.
- Generate orders (Unconfirmed and confirmed) – please refer to the “Contractor’s dashboard” documentation for details.
- Series – button for defining a series for documents
- Foreign number prefix
- Issuing operator – selects an operator from a drop-down list
- Operator password – allows entering a security password
When the password is entered, the system will verify that it is correct and warn the configurator that an incorrect password has been entered.
- Centre – default centre for the contractor
- Responsible for implementation – select the operator responsible for implementation from the drop-down list.
As of version 2016.3, several goods groups can be assigned to a single contractor for the Contractor’s dashboard application. The assigned groups are presented in a separate flat list, shown when the button is used: Goods group. It is possible to add another group to this list, to delete a previously assigned group, and to indicate a default group in the application. The default is the Main Group. The default group cannot be deselected, only changed (the requirement to assign at least one group remains). The default group is set by saving the window with the dedicated button (green tick). Apart from the window with the list of assigned groups, the group indicated as the default one is openly presented on the tab. Similar changes have also been made to the contractor’s template. Assigning groups and default when adding a new contractor is done in the context of a given pattern. It is also possible to set the above for contractor’s cards/templates when copying them, as well as when updating existing cards according to a template.
Contractor’s card, tab: Attributes
List of general attributes of a contractor. The attributes previously defined in the module can be assigned: Administrator. Attributes are assigned according to general rules.
On the tab: Attributes, there is a placeholder to facilitate the selection of attributes to be assigned to the contractor.
Contractor’s card, tab: Attachments
Attachments related to the contractor can be added to the tab. It is possible to attach photos, text files, spreadsheets, etc. here. The user is free to specify the format in which attachments will be saved and stored. This tab is the same as the tab: Attachments, located on the product sheet or employee card. How to add attachments is described in the module: Administrator.
Contractor’s card, tab: Acquirer’s limits
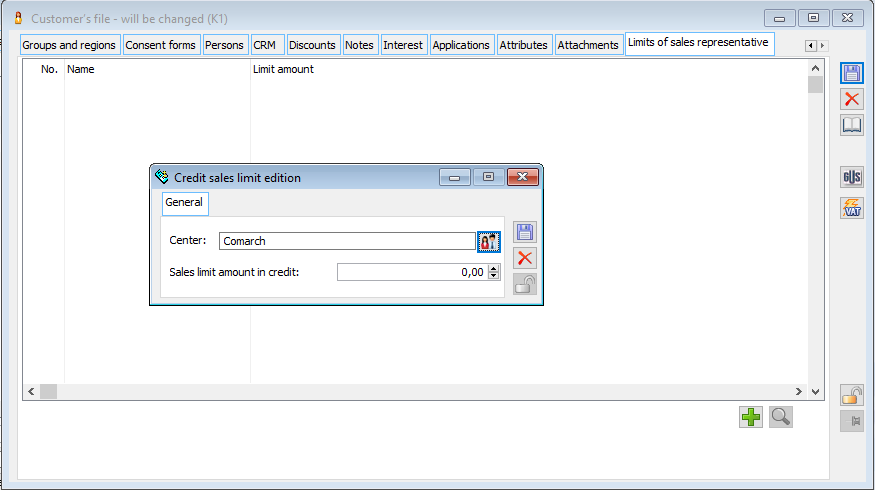
The tab is only active if the contractor, on the tab: General, has the following parameter selected: Acquirer. The system allows credit limits to be assigned to acquirers. Contractor marked as: Acquirer can be assigned a list of credit limits, with each limit being linked to a permission structure centre, meaning that the size of the limit can depend on which centre the operator belongs to. The acquirer’s limit is the maximum amount of credit that all contractors associated with the acquirer can have in total. If the option is selected in the configuration: Check the acquirer’s limit, then the acquirer is required when issuing a sales document. If the limit is exceeded, the system will respond according to the User’s permissions, more specifically according to the settings in the document definition; it will prevent the registration of the transaction, or it will display a warning. No limit means that the limit is not checked (it is unlimited). This takes into account the settings in the document definition for the permission structure centre to which the logged-in operator belongs. Liabilities to the contractors and outstanding deposits are included in the calculation of the balance compared to the limit.
Contractor’s template
A contractor card template is assigned to each group of contractors. The template contains selected fields and card parameters. If they are specified/filled in the template, these values will be automatically assigned to the newly created card if it is in the group to which the template applies, or to the card template in the newly created group if it is subordinate. The template can be modified, and the changes transferred to contractors and templates in subgroups. The meaning of the fields in the template is the same as the fields in the window: Contractor’s card.
To open the contractor template window, highlight the desired group on the left panel of the contractors list displayed in the window: Contractors, on the tab: Groups, and click: ![]() [Change].
[Change].
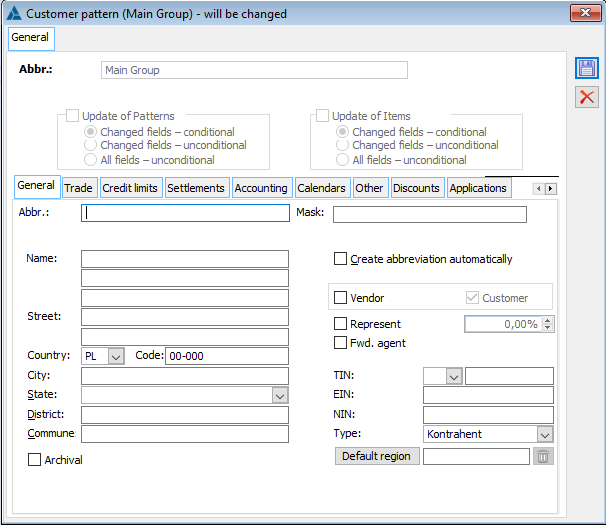
The template contains selected parameters and fields of the contractor’s card, grouped in tabs corresponding to the contractor card’s tabs. All these fields and parameters are discussed in detail in the chapter: Contractor’s card.
Parameters changed during the current template editing are displayed with a yellow background. When saving changes, they can be transferred to contractors or lower level group templates, depending on the option selected:
Update templates: changes will be transferred to templates for lower-level groups.
Update items: changes will be transferred to all the contractors belonging to the group.
The following options are available for each of these updates:
Changed fields – conditional: only those fields whose value in the template has been changed and whose value is the same as in the template before the changes will be updated.
Changed fields – unconditional: only those fields whose value has been changed in the template will be updated; they will be given the new value from the template, regardless of the current value.
All fields – unconditional: all fields present in the template will be updated; they will be given the value from the template, regardless of whether it has been changed.
When updating, pay attention to its type, as it can significantly change the saved properties of the contractor. Change the NIP prefix and select the items update: Changed fields – unconditional will cause that for all contractors, belonging to the group, the number changed in the template will be assigned.
The operator can perform an unconditional update of the contractor’s template if there is no ban to unconditionally update contractor templates and contractor group items (module: Administrator, operator card, tab: Bans).
On the Contractor’s template form, it is possible to check the “Create acronym automatically” parameter. Selecting this option will result in the Acronym field being automatically filled with the value of the GID Number of the contractor’s card in the database on each newly added contractor’s card belonging to the template group. The automatically assigned value can be changed.
Setting the price/promotion date type on the order based on the contractor’s card
As of version 2016.1, Users can indicate whether the date by which the initial price is to be set and promotions charged on orders is to be the date of its issue or the planned completion date. By default, the type of this date was previously determined on the basis of the ZS/ZZ definition. In version 2019.2, it is possible to parameterise the System in this respect with the accuracy of the contractor for which the order is registered.
For this purpose, a new option by contractor was added to the definition of the ZS/ZZ document in the section Initial price and promotions by date, and on the contractor’s card and contractor’s template, the section Initial price and promotions on orders by date was made available with the option to select the Date of issue and Date of execution.
If the above new option is set on the order definition, then the starting price and promotions will be charged on the order according to the date indicated on the card of the contractor for whom the order is registered.
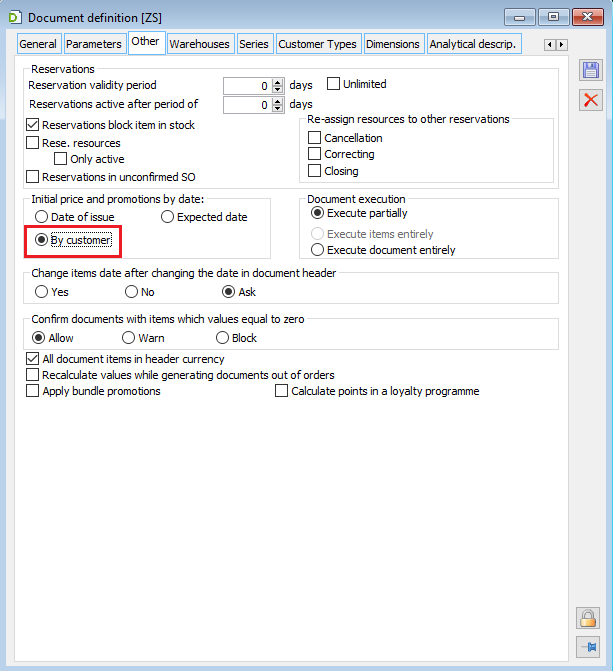
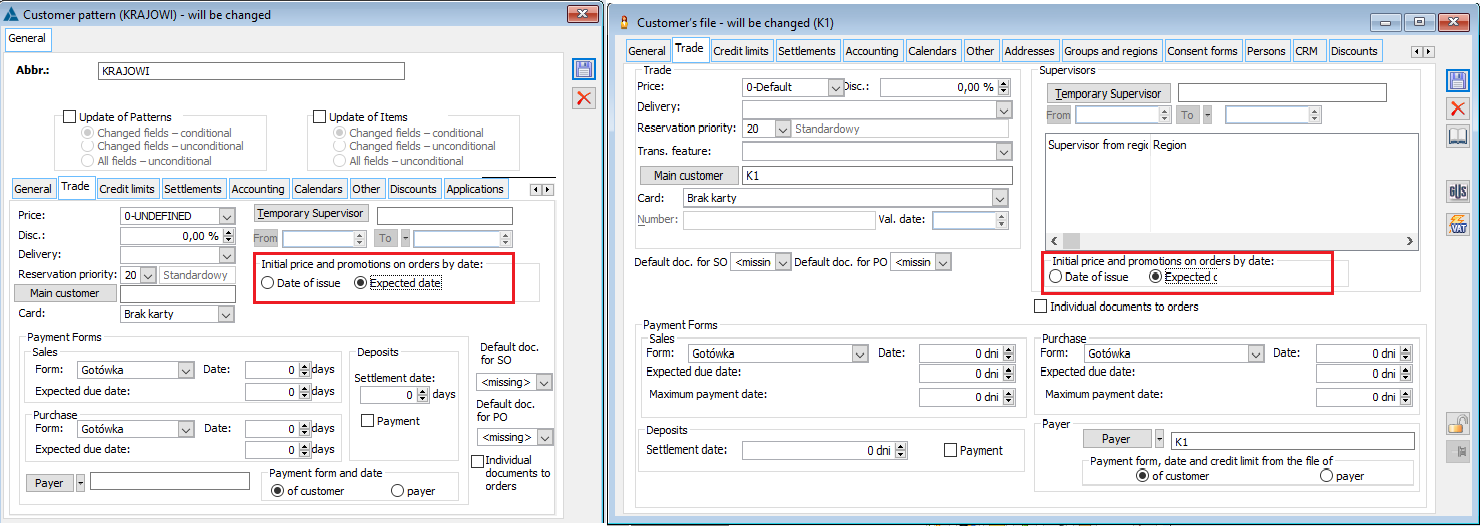
Adding the above-mentioned new parameter to the contractor’s template required making appropriate changes to it, consisting in moving the CRM section to the [Other] tab.
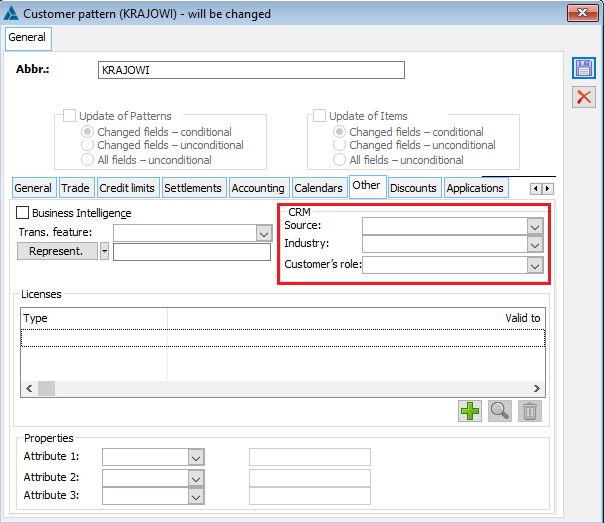
Contractor’s history
Contractor’s history is a function used to view operations performed in relation to a selected contractor. The operations include all commercial transactions, orders, bookings, job orders, settlements, shipments, etc. The individual tabs correspond to lists of documents of various system modules, narrowed down to those relating to a selected contractor, or are lists of items of these documents. This grouping of multiple lists in a single window allows quick access to a wide range of information on operations concerning the contractor. Filters on individual tabs make it easier to find relevant documents. From the contractor’s history level, it is also possible to perform many of these operations similarly to the corresponding document lists.
The contractor’s history window is opened with the button: ![]() [Contractor’s history] on the toolbar. The button is visible and works if a contractor is specified in the active window (e.g. selected on a commercial document).
[Contractor’s history] on the toolbar. The button is visible and works if a contractor is specified in the active window (e.g. selected on a commercial document).
The tabs will not display document values if a ban has been set for the operator: Displaying values in lists (module: Administrator, window: Operator, Bans tab).
Contractor’s history, tab: Settlements
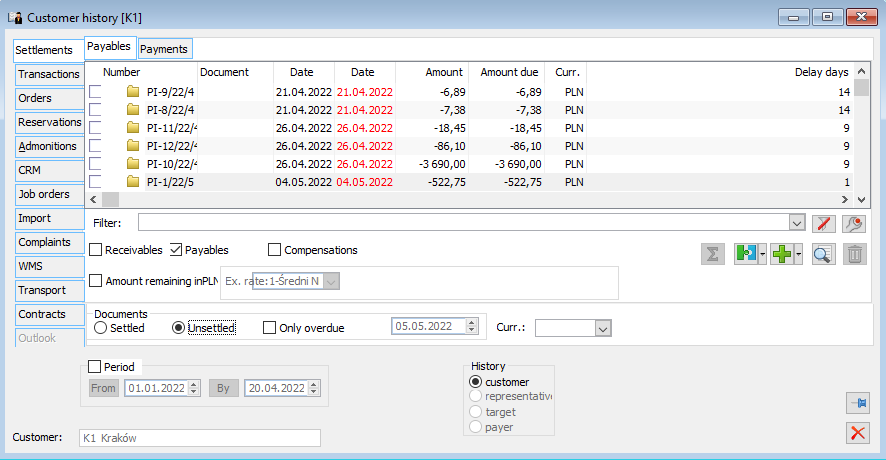
Tab: Settlements, functionally corresponds to the option: Payments. The available functions are detailed in the module documentation: Accountancy.
Contractor’s history, tab: Transactions
The tab contains a list of commercial documents and a list of their items. Some operations on commercial documents can be performed from the level of the contractor’s history. They are discussed in detail in the chapter: List of documents. The operation of the buttons and context menu options is similar to that of the list of documents. The lists can be narrowed down by filters:
Documents – by type of document (except tab: Settlement of deposits),
Period – the period during which the document was issued,
Owner – the centre where the document was issued. Access to the documents displayed in a given centre, in the context of an operator, depends on the parameter setting: View documents, on the card of this operator (window: Operator, tab: Parameters/System).
History – contractor, target contractor, payer.
Filter – other, User-defined.
Tab: Collectively
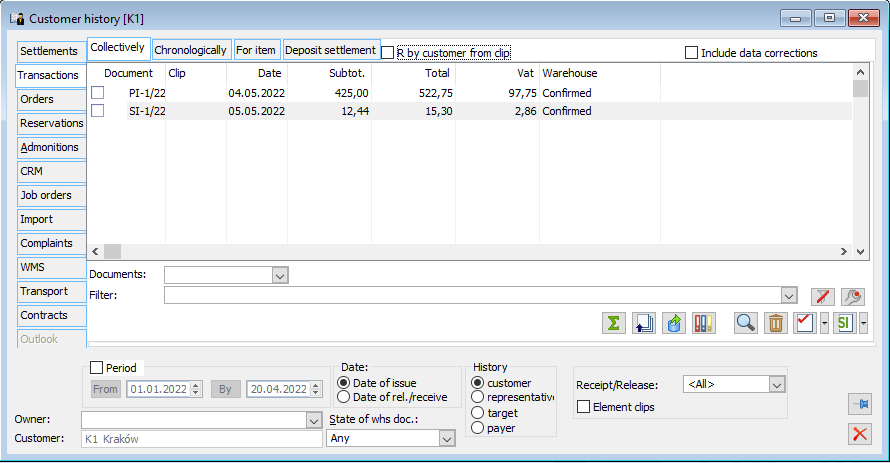
The tab contains a list of all commercial documents for a contractor, acquirer, or target contractor, without division into types (except for clips, which are presented in a separate column). These relate to the contractor or those for whom it is an acquirer, depending on the option chosen: History.
Include data corrections: when this parameter is selected, transactions in history will be included for the contractor from the last data correction.
Tab: Chronologically
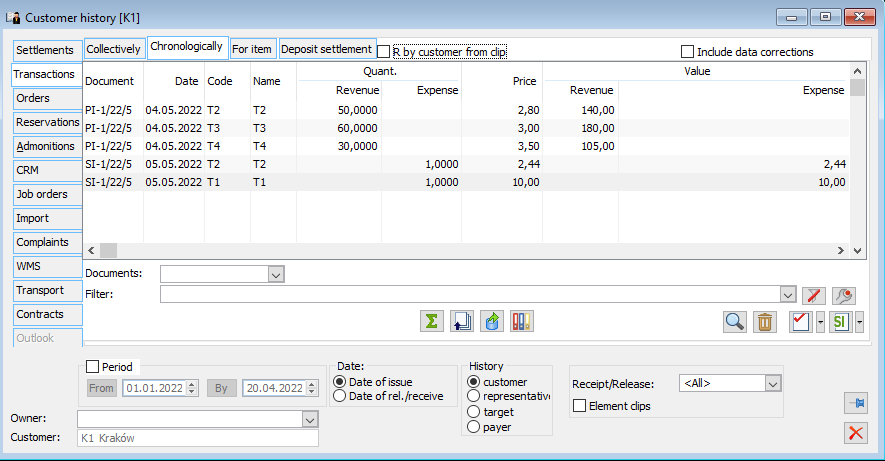
The tab contains a list of items of all commercial documents for the contractor, acquirer, target contractor, without division into types.
Tab: For the goods
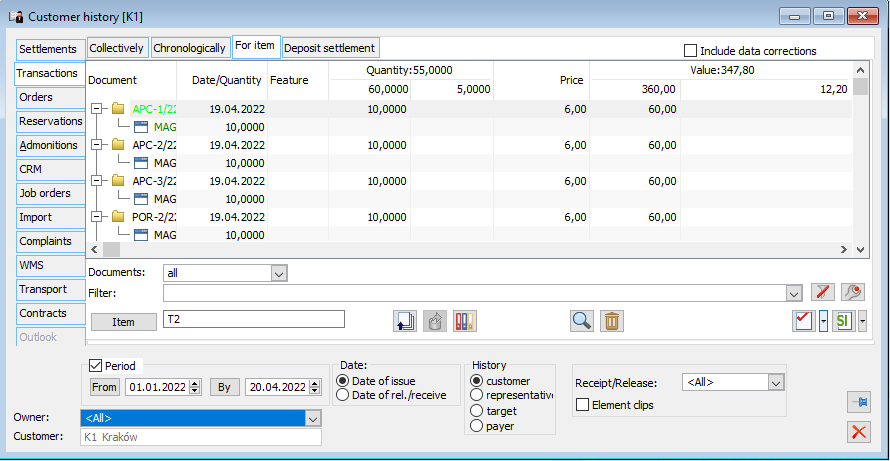
The tab contains a list of items of all commercial documents for the contractor, acquirer, or target contractor, without division into types. The list shall be limited to the product selected from the list, which shall be drop-down by a button: ![]() .
.
It is possible to display the date of issue or release/receipt for documents (depending on whether it is an expenditure or incoming document). The list is presented in detail, distinguishing between supplies and resources, according to the breakdown of the transaction item. One document item is displayed as a tree. The leaves of the tree (lower level) correspond to the components of the document item. One document item may cover goods which are differentiated according to their characteristics or the releasing/receiving warehouse, so it may have many components, although it concerns the same code products. This issue is further discussed in the sections on the transaction items of commercial documents. The quantity of goods in the document item and the quantity in the individual components are displayed in the same column. The sum of the quantities for the components always gives the quantity for the items.
After selecting a transaction sub-item with the left mouse button and clicking: Change is opened:
for sub-items of expenditure documents, the window: Product resource (if the resource still exists) or Delivery (if the entire resource has already been released)
for sub-items of incoming documents window: Delivery
Tab: Settlement of deposit
The tab presents the list of deposit documents (the subordinate branch presents the adjustments registered for a given deposit document) issued for a given contractor. From the tab, it is possible to generate deposit documents, post them, as well as view and edit them. It is also possible to view documents related to the selected deposit document.
The Value to be settled column shows the value of the deposit that has not been returned or invoiced, i.e. it is affected by WKK/PKK adjustments and clips.
The aforementioned logic of determining the value to be settled fails if the Company expects the deposit to be returned each time it is invoiced.
For the above reason, the inclusion of clip invoices in the determination of the value of the above column has been parameterised in version 2020.2 of Comarch ERP XL. The behaviour of the System is determined by the setting of the parameter Include clips:
- if the parameter is turned off, only deposit adjustments are included in the column To be settled
- with this parameter enabled, both the deposit adjustments and the invoices registered to the deposit and the invoices adjustments registered to the deposit adjustments are included in the above column
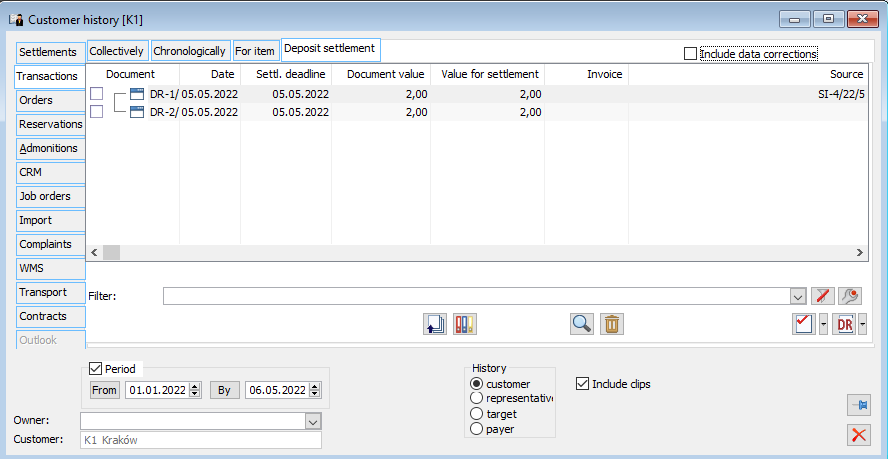
Contractor’s history, tab: Orders
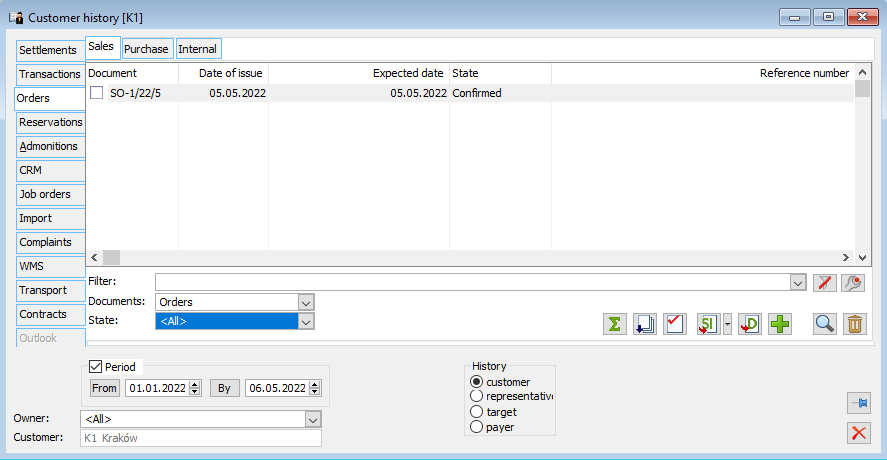
The tab contains a list of all sales, purchase, and internal orders, offers, and requests for quotations of the contractor. The list can be narrowed down to a selected period, type of documents (orders, offers, requests) or to orders with a specific status. Documents are available to view, edit, add, and perform operations on them as described in detail in the module documentation: Orders.
It is possible to display orders for:
- Contractor
- Target contractor.
After selecting the type of document in the field: Documents, buttons will be activated which enable the generation of relevant documents that follow the path of handling documents indicated in the filter, e.g. after displaying purchase offers in the list, the option of generating sales offers and purchase orders from them will be made available. It is also possible to transform displayed documents, e.g. you can generate an offer from a request or an order from an offer. From this level, it is also possible to make a printout of the Order history for order documents or offers, depending on the settings of the Documents filter, which shows the order number, date of issue, expiry date, date of execution, and order status.
Contractor’s history, tab: Bookings
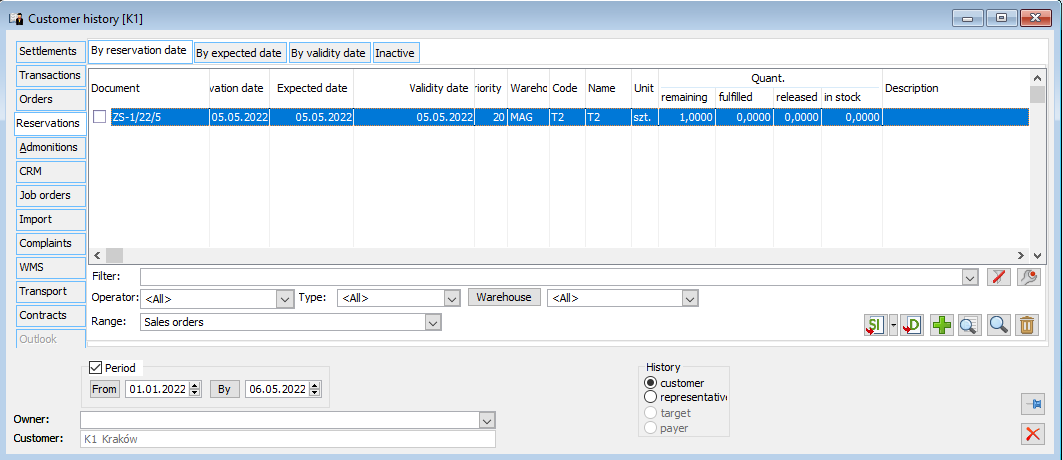
The tab is very similar to the corresponding goods history tab. The use of bookings, the meaning of the displayed data, the parameters and the available operations are described in detail in the chapter: Goods history.
After selecting the range of documents to be displayed: sales orders or purchase orders, the buttons will be activated respectively: ![]() [Convert to sales invoice] and
[Convert to sales invoice] and ![]() [Convert to purchase invoice] to generate the relevant documents. After expanding the menu next to these buttons, it will be possible to generate other documents for the displayed orders or bookings. Generating these documents will follow the same rules as generating them from the list of orders.
[Convert to purchase invoice] to generate the relevant documents. After expanding the menu next to these buttons, it will be possible to generate other documents for the displayed orders or bookings. Generating these documents will follow the same rules as generating them from the list of orders. ![]() [Document] – from this tab, it is possible to raise orders, service orders, picking orders, production orders documents in read or edit mode depending on: the permissions to edit the document of the given centre, the status of the order and the operator’s permission to edit confirmed orders.
[Document] – from this tab, it is possible to raise orders, service orders, picking orders, production orders documents in read or edit mode depending on: the permissions to edit the document of the given centre, the status of the order and the operator’s permission to edit confirmed orders.
Contractor’s history, tab: Reminders
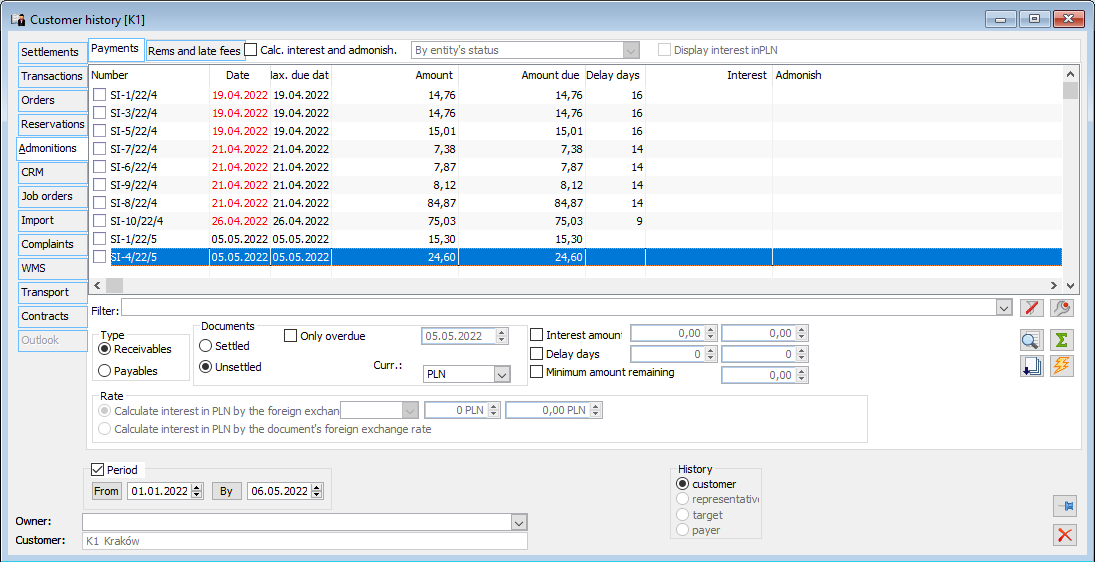
The tab functionally corresponds to the option: Generating notes and reminders. On the tab, it is possible to sum up the receivables from the invoices appearing on this call (after clicking: ![]() [Enable/disable summation]) and also, on the tab: Reminders and interest notes, narrowing the list of displayed items based on standard filters (mandatory filters can be defined here). It is also possible to display interest and costs in a selected currency and convert them in PLN.
[Enable/disable summation]) and also, on the tab: Reminders and interest notes, narrowing the list of displayed items based on standard filters (mandatory filters can be defined here). It is also possible to display interest and costs in a selected currency and convert them in PLN.
More information about payments, notes, and reminders can be found in the module’s documentation: Accountancy.
Contractor’s history, tab: CRM
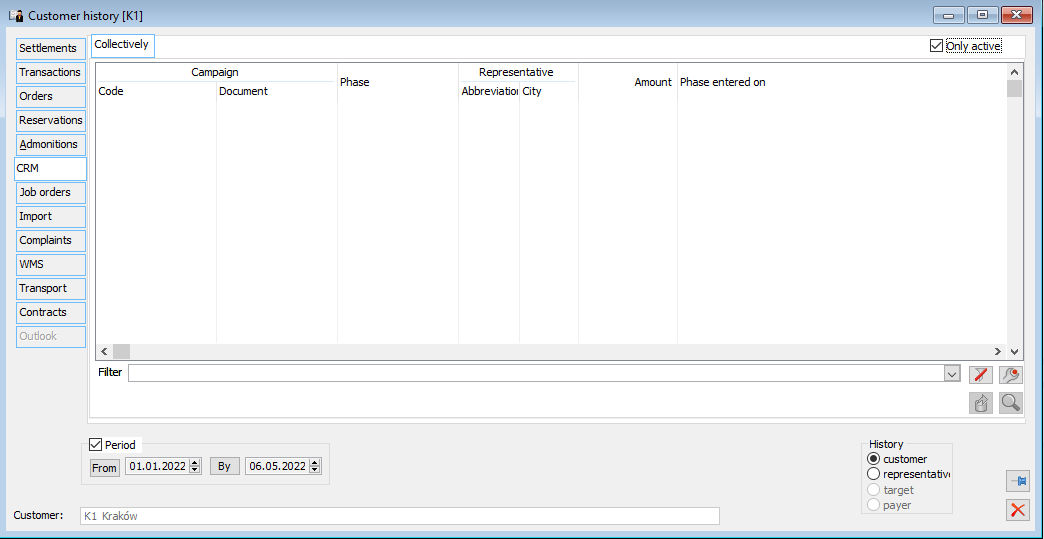
The tab contains a list of campaigns in which the contractor participates or the contractors for which he is an acquirer, depending on the option selected: History. Campaigns are described in detail in the following module documentation: CRM.
Contractor’s history, tab: Orders
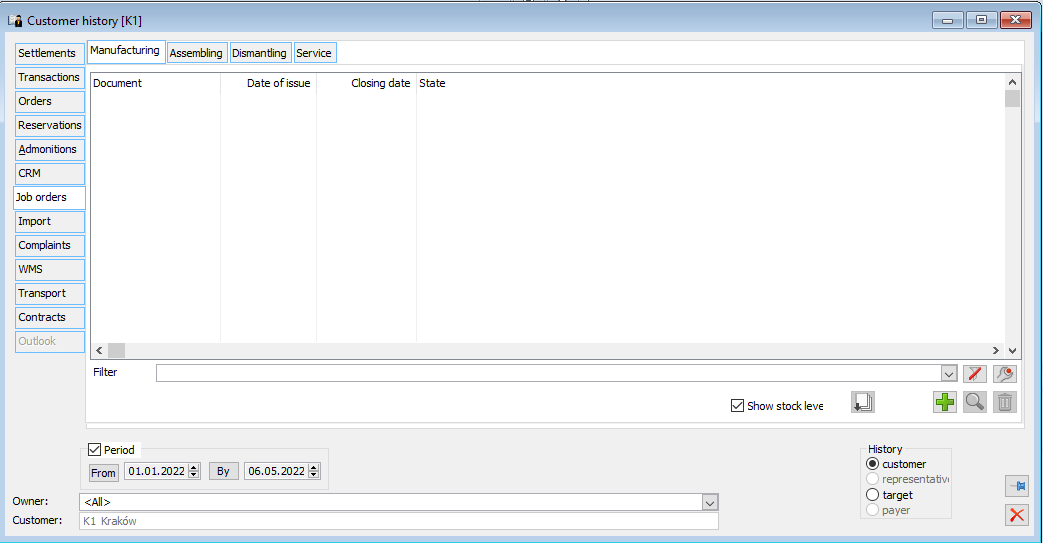
The tab contains a list of production, assembly, disassembly, repair, and service orders for the contractor. The list can be narrowed down to a selected period or to orders with a specific status. Documents are available to view, edit, and perform operations on them as described in detail in the following module documentation: Production. On each tab, there is a Related list button that opens the Related history window.
Button: ![]() [New] enables a new order to be generated for the current contractor.
[New] enables a new order to be generated for the current contractor.
Contractor’s history, tab: Import
The tab contains a list of import documents and a list of their items. The lists can be narrowed down to a selected period. Only documents with the same currency can be displayed at the same time. Some operations on import documents can be performed from the level of the contractor’s history. They are discussed in detail in the following module documentation: Import. The operation of the buttons and context menu options is similar to that of the import document list.
Import invoices, internal invoices, and SAD documents are displayed in separate lists (tabs). Each of these contains tabs for Collectively, Chronologically, and For goods. From the list of import invoices, by selecting FAI and right-clicking on the mouse, document generation options are available:
- SAD of the bonded warehouse
- SAD
- FWS
- PZI
Contractor’s history, tab: Complaints
The tab contains a list of purchase and sale complaints issued for a given contractor. RLS and RLZ are displayed in a common list. Documents can be displayed on the tabs as follows: Collectively, Chronologically, For goods.
The list of Complaints may be narrowed down based on:
- Filter – Considered, Accepted, Rejected
- Type of document – Purchase, Sale
- Status – Unconfirmed, Confirmed, In Progress, Considered, Closed
You can also narrow down the list of documents based on the indicated period, Document owner, or Date (Issued or Considered).
From the Contractor’s history level, it is possible to issue RLS and RLZ documents using the button: ![]() [New]
[New]
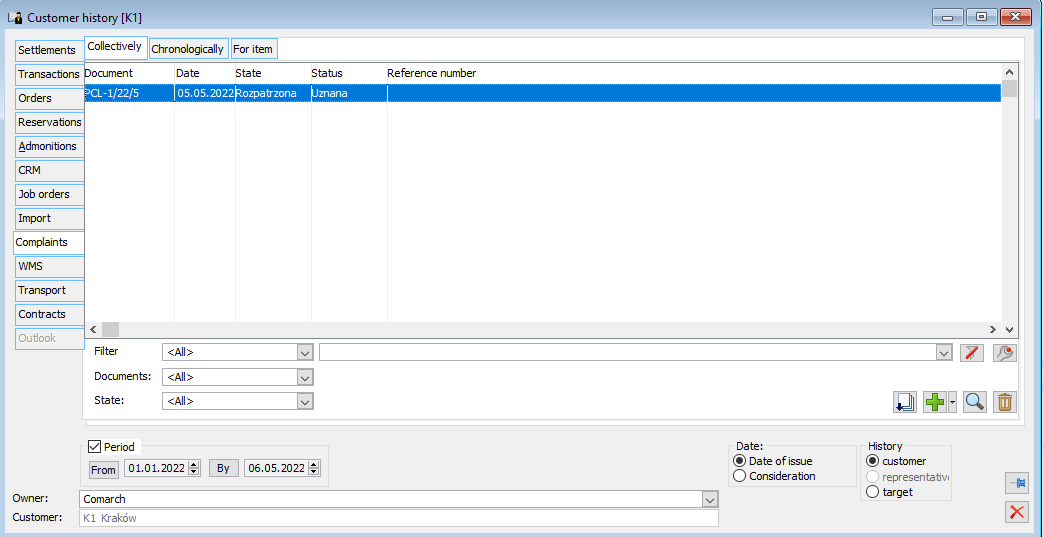
Contractor’s history, tab: WMS
Documents can be displayed on the tabs as follows: Collectively, Chronologically. The list of displayed documents can be narrowed by filters:
Documents – by type of document (except tab: Settlement of deposits),
Period – the period during which the document was issued,
Owner – the centre where the document was issued. Access to the documents displayed in a given centre, in the context of an operator, depends on the parameter setting: View documents, on the card of this operator (window: Operator, tab: Parameters/System).
History – contractor, target contractor, payer.
Filter – other, User-defined.
Status – the status in which the documents are located: Not approved, Approved, In progress, Completed, Active, Closed.
From this tab you can also: add order and note documents, check the history of related documents, preview a document or delete it.
Contractor’s history, tab: Transport
Tab: Parcels
The tab contains a list of parcels to which commercial documents are related for the selected contractor. A parcel will be listed if it contains at least one document issued for the selected contractor. The displayed data and available functions are described in detail in the chapter: Parcel list.
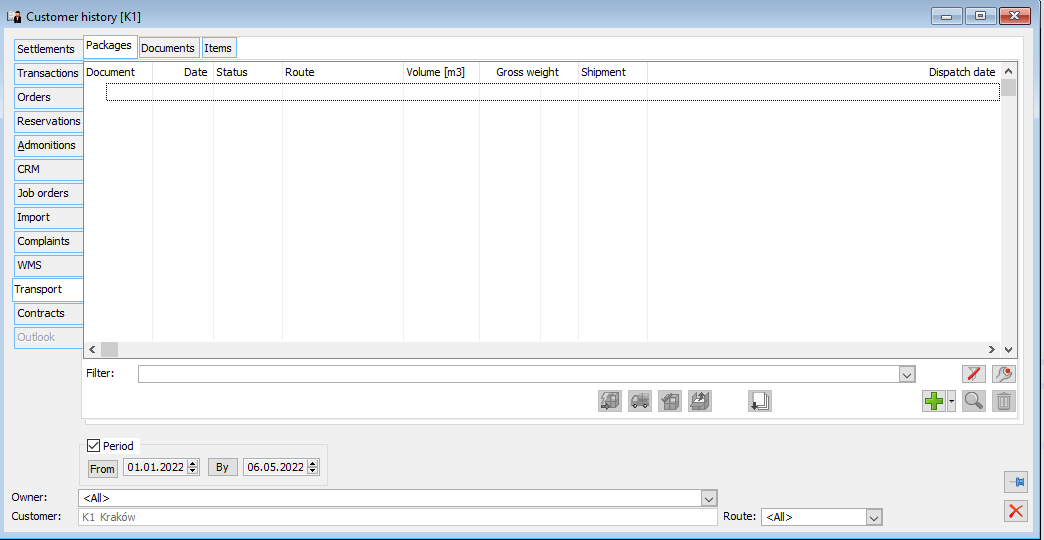
Tab: Documents
The tab contains a list of documents issued for the selected contractor that are related to parcels. The list displays information about related parcels and shipments. By clicking the button: ![]() [Preview] or selecting one of the options from the drop-down menu using the button:
[Preview] or selecting one of the options from the drop-down menu using the button: ![]() , you can view a document, parcel or shipment.
, you can view a document, parcel or shipment.
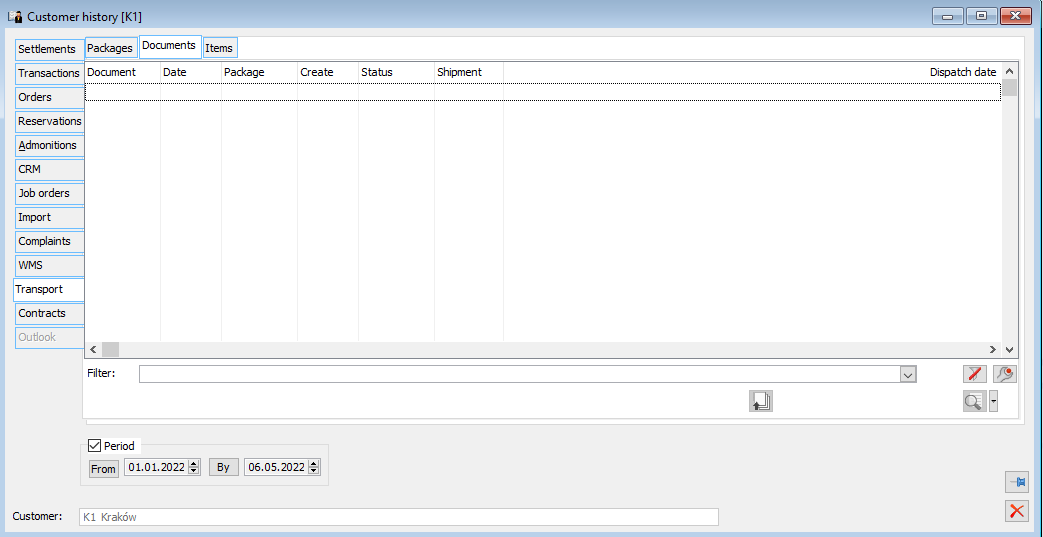
Tab: Goods
The Goods tab contains a list of document items issued for the selected contractor that are related to parcels. The list shall be limited to the goods selected from the list, which shall be drop-down by a button: ![]() . The list displays information about related parcels and shipments. By clicking the button:
. The list displays information about related parcels and shipments. By clicking the button: ![]() [Preview] or selecting one of the options from the drop-down menu using the button:
[Preview] or selecting one of the options from the drop-down menu using the button: ![]() , you can view a document, parcel or shipment. This tab is used to search for information on the transport of the selected goods, in particular on the status of the parcel and the shipment.
, you can view a document, parcel or shipment. This tab is used to search for information on the transport of the selected goods, in particular on the status of the parcel and the shipment.
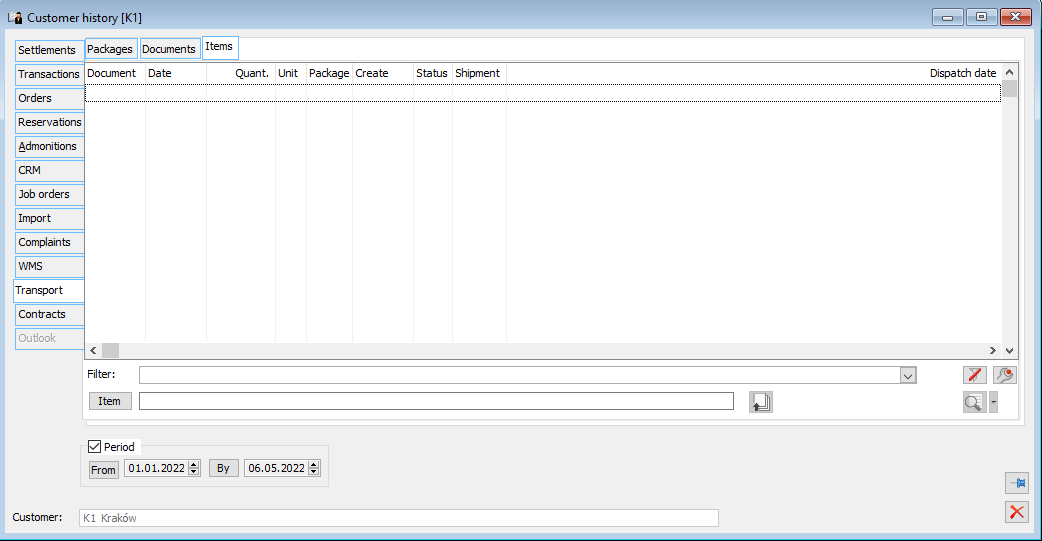
Contractor’s history, tab: Agreements
The tab contains a list of agreements issued for a given contractor. Agreements can be displayed on tabs as follows: Collectively, By type. The tab By type is similar to the list of agreements. On the left, the types of agreements are presented, and on the right, only agreements issued for the contractor for whom the history is displayed.
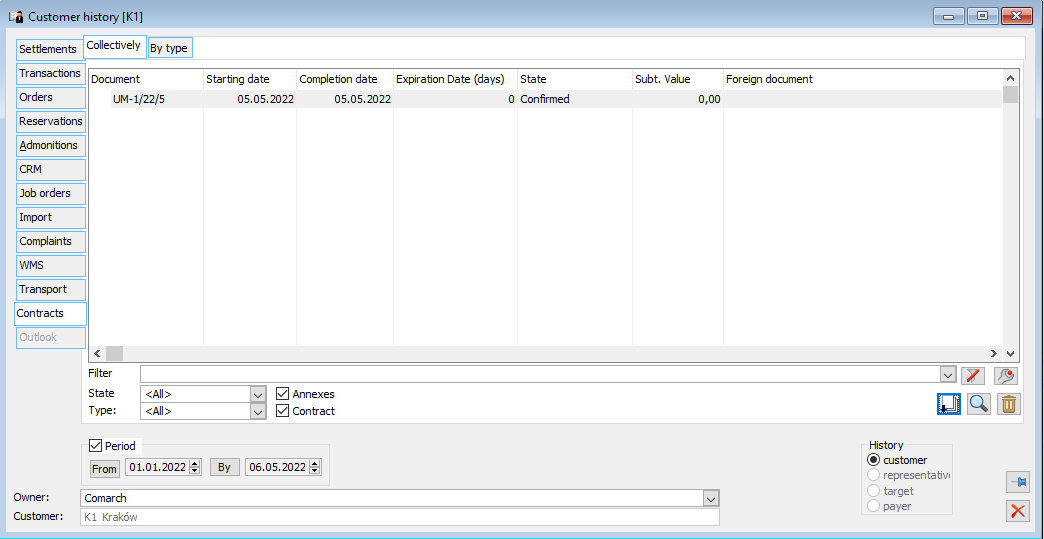
Contractor’s history, tab: Outlook
To activate the tab, on the contractor’s card, on the tab: CRM, in the field: Outlook URL, enter the recipient’s mailbox address (Folder properties: Inbox, tab: Home page, field: Address). In this way, from the tab: Outlook, it will be possible to receive e-mail sent to a given address, edit it, send a reply, etc.
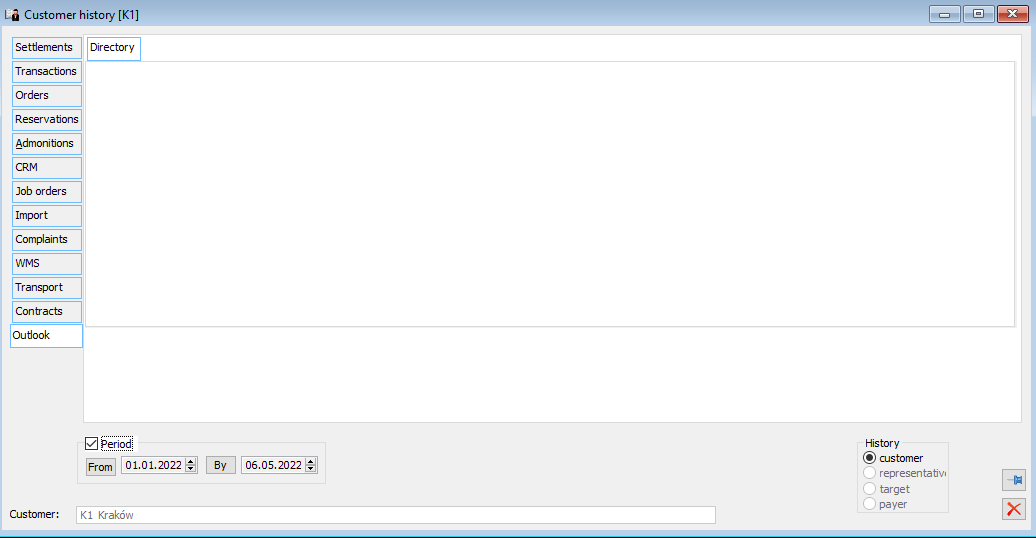
- Functionality not available in Comarch ERP XL Start ↑
