Introduction
The following chapter will describe the basic scenarios of activities that can be carried out when working with the module: Orders. There will be numerous references in the descriptions of these activities to the individual windows above, the use of which will be helpful for carrying out specific activities.
How to register a request for quotation
Registering a request for quotation is the first action in trading in the procurement method. Module: Orders, in response to the needs of the Users, makes it possible to skip this stage, as well as the next one – the offer – as placing an order is not always preceded by receiving a request for quotation or making an offer.
In order to register a request for quotation, the user shall open the window: Request for quotation, by clicking:
![]() [Expands the menu of available documents], located next to the icon:
[Expands the menu of available documents], located next to the icon: ![]() [New purchase order] and then, from the expanded sub-menu, selecting the item: Purchase enquiry or Sales enquiry, or clicking in the window: Request list, on the Requests/Sales or Requests/Purchase tab, the button:
[New purchase order] and then, from the expanded sub-menu, selecting the item: Purchase enquiry or Sales enquiry, or clicking in the window: Request list, on the Requests/Sales or Requests/Purchase tab, the button: ![]() [Add request for quotation] or a key from the keyboard: <Insert>.
[Add request for quotation] or a key from the keyboard: <Insert>.
The window that opens must be filled in according to the instructions described in the chapter: Types of contractors.
When issuing order documents, the contractor type assigned to the document definition in a given company structure centre is controlled. The control also works when there are documents in the database issued, for example, to the ABC contractor, which has the following type specified: Customer and a change is made to the document definition so that only the following contractor type is available on the order documents: Investor. Then, when copying such documents using <Ctrl>+<Insert>, appropriate information about an incorrect type of a contractor on a document will appear.
On documents SOI, POI, SQ, PQ, SO, PO, IO the list of contractors is limited to conforming types of contractors appearing after clicking the button Sales representative.
Filter wizard on the list of document elements
As of 2017.0 version, functionality to create filters on most documents that have elements has been made available. Under the list of items there is a filter line with a wizard.
The filter area is always active, regardless of the document status and the operator’s rights to the document (viewing, editing, etc.).
Due to the specificity of documents with two lists that display records from different source documents, it is possible to apply only a “simplified” version of the filter wizard, which will be able to indicate only the goods. That is, the user will be able to restrict the list by product only, and not by specific quantities, units, or other displayed data.
Moving multiple items at once
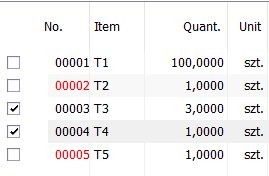
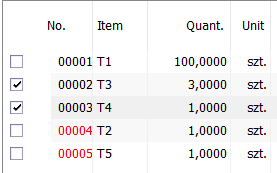
From version 2017.0 onwards, after selecting multiple items and using the functionality under the down/up buttons, all selected items can be moved by one item taking into account the specifics of the sales enquiry and purchase enquiry.
After filling in the fields in the window: Request for quotation, click: ![]() [Save changes].
[Save changes].
This will register the request for quotation and add it to the request for quotation list.
How to generate a purchase enquiry from a sales enquiry
After registering a sales enquiry (from the tab: Requests/Sales), the user can generate a purchase enquiry from it. The resulting purchase enquiry will have the same content as the source sales enquiry.
To generate a purchase enquiry from a sales enquiry:
- in the window: Orders list, on the tab: Requests/Sales, select the sales enquiry from which the purchase enquiry is to be generated
- select the following function from the drop-down menu next to the [Convert to offer] button: Purchase enquiry
- a purchase enquiry will be generated, which content will be transferred from the sales enquiry
- after entering the data for the purchase enquiry, click [Save changes]. The new enquiry will be registered on the list of purchase enquiries (tab: Requests/Purchase).
How to make changes to a request for quotation
Making changes to a request for quotation is possible only if it has not been transformed into an offer.
In order to make changes in the request for quotation one should:
- open the window: Request for quotation (which is to be opened for editing), by selecting this enquiry on the list of enquiries and:
- clicking the [Change] button or
- selecting from the context menu (opened by right-click), the option: Change;
- Then make the changes in the window that opens: Sale/purchase enquiry.
- Once the changes have been made, they must be approved by clicking [Save changes] button.
How to delete a request for quotation
Deleting a request for quotation from the list of requests for quotation is possible only if it has not yet been converted into an offer.
In order to delete a request for quotation from the list:
- On the list of requests for quotation, select the request to be deleted (the multiselect mode in which requests are displayed allows multiple items to be selected at once),
- click the [Delete] button or
- select from the context menu (opened by right-click), the option: Delete.
After selecting the option: Delete, the user will be prompted to delete the item. If the following button is clicked:
![]() , then the selected item(s) will be deleted. Clicking:
, then the selected item(s) will be deleted. Clicking: ![]() button will cancel the operation.
button will cancel the operation.
It is not possible to delete a request for quotation on the basis of which an offer was made.
How to convert a request for quotation into an offer
Conversion of a request for quotation into an offer is possible for every registered request for quotation.
To convert a request for quotation into an offer:
- on the list of requests for quotation, select the request for quotation which is to be converted into an offer.
- click [Convert into offer]. This will open the window: Sales/purchase offer, depending on which request for quotation is being converted.
- in the open window: Sales offer (or in the window: Purchase offer) fill in the fields as described in chapter: Sales/purchase offer, taking into account the specifics of the sales offer and purchase offer.
- After filling in the fields in the windows: Sales offer or Purchase offer, click the [Save changes] button. This will register the new offer on the offer list.
How to register an offer
A sales offer is registered by converting a request for quotation into an offer (chapter: How to convert a request for quotation into an offer/register a new offer.
In order to register a new offer, the user shall open the window: Sales offer, by:
- clicking the [Expands the menu of available documents], located next to the icon [New purchase order] and then, from the expanded sub-menu, selecting the item: Sales offer or Purchase offer, or
- by clicking in the window: Offer list, on the tab: Offers/Sale or Offers/Purchase, the button [New] or a button on the keyboard: <Insert>.
The window that opens must be filled in according to the instructions described in the chapter: Sales/purchase offer, taking into account the specifics of the sales offer and purchase offer.
After filling in the fields in the window: Sales/purchase offer, click: ![]() [Save changes]. This will register the new sales offer and add it to the list of sales offers.
[Save changes]. This will register the new sales offer and add it to the list of sales offers.
How to generate a sales offer from a purchase offer
Once a purchase offer has been registered and approved, the user can generate a sales offer from it. The sales prices in the generated offer will be set as usual, based on the default price list. The prices from the source purchase offer will appear as base prices in the sales offer, on the basis of which the margin is calculated.
To generate a sales offer from a purchase offer:
- in the window: Orders list, on the tab: Offers/Purchase, select the confirmed offer from which the sales offer will be generated
- from the drop-down menu using the button next to [Convert to order], select the function: Sales offer
- a sales offer will be generated. The goods from the source purchase offer will be transferred to the offer.
- To save the generated sales offer, click [Save changes] button. The offer will be registered and will be available from the orders list, from the tab: Offers/Sale.
The user cannot delete a purchase offer if a sale offer has been generated from it.
How to prepare different variants of an offer
Module: Orders, provides for different variants of offers. This means that one offer may have many variants. For example: the same goods may be offered at different prices or in different quantities. Different types of the same product can also be offered, for example TV sets from different manufacturers or cars with different equipment.
A new variant of the offer can be registered in the window: Sales/purchase offer in the tab: General.
To register a new variant of an offer:
In the window: Sales/purchase offer, on the General tab, next to the field: Variant, click:
![]() [Select offer variant], from the expanded list select the item: <New variant>. A question will appear: “Do you want to overwrite the offer items in the new variant?”
[Select offer variant], from the expanded list select the item: <New variant>. A question will appear: “Do you want to overwrite the offer items in the new variant?”
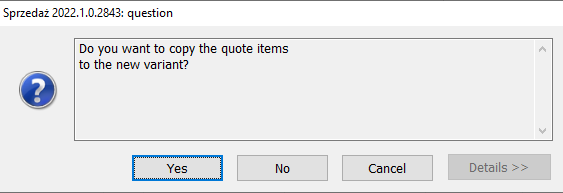
Clicking: Yes will generate a new offer identical to the offer which was edited when the new variant was generated. Only the offer number (the first free number for the same series will be assigned) and the date of issue (the current date will be entered as the date of issue) will be changed on the newly created offer. An offer created in this way can be freely modified.
If the following button is clicked: No, the programme will generate a new offer with the same header as the previous offer (that is contractor, global discount, payment method, etc.). Only the date of issue will be changed and a new number assigned. The offer, however, will not contain any items. All items must be entered manually.
Clicking: Cancel will cancel the operation and return to the original offer.
After selecting the button: Yes or No, it is necessary to enter the necessary data in the opened window: Sales offer or purchase offer and register the new offer variant by clicking: ![]() [Save changes].
[Save changes].
All variants of the offer created in this way can be completely independent – assigned to different operators, contain different elements, etc.
On the General tab of each new offer, it will be possible to display in the field: Variant, all variants created for a given offer. This list shall always contain an item: <New variant>, which allows the user to create a new variant of the offer.
Approval of offer variantsn
The approval of an offer is affected by two parameters:
- Document approval right
- Automatically approve the offer.
These parameters are defined in the document definition: sales offer and in the document definition: purchase offer. The definitions of these documents can be found in the module: Administrator, in the window: Document definitions.
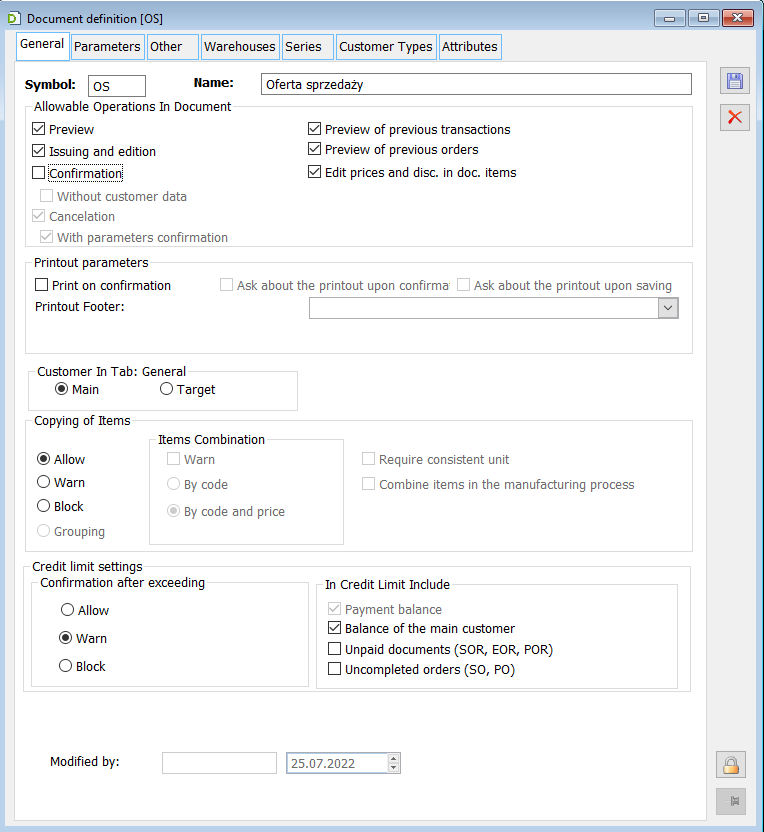
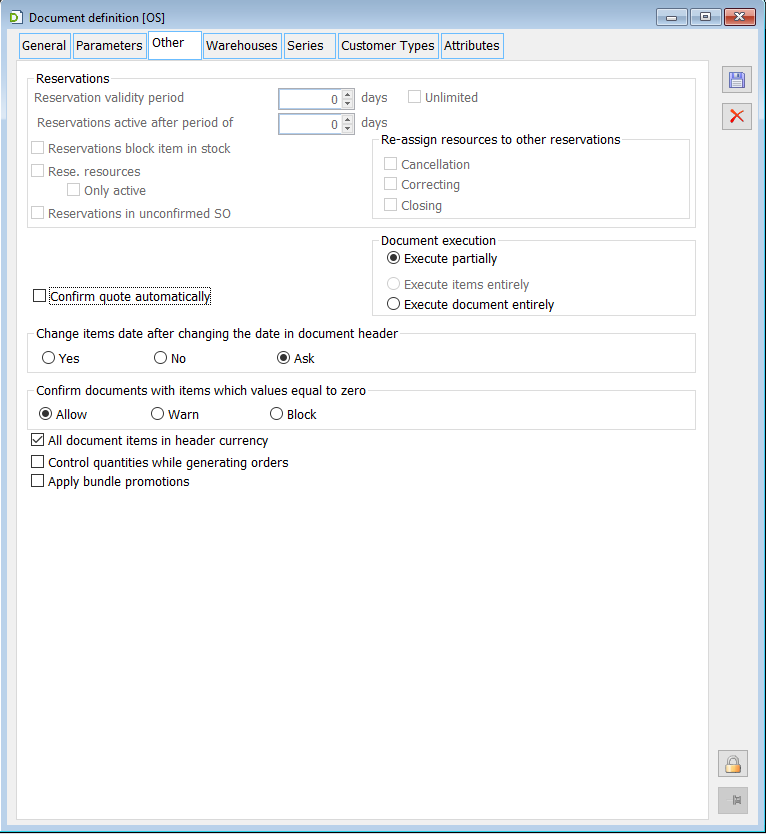
Depending on the definition of these parameters, the following situations are possible:
- If these are checked, then the offer variant is always confirmed – regardless of whether it is a confirmed, unconfirmed, or rejected offer variant.
If a confirmed offer variant is generated, then the operator creating the new offer variant will be displayed as the approving operator (window: Sales/purchase offer, tab: Header, field: Confirmed by).
- If they are not checked, then the offer variant is always unconfirmed (regardless of the state the offer is in).
How to convert an offer into an order
Converting an offer to an order is only possible if the offer in question is confirmed.
To convert a purchase offer to an order:
- in the list of offers, select a sales/purchase offer which is to be converted into a sales/purchase order.
- Once the offer is selected, click the [Convert to order] button or select the following item from the context menu (opened by right-click): Convert to order. A new window will open: Sales/purchase order (depending on which offer the order was generated from).
- In the open window: Sales/purchase order, fill in the fields as described in chapter: Sales/purchase order, taking into account the specifics of the sales and purchase order.
- After filling in the fields in the window: Sales order, click [Save changes]. This will register the new order on the orders list.
If the “Control quantities when generating orders” parameter being enabled on Purchase offer/Sales offer form, the System generates for the next order, sourced from a given offer, only those items and in such quantities which have not been previously included in previous orders created based on this offer.
How to register sales/purchase order
A sales/purchase order may be registered as a new order, not preceded by a request for quotation or offer. However, it may also be a continuation of a process which began with a request for quotation or offer. In this situation, the items on the order are transferred by converting the offer into and order. However, the transfer of these data does not mean that they cannot be changed. It may happen that certain values in a particular order are modified in comparison to the values that were recorded in the offer (for example prices of goods).
A new sales order can be registered by:
- converting an offer into a sales/purchase order
- registering a new order.
To register a new sales/purchase order:
- open the window: Sales/purchase order, by:
- clicking the [New purchase order] button or the [Expands the menu of available documents] button next to it, and then selecting the following item from the expanded sub-menu: Sales order or
- by clicking in the window: Orders list, in the tab: Orders/Sale or Orders/Purchase, the [New] button or clicking on the keyboard: <Insert>
- The window that opens must be filled in according to the instructions described in the chapter: Sale/purchase order
- After filling in the fields in the window: Sales/purchase order, click [Save changes]. This will register the new order and add it to the orders list.
How to generate purchase order from sales order
When working with the following module: Orders, it may happen that more goods are ordered for sale than there are in the User’s warehouses. In such a case, it is necessary to purchase the missing quantity. In order to facilitate the process of purchasing goods, the module: Orders, provides for the possibility to generate a new purchase order from the sales order. This function speeds up the turnover process by automatically transferring the data from the sales order to the purchase order. It is not possible to generate a purchase order from a sales order that has been completed (completed orders are displayed in maroon).
To generate purchase order from sales order:
- in the list of sales orders, select the order from which the purchase order is to be generated. The selection can be made using the left or right mouse button, or a key on the keyboard: <Space>
- after selecting the sales order, click the [Document type] button next to the [Convert to sales invoice] icon. From a list that will appear, select the following item: Purchase order. This will open the window: [Generating orders]
- select the method for optimising the orders list by ticking one of the boxes described.
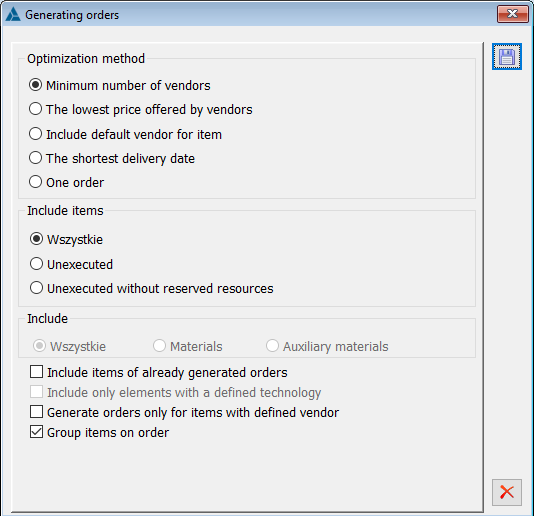
Optimisation method – the optimisation methods shall depend on the manner of filling in the Contractors tab in the window: Product card, for the product that is the subject of the transaction.
The following optimization methods are possible:
- Minimum number of suppliers – selecting this function will cause the newly created purchase order to have the contractor that has been registered in the product file set by default (window: Product card, Contractors tab), which is the subject of the order. If more than one contractor is entered in the tab, the first one in alphabetical order shall be entered into a new purchase order
- The lowest price offered by suppliers – if this function is selected, a new purchase order shall include the contractor entered as the lowest price contractor in the file of products being the subject of the order
- Include default supplier for the product – if this function is selected, a new purchase order shall include the contractor entered as the proposed contractor in the file of products being the subject of the order
- The shortest delivery date – if this function is selected, a new purchase order shall include the contractor entered as the contractor offering the shortest delivery time in the file of products being the subject of the order
- One order – if a purchase order is generated from several selected sales orders, then the setting of this parameter shall influence whether a single purchase order grouping the source items or several purchase orders shall be generated from these orders, respectively to the source orders
Include items – the option is active also when all the selected SO have the status of unconfirmed documents.
- All – an order will be generated for all the items of the source order, regardless of their status
- Unfulfilled – the generated order will include only the source order items that have a non-zero unfulfilled quantity (there are reservations)
- Unfulfilled without reserved resources – the generated order will include the unfulfilled items of the source order but excluding the unfulfilled quantities with allocated resources
Generate orders only for goods with specified supplier – if this option is checked, an order shall be generated only for those goods that have a supplier specified in the goods file. If there is no such supplier in the goods file, the purchase order shall be generated only for the other commodities (if they have a specific supplier) or it shall not be generated at all if the sales order includes only the commodities without a specific supplier
Group items on order – if this option is checked, items from the source sales order will be grouped on the purchase order; unchecking the option will rewrite the items and quantities as they were recorded on that order.
Once the user has selected how to optimise the orders list, click: ![]() [Convert]. This will add the new purchase order to the list of purchase orders. An appropriate message will appear informing about this.
[Convert]. This will add the new purchase order to the list of purchase orders. An appropriate message will appear informing about this.
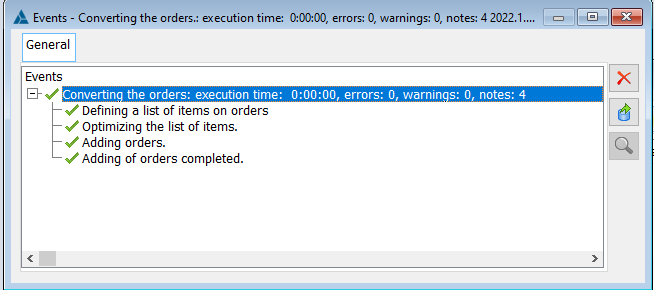
To enter the data for a new purchase order, select the Purchase tab and select the order that was generated from the sales order. Then, after selecting the new purchase order, click: ![]() [Change]. In this way, a window will be displayed: Purchase order, in which the user enters the data necessary to place a valid purchase order. The method of filling in this window is described in the chapter: Sales/purchase order.
[Change]. In this way, a window will be displayed: Purchase order, in which the user enters the data necessary to place a valid purchase order. The method of filling in this window is described in the chapter: Sales/purchase order.
If the commodity code is changed on a purchase order generated from a sales order, then a message shall be displayed to link the elements of the two orders. Clicking:
- Yes – will cause the link to be disconnected and a new commodity code to be entered on the purchase order item (with the sales order element unchanged).
- No – shall cause the link not to be disconnected. The new commodity code will be entered into the purchase item.
How to generate purchase order from internal order
A purchase order can be generated from internal order. This functionality is useful when, for example, an internal order has been placed in a branch to the head office and the head office, for the purpose of this order, places a purchase order with a supplier.
To generate purchase order from internal order:
- In the window: Orders list (in the tab: Orders/Internal), select the order from which the purchase order is to be generated
- From the drop-down menu using the button next to [Convert to WMR- document ] button, select the function: Purchase order
- A new window will open: Generating orders, in which one needs to select how to optimise the generated order. In the window, the same optimisation options are active as when generating a purchase order from a sales order
- After clicking in the window: Order generation, the [Convert] button, a purchase order will be generated, according to the defined optimisation options.
How to generate purchase order from balance of goods
Once a balance of goods has been generated for a particular group of goods, it may be necessary to issue a purchase order for the missing reserved goods.
To generate purchase order from balance of goods:
- after generating the balance of goods and indicating the quantity in the column: Orders – Quantity, click [Generate purchase order] (this option is also available by selecting the following function from the drop-down menu located next to the button: Purchase order).
In the opened window: Generating orders, ways to optimise the generated order and other options to parameterise the generated order will be displayed:
- Minimum number of suppliers.
- The lowest price offered by suppliers (includes entries on the product card, on the tab: Contractors) – for example, if there are several items in the balance sheet, for which an order will be generated, and for each product the lowest price is offered by different contractors, then several orders will be generated – respectively for each contractor.
- Include default supplier for the product (includes entries on the product card, on the tab: Contractors)
- The shortest delivery date (includes entries on the product card, on the tab: Contractors)
- One order – if checked, it will determine whether a single order will be generated for all items.
Include items – the options in this section are disabled when generating a purchase order from the goods booking balance.
Generate orders only for goods with specified supplier – only orders for items with a specific supplier shall be generated (the setting in the product card shall be taken into account).
Group items on the order – the parameter shall group the same items on the order.
- after specifying these parameters, click the [Convert] button. A purchase order will be generated.
How to cancel a sales/purchase order
An order that has been approved but not completed can be cancelled. To cancel a sales/purchase order:
- In the list of orders, select the order to be cancelled
- Select from the context menu, opened by right-click, the following function: Cancel
- A window will be displayed: “Do you wish to discontinue order implementation?”. To cancel the said order, select the option: Yes.
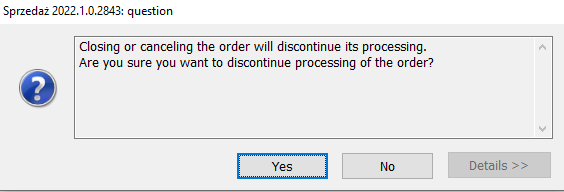
- After selecting the option: Yes, a cancellation options window will appear.
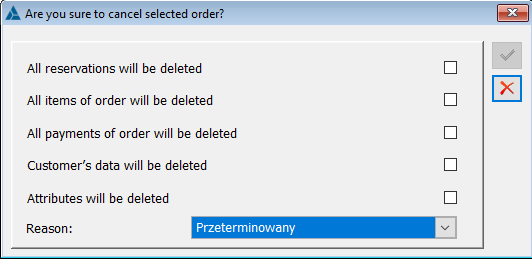
- After selecting the selected options, click the [Cancel document] button. The user can use the failure codes defined in the following window to indicate the reason for cancelling the document: Category dictionaries. The order will be cancelled. The number of the cancelled order will be displayed in grey in the orders list.
Cancellation of an order is not possible in the situation when:
- The order is not confirmed
- The order is being processed.
How to generate internal order from sales order
An internal order generated from a sales order enables the delivery to the source warehouse, indicated in the SO, of goods that are missing from that warehouse and thus cannot be sold to the contractor.
To generate internal order from sales order:
- On the orders list, on the tab: Sales, indicate the order for which the internal order is to be generated.
- Then, click the button next to the [Convert to sales invoice] or [Convert to export invoice] icon (depending on whether the transaction type was specified for the selected order: domestic or other) and select the option from the expanded menu: Internal order.
- A new window will open: Generating orders, where the user can specify how to include items from the source order: Include items:
- All – an order will be generated for all the items of the source order, regardless of their status.
- Unfulfilled – the generated order will include only the source order items that have a non-zero unfulfilled quantity (there are reservations).
- Unfulfilled without reserved resources – the generated order will include the unfulfilled items of the source order but excluding the unfulfilled quantities with allocated resources.
- Include items of already generated orders – means that when generating an internal order, items of already generated orders will be included and thus will not be generated again.
- Group items on the order – the parameter shall group the same items on the order.
- After clicking in the window: Generating orders, the button [Save changes] the following window will open: Internal orders, that needs to be filled in in accordance with the description found in the following chapter: Internal order.
- On the generated IO, the target warehouse will be indicated by default, which is the source warehouse on the sales order.
How to generate internal order from several sales orders
In the system, it is possible to generate a IO not only from one, but also from multiple sales orders.
To generate a IO from multiple SO:
- In the window: Orders list, on the tab: Sales, indicate the orders for which the internal order is to be generated
- From the drop-down menu using the button next to [Convert to sales invoice] select the function: Internal order
- A window will be displayed: Generating orders, where the user can specify how to include items from the source orders. In the window, the same options are active as in the window displayed in the case of generating IO from one SO
- After clicking in the window: Generating orders, the button [Save changes] the following window will open: Internal orders, that needs to be filled in in accordance with the description found in the following chapter: Internal order.
How to generate a sales order from a purchase order
Just as it is possible generate a purchase order from a sales order, it is also possible to generate a sales order from a purchase order. Again, it is only possible to generate sales orders from orders that have not yet been completed.
To generate a sales order from a purchase order, in the list of purchase orders, select the order from which the sales order is to be generated.
Then, after selecting the purchase order, click: ![]() [Document type], located next to the
[Document type], located next to the ![]() icon: [Convert to purchase invoice] and then, from the expanded list, select the option: Sales order. This will open the window: Sales order.
icon: [Convert to purchase invoice] and then, from the expanded list, select the option: Sales order. This will open the window: Sales order.
Then, fill in the window: Sales order, as described in chapter: Sales/purchase order. After filling in the fields in the window: Sales order, click: ![]() [Save changes]. The new sales order will be registered and added to the list of sales orders.
[Save changes]. The new sales order will be registered and added to the list of sales orders.
How to register an order adjustment
An adjustment to an order is a document that allows the user to change registered sales or purchase orders. The adjustment creates a new order based on the unfulfilled items from the order being corrected.
To check the stock for an order implementation, on an order that is in progress, on the General tab, select from the drop-down list: Quantities, the following option: Unfulfilled.
To register a correction to an order, on the list of sales orders or purchase orders (depending on which order the correction is to concern) select the order to be corrected, after selecting the corrected order click: ![]() [Order adjustment] or select the following function from the drop-down context menu opened by right-click: Adjustment. In this way, a window will be displayed: Sales order, if a sales order is being corrected, or the following window: Purchase order, if a purchase order is being corrected.
[Order adjustment] or select the following function from the drop-down context menu opened by right-click: Adjustment. In this way, a window will be displayed: Sales order, if a sales order is being corrected, or the following window: Purchase order, if a purchase order is being corrected.
Then, fill in the fields in the window that opens: Sales order, or in the window: Purchase order, as described in chapter: Sales/purchase order.
After filling in the fields in the window: Sales order or Purchase order, click: ![]() [Save changes]. This will register the correction as a new order and add the new order to the list of sales or purchase orders.
[Save changes]. This will register the correction as a new order and add the new order to the list of sales or purchase orders.
When creating an order adjustment, the information on sets will not be included in the adjustments.
How to register an adjustment for several orders
In the module: Orders, it is possible to issue one adjustment to several orders. The adjustment creates a new order based on the unfulfilled items from the orders being corrected. At the same time, it closes the corrected orders with the quantities resulting from the realised items.
When editing the order adjustment document, please remember the notes concerning this document found in chapter: Order adjustment. Registering an adjustment for several orders is possible from the level of window: Orders list and from the level of window: Contractor’s history.
Adjustment generated from the level of the window: Contractor’s history
To register an adjustment to several orders from the window: Contractor’s history:
- from the menu: List, select the following item: Contractors list or click the button [Contractors list], located on the toolbar;
- from the list of contractors displayed, select the contractor, for whom an adjustment to several orders will be issued, and click the [Contractor’s history] button, located on the toolbar. In this way, a window will be displayed:
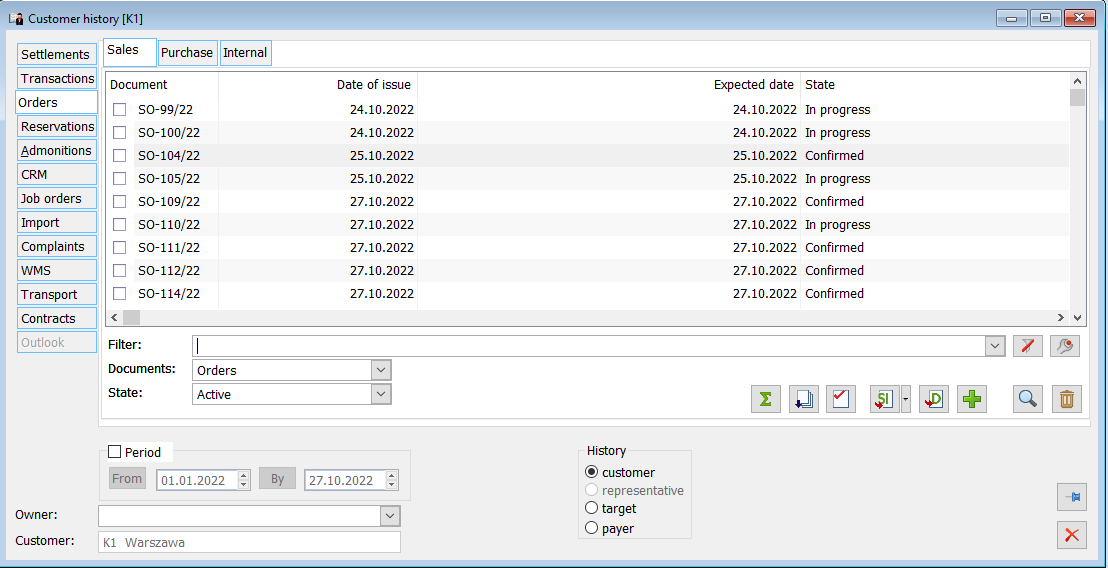
- In the window: Contractor’s history, select the horizontal tab: Orders. This tab contains vertical tabs: Sale and Purchase. Depending on the type of orders to which an adjustment is to be issued, select one of these tabs.
- On the vertical tab: Sales or Purchase, next to the field: Documents, click the button [Select completion status] and from the list that will be displayed, select the item: Orders or Act. orders (Active orders).
- On the list of documents displayed in this way, select the documents to which an adjustment is to be issued. The selection is made by indicating the document and clicking the key on the keyboard: <Space> or/and clicking on it with the left mouse button. To select several documents, it is necessary to hold down the following keyboard key during this operation: <Ctrl>.
- After selecting the documents to which a correction is to be issued, click the [Correction of selected orders] button. This will open the window: Sales order if sales documents are being corrected or the window: Purchase order if purchase orders are being corrected.
- Then, fill in the open window: Sales order or Purchase order, as described in chapter: Sales/purchase order. The filled in order will constitute an adjustment for several orders.
- Once the data have been entered to the relevant order, they must be saved by clicking [Save changes] button. This will register the adjustment of the order as a new order and add the new order to the list of sales or purchase orders.
Adjustment to multiple orders generated from the window: Orders list
To generate an adjustment from multiple orders:
- Open the window: Orders list (in the tab: Sale or Purchase)
- On the list of orders, select the orders from which an adjustment is to be generated (source orders should have the same contractor)
- Click [Order adjustment] or select the following function from the drop-down context menu opened by right-click: Adjustment.
- A window will be displayed: Order (sale or purchase) that needs to be filled in in accordance with the description found in the following chapter: Sales/purchase order.
- When editing the order adjustment document, please remember the notes concerning this document found in chapter: Order adjustment.
- Once data are saved, the user can save the order by clicking the button: [Save changes].
How to generate a document from sales order
The creation of a document from an order is only possible if this order is confirmed,
and this confirmation is positive. A positive confirmation occurs in the window: Sales order, on the tab: Confirmation.
The following documents can be generated from a sales order:
- Sales invoice,
- Stock issue,
- Goods issue,
- Warehouse release,
- Receipt,
- Purchase order
- Picking order
- Export invoice
- Stock export issue
- Internal invoice
- Internal order
- Purchase order
- Picking order
- Production order
To generate document from sales order:
- In the list of sales orders, select the order from which the document is to be generated.
- After selecting the order, click the [Document type] button next to the [Convert to sales invoice] icon. This will bring up a list from which the user can select the name of the document to be created.
After selecting a document, the programme:
- Creates the header of a new document, assigning it a consecutive number, entering the contractor and setting all the parameters, according to the order,
- Analyses all the order items and for each of them checks if the item on the commercial document can be created (for example if the appropriate quantity of the goods to be sold is in stock). If the item can be created, it shall be created according to the relevant order item (quantity, prices, discount amount) and the reservation that was automatically created by the order at the moment of confirmation shall be cancelled,
- After the relevant items have been generated, the appropriate payments shall be generated (According to the settings on the Payments tab, in the window: Sales order). Payments are generated if on the definition of the given document (SI, SOR) and in the structure of rights the following parameter was checked: Is supposed to generate payments.
If any problems arise during the order conversion, for example there are no goods in the warehouse to be sold, a list of messages shall be displayed.
If the conversion takes place without errors, a window will be displayed for the document that was to be created from the order.
If in the order definition the following field was not checked: Recalculate values when generating documents from orders, and during the item generation the price/value changes (for example as a result of ticking the box: quantity price value and price rounded to the nearest grosz – on the document definitions to be generated), then a warning about the change will be displayed in the log.
If on the order (sales/purchase) the commodity is indicated in the auxiliary unit, then on the generated invoice the item will be grouped in the same unit (for example if on the order, several items include the same commodity, but in different auxiliary units, then on the generated invoice, these items will be grouped according to the units indicated in the order).
When generating a commercial document from an order, those resources that are assigned to bookings associated with the order will be copied.
Calculating amounts in SI created from SO:
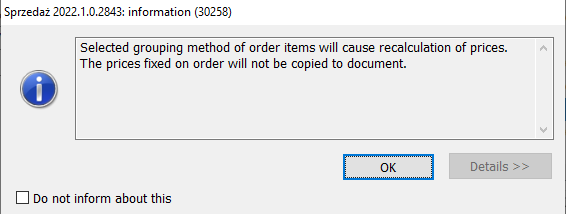
If during the generation of the SI document from the SO (the SO document must be marked in the orders list with a sign: ![]() ) in the window: Orders conversion, the following option is selected: Group order items by commodity code (with the parameter by price precision unchecked), the prices on the generated SI will be recalculated (based on the price from the product card).
) in the window: Orders conversion, the following option is selected: Group order items by commodity code (with the parameter by price precision unchecked), the prices on the generated SI will be recalculated (based on the price from the product card).
When converting the order to SI, an appropriate message shall be displayed informing about this fact, if the following parameter in the SO document definition is unchecked: Recalculate values when generating orders.
How to generate a document from a purchase order
The creation of a document from an order is only possible if this order is confirmed, and this confirmation is positive. A positive confirmation occurs in the window: Purchase order, on the tab Confirmation.
The following documents can be generated from a purchase order:
- Purchase invoice,
- Received note,
- Goods received,
- Warehouse receipt,
- Sales order,
- Import invoice,
- Import received note.
To generate document from a purchase order:
- in the list of purchase orders, select the order from which the document is to be generated;
- after selecting the order, click the [Document type] button next to the [Convert to purchase invoice] icon. This will bring up a list from which the user can select the name of the document to be created.
After selecting a document, the programme:
- creates the header of a new document, assigning it a consecutive number, entering the contractor and setting all the parameters, according to the order;
- analyses all order items and for each of them checks whether the item on the commercial document can be created. If the item can be created, it is created according to the corresponding order item (quantity, prices, discount amount);
- after the relevant items have been generated, the appropriate payments shall be generated (According to the settings on the tab: Payments in the window: Purchase order). Payments are generated if on the definition of the given document (SI, SOR) and in the structure of rights the following parameter was checked: Is supposed to generate payments – if the conversion takes place without errors, a window will be displayed for the document that was to be created from the order.
If in the order definition the following field was not checked: When converting orders to invoices, recalculate item values, and during the item generation the price/value changes (for example as a result of ticking the box: quantity price value and price rounded to the nearest grosz – on the document definitions to be generated), then a warning about the change will be displayed in the log.
How to generate a warehouse document from sales order
It is possible to create a warehouse document only on the basis of an order that has been positively confirmed.
To generate a warehouse document from sales order:
- in the list of sales orders, select the order from which the warehouse document is to be generated
- after selecting the order, click the [Document type] button next to the [Convert to sales invoice] icon. This will bring up a list from which the user should select the following item: Warehouse release. This will initiate the process of conversion into: Warehouse release. If any problems occur during conversion (creation of a warehouse document fails), a list of messages about these problems will be displayed
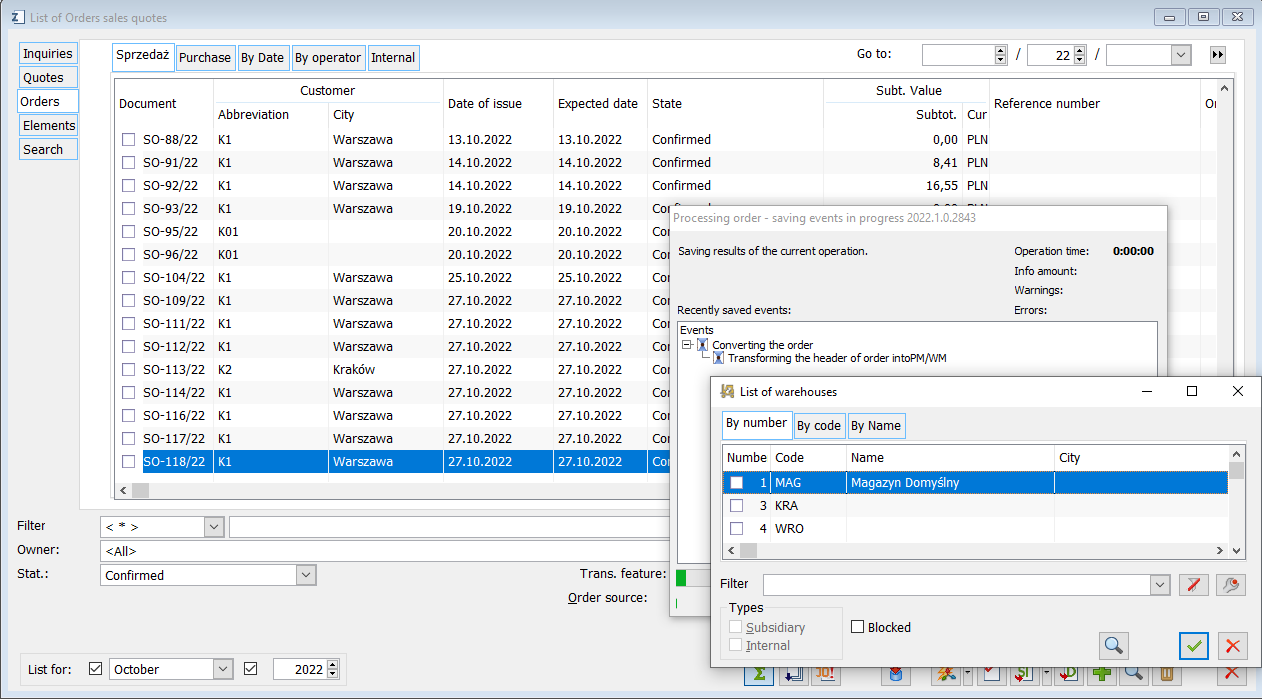
- During the conversion, the following window will appear: List of warehouses, where the user selects the warehouse from which the warehouse release is made (if the parameter is set: Sale from warehouse, to the value: All items from one warehouse or All from default warehouse, the window does not appear). This warehouse in the new document: Warehouse release, will be entered as the default warehouse
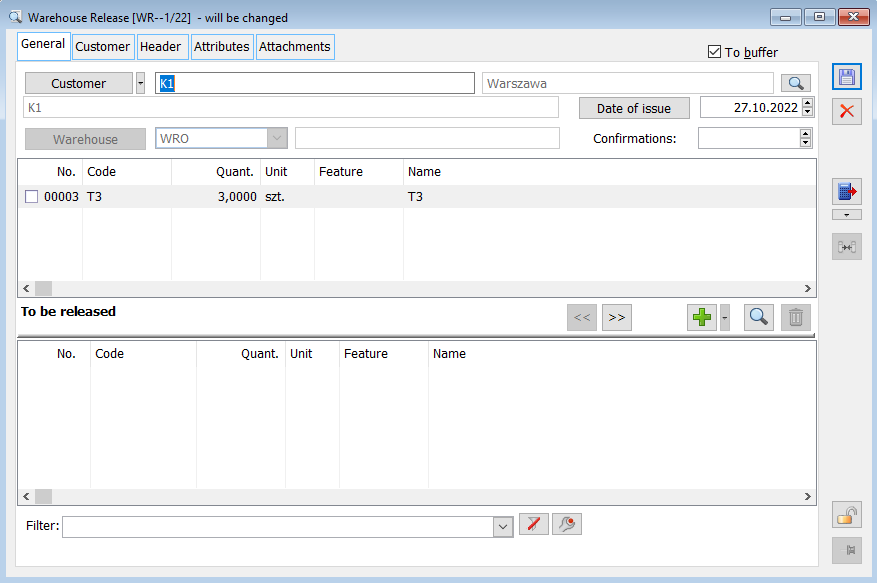
- After selecting a warehouse, which is done by selecting it and clicking [Select] or a key from the keyboard: <Enter>, the conversion process will continue. As a result, a window will be displayed: Warehouse release that needs to be filled in and saved by clicking [Save].
When generating a warehouse document from an order, those resources that are assigned to bookings associated with the order will be copied. It should be noted, however, that it is also possible to add new items to the warehouse document generated from the order – goods that were not in the order or goods that were in the order but were issued in greater quantity than indicated. When generating FS, such items will be sub-items that do not fulfil the reservation (as if they came from the increase of quantity on SI).
If the traits of the ordered goods are indicated on the order (in the window: Order item, on the tab: General), the goods received with a warehouse document shall also be described with those traits. They can be modified on a specific WR- document.
A generated WR- document can be clipped to a commercial document. It is also possible to clip several WR- documents generated from different orders with one commercial document – of course only if the same contractor is present on the documents.
It is possible to generate one commercial document from warehouse documents linked to various orders. The same conditions must be met as when generating a commercial document from multiple orders.
How to generate a warehouse document from a purchase order
It is possible to create a warehouse document only on the basis of an order that has been positively confirmed.
To generate a warehouse document from a purchase order:
- in the orders list, select the order from which the warehouse document is to be generated
- after selecting the order, click the [Document type] button next to the [Convert to purchase invoice] icon. This will bring up a list from which the user should select the following item: Warehouse receipt. This will initiate the process of conversion into: Warehouse receipt. If any problems occur during conversion (creation of a warehouse document fails), a list of messages about these problems will be displayed
- During the conversion, the following window will appear: List of warehouses, where the warehouse for the warehouse receipt is selected. This warehouse in the new document: Warehouse receipt, will be entered as the default warehouse
Note
When the following parameter has been selected on the document definition: All items on document from one warehouse or All items on document from default warehouse (window: PO document definition, Warehouses tab), then the window: List of warehouses, will not be displayed.
- After selecting a warehouse, which is done by selecting it and clicking [Select] or a key from the keyboard: <Enter>, the conversion process will continue. As a result, a window will be displayed: Warehouse release, that needs to be filled in in accordance with the description found in the module documentation: Sales and saved by clicking [Save].
It should be noted, that it is also possible to add new items to the warehouse document generated from the order – goods that were not in the order or goods that were in the order but were received in greater quantity than indicated.
If the traits of the ordered goods are indicated on the order (in the window: Order item, on the tab: General), the goods received with a warehouse document shall also be described with those traits. They can be modified on a specific WR+ document.
It is possible to generate one commercial document from warehouse documents linked to various orders. The same conditions must be met as when generating a commercial document from multiple orders.
How to generate a commercial document from multiple warehouse documents that are linked to different orders
It is possible to generate a commercial document (income and expenditure) from multiple warehouse documents that are linked to different orders.
Two sales orders have been generated for the K1 contractor – one for goods T1 and the other for goods T2. For these orders, separate warehouse documents (WR-) have been generated. Functionality of Comarch ERP XL allows generating a commercial document – SI – from these warehouse documents. The document will include goods released by means of these documents.
To be able to generate a commercial document from multiple warehouse documents related to different orders, the same conditions must be met as when generating one commercial document from multiple orders:
- consistent document type (SO, IO, PO)
- consistent document status (confirmed or in progress)
- consistent contractor
- consistent gross/net document flag
- consistent owner
- consistent manner of order execution (Execute in whole or not)
It is also possible to generate a commercial document from multiple warehouse documents linked to different orders if advance payment invoices have been generated for those orders (or one of them). It should be noted, however, that the system will not check the correspondence of the advance payment invoices with the elements of the individual orders to which the invoice was issued.
Generating a commercial document from multiple warehouse documents linked to different orders is done as follows:
- The user shall open the following window: List of commercial, warehouse, and transport documents, and select the tab: Warehouse/Receipts or Warehouse/Releases (depending on whether the user wants to generate a PI document from WR+ documents or an SI document from WR- documents)
- Then, on the tab: Warehouse (Receipts/Releases), select in multiselect mode the warehouse documents from which the commercial document is to be generated
- Once the user has selected the relevant documents, click the [Purchase invoice] or [Sales invoice] button.
- A commercial document will be generated with the items of warehouse documents linked to different orders.
How to generate a WMR- document from a sales order
The system offers the functionality of generating an inter-warehouse transfer
from a sales order. This functionality can be used, for example, when a sales order is received from warehouse A. In order to execute it, goods from warehouse B
(for example from another branch) must be moved to this warehouse. WMR- document is generated from the SO, which does not fulfil this order, but only transfers the goods for it, optionally allocating the transferred resources to it.
To generate an WMR- document from a sales order:
- On the orders list, on the tab: Orders/Sale, select the order from which the MMW document is to be generated
- From the drop-down menu using the button next to [Sales invoice] select the function: Inter-warehouse transfer
- A window will be displayed: Source warehouse. In this window the user indicates the source warehouse 0, meaning the one from which the resources will be taken to the target warehouse (meaning the source warehouse on the sales order from which the MMW document is generated).
How to generate an WMR- document from an internal order
To generate an WMR-document from internal order, proceed as follows:
- On the list of internal orders (window: Offers and orders list, tab: Orders/Internal), select the IO from which the MMW document is to be generated
- Click the [Convert to WMR- document] button or select the function from the right-click drop-down menu: Convert to WMR- document
- An WMR- document will be generated that has the items as on the source order. A description of the WMR- document can be found in the module documentation: Sale.
How to generate the WMR- document from several internal orders
Generating an WMR- document from several internal orders is possible when these orders have common source and destination addresses.
To generate an WMR- document from multiple IO:
- On the orders list, on the tab: Orders/Sale, select the orders from which the MMW document is to be generated
- Click the [Convert to WMR- document] button or select the function from the right-click drop-down menu: Convert to WMR- document
- A new window will open: Orders conversion, where the user can specify how to group order items.
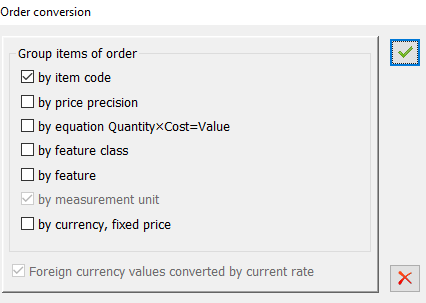
- After indicating the way of grouping the orders, click the confirm button, which will generate the WMR-document.
- The generated document will contain items from the source IO documents grouped according to the options indicated in the window: Orders conversion (for example, if the orders contain the same product), and in the window: Orders conversion, the following option is selected: Group order items by commodity code, then on the WMR- document this commodity will be included in one item – otherwise on the WMR- document the commodity will be included in separate items in quantities corresponding to the items on the orders). A description of the WMR- document can be found in the module documentation: Sale.
How to generate a picking order from an internal order
A picking order generated from an internal order facilitates the delivery to the source warehouse indicated in the order of a product that is missing from that warehouse.
To generate a picking order from an internal order:
- In the window: Orders list, on the Internal tab, indicate the order for which the picking order is to be generated,
- Then, from the drop-down menu select the following option: Picking order,
- A window will be displayed: Picking order that needs to be filled in in accordance with the description found in the module: Production. The target warehouse on the new order will be, by default, the source warehouse from the internal order from which the order was generated.
How to generate a IMI from a purchase order
It is possible to generate IMI document from a purchase order when the order is confirmed and the following type of transaction was specified:
- Intra-community
- Other foreign (non-EU).
Moreover, the following parameter must be selected on the order: Include SAD/FWS handling (on the tab: Header).
To generate an IMI document from a purchase order:
- on the list, select the order to which a IMI document is to be generated
- click [Convert into import purchase invoice IMI] or
- from the context menu (opened by right-click, after selecting an order, from which the IMI is to be generated), select: Convert to IMI document.
Pay attention to the following, when generating IMI from purchase order:
- On the generated IMI invoice it is possible to change the currency. When changing currency it is possible that differences may occur due to rounding up of amounts.
- It will not be possible to generate IMI from a purchase order, if this order is linked with IPOR document.
- It will not be possible to cancel/close an order if it has not been handled – meaning if PZI that is the last document in the following path: PO>IMI>AC/SII-PII>IPOR was not confirmed.
How to generate a IMI from multiple purchase orders
Similarly as in the case of generating IMI document from purchase order, generating IMI from multiple orders is possible when:
- These orders are confirmed and have a specific type of transaction defined:
- Intra-community
- Other foreign (non-EU)
- On the orders, the following parameter was checked: Include AC/SII handling (on the tab: Header)
- The order has a common contractor
- The orders have the same currency and have the same exchange rate set
Generating a IMI document from multiple orders takes place by selecting relevant orders on the orders list and selecting the following function: ![]() [Convert into import purchase invoice]. This function is also available from the drop-down right-click menu.
[Convert into import purchase invoice]. This function is also available from the drop-down right-click menu.
When generating IMI from multiple orders it is not possible to group items (that is: if the source order contains the same product, then on IMI document it will be recognized separately for each item – respectively for a given order).
It will not be possible to cancel/close an order if it has not been handled – meaning if IPOR that is the last document in the following path: PO>IMI>AC/SII-PII>IPOR was not confirmed
How to generate a IPOR document from a purchase order
It is possible to generate IPOR document from a purchase order when the order is confirmed and the following type of transaction was specified:
- Intra-community,
- Other foreign (non-EU).
Moreover, the following parameter must be selected on the order: Include SAD/FWS handling (on the tab: Header).
To generate an IPOR document from a purchase order:
- on the list, select the order to which a IPOR document is to be generated
- from the drop-down menu next to the [Convert into import purchase invoice] button, select: Import received note.
The IPOR element of the generated purchase order will have the following tab: Calculation, similarly as manually-generated IPOR (as the first document in the path of documenting import purchases). More information on IPOR document is available in the module documentation: Import.
How to generate a IPOR document from multiple purchase orders
Similarly as in the case of generating IPOR document from one purchase order, generating IPOR
from multiple purchase orders is possible when:
- these orders are confirmed and have a specific type of transaction defined:
- Intra-community
- Other foreign (non-EU)
- On the orders, the following parameter was checked: Include AC/SII handling (on the tab: Header)
- The order has a common contractor
- The orders have the same currency and have the same exchange rate set.
To generate an IPOR document from a purchase order:
- on the list, select the orders to which a IPOR document is to be generated
- from the drop-down menu with the button next to
- [Convert into import purchase invoice], select the function: Import received note
Similarly as in the case of generating IMI from multiple orders, when generating IPOR from multiple orders, grouping of items is not possible. One IPOR item will correspond to one order item.
The IPOR element generated from the purchase orders will have the following tab: Calculation, similarly as manually-generated IPOR (as the first document in the path of documenting import purchases). More information on IPOR document is available in the module documentation: Import.
How to generate one commercial document from multiple orders
Generating a commercial document from multiple orders is possible when specific conditions are met.
The conditions to be met by orders for it to be possible to generate one commercial document:
- Consistent document type (SO, IO, PO)
- Consistent document status (confirmed or in progress)
- Consistent contractor
- Consistent gross/net document flag
- Consistent owner
- Consistent manner of order execution (Execute in whole or not)
- No warehouse documents generated
It is also possible to generate a commercial document from multiple orders if advance payment invoices have been generated for those orders (or one of them). It should be noted, however, that the system will not check the correspondence of the advance payment invoices with the elements of the individual orders to which the invoice was issued.
Although the main contractor must be consistent on the orders from which the commercial document is generated, it is possible that the target contractor on these orders is different.
To generate one commercial document from multiple orders, select the orders from which the commercial document is to be generated in the orders list. It can be done with the use of multiselect mode in which the orders are displayed.
It is also possible to generate one commercial document from multiple orders in the window: Contractor’s history (tab Orders). In such a case, select orders from which the commercial document is to be generated.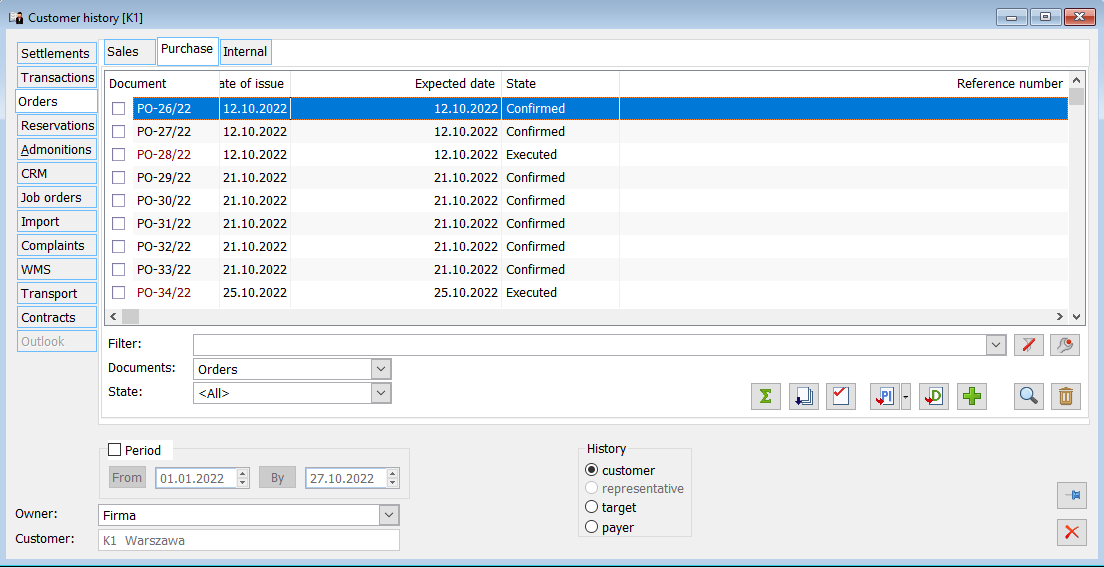
Then, after selecting the orders, click: ![]() ,
, ![]() ,
, ![]() ,
, ![]() ,
, ![]() , (depending on the type of orders) or select the type of document to be generated using:
, (depending on the type of orders) or select the type of document to be generated using: ![]() [Expands the menu of available options]. Thus, the process of document generation from multiple orders will be initiated and the following window will be opened: Orders conversion.
[Expands the menu of available options]. Thus, the process of document generation from multiple orders will be initiated and the following window will be opened: Orders conversion.
In the window: Orders conversion, the user shall specify how to group order items. This will affect the subsequent grouping of order items on the commercial document. Subsequent grouped order items will create further sub-elements to that item. If none of the grouping options is selected, then each order item will be rewritten to a separate item on the commercial document. These items are sorted by the execution date of the orders from the header.
Please note that checking in the window: Orders conversion, option: Group order items – by product code, will result in the product card prices being taken for the goods listed on the commercial document, rather than those indicated on the source order.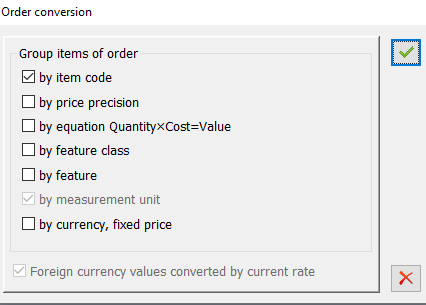
Then, after selecting the desired options, click: ![]() [Confirm]. A commercial document will be generated, on which the items from selected orders will be included. The description of the commercial documents can be found in the module documentation: Sale.
[Confirm]. A commercial document will be generated, on which the items from selected orders will be included. The description of the commercial documents can be found in the module documentation: Sale.
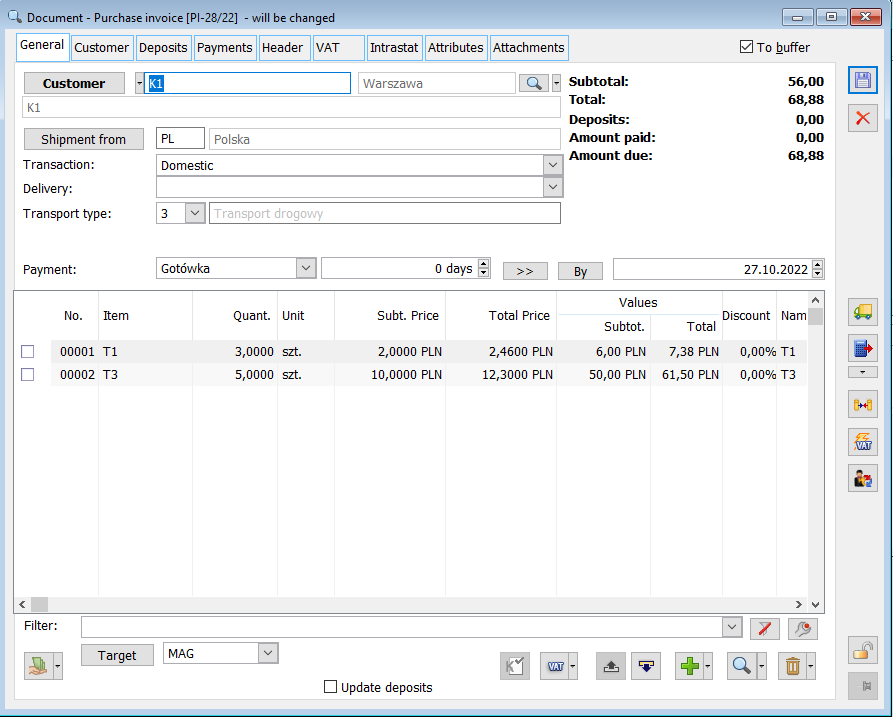
It is also possible to generate a single commercial document from multiple orders if these orders were issued by different centres.
How to issue advance payment invoice for an order
To issue advance payment invoice:
- in the window: Sales order, or in the window: Purchase order, (depending for which order the advance payment invoice is to be issued), on the tab: Confirmation, confirm the order.
- On the tab: Payments/Advance payments, in the panel: Payment schedule, select the payment for which the advance payment invoice will be issued by checking the box next to this payment with the left mouse click or the key on the keyboard: <Space>, and then click [New]. In this way, a window will be displayed: Payment for order.
- Then, fill in the window: Payment for order, as described in chapter: Payment for offer/order, checking the field: Advance payment for invoice.
- After filling in the window, save the changes by clicking [Save changes]. This will cause an advance payment to be added to the list of payments, which will be the basis for issuing an advance payment invoice.
- On the tab: Payments/Advance payments, in the panel: Advance payment invoices, click [Add invoice based on advance payments]. In this way, a window will be displayed: Advance sale invoice or: Advance purchase invoice, depending on which order the advance payment was issued for.
- Once this window is filled in, save the entered data by clicking: [Save changes].
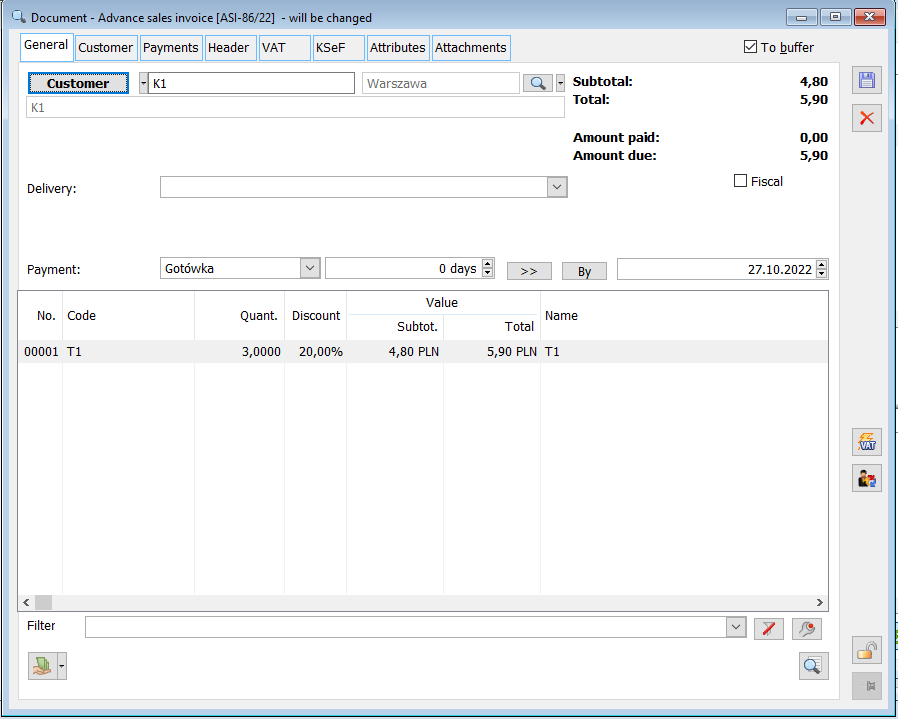
It is also possible to generate advance payment invoice to a partially completed order.
More information on advance payment invoices can be found in chapters: Advance payment invoices and Advance payment invoice – window description.
How to generate a production order from a sales order
To generate a production order from a sales order:
- In the list of sales orders, select the order for which the production order is to be generated.
- Expand the drop-down menu using the button next to [Convert to sales invoice] or [Convert to export invoice] (depending on whether the transaction type was defined for the order: domestic/intra-community/other foreign) and select the following function: Production order.
- An optimisation window will open: Generating orders, that needs to be saved.
- Then the following window will appear: Select the manner of generating orders, in which the following options are available:
- All items on one order
- Each item on different order
- After the selection has been approved, either a single order will be created containing all the items or several orders will be created
- The resource from the PW generated from the production order will be automatically linked with the reservation generated for the source sales order (as long as it is a stock less reservation).
How to generate WR- documents from SO for several warehouses at the same time if the order contains items with different warehousesn
If there are items with different warehouses on the order, it is possible to issue goods from several warehouses simultaneously. After selecting the option on the SO document: Warehouse release, a window with a list of warehouses and the possibility of selecting several of them is displayed, and after its approval as many WR- documents are generated as many warehouses have been selected on the list.
To generate a WR- document from SO for several warehouses at the same time, it is necessary to:
First, issue a SO document containing a minimum of two items / goods located in different warehouses (tab: General of SO item, field: Warehouse), for example:
- T1 product in MAG warehouse,
- T2 product in KRA warehouse,
- T3 product in WRO warehouse.
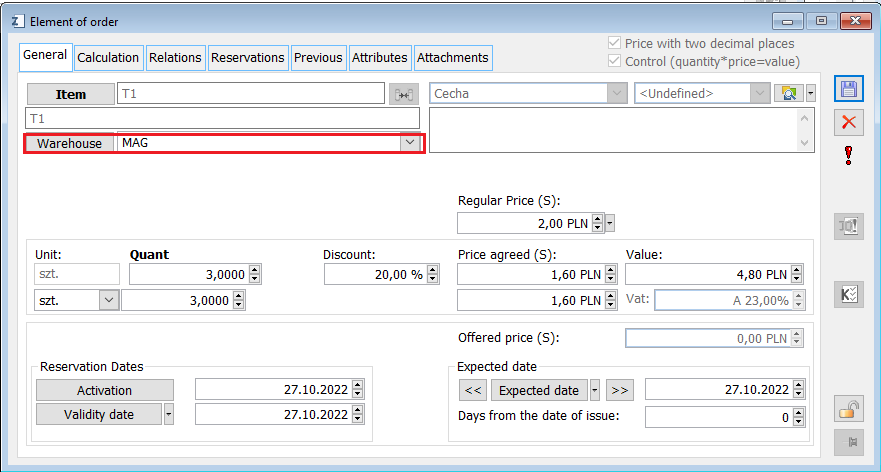
Then confirm the above-mentioned SO and then issue based on that SO (from list) a WR- document. As a result, the following window will be opened: List of warehouses.
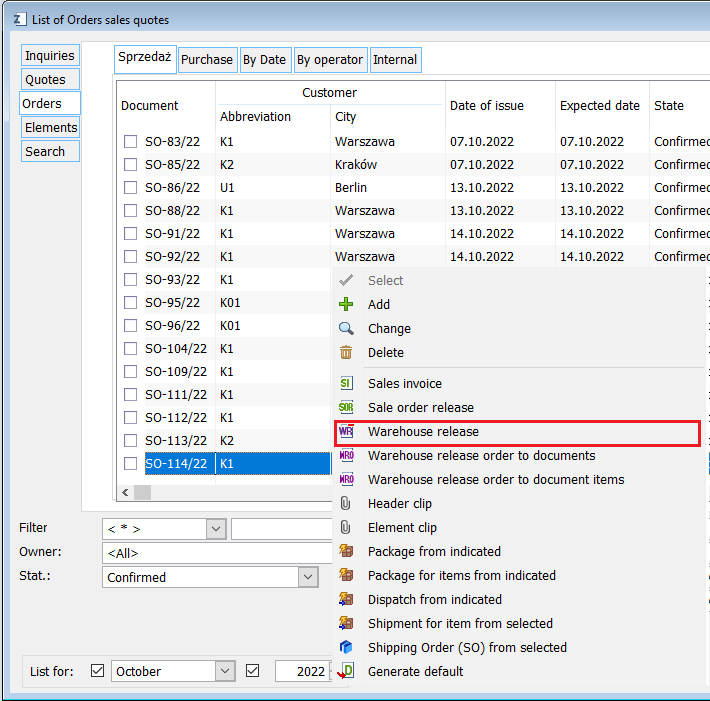
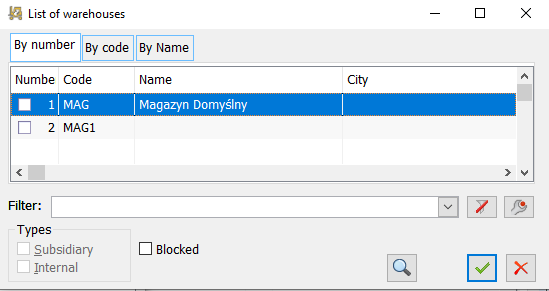
After selecting all warehouses in the window: List of warehouses and confirming by clicking ![]() , WR- documents will be generated, for example:
, WR- documents will be generated, for example:
- WM-1 with T1 product and MAG warehouse,
- WM-2 with T2 product and KRA warehouse,
- WM-3 with T3 product and WRO warehouse.
