
This article serves as a supplement to the article Manual: Comarch e-Invoice Converter (referred to as the main manual) providing information regarding the tool’s operation on a Linux environment.
System requirements
The Linux system should meet the requirements described in this chapter.
The following must be installed on the Linux server:
- Java in a version supported according to the main manual,
- SSH server.
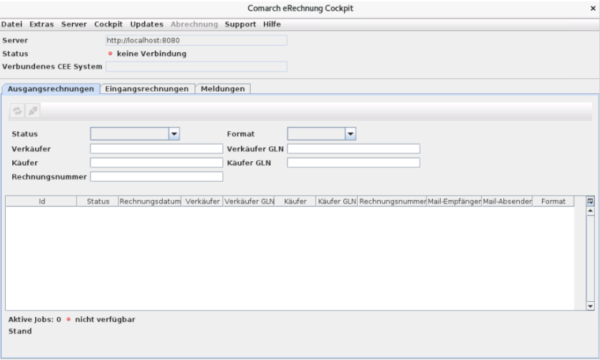
GUI support is required for the control cockpit. This is particularly necessary because code lists and specific implementations are handled via the control cockpit.
For GUI support on a Linux server, active X11 Forwarding on the SSH server is required.
Furthermore, a graphical interface is required, such as KDE or GNOME, which is run as a server, and RDP (Remote Desktop Protocol), such as xrdp.
For network support on the Linux server, the Webcockpit port must be unlocked.
In addition to these special requirements for Linux, the remaining requirements from the main manual also apply.
Tools for working with Linux servers
This chapter describes the tools used for working with Linux servers.
Server management
Server access is best obtained via SSH and CLI (Command Line Interface). The following applications are used for this purpose:
- Putty – the client is exclusively CLI
- WinSCP – used for transferring files. It also works with MobaXterm software.
- Unzip – used for unpacking files during installation or updates
Graphical applications
Graphical applications cannot be displayed directly on the Linux server, so their interface is launched on a computer with graphics support, e.g., with a Windows system.
In order for the GUI of graphical applications launched in the SSH client terminal to be displayed on the local system, the following conditions must be met:
- X11 Forwarding must be active on the SSH server on the connected Linux server,
- an X11 server must be installed on the local system,
- X11 Forwarding must be enabled on the SSH client.
One of the applications that already supports these functions is MobaXterm. It is a terminal client with many additional features. Among other things, it allows running a graphical application operating on a Linux server and displaying it on a local computer. The Home Edition version can be used commercially if it was installed independently by the user.
Preparing MobaXterm
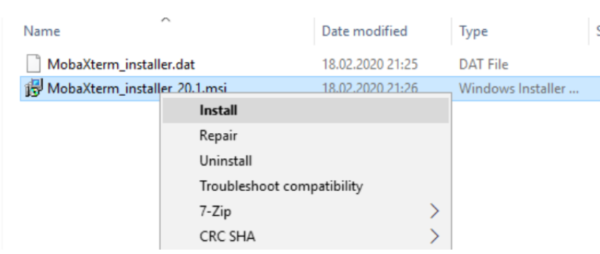
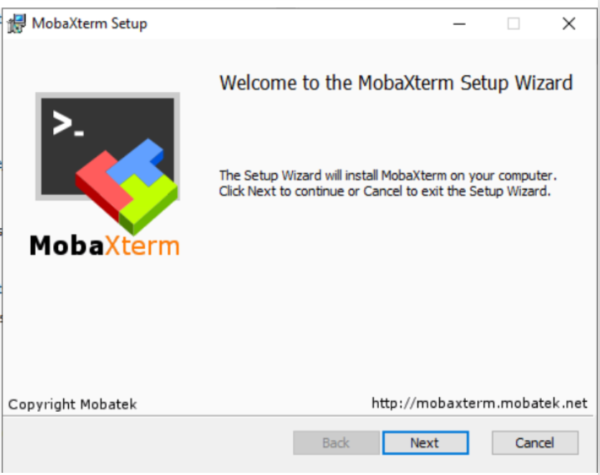
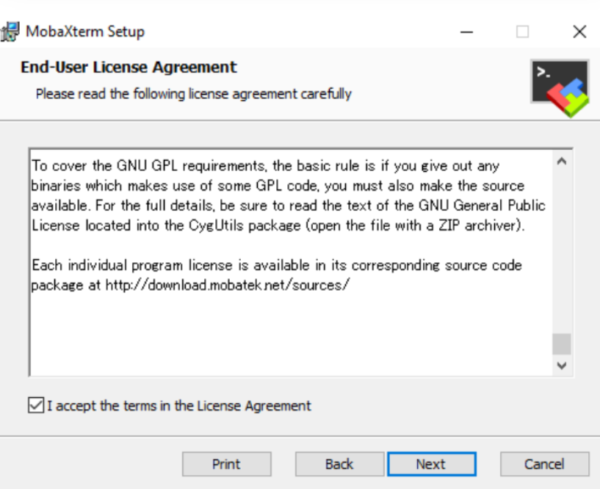
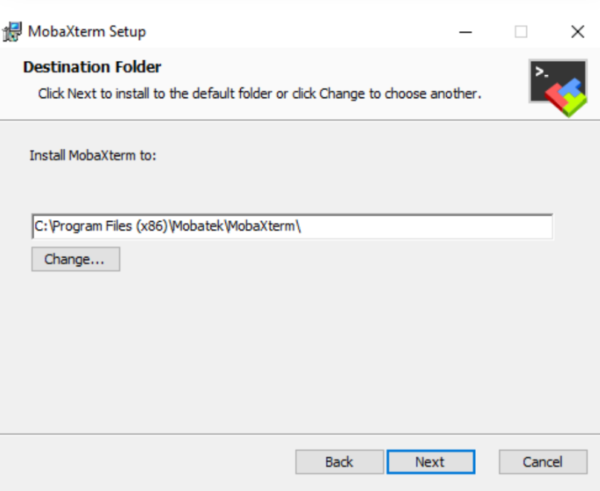
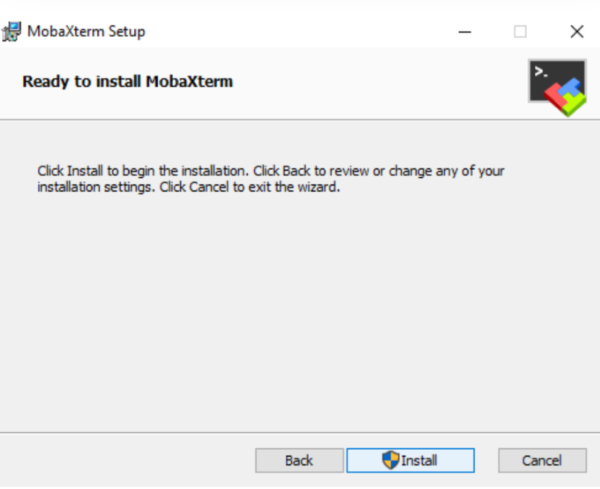
Installation
The following screenshots show the installation of MobaXterm using an .msi file.
RDP session with MobaXterm
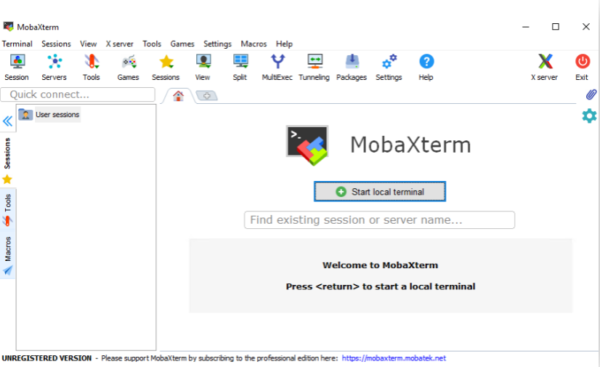
To launch the control cockpit, an RDP session is required, which is defined in MobaXterm.
When launched for the first time, the screen shown below appears.
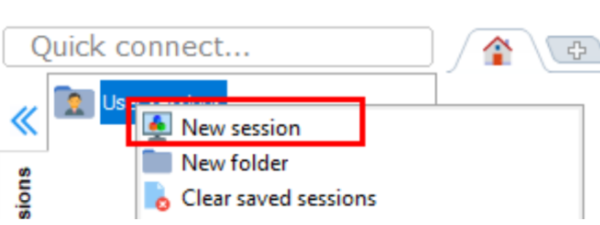
By right-clicking on the User sessions tab, you define a new connection (session) of the RDP type with the Linux server.
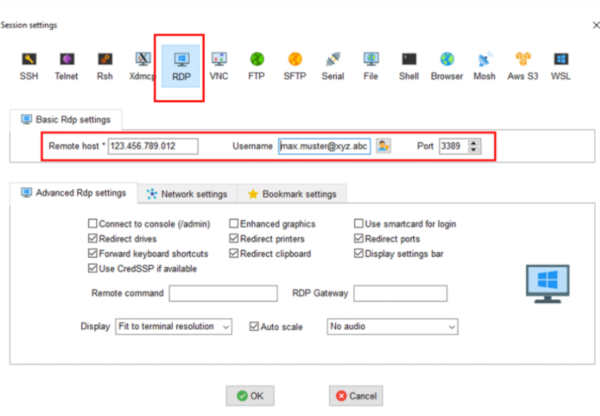
Next, providing the user password for this session is also required. Once the RDP session is defined, it can be launched with a double-click. Launching the session results in logging into the RDP session.
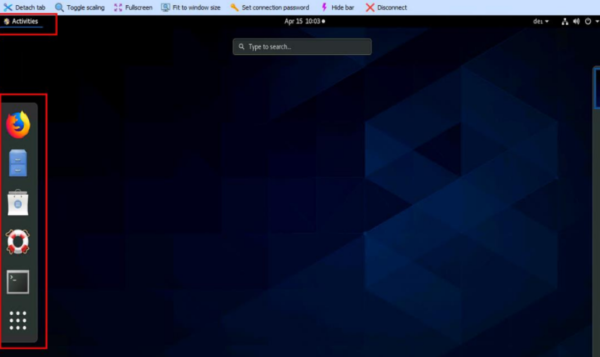
In this case, the available applications are displayed in the sidebar. This panel appears after selecting the [Activities] button.
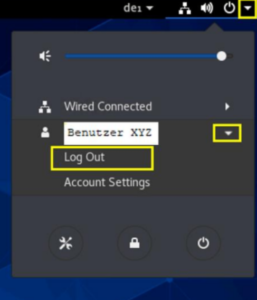
Correct logging out occurs after clicking the arrow in the upper right corner and selecting the [Log Out] button, available under the username.
SSH connection configuration with MobaXterm
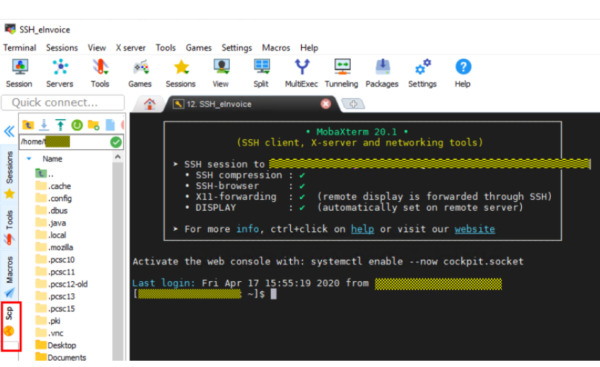
Using an SSH session, you can issue commands in the command line on the Linux server. Similarly to an RDP session, it is created using the Pop-Up method and a new session.

Next, the following window for entering commands appears:
Information regarding the browser type entered in the Advanced SSH Settings can be found in the image in the description of the last tab with the folder system on the left side.
Using the SCP normal speed option, you can copy files to the current folder using the Drag&Drop method (problems occasionally occurred in other modes).
Launching the control cockpit
If the central Comarch e-Invoice tool is installed according to the Installation chapter, the control cockpit can be launched in the following way:
- Launch the software.
- Log in to the session.
- From the Activities level, select the Terminal application (this is a CLI session within RDP).
- In the terminal, change the directory to the installation directory, for example: cd /opt/comarch/eInvoice/Application.
- The application is launched using the command ./cockpit_start.sh.
In the terminal, before pressing the [Enter] button, it looks as follows:
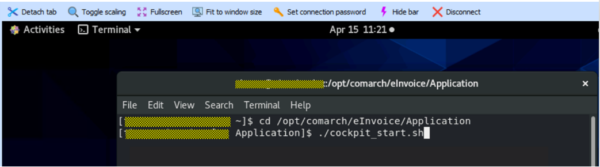
The application is launched after selecting the [Enter] button.
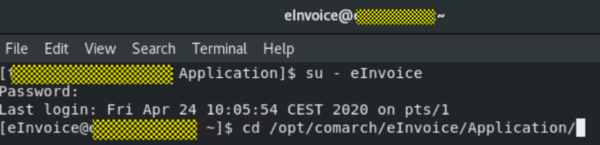
Before the update, the user should be changed using su – e-Invoice, and then the update is launched under this user, as shown below:
Installation
First installation
User and permissions
It is recommended to create a dedicated user and a related dedicated user group. The user should have the user group assigned as their primary group. More information on this topic can be found at the link https://wiki.ubuntuusers.de/Benutzer_und_Gruppen/.
Installation and updates are carried out via the control cockpit and should be performed by the user created for this purpose.
This guarantees that after installation or update, the objects will have the same user and the same group as the owner.
Users who work with the control cockpit, or under whom the central tool server runs, also need membership in this group, even if it is not their primary group.
Installation of objects
Installation and configuration essentially proceed as described in the article Manual: Comarch e-Invoice Converter.
Initially, the installation folder is created, for example /opt/comarch/eInvoice/Application, to which the ComarchERechnung.zip file is copied (for example, WinSCP can be used for this).
- Initially, the installation folder is created, for example /opt/comarch/eInvoice/Application, to which the ComarchERechnung.zip file is copied (for example, WinSCP can be used for this).
- In the terminal, go to the folder and then unpack the file using the command unzip ComarchERechnung.zip.
- Then, using ./Copy_CEE_DefaultSpecifiactions_To_InstallFolder.sh, the remaining necessary objects are copied.
- Next, permissions are set using the following sequence of commands: chmod -R ug=rwx /opt/comarch/eInvoice/Application.
As a result, the owner user and the owner group receive full rights to all objects in the installation folder and subfolders.
If an installation already exists on a Windows system, it or parts of it can be moved to Linux. Additional information to consider is described in the chapter Moving from Windows to Linux.
Granting permissions to objects
If the user and user group for the objects in the installation folder do not match, they should be changed to the correct ones in the following way (e.g., from the root user):
chown -R (username) /opt/comarch/eInvoice/Application
changes the owners of all objects in the folder recursively to the specified user, and
chown -R :(group name) /opt/comarch/eInvoice/Application
changes the group/group owner for all objects in the folder recursively to the specified group.
Therefore, in this case, it is recommended to: If different users use the cockpit, it is recommended to disable the daily creation of new files and grant permissions to the log file as described above.
Configuration
Settings for the central tool are entered via the control cockpit. The method of launching it is described in the chapter Launching the control cockpit.
It should be remembered that according to the chapter Granting permissions to objects, all folders (such as working and output folders), as well as the objects used in them (e.g., Comarch ERP Enterprise certificate) used in the settings, must have permissions granted.
Interactive launching of the conversion tool server
The conversion tool server can be launched interactively, i.e., in an SSH or terminal session using the commands:
- cd /opt/comarch/eInvoice/Application
- ./run_conversion_server.sh
This allows you to immediately check if the settings are working.
Interactive launching of the Webcockpit server
The conversion tool server can be launched interactively, i.e., in an SSH or terminal session using the commands:
- cd /opt/comarch/eInvoice/Application
- ./run_webcockpit_server.sh
This allows you to make settings immediately.
Conversion tool server as a systemd service
In the installation directory, there is a file named linux_conversion_service.service, which should be copied or renamed to einvoice_conversion.service. It contains data for starting the service and can potentially be customized:
- The username for launching is provided as the name of the user under whom the service runs, regardless of who started it.
- If java -version does not return any result, the full path to java (*/bin/java*) must be provided.
- If the recommended installation folder was not used, the paths to the folders must be adjusted.
Next:
- The service file should be copied to /etc/systemd/system.
- The change must be reported to the system using the command systemctl daemon-reload.
- Automatic startup at system boot should be activated using the command systemctl enable einvoice_conversion.service.
The service can be deactivated using the command:
-
systemctl disable einvoice_conversion.service
The service is managed manually using the following commands:
- systemctl status einvoice_conversion.service
- systemctl start einvoice_conversion.service
- systemctl stop einvoice_conversion.service
Webcockpit server as a systemd service
In the installation directory, there is a file named linux_webcockpit_service.service, which should be copied or renamed to einvoice_webcockpit.service.
To be able to control the conversion tool/Webcockpit services from the Webcockpit level, the appropriate command must be defined in the following scripts.
| Script | Action | Service for | Remarks |
| RestartConversionService.sh | Restart (i.e. if necessary termination, and then restart) | Conversion tool | Example: systemctl restart einvoice_conversion.service |
| RestartWebCockpitService.sh | Restart | Webcockpit | |
| StartConversionService.sh | Start | Conversion tool | |
| StartWebCockpitService.sh | Start | Webcockpit | |
| StopConversionService.sh | Termination | Conversion tool | |
| StopWebCockpitService.sh | Termination | Webcockpit |
Before proceeding to the next step, the commands used should complete their operation. If, for example, a command to terminate a service is executed, the service should be stopped after its completion.
Additionally, users (with passwords) for logging into Webcockpit should be entered in the webcockpit-users.properties file.
Satellite cockpit
The creation of a folder with objects for the satellite cockpit is done using the .sh file Create_Installationfolder_For_Satellite.sh (go to the installation folder and invoke using ./sh-filename).
The created folder can then be copied to another Windows or Linux system.
Moving from Windows to Linux
If there is already a running and configured installation of the central tool, proceed as follows, using a user in accordance with the User and permissions chapter:
- If the existing version of the central tool is already adapted for Linux, which has been the case since version 1.5.7, instead of the unzip command from the Installation of objects chapter, you can copy the installation folder from the Windows system along with all subfolders to the installation folder on the Linux system. Then, perform the remaining commands described in the Installation of objects chapter.
- If there is no version adapted for Linux yet, proceed according to the instructions contained in the Installation of objects chapter. Then, copy all configuration files, i.e., .xml and .properties files, from the Windows system to the installation folder. In the next step, proceed to implement the points described in the Granting permissions to objects chapter.
Additional information
Problems with RDP session in MobaXterm (GNOME session)
Sometimes the RDP session causes trouble, for example:
- The session is not responding
- A new session disappears immediately after it is launched
If it is a screen saver lock, go to the tab and select the [Enter] button to re-enter the password. Such locks can be managed by right-clicking on the desktop and going to Settings in the Privacy and Power sections.
If the problem cannot be resolved in any other way, the final option is to log in via an SSH session, possibly assuming root administrator privileges (sudo -i), and then terminating all of your own processes or the processes of a given user:
- Using ps aux | grep username, you can see all sessions related to a given user
- Their sessions/processes are terminated with the pkill command: pkill -9 -u username, where username is the value in the first column of the ps aux command output
If it does not affect other applications or users, you can also perform a reboot.
Use of network drives
In the e-invoice settings, network drives can be specified as output folders, e.g., for FatturaPA invoice files.
On Linux, these disks must, of course, be shared beforehand via mount.
Problems with access to the billing server
In the Linux system, there were problems with TLS encryption because different default settings applied here than in the Windows system. To prevent this, when calling the server directly and in the service definition, the correct version of the TLS protocol is immediately passed as a Java system property with the -D option, using:
-Dtls.versions=TLSv1.2
by inserting this information before -jar (in the run_conversion_server.sh and einvoice_conversion.service files). The standard call is commented out in these files and has been replaced by a call with this option.