The Safe Management feature is available in the shift work mode on the POS workstation. The solution is directed to stores where sales revenues are withdrawn by the manager at the end of day and stored in an appropriate place in a back room. To support that, when a shift is being closed, excessive cash, external vouchers, and checks are automatically deposited into the safe, while their value is deducted from the operator’s cash register balance.
If an amount limit is reached in POS, the application displays the following notification: “The maximum limit of the safe’s balance has been reached. The maximum limit of the safe’s balance is set as: [specified amount]. The current safe’s balance is: [current safe balance].Withdraw cash from the safe and transfer it to the bank”.
Safe
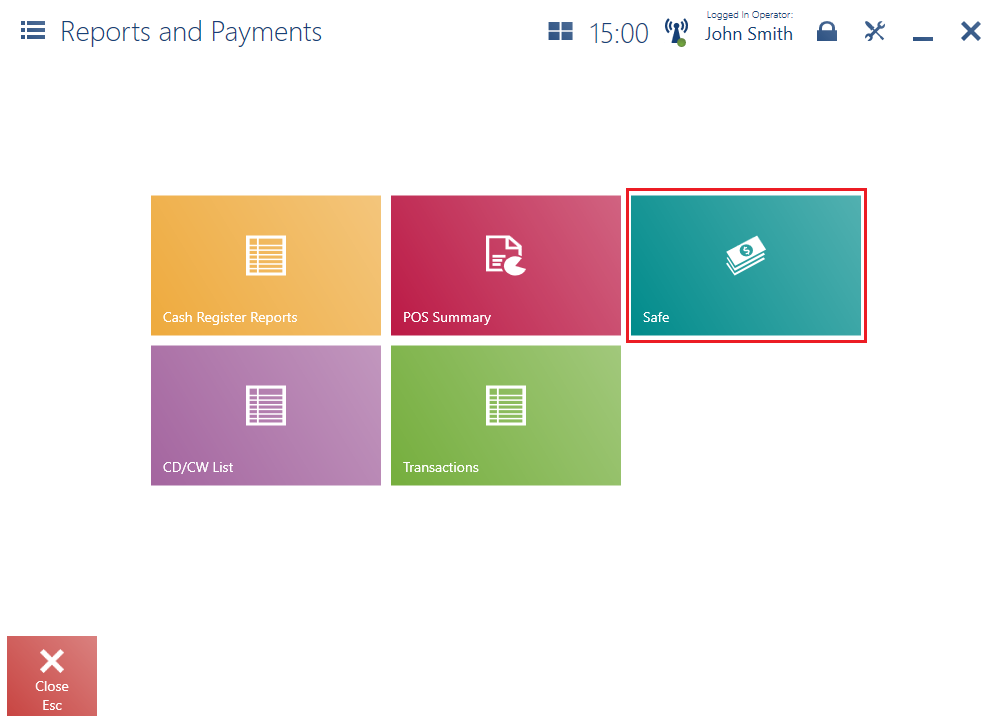
The Safe feature is available after selecting [Reports and Payments] → [Safe].
The Safe window is composed of the following columns:
- Payment Form – payment forms available on the POS workstation, taking into account each of the available currencies
- Number of Transactions – the number of safe deposits and withdrawals
- Deposits – the combined total amount paid manually and related to cash sales
- Withdrawals – the combined total amount withdrawn manually and related to shift-beginning withdrawals
- Total – the difference between deposits and withdrawals given in each currency
- Ending Balance – it displays the summary of a beginning amount and all incomings in the shop registered for a given payment form, on a given work day. The ending balance of each payment form is that form’s beginning balance the following day.
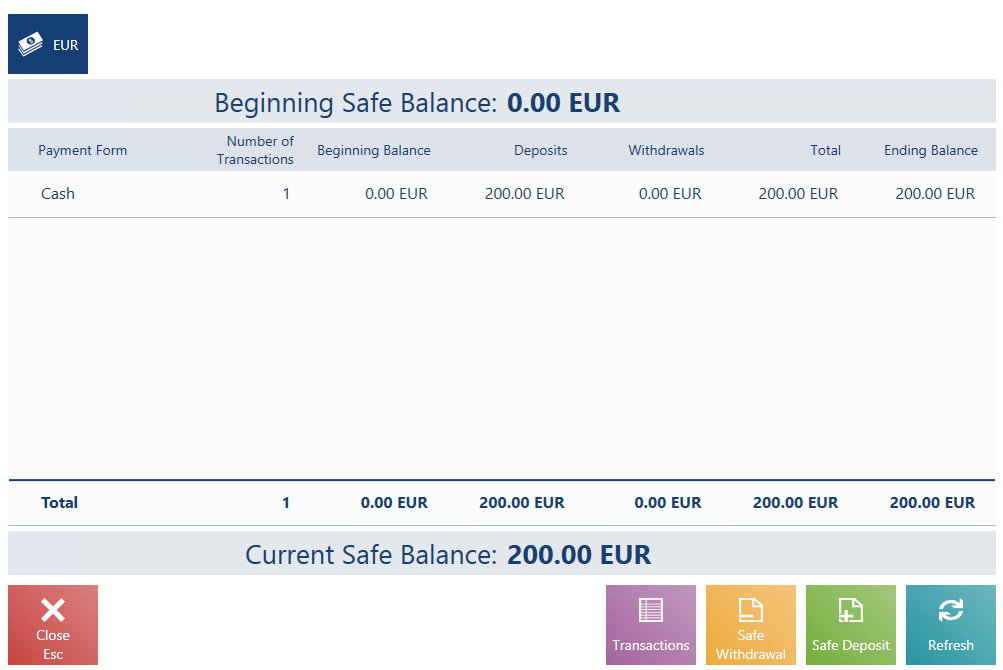
The Safe window contains the following buttons:
- [Transactions] – it opens the list of all safe-related transactions carried out in the store
- [Safe Withdrawal] – it opens a window enabling the user to make a safe withdrawal
- [Safe Deposit] – it opens a window enabling the user to make a safe deposit
- [Refresh] – it updates data through the POS Agent service
- [Close] – it closes the safe window
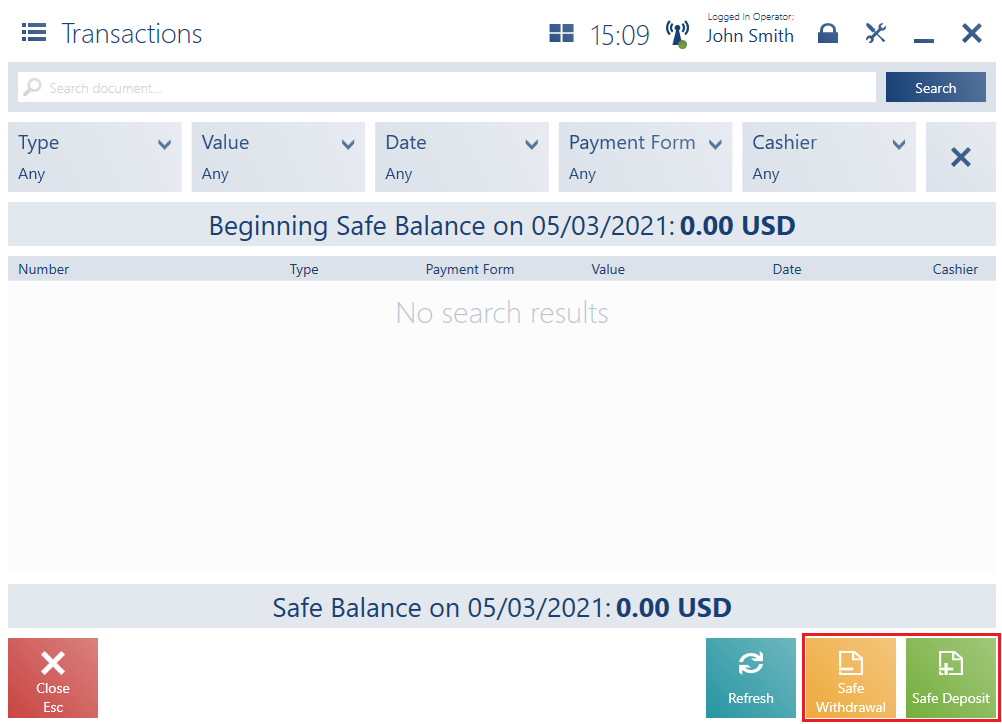
Transaction list
The list of transactions may be opened by selecting the button [Transactions] in the Safe window.
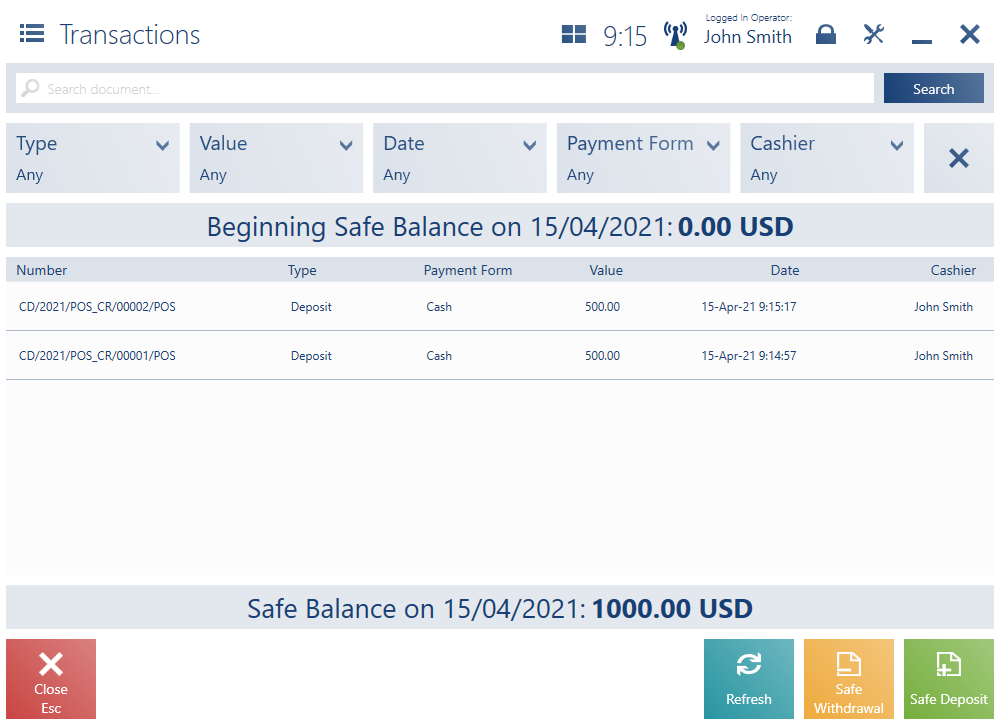
The Transactions list presents a beginning safe balance and a current safe balance, together with the following columns:
- Number
- Type – with the available values Deposit and Withdrawal
- Payment Form
- Value
- Date
- Cashier
The upper part of the window contains the text filter field, making it possible to browse the list on the basis of any part of a transaction’s system number.
Search results may also be narrowed down with the use of expandable filters:
- Type
- Value
- Date
- Payment Form
- Cashier
The Transactions window contains the following buttons:
- [Refresh] – it updates data with the use of the POS Agent
- [Safe Withdrawal] – it opens the safe withdrawal window
- [Safe Deposit] – it opens the safe deposit window
Safe deposit/withdrawal
The user can initiate a safe deposit/withdrawal:
- Directly in the Safe window
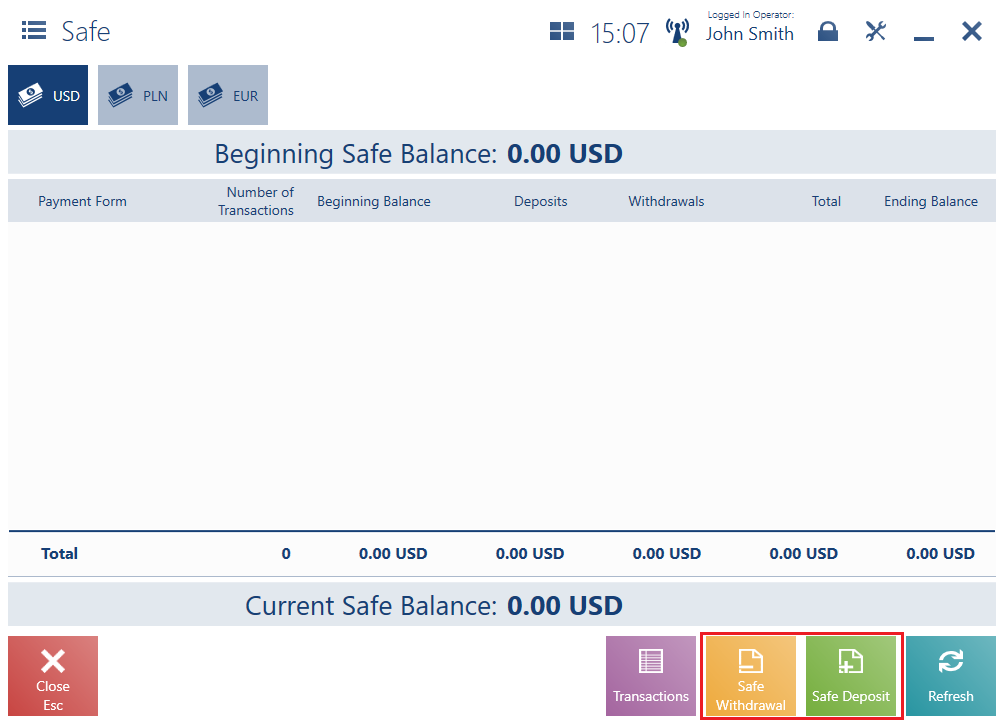
- On the Transactions list
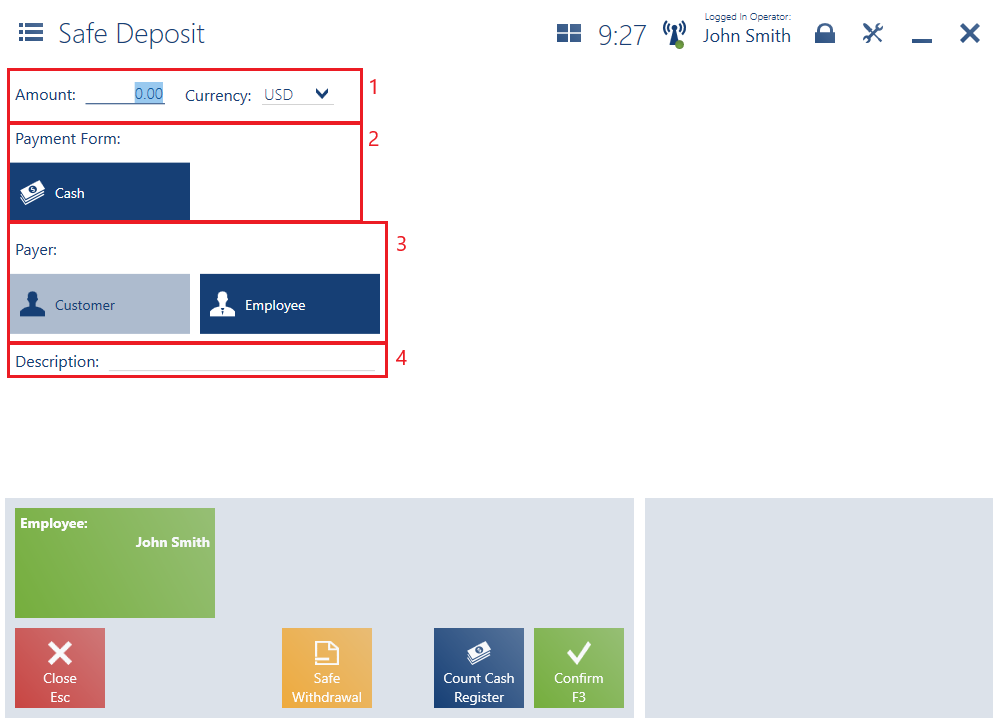
The deposit/withdrawal form contains the following fields (particular points correspond to the places marked in the figure above):
1. Amount and Currency – they allow the user to enter an amount in a currency available on the POS workstation
2. Payment Form
3. Payer – it makes it possible to specify a customer or employee. Once the button [Customer]/[Employee] is selected, the application displays the customer/employee selection list.
4. Description – it allows the user to enter information on the purpose of a deposit/withdrawal
The deposit/withdrawal form contains the following buttons:
- [Safe Deposit]/[Safe Withdrawal] – it switches between deposit/withdrawal documents without the need for the user to enter data again
- [Confirm] – it confirms the document
- [Count Cash Register] – it opens the window Cash Register Counting (as in the case of the window opened at the end of day) presenting a payment form and currency selected in a given deposit/withdrawal document