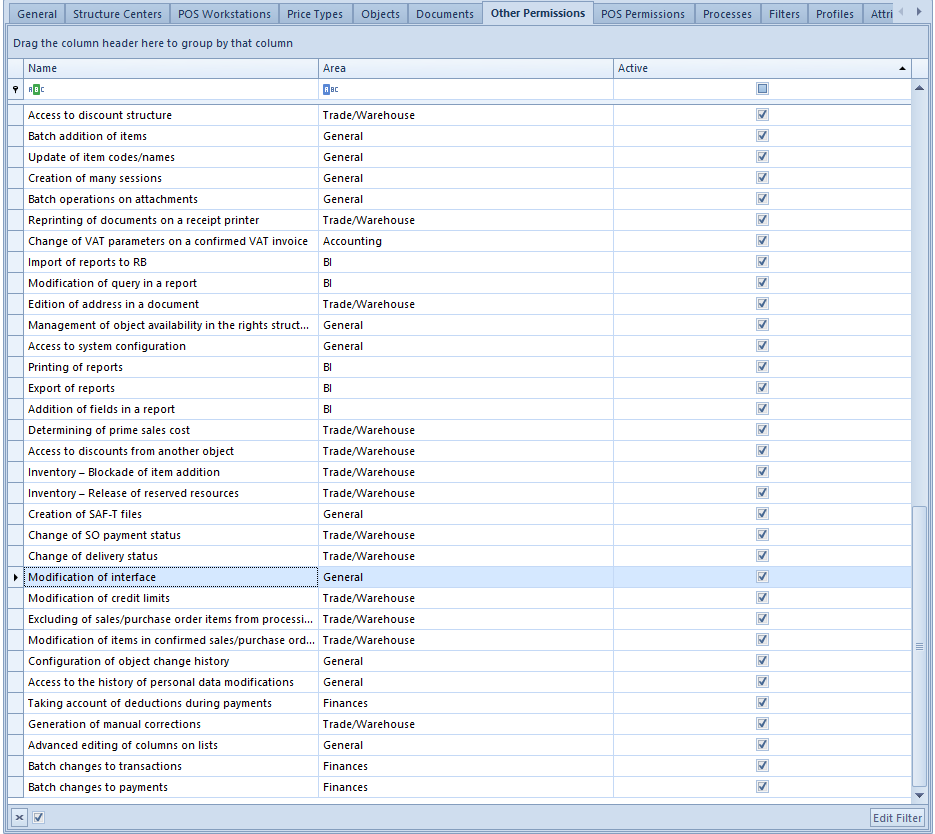
Comarch ERP Standard System allows for handling permissions to interface modification. On the form of an operator group, in Other Permissions tab, there is Modification of interface permission available, which allows operators from a given group for opening interface editor. Once the permission is withdrawn, operators from that group will not be able to open the interface editor.
Modification of interface permission assigned to an operator group
Operators who belong to B2_group can:
Edit interface for all operators and operator groups
Limit the possibility of editing of singular control fields for operators who do not belong to the B2_admin group
Operators who belong to B2_group can edit only their own interface.
Note
It is necessary to remember that permissions add up in the context of a whole center. If an operator belongs to several groups within one center and at least one of those groups has the permission to modify the interface assigned, that operator will be able to modify the interface.
Interface editor – general information
Interface editor allows for changing the appearance of all key windows in the system. Thanks to that tool, the system administrator can easily hide and block items on forms or take away from users and user groups the access to a given column or field, while a user can adapt the layout of a window to his/her needs and preferences.
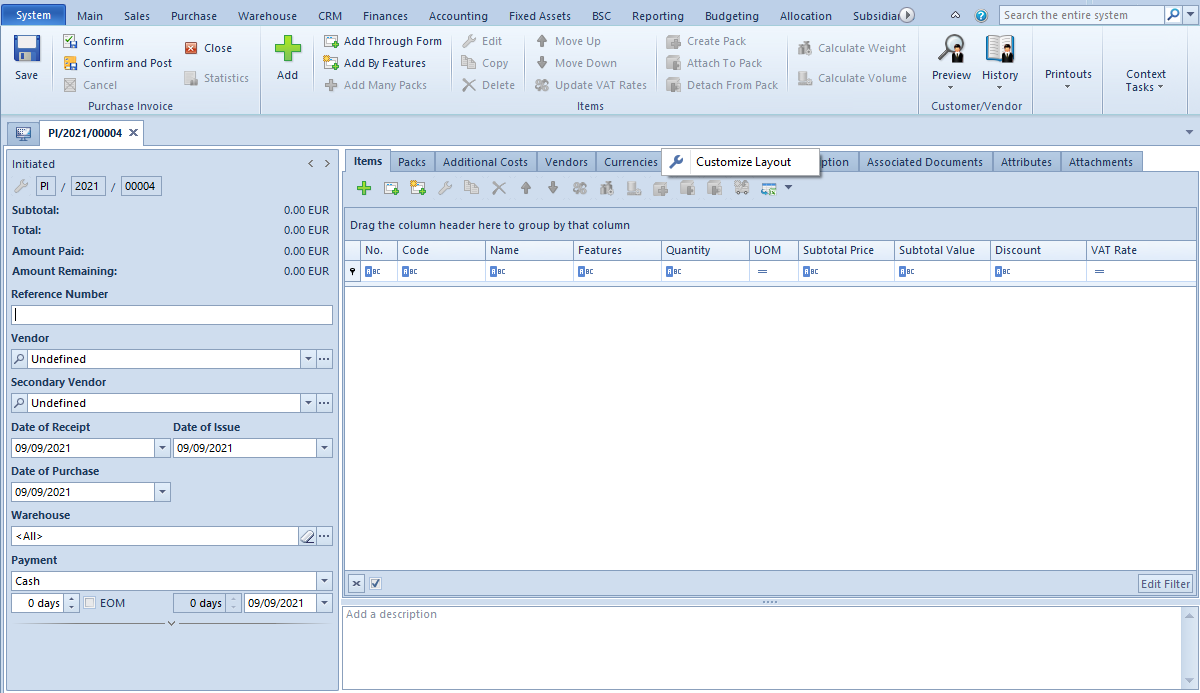
To start the interface editor, it is necessary to click the right mouse button on the empty window area, not related to data insertion, and select [Customize Layout] button.
[Customize Layout] button
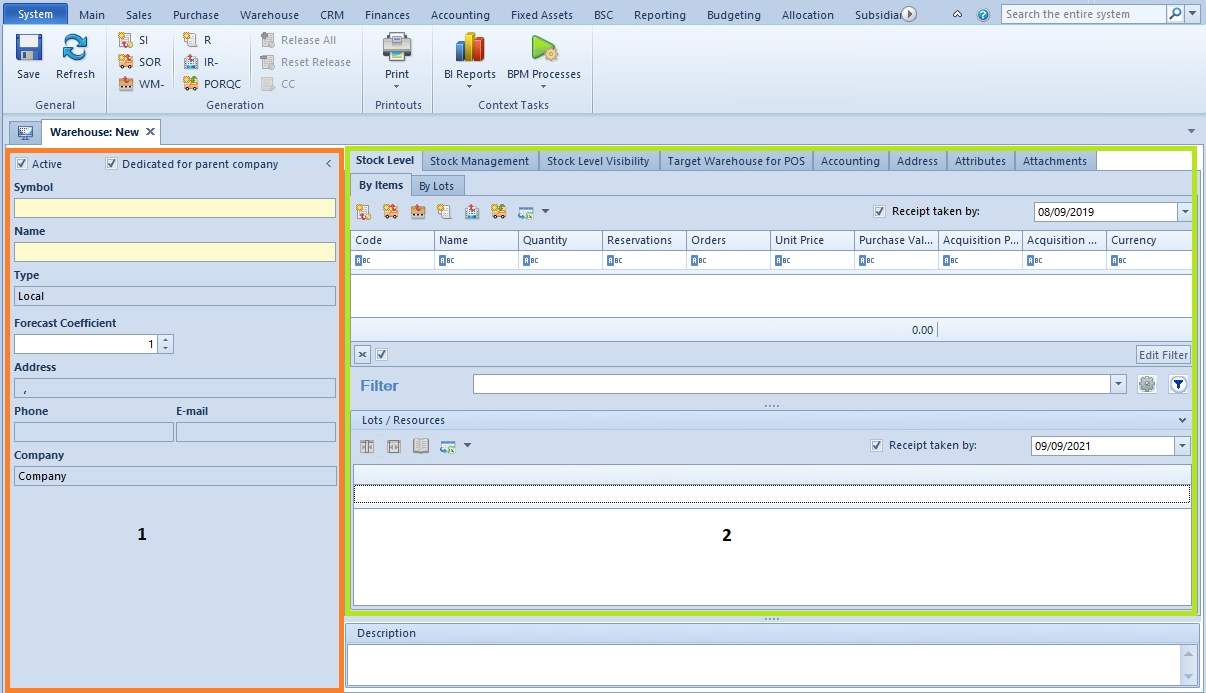
Button [Customize Layout] Since particular forms in the system are divided into areas, each of them has separated interface. Hence, when selecting for editing the area placed on the left side of a form (area marked with number 1 in the figure below), the user will not be able to edit theright side of that form (area marked with number 2 in the figure below).
Areas on a form
Interface editor structure
General information
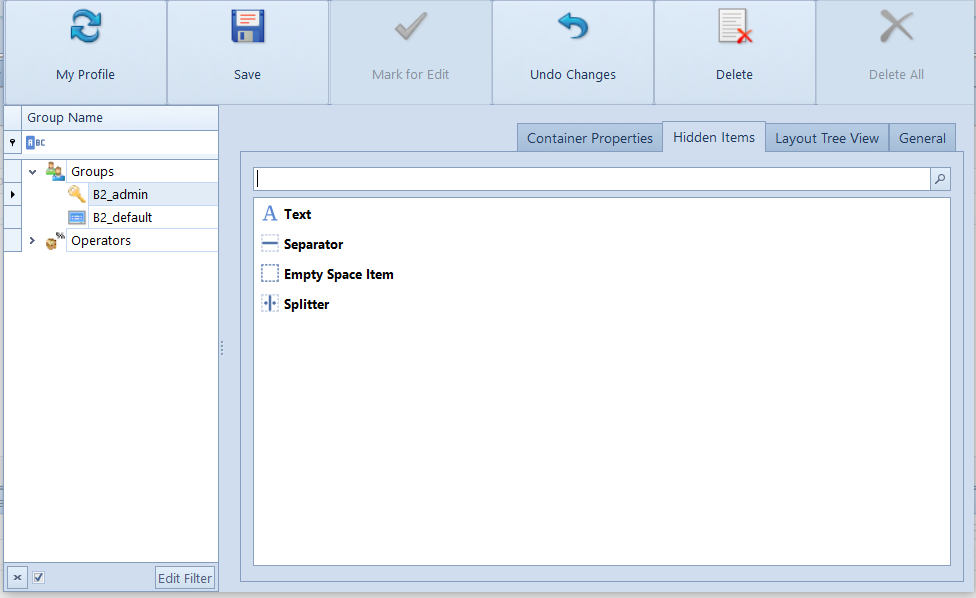
The interface editor is composed of a button container, a list of operators and operator groups and tabs Hidden Items, Layout Tree View and General. After selecting for editing of an operator group, also Container Properties tab becomes available.
Interface editor window
Interface editor buttons
[My Profile] – this button opens interface settings for the account of a currently logged-in user; it is visible only for users who are administrators
[Save] – this button saves changes. Next to a group or an operator selected for editing, for whom the changes have been saved, an icon with a red diskette , which symbolizes a modified interface, appears.
The interface editor allows for saving changes for many operators or groups of operators at the same time. First, it is necessary to select all objects for which the entered changes should be saved. Changes are entered on the interface of an operator or a group marked for editing. Subsequent operators or operator groups can be marked by highlighting them on the list with the use of the left right mouse button and <Ctrl> key (marking single operator/group) or <Shift> (marking all operators/groups between two selected operators/groups).
Marking many operators in the interface editor
Note
Several operators can be marked only if an operator is selected for editing. The same rule applies to operator groups.
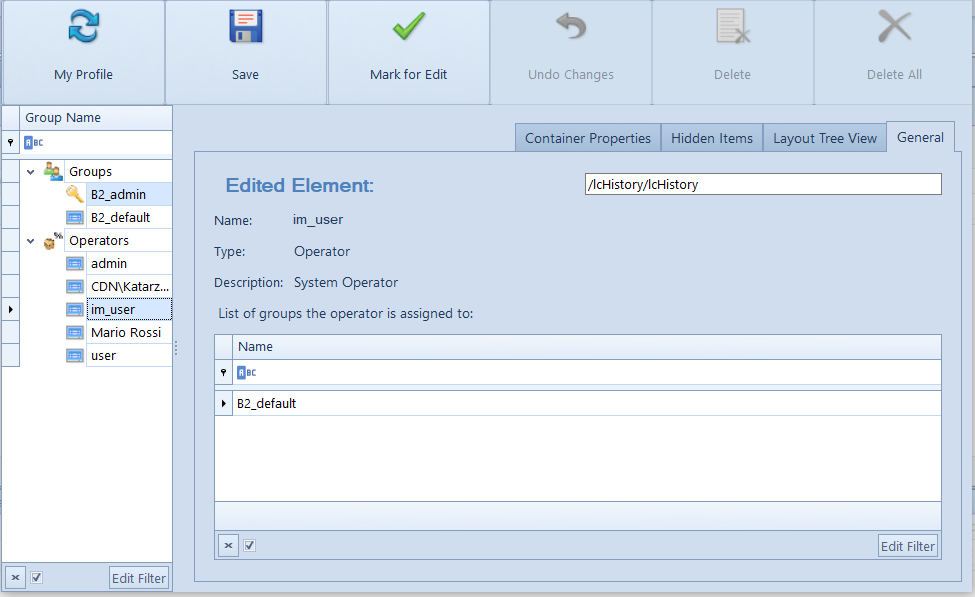
[Mark for Edit] – allows for the edition of a form layout for the selected user group or user. A key icon appears next to the selected operator group or operator.
[Undo Changes] – deletes unsaved changes
[Delete] – deletes all changes for the selected user group or account
[Delete All] – deletes all changes made in all user groups and accounts – visible only to the users who are logged in as administrator
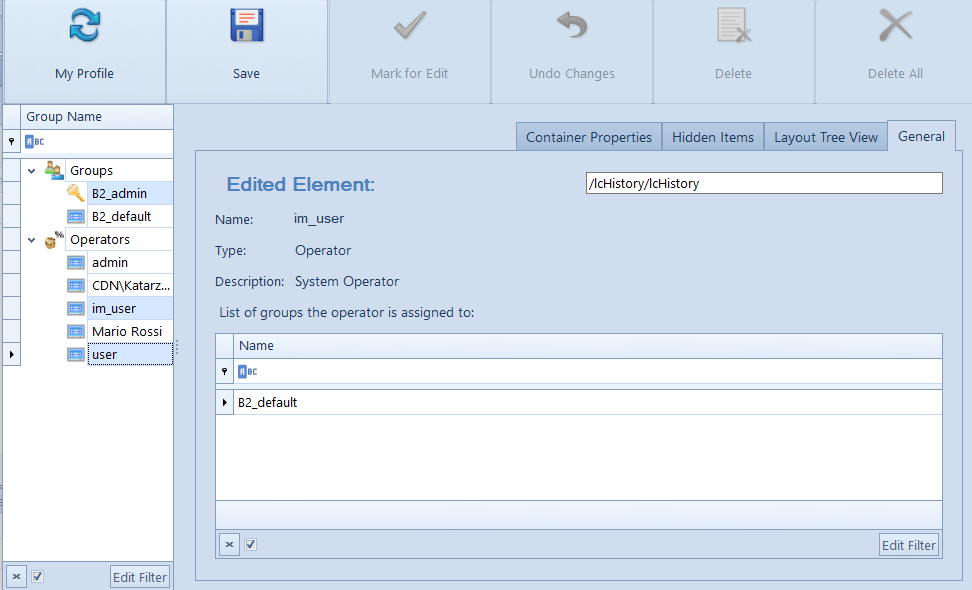
Tab General
This tab contains information about an edited element (users’ group or user account) and it is the following:
Edited Element – provides information about the selected window element
Name – name of the users’ group or user account
Type – type of the edited element
Description – element description
Below the description, there are:
List of user accounts – if a group of users is marked for edit
List of groups to which a user belongs – if a user account is marked for edit
Tab General
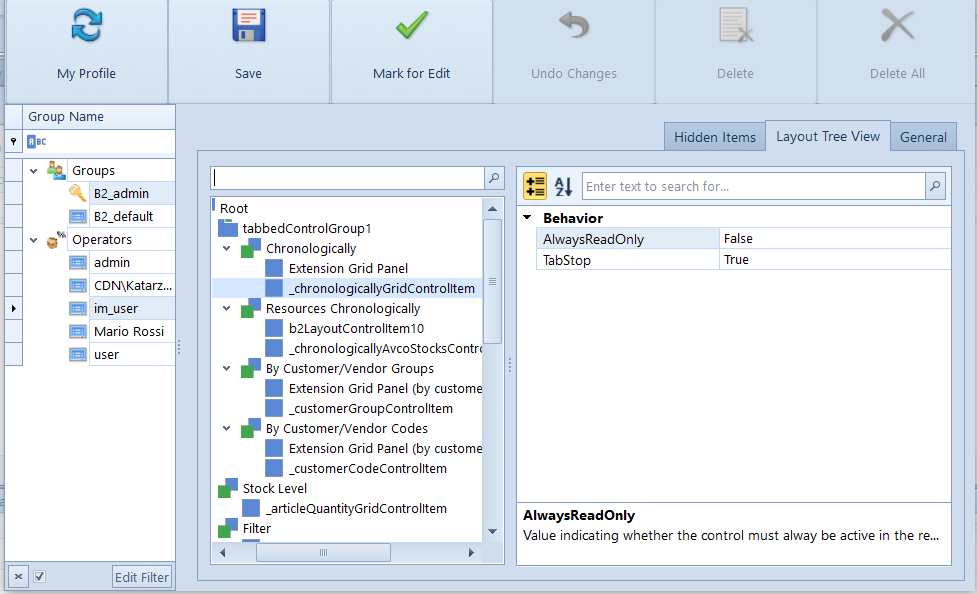
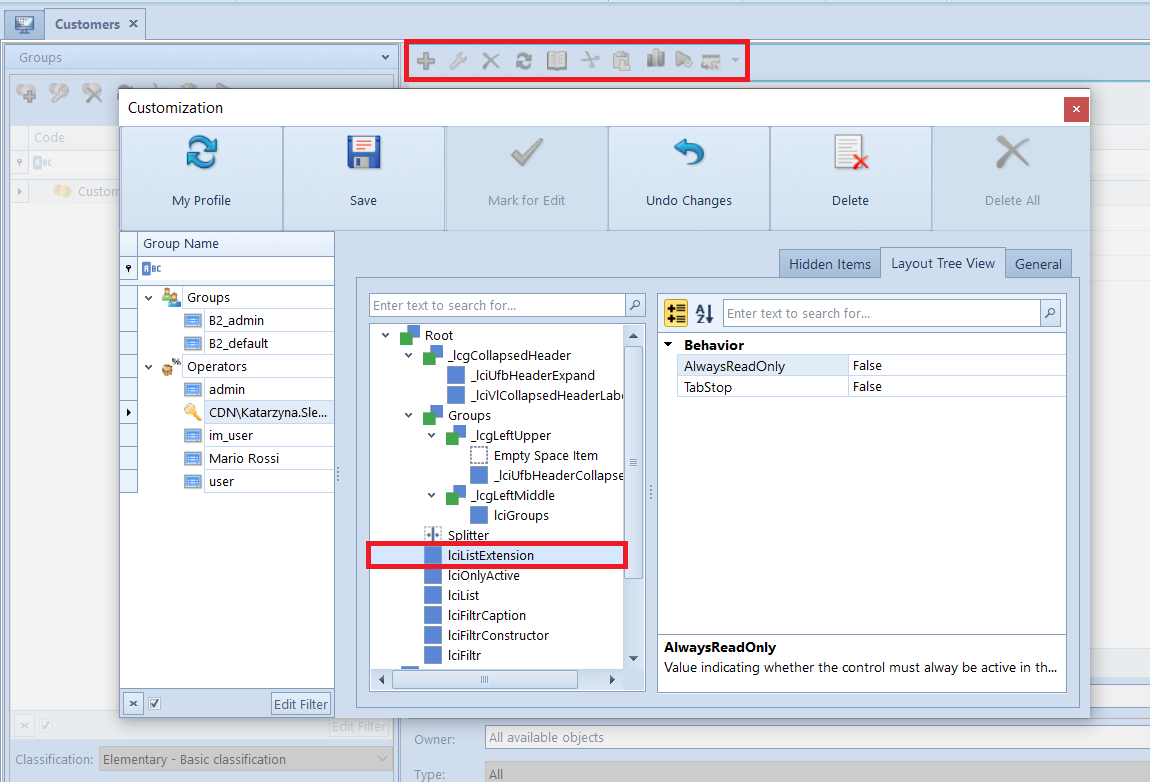
Tab Layout Tree View
The layout is typically composed of two elements: Group and Hidden Items.
Group – this element contains the whole structure of given window in which the interface editor was run
Hidden Items – the second element contains items added to the view, which are not displayed. Items included in this element are described in the next chapter of this article.
Most items are grouped. To see them, click on the symbol.
After selecting the , the list of all items creating a given element is expanded. In this tab it is possible to copy the contents of a given form, e.g., among tabs with the help of the drag & drop method.
Tab Layout Tree View
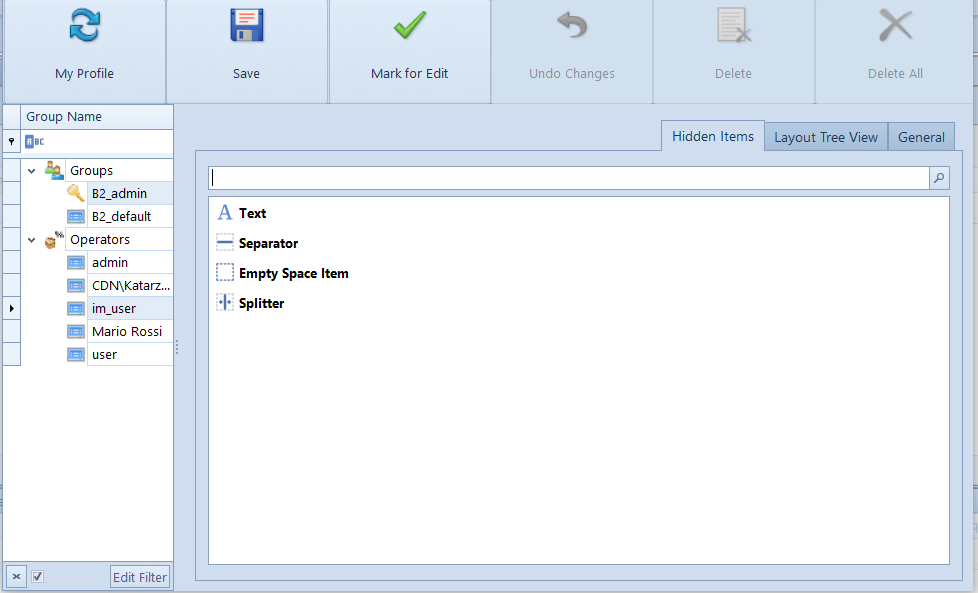
TabHidden Items
This tab is composed of three elements which can be used to modify the window:
Empty Space Item – adds an empty space to a form
Texts – enables adding a text
Separator – separates the fields available in a window
Splitter – adds an element allowing the user to manipulate the size of the items displayed in the window
The tab presents also items hidden with the use of Hide Item, available in the context menu for an item, in the tab Layout Tree View. Detailed description of the option Hide Item can be found in article Interface item management.
To use one of window modification elements or a hidden item, it is necessary to drag and drop it in a target place.
Tab Hidden Items
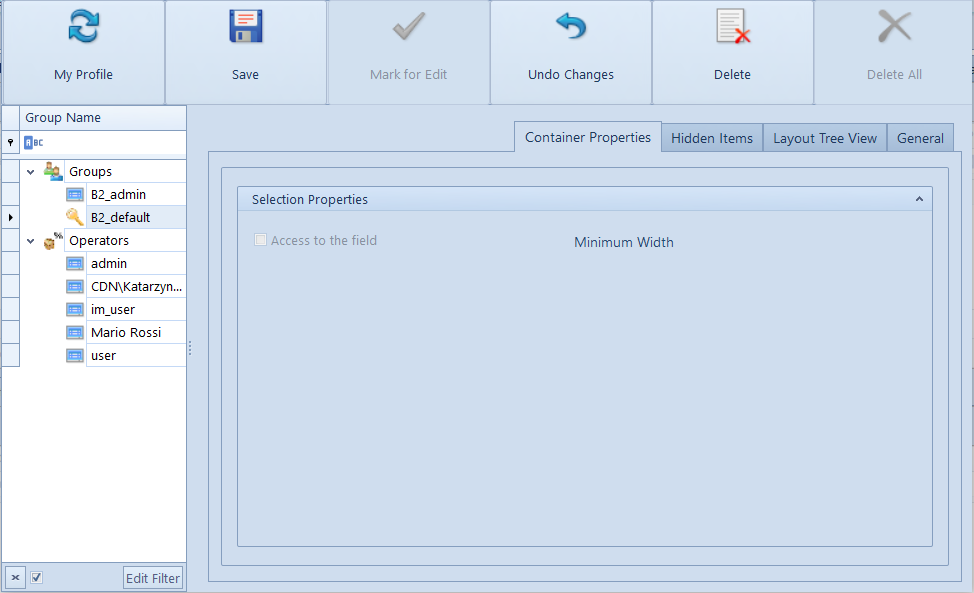
Tab Container Properties
This tab is visible, when a group of operators is marked for edit. The tab allows for:
Withdrawing access to a single control field
Tab Container Properties for a single control field
After withdrawing access, a given control field is transferred to the Hidden Items tab. However, contrarily to a hidden control field, a control field with withdrawn access cannot be dragged back by a user who does not belong to the B2_admin group.
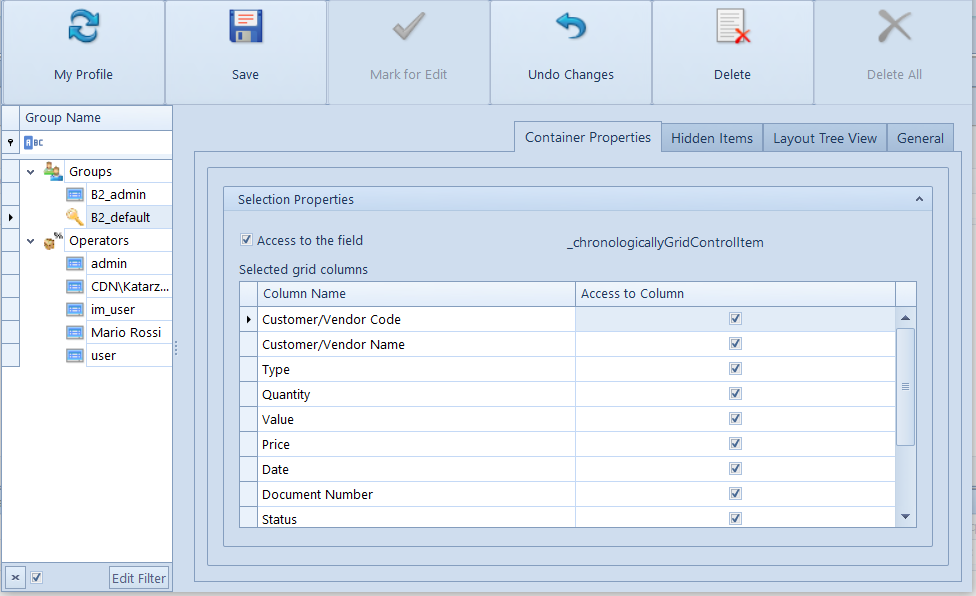
Withdrawing access to columns on a list
Tab Container Properties for a list
After withdrawing access to a column, such column is no longer visible on a list and it is not possible to drag it back with the use of [Select Column] option, which is available under the right mouse button upon clicking on a list header. Thanks to that, a user who does not belong to the B2_admin group will not be able to restore the column to the list.
Note
When saving the layout of an edited window, the setting of the opened tab as default is saved as well. After opening for editing of a given window again, the tab which was visible at the moment of saving of the interface, will be dragged on top as first.
Interface item management
General information
This article describes how the system allows for adapting the interface to the user’s needs.
If a user selects (marks) an item in the layout tree view available in the interface editor, it is marked with blue lines in the edited window. It helps user to find quickly a given item.
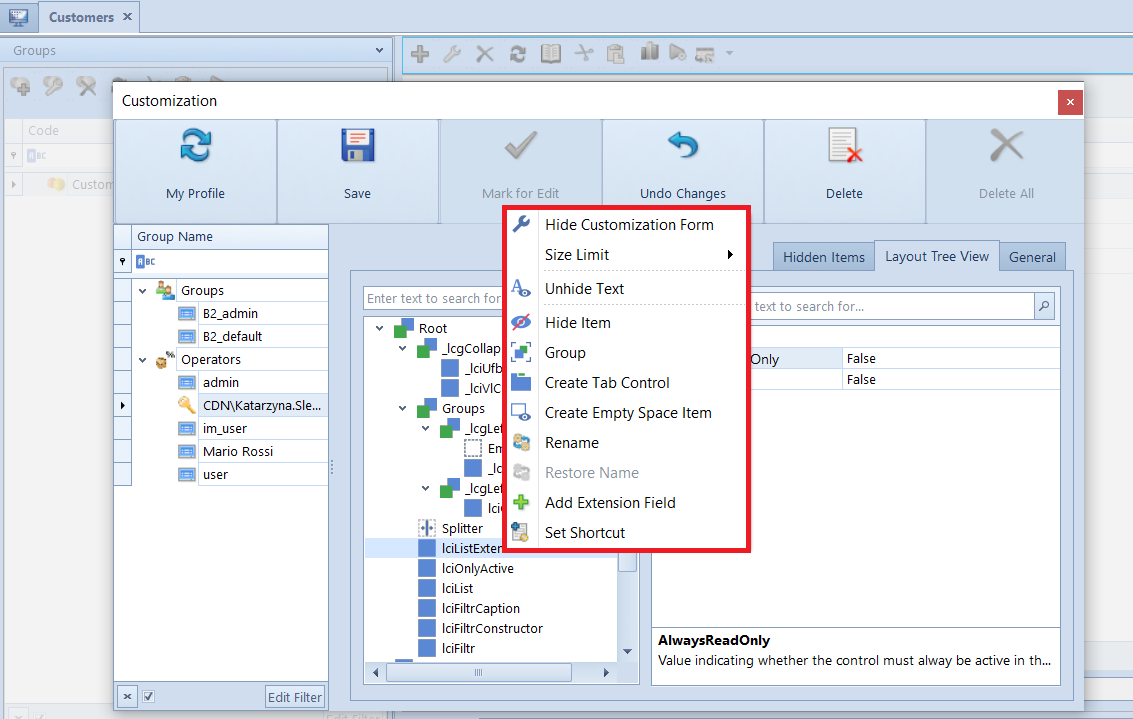
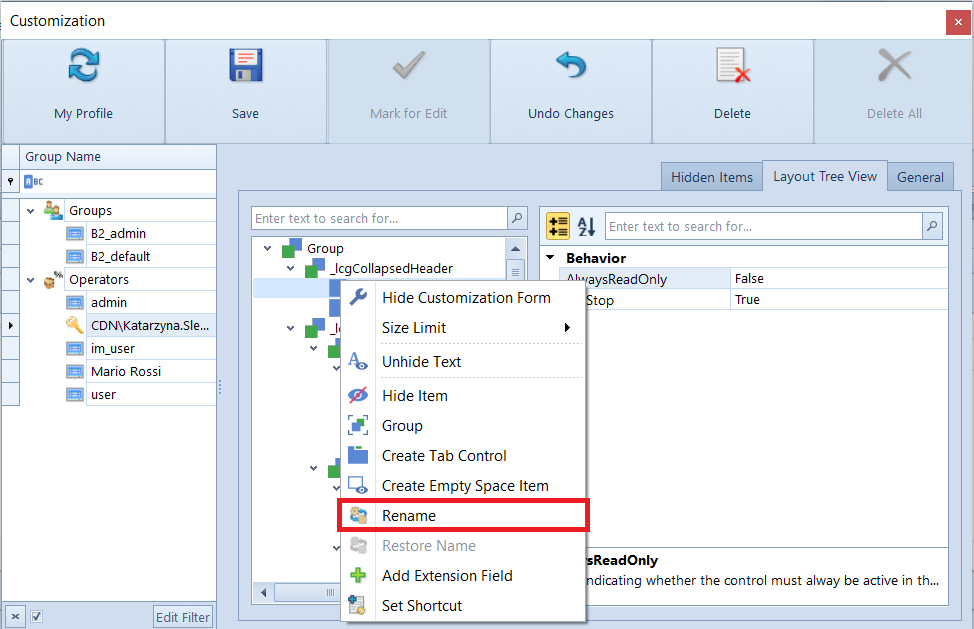
The following options available in the context menu refer to item management:
Hide Customization Form – closes the customization window
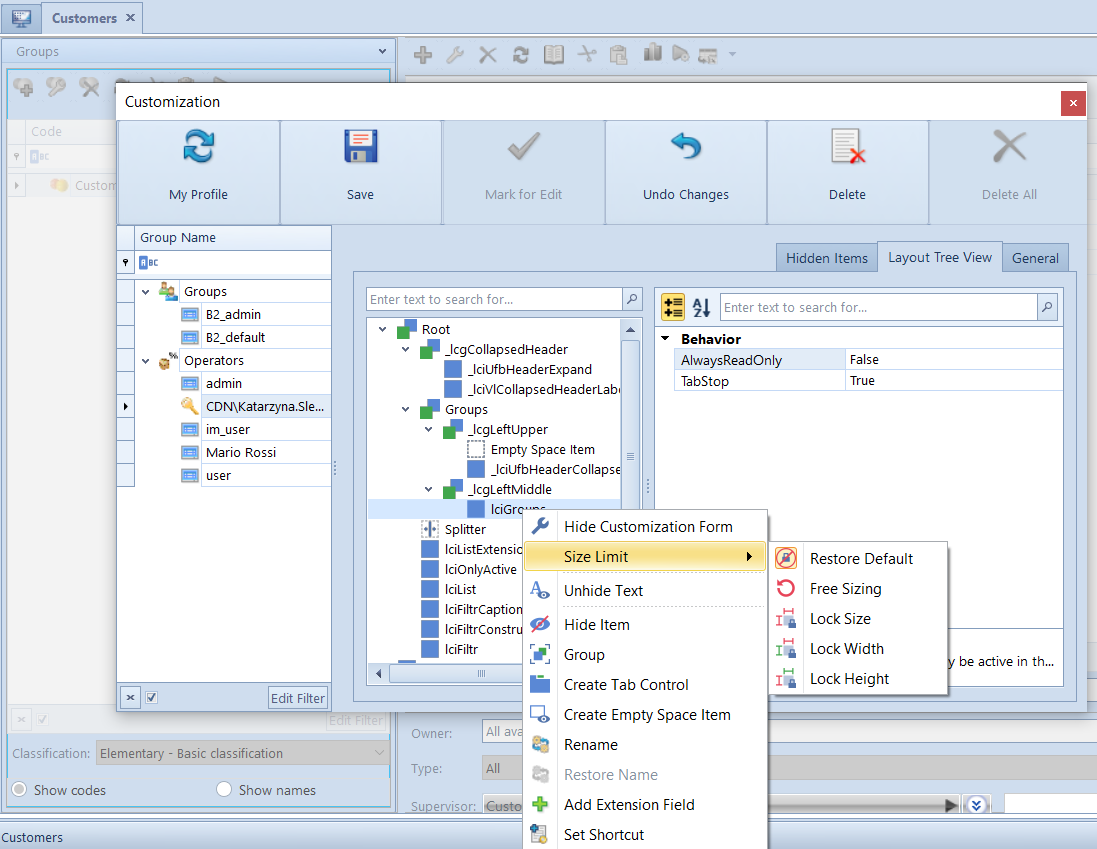
Size Limit – it is possible to limit the size of a displayed item. The following options regarding size limiting are available:
Restore Default – restores default settings
Free Sizing – does not limit an item
Lock Size – blocks the width and the height of an item
Lock Width – blocks the width of an item
Lock Height – blocks the height of an item
Size limit
Hide Item – makes an item invisible for the user. Such item will be moved to the Hidden Items group of buttons. The user may set it as visible after logging on to his profile. The item can be made again visible by dragging it to the form from the Hidden Items tab to a target place.
Create Empty Space Item – adds an empty space under the selected item
Creating empty space
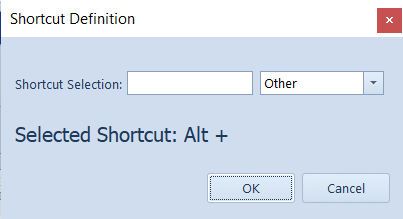
Set Shortcut – allows the user to define a shortcut. On the form, there is a window being opened to suggest what letters may refer to the selected item. The user can also select option Other to use a field for selecting a shortcut. After selecting a suggestion on entering an own character and confirming the entered letter by pressing [OK], each time you click the combination of the keys Alt+ (the selected letter) in given window, the mouse cursor will be redirected to given item
Defining shortcut
Management of item location in the structure
Depending on the current place of an item, the following options are displayed:
Group – allows grouping the items
Grouping items
Ungroup – ungroups the previously grouped items
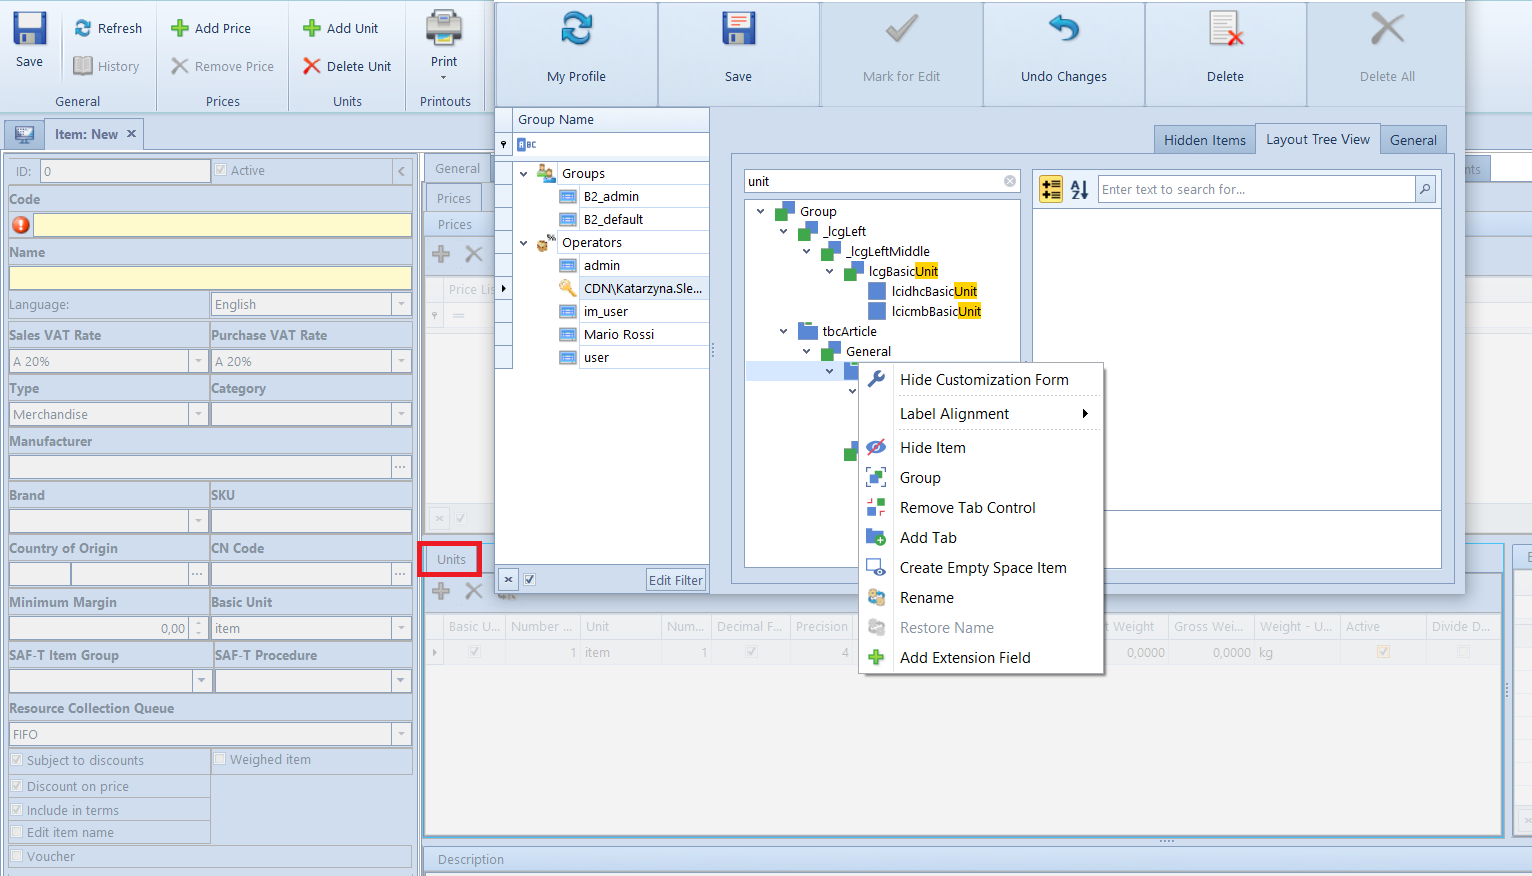
Create Tab Control – this option becomes available upon selecting a previously defined group of items. It allows for the creation of a separate tab
Created tab control with tabs – units
Remove Tab Control
Add Tab – adds new tabs to which it is possible to define the following items or item groups
Managing item field description
Options related to this area:
Rename – allows the change of item field description if option Hide Text is not selected
Changing item name
Hide Text – hides field description related with given item from the user
Unhide Text – shows a previously hidden field description
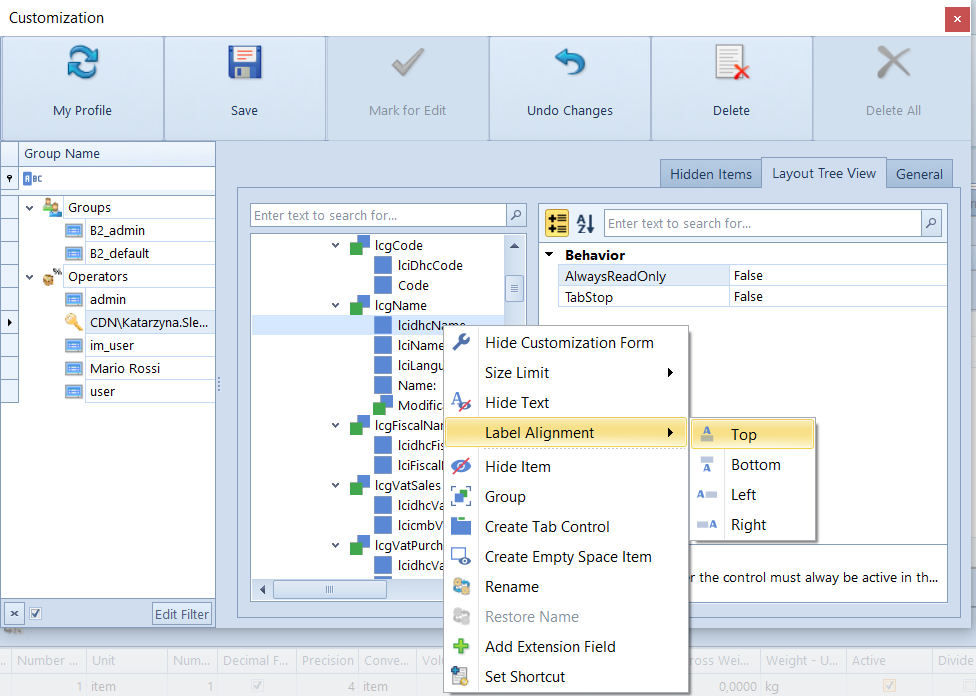
Label Alignment – allows the selection of position for field description (top, bottom, right, left)
Alignment of field description on item
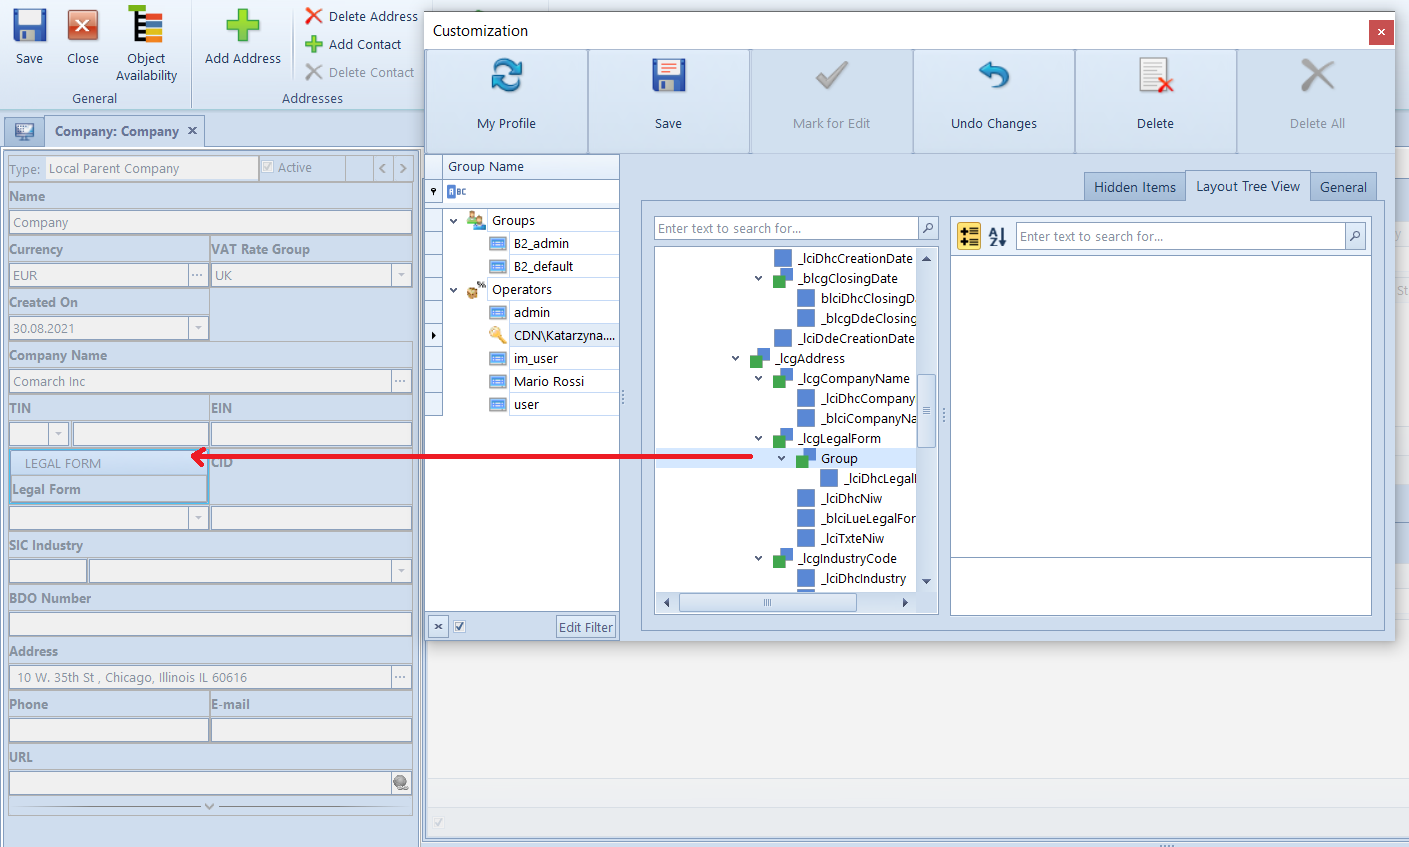
Extension Management
Options connected with an extension become available upon the addition of an extension field. The possibility of adding extensions is available on all detail forms in the system (e.g., customer form, item form etc.).
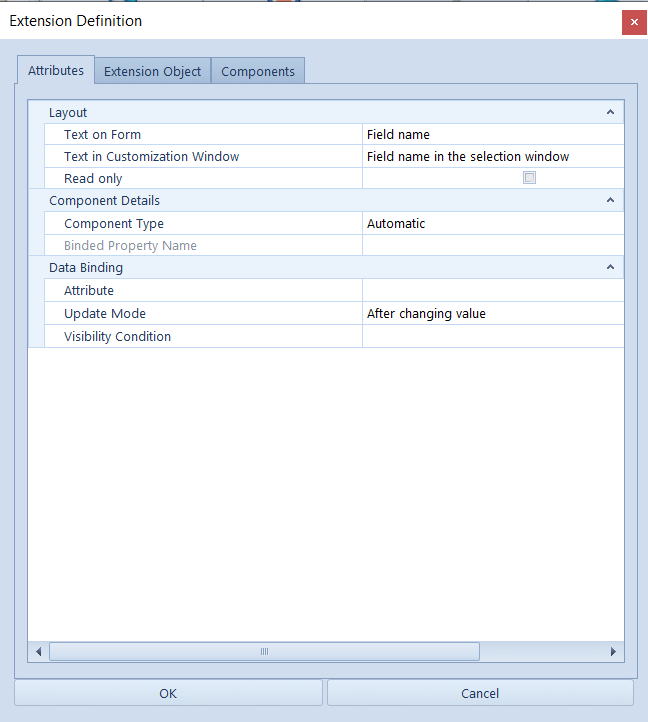
To add an extension to a form, it is necessary Add Extension Form option. A form definition window opens, where it is possible to define and extension based on three definitions: Attribute, Extension Object and Component. Below is detailed description of particular options.
Layout
Available for
Text on Form
description which will be presented on form
Attribute
Extension object
Components
Text in Customization Window
description which will be presented in the interface editor
Attribute
Extension object
Components
Read only
if selected, edition of a field in a form is disabled (the field will be insensitive)
Attribute
Extension object
Components
Component Details
Available For
Component Type
type of an added extension (Text Field, Numeric Field, Logic Field, Date Field, Checkbox, Multivalued drop-down list field, System Object); moreover, it is possible to select the type of control that will represent a given field on a form
Attribute
Extension object
Binded Property Name
information about the type of data the system is expecting from the user (data types change depending on the selected type of component)
Attribute
Extension object
Data Binding
Available For
Attribute
field connected with adding of extension of Attribute type. A list of attributes assigned to given object which value will be included in the added extension field is displayed
Attribute
Source Object
field connected with adding of extension of Extension Object type. A data source is specified in this field
Extension Object
Source Object Property
a list of public properties defined for the previously selected source object is displayed
Extension Object
Update Mode
selection of one of the three available methods of refreshing data (in company database) entered into the added extension field (Never, After changing the value, After verifying the correctness)
Attribute
Extension Object
Data Source Property
here it is necessary to select a public property of a selected extension in order to provide values displayed in a checkbox
Extension Object
Name of Property with Value
the property from which a value will be retrieved and set in the property selected in the Source Object Property field
Extension Object
Defining extension – Attributes
Note
In order to use Interface Editor, it is not necessary to have a license for DevExpress which is used by Comarch ERP Standard. However, if a user wants to add new extension fields to the interface based on their own libraries, a license for DevExpress will be necessary.
Note
Each time after updating Comarch ERP Standard system, it is necessary to verify operation of extensions in forms.
Example
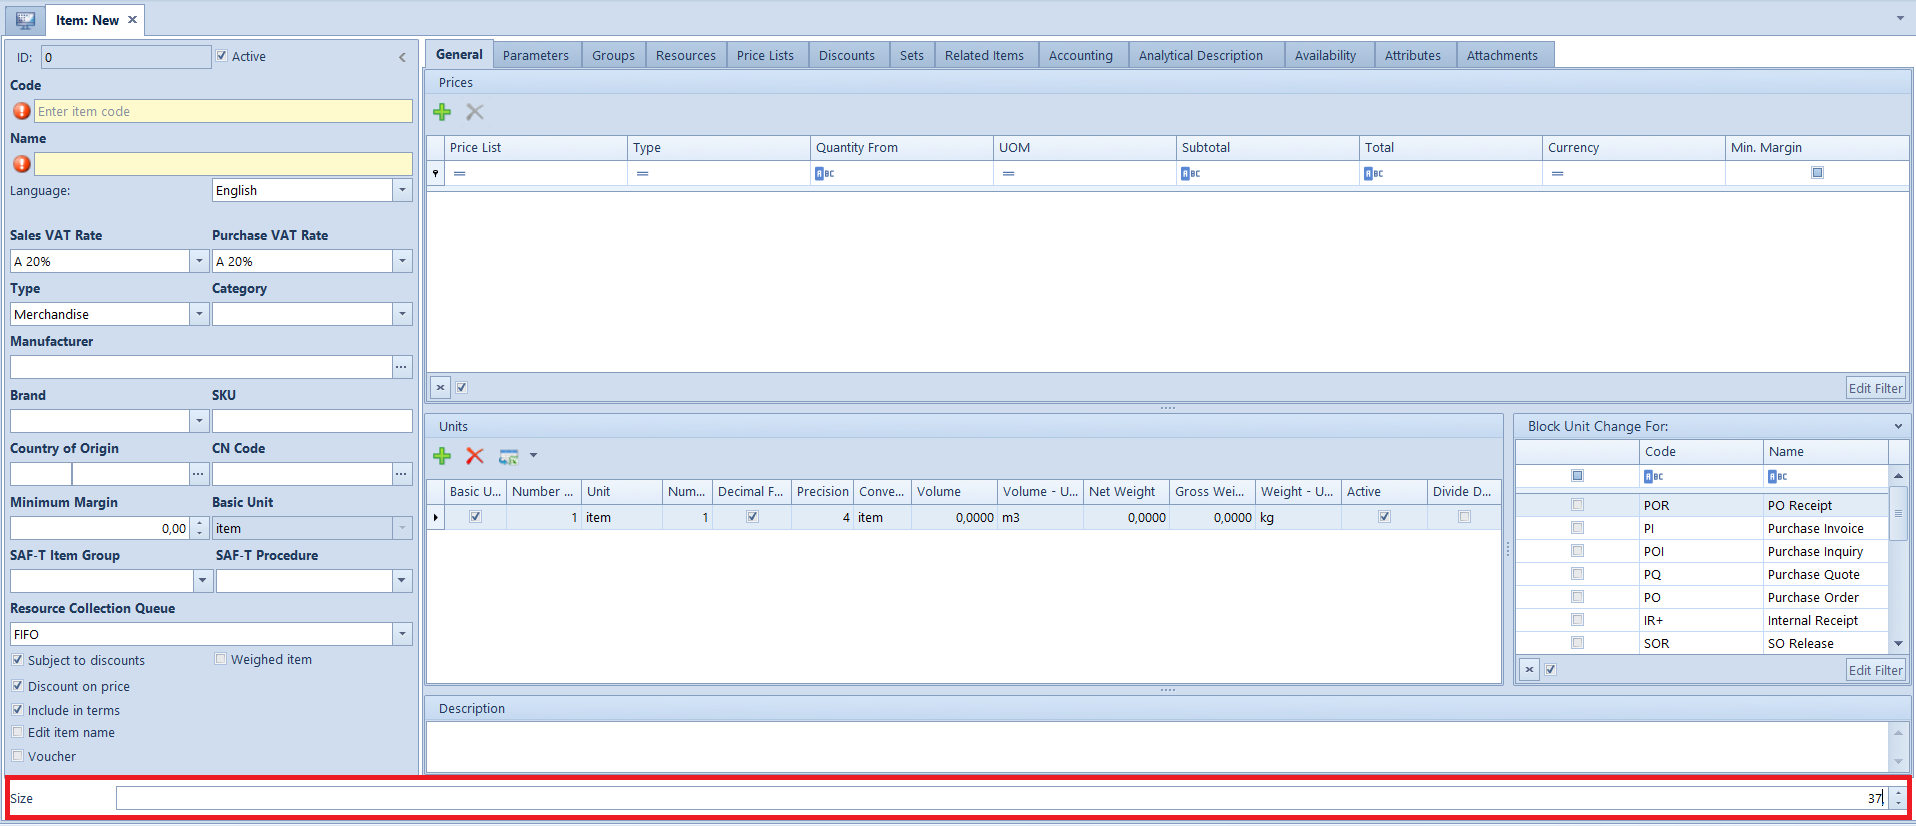
The user wants to add an extension field to item forms, which will allow for defining values for Size attribute. To do so, the user performs the following actions:
In the interface editor, opened for item form, the user finds item in which the attribute field should be displayed and selects Add Extension Field option from the context menu
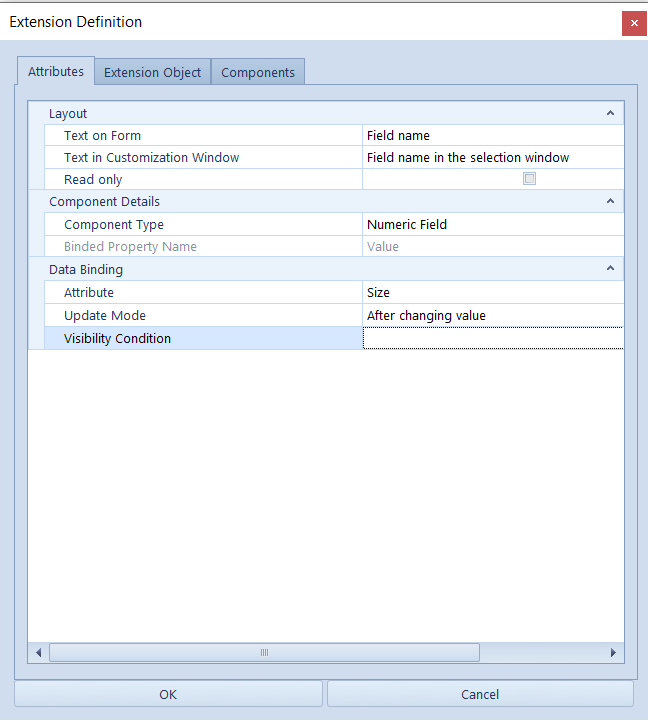
In the extension definition window, in tab Attributes, the user defines information which should be displayed for the extension in the interface, sets the component type to Numeric Field and the attribute to Size.
After saving the entered changes, the attribute field will be displayed on the item form in the selected place.
Apart from adding objects, it is possible to:
Edit Extension Field – edits the previously added extension field
Remove Extension Field – deletes the previously added extension field from the form
Importing and exporting of interface settings
This article presents two methods of importing and exporting interface modifications provided by Comarch ERP Standard. Owing to that function, settings can be easily transferred among multiple company databases of the system.
The first method allows for exporting all changes made in the interface which were applied in a database. The file will contain formation regarding:
operators/operator groups for which changes were made
place of changes
changed elements
During export, all changes are saved in *.la file. While importing data from the file to a company database, all the changes are uploaded for operators/operator groups and they will correspond to data from the file. If any operator or group does not exist in a company database but is included in the file, data from file referring to that operator or group will not be uploaded.
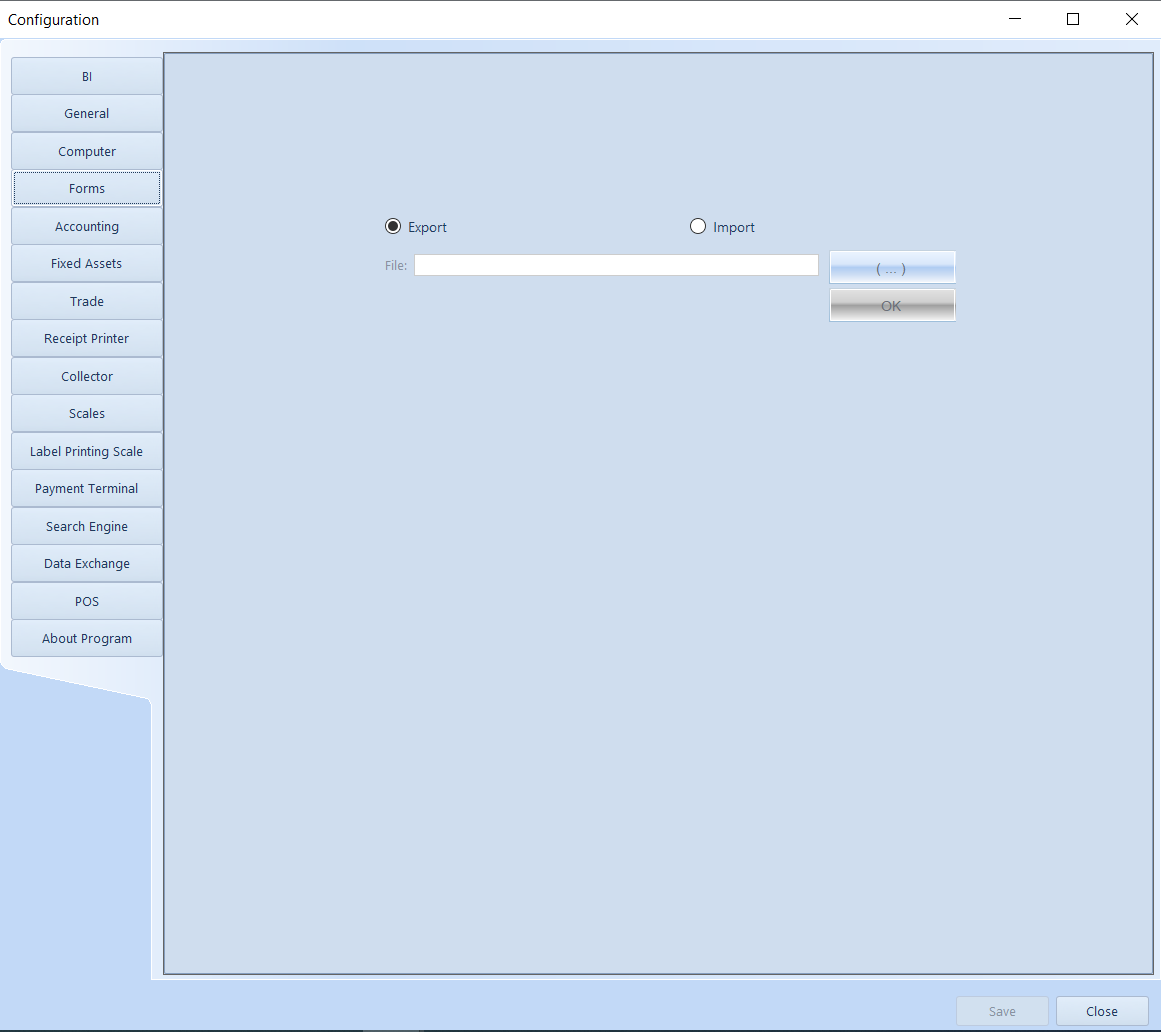
The tool enabling import/export is available in tab System → Configuration → Forms.
Importing/exporting of interface modifications for a whole company database
The second method provided by the system allows for import and export of modifications for selected operator groups or operators. The mechanism of importing and exporting is the same. The function of import and export for operators and groups is available in the main menu for those objects.
Buttons for import and export of interface modifications for operator groups and operators