Generating SENT document

It is possible to generate a carriage document on the basis of:

  • trade documents (invoices, sales orders)
  • warehouse documents (POR/SOR)

To do so, it is necessary to select an appropriate document on the list and click on [SENT] button. PUESC platform on tab My documents will be opened.

The user logs in to the PUESC platform according to the settings defined in: System → Configuration → Data exchange → SENT.

For release documents (SO, R, SI, SOR), SENT_100 dispatch form is opened, in accordance with the data retrieved from the document on the basis of which it is being generated.

For receipt documents (POR, PI), SENT_200 dispatch form is opened, in accordance with the data retrieved from the document on the basis of which it is being generated.

In case a SENT document has already been generated to the document, another attempt of its generation, depending on selected action, might result in:

  • completion
  • update
  • closure
  • cancelation
  • verification of notification status


SENT configuration

Polish law of 9 March 2017 on the monitoring of rad transport of goods imposes new registration obligations and defines liability for their infringement to three types of entities:

  • sending entity – natural person, legal person, organizational unit not holding legal personality, running a business, delivering goods, delivering goods in the EU, exporting goods
  • receiving entity – natural person, legal person, organizational unit not holding legal personality, running a business, purchasing goods, purchasing goods in the EU, importing goods
  • carrier and driver – natural person, legal person, organizational unit not holding legal personality, running a business, transporting goods

SENT configuration

In order to be able to handle SENT functionality:

  • on the company form (Configuration → Company Structure → Rights Structure → edition of selected company), it is necessary to check parameter: Monitor SENT Transport The value of the parameter can be changed at any moment during work with the system.

Once the parameter is checked, an additional field ID in PUESC appears in the header of the company form. The ID is completed automatically on the basis of TIN and EIN and its format is: PL + TIN + 5 last digits of EIN number.

Example

Case 1:

Company’s TIN:  9557335883, EIN not completed

ID in PUESC is defined as follows:  PL9557335883

Case 2:

Company’s TIN:  9557335883, number REGON 350512345.

ID in PUESC is defined as follows:  PL955733588312345

  • From the level of the system configuration (System → Configuration → Data Exchange), it is necessary to configure Web Service service, in order to enable sending notifications to Electronic Services Portal of the Customs Service (PUESC) in .xml format, which are compatible with technical specification available on the portal.
  • Web Service Address: – address used for communication with PUESC portal
  • Exchange File Directory – field allowing for specifying a directory in which files exported by means of […] button are to be saved
  • Completed By – field allowing for selecting a person authorized to send files. Depending whether option Employee or Contact Person is selected, when clicking on […], a selection window is opened from the list of employees or contact persons.
  • E-mail – contact address of the person authorized to send files. By means of […] button a selection window from the list of contacts is opened.

Web Service service configuration

Note
The options listed above are available upon checking parameter Monitor SENT Transport in the company form.

  • form the level of Configuration → CN Codes, it is necessary to define CN codes:
  • with checked parameter Upload to SENT
  • with specified unit in field UOM for SENT
  • with completed field Description

Those parameters allows for specifying goods whose data is to be sent to the PUESC (Platforma Usług Elektronicznych Skarbowo-Celnych) portal.

Parameters regarding SENT on CN codes form

  • an item/item group should be associated with CN code. After that, the parameter SENT is automatically checked, with the possibility of unchecking it.

Item form associated with a CN code and parameter SENT checked


Logs

Logs regarding the process of Auto Update intalation are saved in files available in the default localization:

c:\Program Files (x86)\Comarch ERP Auto Update\logs\

Logs regarding the functioning of the application are avaialble in the Auto Update tool, in path More -> Logs and are divided into:

  • Main agent logs
  • Remote actions logs
  • Saved Sagas − logs of objects responsible for executing remote and local actions

AU logs


Qucik fixes

In Comarch ERP Auto Update, is now available a functionality of local and remote installation of quick-fixes. To install quick fixes, the user should open Quick Fixes tab A window, where it is possible to manage quick fixes, is opened.

Local installation

In the tab Quick Fixes, the functionality of local installation of available quick fixes is now accessible. Quick fixes made available for a given workstation will be visible in the quick fixes management window.

On the list of quick fixes, there are all quick fixes available for a given agent or its child agents. Please not that only quick fixes dedicated for the installed product version. At the moment of making the quick fix available, it will be blocked. To unblock it, click on [Unlock] button. Then, a window, here it is necessary to insert a proper authentication code provided along with the quick fix.

Note
Installed quick fixes are cumulative, thus each subsequent quick fix from given area   contains previous quick fixes.

Upon entering a valid code, a user is notified that the code has been correctly verified. The quick fix is then unlocked and can be downloaded.

It is also possible to roll back an installed quick fix with the use of option [Roll Back] which is available only for a   recently uploaded quick fix. When rolling back a quick fix, note that the backup copies of databases will not be restored automatically

Note
 Shared quick fixes must be installed on all the agents a given quick fix is destined for.

Remote installation

With the use of Comarch ERP Auto Update it is possible to install quick fixes in parent agents remotely. Buttons in section Remote Actions are used for this purpose.

Clicking the option [Download] will display a list of agents for which a selected quick fix can be downloaded as well as agents that are not connected to the parent agent. Unconnected agents are displayed on the list because of the lack of current information about the components installed by them.


In the remote download window, it is possible to select agents for which a quick fix will be downloaded. Upon selecting the action of remote download, the program will inform the user about commencing the download of the quick fix. After download, [Install] action should be selected. Then, after marking the item and clicking on [Remote Installation] button, the quick fix will be installed on selected agents.


Schedules

Schedule is a plan of course of actions in time. The list of schedules is available from the level of the main Auto Update menu

In the view of the list of schedules, the user can:

  • Add new schedule
  • Delete an existing schedule
  • Copy an existing schedule

The list of schedules is composed of the following columns:

  • Schedule name
  • Profile code
  • Download start/download finish time
  • Installation start/installation finish time
  • Schedule status

New schedule addition view is composed of the forms:

  • General settings
  • Schedules
  • Products and versions
  • Add-ons
  • Child agents

In the General settings tab, it is necessary to insert the name of the newly created schedule and select profiles it will refer to.


The tab Schedules allows for setting separate download and installation schedules.

From the level of this window, it is possible to add new schedule, edit an existing schedule or delete it.

A given action can be executed more than one time, therefore three types of schedules are available:

  • One-time – in this schedule, the user can specify an exact period in which a selected action must be executed

  • Daily – this schedule type allows for defining a schedule that repeats each specified number of days

  • Weekly – means that the schedule will be executed on selected weekdays

The Products and versions tab is divided into the following sections:

  • Selection of products and their versions
  • Selection of available quick fixes for selected versions

Within one schedule it is not possible to select more than one version of one product

Tab Add-ons – possibility of selecting add-ons, provided that a proper version of product was selected in the previous tab

The Child agents tab allows for selecting child agents for the schedule.

When the time specified in the schedule comes, each child agent downloads products, quick fixes and add-ons. The child agent connects with a child agent marked as Local parent agent and retrieves data from that localization. If the data is not available, connection with the parent agent will be established. This way, it will not be necessary for all child agents to connect directly with the parent agent. In a schedule, there is no need to define components to download. Each child agent should download configured components, quick fixes and add-ons for a product already added to the schedule.

In the Comarch POS component configuration, the following parameters are available:

  • Delete database on POS uninstallation – if the parameter is checked, when uninstalling the Comarch POS product, also its database is removed from the SQL server
  • Close Processes Automatically During Updates – allows for deciding whether Comarch Auto Update will automatically close the process for the component during a remote or planned update.


Polish national system of e-Invoices

General information

Note
The functionality is available in the Polish version of the database.

KSeF represents one of allowed forms of documenting transactions, along with paper invoices and electronic invoices, currently present in economic circulation.

Structured invoice is an invoice issued by taxpayers with the use of a data transmission system (KSeF), marked with an invoice identification number assigned in the system.

Receiving structured invoices with the use of KSeF requires invoice recipient’s acceptance. In case the recipient does not agree to receive documents in such form, the issuer is authorized to issue a structured invoice in the system, but its transfer should be performed in a way agreed with the recipient.

Changes to company configuration

On the company form, in Trade section, parameter Use KSeF was added. The parameter:

  • is presented on the form only if VAT Rate Group is set to PL
  • can be selected/deselected at any moment during the work with the system
  • by default, is deselected on newly created and converted databases

Company form

After checking the parameter, a control field allowing for indicating the start date of KSeF handling, is presented (by default, the current date is set) and additional tab KSeF is added to the company form and contains the following parameters:

  • Automatically download the uploaded invoice files as attachments
  • Download OAR as attachments
  • Multiple document export mode – with values: Interactive session (default option), batch file
  • Automatic KSeF verification prior to document confirmation
  • Authentication – this section is filled-in automatically when generating token on the basis of the properties of the certificate for which a given token is being generated. Depending on data inserted for the certificate, TIN number or NIN number. It is necessary to establish a correct communication with KSeF.

Tab KSeF on the company form

On the ribbon displayed in the KSeF tab, new button group KSeF was added and it contains the following buttons:

  • Generate Token – after clicking the button, a token for the authenticated entity is generated, also the value of the entity ID and the token are entered in dedicated fields in the KSeF tab
  • Delete Token – this button is active only if a token has already been generated.

On the company form, in Operators tab, there is Token Authentication in KSeF column. It is presented only if KSeF handling is activated (it cannot be edited in subordinated centers). If the operator executes an action related do KSeF handling that requires authentication and if on the company form, in Operators tab, in Assigned Operators, table, the parameter Token Authentication in KSeF is:

  • checked, authenticated data transferred to KSeF consists of: ID and token set for the company on the tab KSeF.
  • unchecked, it is necessary to open the window for certificate selection and transfer to KSeF the parameters of the selected certificate as authentication data.

In the tab, there is also parameter KSeF Work Environment with the following options:

  • Demo,
  • Development,

which allows specifying working mode of the KSeF component with selected environment. In case a token used for the communication with KSeF was already generated, before changing environment, first, it is necessary to delete that token.

Note
Demo mode is available only until no document is sent to KSeF in development mode.

Changes to document definitions

In the definitions of the following documents:

  • Sales invoice (SI)
  • Sales invoice quantity correction (SIQC)
  • Sales Invoice Value Correction (SIVC)
  • Sales Invoice VAT Correction (SITC)
  • Advance Sales Invoice (ASI)
  • Advance Sales Invoice Value Correction (ASIVC)

parameter Automatically upload to KSeF is available (checked, by default). It is presented only if the option of KSeF handling is activated in the company configuration.

Note
All operations related to handling require possession of KSeF license.

 Authorizations on operator group

On the operator group form (Configuration → Operator Groups), in Other Permissions tab, the following elements are available:

  • Upload invoices to KSeF
  • Download invoices from KSeF
  • Edit KSeF number in a confirmed document
  • Print invoices not uploaded to KSeF

These permissions are unchecked, by default.

 Changes to customer/vendor form

On customer/vendor form, parameter Collect invoices via KSeF, is available and it is presented, if:

  • the function of KSeF handling is activated on the company form
  • customer/vendor type: National
  • customer/vendor status: Entity

Customer form header

if the parameter is checked by the operator, the system can automatically uncheck in case of changing:

  • the type of customer/vendor to EU or Non-EU
  • customer/vendor status to retail customer

Changes regarding KSeF to the list of documents of sales invoices, their corrections and advance invoices

On the ribbon above the list of sales invoices, KSeF group of buttons is available and it contains the following buttons:

  • Export
  • Download OAR
  • Check Correctness

Note
The buttons are visible only if the currently logged-in user has license for handling KSeF.

KSeF button group

On the list of sales invoices and purchase invoices, additional columns (hidden by default) are available, which optimize the work with KSeF:

  • KSeF Number – presents the number from the control field of the analogical field on the invoice form
  • KSeF Source Invoice No. – presents KSeF number of the source invoice to which the correction is issued
  • KSeF Issue Date – (unavailable on the PI list)

 Changes regarding KSeF to document forms

Note
Parameters described below are displayed only if in the company configuration, the parameter Use KSeF is activated.

In the header of the documents: sales invoice, its corrections (SIQC, SIVC, STIC), advance sales invoice and its corrections, the following fields are available:

  • KSeF number
  • KSeF status – the value of the field is displayed depending on the status of the communication with KSeF (Uploaded, Not Uploaded, OAR Downloaded, Rejected)

In case of purchase invoice, advance purchase invoice and their corrections, on document forms only KSeF Number field is presented. 

Changes regarding KSeF to accounting documents

On accounting documents, the following elements are available:

  • columns: KSeF Number and KSeF Source Invoice No. on the list of VAT accounts
  • fields: KSeF Number and KSeF Status on the form of VAT sales/purchase invoice and their corrections – values of the fields are transferred, by default, from the source document.

In the case of VAT invoices/corrections added manually to the account, the value of the parameter KSeF Status can be set to:

  • Not Uploaded (default value)
  • Uploaded
  • OAR Downloaded 

Changes to generic directories

In generic directory Attachment Types, system value with the following parameters is available:

  • Value: KSeF file
  • Description: Xml file (*.xml)|*.xml
  • Active: Yes
  • Default: No
  • Compression: Yes
  • Write: File in database
  • Size limit (bytes) No limits 

Verification of invoice correctness in terms of KSeF file structure

Note
The operator does not have to be authorized to upload documents to KSeF to be able to verify the correctness of invoices.
The verification regards all sales documents uploaded to KSeF: SI, SIQC, SIVC, ASI and ASIVC. [/alert]

Manual verification is activated after clicking on the [Check Correctness] button, available from the level of invoice form. Automatic verification is executed during the attempt of confirming a document from the level of details or of the list, if on the company form, the Automatic KSeF verification prior to document confirmation parameter is checked.

Regardless of selected verification method, if the attempt is:

  • successful, in the information bar information KSeF verification: positive
  • failed, in the information bar, information KSeF verification: negative is presented and returned error/errors are presented in the details 

Exporting documents to KSeF

Exporting individual source documents to KSeF (SI and ASI)

Documents can be exported manually or automatically. For the manual export, the button is available, if:

  • the currently logged-in user is authorized to export documents to KSeF
  • document has Confirmed or Printed for SI and ASI and Confirmed for SIQC, SIVC, SITC, ASIVC.
  • KSeF status of the document has value Not Upload or Rejected
  • the issue date of the document is equal or later than the date set in the company configuration of the parameter Use KSeF from

Note
Only documents issued in the company to which the center of the currently logged-in operator belongs, can be exported.

If checked, when confirming  a document, the system verifies the saving of the document operations history:

  • after correct verification of a document, the document is confirmed and then sent to KSeF
  • If document verification is failed, the document will remain unconfirmed and will not be sent to KSeF.

Exporting single corrections to KSeF (SIQC, SIVC, SIVC, ASIVC)

  • the currently logged-in user is authorized to export documents to KSeF
  • its status is Confirmed
  • source document that has to be corrected was sent to KSeF
  • KSeF status of the document has value Not Upload or Rejected
  • the issue date of the document is equal or later than the date set in the company configuration of the parameter Use KSeF from

Note
It is not possible to send to KSeF automatic corrections whose source documents was not previously exported to KSeF and manual corrections.

Exporting many documents to KSeF

Depending on the setting of the parameter Multiple document export mode, which is available on the company form, export of many documents can be performed in one of the following modes:

  • interactive session
  • batch file

After selecting on the list of invoices more than one element and clicking on the [Export] button, the system verifies whether the operator is authorized to export the document to KSeF. IF the operator has authorization assigned, then, depending on the settings of the parameter, the interactive section is checked or export in batch file is activated. If the authorization is not assigned, the system blocks the operation.

Among documents selected by the user, the following documents are ignored:

  • documents with status: Initiated, Unconfirmed and Canceled
  • with KSeF status different than Not-Uploaded or Rejected
  • with the issue date earlier than the date set in the company configuration of the parameter Use KSeF from
  • that have already been printed
  • that are not compliant with the structured invoice scheme

Additionally, it is also possible to export many documents for a given period – after selecting [Export For Period] button and verifying operator’s authorizations, additional window, in which it is necessary to fill-in export details, is presented:

  • Field Day/Range of Dates – allows for specifying dates of exported documents

Note
It is not possible to select a date earlier than the date set in the company configuration for the parameter Use KSeF from.

  • Field Owner – allows for exporting document issued in a selected center
  • Button [Export] and [Cancel] – the mechanism of export verification is analogical to the mechanism activated by the [Export] button

Export window

 Printing sales invoices sent to KSeF

Hint
To ensure correct handling of uploading printed documents to KSEF, it is recommended to turn on increasing history on sales invoice, advance sales invoices and on the corrections of these documents.

An invoice sent uploaded to KSeF can be sent to the recipient also as a printout, e-mail or e-Invoice. Since uploading to KSeF an invoice that was previously delivered to the recipient is considered as issuing subsequent (new) invoice, the functionality that blocks the possibility of exporting previously printed or sent via e-mail invoices to KSeF, has been introduced.

In case in the company configuration, the option of handling KSeF is activated, then, when trying to print a document, the system verifies whether:

  • the document issue date is earlier than the date set in the company configuration for the parameter Use KSeF from, then, regardless of the setting of the parameter Collect invoices via KSeF, on the customer form, the document is print without checking subsequent conditions
  • the document issue date is equal or later than the date set in the company configuration for the parameter and the parameter Handle KSeF is unchecked, then it is necessary to verify document KSeF number:
    • If it is assigned – printing is started
    • IF there is no KSeF number assigned, it is necessary to check whether the operator is authorized to print invoices not uploaded to KSeF – if such authorizations are assigned, a window with a dedicated message and buttons [Print] and [Cancel] are displayed 
  • the document issue date is equal or later than the date set in the company configuration for the parameter and the parameter Handle KSeF is checked, then it is necessary to verify document KSeF number: If there is no KSeF number, the error is presented. 

Importing purchase invoices from KSeF

On the ribbon, above the list, KSeF button group was added along with the following buttons:

  • Import
  • Import for Period

Upon selecting each button, the system verifies whether the operator is authorized to import documents from KSeF – if is not authorized, an appropriate message blocking the operation is displayed.

If the button [Import for Period] is selected, additional window allowing for specifying import details, is displayed:

  • Invoices By Date with options: Invoices uploaded to KSeF, Invoices received in KSeF
  • Start date and end date control field (current dates, by default)
  • Import and Cancel buttons

Structured invoices are imported as attachments On the basis of the attachment file preview, the user can add such document manually to the system, from the level of the list of purchase invoices or VAT accounts. 

Retrieving OAR

[Download OAR] button is available on the invoice form, if the KSeF status of the document has value Uploaded. After clicking on the button, in case of response, KSeF sends:

  • OAR, then:
    • document KSeF status is OAR Downloaded
    • KSeF Number on the document is filled-in
    • if in the company configuration parameter Download OAR as attachments is checked, then xml file with attached OAR is added. In document changes history, operation KSeF AOR Download is saved with the document upload date.
  • information that the session is being initiated or processed, then:
    • document KSeF status is not updated
    • in document changes history, operation KSeF AOR Download is saved with the processing stage description
  • error, then:
    • document KSeF status is changed to Rejected
    • In document changes history, operation KSeF AOR Download is saved with the error description

Note
The [Download OAR] button is active from the level of the list of sales invoices only, if one document is selected on the list.

Synchronization of KSeF parameters from Comarch POS / Comarch Mobile

When performing the synchronization to Comarch POS and to Comarch Mobile, the following value is sent:

  • of the parameter Use KSeF from the company configuration along with its activation date
  • value of the parameter Collect invoices via KSeF from the customer form
  • value of the KSeF Number field of synchronized sales invoices and their corrections

When importing data, the value of Collect invoices via KSeF parameter, from the customer form, is sent.


Standard processes

Installation of Comarch ERP Standard BPM gives the user the possibility of accessing standard processes. The processes represent examples of activities usage and help to handle the most common business scenarios. They can be added to the library with the use of the <<mechanism importing processes>>. Files of standard processes can be found in the main installation directory of the Comarch ERP Standard application, in BPMProcesses folder.

Detailed description of all current standard processes is located, by default, in the installation directory of Comarch ERP Standard, in BPMProcesses|Documentation folder. The documentation can be also opened from the level of Process Editor.

Note
A modified standard process can be saved as user’s process only. It is not possible to save changes in a standard process.

Below, there is a list of available standard processes:

  • Update Supervisor (Customer) on Contact Person Forms – it allows for replacing an inactive supervisor (customer) with a new one on the forms of contact persons
  • Update Supervisor (Employee) on Customer Forms – it allows for replacing an inactive supervisor (employee) with a new one on the forms of customers/vendors
  • Update Supervisor (Employee) on Contact Person Forms – it allows for deactivating and adding a supervisor on contact person forms
  • Update Attribute On Customer Form Upon Sales Complaint (SCL) Confirmation – this process updates the attrubite on the customer form during the confirmation of a sales complaint (SCL) document
  • Update Items Delivery Date On The Basis of BI Report – this process updates time of items deliviery in currently valid price lists
  • Update Exchange Rates – this process updates exchange rates for the exchange rate type indicated in ExchangeRateName parameter
  • Update Thresholds (minimum quantity and optimal quantity) – this process updates thresholds: minimum quantity and optimal quanatity for items from a scpecific groups, on the basis of the following documents: SI, R, SOR, IR- and their corrections, in accordance with a given warehouse and for a given period.
  • Analyze Item Sales – this process informs the user who initiates the process about exceeding the threshold value
  • Cancel Intercompany Warehouse Movement Processed in POS – this process is uded for canceling all documents creted within an intercompany warehouse movement processed in Comarch Retail POS
  • Handle Automatically Intra-Community Transaction –this process automatizes the process of handling intercomapny transactions.
  • Handle Automatically EU Transactions in VAT Accounts – process for VAT invoices and VAT incvoice corrections with Intercompany transaction type, automatically generates VAT documents that respectively present output and input VAT tax on VAT-7 tax return
  • Handle Automatically Transaction with Reverse Charge – this process automatizes the process of handling transactions subject to reverse charge. The process is started at the moment of confirming or canceling a purchase invoice with at least one item subject to reverse charge.
  • Handle Automatically Transaction with Reverse Charge in VAT Accounts – process for VAT invoices and VAT incvoice corrections with National transaction type, automatically generates VAT documents that respectively present output and input VAT tax on VAT-7 tax return
  • Invoice Automatically SO Release Documents (SOR) – default configuration of the process handles invoicing on monthly baiss for all customers. For each release a separate sales invoice with Unvonfirmed status is generated
  • Post documents automatically – this process enables automatic posting of confirmed documents in accordance with values set in the process parameters
  • Restock Shortages Automatically – the process automates generation of warehouse documents to sales invoices and receipts in which shortages have been registered.
  • Complete Analytical Description in Documents Automatically –this process enables automatic completion of analytical description for documents in accordance with values set in the process parameters
  • – This process verifies the VAT tax status retrieved from the customer form on documents FZ, FZL (sprzedawcy); FS, FSL (nabywcy)
  • Add Customer-Vendor Default Name (local) – this locall process aims to add new customer through the possibility of entering default customer name, code, TIN number and description
  • Add Supervisor (Customer-Vendor Type) for Selected Customers-Vendors – this process allows for adding supervisors to selected customers in batch
  • Unprintable Invoices for Natural Persons in JPK_V7M – This process automatizes the process of handling invoices for ntural persons not subject to printing on fiscal printer
  • Printable Invoices in JPK_V7M – This process automtizes the process of handling fiscal invoices in JPK_V7M file
  • Generate Opposite Documents for Operations Executed Between Companies within One Structure – this process is responsible for creating opposite documents in case of registering in case a transaction between companies within the same multicompany structure is registered in the system.
  • Generate PDF for Sales Invoice (SI) – This process generates a printout in .pdf format for a sales invoice accepted by the user
  • Information on the processing of sales orders through trade documents issued in the offline mode in Retail POS – This process is started automatically at the moment of registering in the system documents SI/R issued in Comarch Retail POS that were not synchronized previously because of the lack of connection with the workstation. This process creates associations between SI/R documents issued on the workstation with SO documents and sends the information regarding the association to a selected operator group.
  • Inform About Customers With Exceeded Credit Limit – this process sends to the mailboc of the employee who started the process a stateent of customers who exceeded credit limit
  • Inform About Payment Delays On The Basis of BI Report – this process sends an e-mail message with a statement of customers who have unpaid payments aboive a specific number of days
  • Calculate Price for Basic Unit on the Basis of Additional Unit’s Price – this process completes the ffunctionality of price lists for secondary additional lists in the system. It is used in a situation when, in the system, prices are entered in an additional unit, while transactions for an item are performed both in the additional unit and in the basic unit.
  • Control Minimum Margin On Sales Invoice (SI) Items (A) – this process is responisble for controlling the minimum margin with the possibility of confirming a document on which the margin level is not reached
  • Control Minimum Margin On Sales Invoice (SI) Items (B) – this process allows for confirming a document that does not rich the minimum margin and its confirmation is blocked by the Control Minimum Margin On Sales Invoice (SI) Items (A) process – a document from this process is submitted to authorized operators for confirmation
  • Control Uniqueness of Customer-Vendor TIN Numbers – this process enables control of the uniqueness of customer forms in regard to the TIN number within the whole database
  • Control Uniqueness of Document Reference Number – within the process, when saving PO, PI, SOR, DM documents and their corrections and when confirming PO, PI, VPI, SOR documents and their corrections, the system verifies the uniqueness of the reference number for the documents of a given type
  • Copy Attribute From Customer Form To Sales Complaint (SCL) – this process compares the value of an attribute (according the name of the attriute class defined in the parameter) on the customer form and in the SCL document header when changing the claimant on the SCL document
  • Handle Discrepancies in Delivery – this process supports the functionality of registering discrepancies in deliveries of items moved between the headquarters and a subsidiary or between subisidiaries
  • Notify About Cash Register Discrepancy– this process informs selected operator group that, when opening cash register turn on a POS workstation, a discrepancy between the actual cash register balance and the cash register balance registered in the system occured
  • Inform About Sales Complaint (SCL) Item Status Change – this process allows for sending automatic notifications (e-mail messages) to clients, regarding sales complaint item status change
  • Notify About Tasks – with the use of this process, an employee with an assigned task, recevies a notification regarding this event
  • Notify About Arrears – Dunning Letters (DL), Notify About Arrears – Late Fees (LF), Notify About Arrears – Payment Reminders (PR) – these processes enable an on-going verification of delayed paiments for the whole organization or for a selected center (if selected center is not of a company type, the proces refers to the first parent center of company typ for the center indicated in the process) for all or selected customers, according to the parameters specified in the process definition
  • Associate SCL With Sales Documents (R, SI) – this process allows for creating associations between confirmed sales complaitndocuments (SCL) and sales documents (R, SI)
  • Submit SO to Another Center – this process allows for submitting (copying) a sales order document (SO) to another center
  • Generate a Series of Contacts for Selected Customers – process used for creating contacts in batch
  • Generate a Series of Meetings for Selected Customers – process used for creating meetings in batch
  • Generate a Series of Questionnaires for Top Vendors on the Basis of BI Report – process used for creating in batch questionnaires for top vendors on th ebasis of a selected BI report
  • Create Purchase Orders (PO) With the Use of Item Quantity Calculation (IQC) – this process allows for creating item quantity calculation (IQC) on the basis of which purhcase orders (PO) are generated and saved as unconfirmed
  • Subscribe BI Report Part 1 of 2 – processes Subscribe BI report allow for sending defined subscriptions of BI report to the task inboxes of employees selected as report recipients
  • Subscribe BI Report Part 2 of 2 – this process is responsible for sending the subscription defined in the process Subscrive BI Report Part 1 of 2 in accordance with the schedule defined in the report subscription
  • Verify Bank Account For Selected Customers/Vendors – this process is used for checking bank accounts of customers who fullfil speicifc requirements and belong to the group from the level of which the process was started. Then, it sends a message to the operator’s inbox.
  • Verify VAT Status For Selected Customers-Vendors –this process is used for verifying VAT sttus for selected customers
  • Verification of Customer/Vendor VAT Status When Saving or Confirming a Document – this process checks customer VAT status on PI, API (vendor) and SI, ASI (customer) documents
  • Inform About Unconsidered Sales Complaints (SCL) – this process informs the user who initiated it about uncosidered sales complaints (SCL)
  • Inform About Acceptance of Sales Complaint (SCL) – this process is started when changing the status on the heeader of an SCL document and verifies whether its status is changed to IF yes, the information regarding the acceptance is sent to operators indicated in the process parameter
  • Send Formatted E-mail – this process sends an e-mail message with a specific content and subject to the recipients indicated in the process
  • Display Message About Customer Submitting Complaint SCL – this process displays message informing about setting the customer on a SCL document
  • Block Customer-Vendor Addition (local) – this process block addition of a new customer with default code and TIN number
  • Block Confirmation of Purchase Order (PO) With High Value (local) – locl process that block the possiblity of confirming purchase orders with high values (by default, it is value 1000 in the document currency) by users who do not belong to a selected group (B2_admin, by default)
  • Change Customer Type in CRM – this process is triggered after confirming a sales quote (SQ) or a sales order (SO)
  • Find All Documents To Post – this process creates a list of documents that are supposed to be posted and checks whetehr the document type has a posting scheme associated
  • Process Intercompany Delivery – this process is used for issuing POR documents in case of registering in the systsem, with the use of a SOR document, a delivery between compianies within the same multi-company structure
  • Process Intercompany Warehouse Movement – this process is used for processing delivieries or returins in case of registering in the system, with the use of a WM- document, a warehouse movement within the same multicompany structure
  • Add Customer-Vendor Default Name (local) – this local process aims to add new customer through the possibility of entering default customer name, code, TIN number and description
  • Add Supervisor (Customer-Vendor Type) for Selected Customers-Vendors – this process allows for adding supervisors to selected customers in batch
  • Analyze Item Sales – this process informs the user who initiates the process about exceeding the threshold value
  • Associate SCL With Sales Documents (R, SI) – this process allows for creating associations between confirmed sales complaint documents (SCL) and sales documents (R, SI)
  • Block Confirmation of Purchase Order (PO) With High Value (local) – local process that block the possibility of confirming purchase orders with high values (by default, it is value 1000 in the document currency) by users who do not belong to a selected group (B2_admin, by default)
  • Block Customer-Vendor Addition (local) – this process block addition of a new customer with default code and TIN number
  • Block Saving or Confirmation of Document Issued for Customer/Vendor Not Marked As Active Taxpayer − This process verifies the VAT tax status retrieved from the customer form on PI, API (vendor), SI, ASI (customer) documents
  • Calculate Price for Basic Unit on the Basis of Additional Unit’s Price – this process completes the functionality of price lists for secondary additional lists in the system. It is used in a situation when, in the system, prices are entered in an additional unit, while transactions for an item are performed both in the additional unit and in the basic unit.
  • Cancel Intercompany Warehouse Movement Processed in POS – this process is used for canceling all documents created within an intercompany warehouse movement processed in Comarch Retail POS
  • Change Customer Type in CRM – this process is triggered after confirming a sales quote (SQ) or a sales order (SO)
  • Complete Analytical Description in Documents Automatically –this process enables automatic completion of analytical description for documents in accordance with values set in the process parameters
  • Control Minimum Margin On Sales Invoice (SI) Items (A) – this process is responsible for controlling the minimum margin with the possibility of confirming a document on which the margin level is not reached
  • Control Minimum Margin On Sales Invoice (SI) Items (B) – this process allows for confirming a document that does not rich the minimum margin and its confirmation is blocked by the Control Minimum Margin On Sales Invoice (SI) Items (A) process – a document from this process is submitted to authorized operators for confirmation
  • Control Uniqueness of Customer-Vendor TIN Numbers – this process enables control of the uniqueness of customer forms in regard to the TIN number within the whole database
  • Control Uniqueness of Document Reference Number – within the process, when saving PO, PI, SOR, DM documents and their corrections and when confirming PO, PI, VPI, SOR documents and their corrections, the system verifies the uniqueness of the reference number for the documents of a given type
  • Copy Attribute From Customer Form To Sales Complaint (SCL) – this process compares the value of an attribute (according the name of the attribute class defined in the parameter) on the customer form and in the SCL document header when changing the claimant on the SCL document
  • Create Purchase Orders (PO) With the Use of Item Quantity Calculation (IQC) – this process allows for creating item quantity calculation (IQC) on the basis of which purchase orders (PO) are generated and saved as unconfirmed
  • Display Message About Customer Submitting Complaint SCL – this process displays message informing about setting the customer on a SCL document
  • Find All Documents To Post – this process creates a list of documents that are supposed to be posted and checks whether the document type has a posting scheme associated
  • Generate a Series of Contacts for Selected Customers – process used for creating contacts in batch
  • Generate a Series of Meetings for Selected Customers – process used for creating meetings in batch
  • Generate a Series of Questionnaires for Top Vendors on the Basis of BI Report – process used for creating in batch questionnaires for top vendors on the basis of a selected BI report
  • Generate Opposite Documents for Operations Executed Between Companies within One Structure – this process is responsible for creating opposite documents in case of registering in case a transaction between companies within the same multicompany structure is registered in the system.
  • Generate PDF for Sales Invoice (SI) – This process generates a printout in .pdf format for a sales invoice accepted by the user
  • Handle Automatically EU Transactions in VAT Accounts – process for VAT invoices and VAT invoice corrections with Intercompany transaction type, automatically generates VAT documents that respectively present output and input VAT tax on VAT-7 tax return
  • Handle Automatically Intra-Community Transaction –this process automatizes the process of handling intercompany transactions.
  • Handle Automatically Transaction with Reverse Charge – this process automatizes the process of handling transactions subject to reverse charge. The process is started at the moment of confirming or canceling a purchase invoice with at least one item subject to reverse charge.
  • Handle Automatically Transaction with Reverse Charge in VAT Accounts – process for VAT invoices and VAT invoice corrections with National transaction type, automatically generates VAT documents that respectively present output and input VAT tax on VAT-7 tax return
  • Handle Discrepancies in Delivery – this process supports the functionality of registering discrepancies in deliveries of items moved between the headquarters and a subsidiary or between subsidiaries
  • Inform About Acceptance of Sales Complaint (SCL) – this process is started when changing the status on the header of an SCL document and verifies whether its status is changed to IF yes, the information regarding the acceptance is sent to operators indicated in the process parameter
  • Inform About Customers With Exceeded Credit Limit – this process sends to the mailbox of the employee who started the process a statement of customers who exceeded credit limit
  • Inform About Payment Delays On The Basis of BI Report – this process sends an e-mail message with a statement of customers who have unpaid payments above a specific number of days
  • Inform About Sales Complaint (SCL) Item Status Change – this process allows for sending automatic notifications (e-mail messages) to clients, regarding sales complaint item status change
  • Inform About Unconsidered Sales Complaints (SCL) – this process informs the user who initiated it about unconsidered sales complaints (SCL)
  • Information on the processing of sales orders through trade documents issued in the offline mode in Retail POSThis process is started automatically at the moment of registering in the system documents SI/R issued in Comarch Retail POS that were not synchronized previously because of the lack of connection with the workstation. This process creates associations between SI/R documents issued on the workstation with SO documents and sends the information regarding the association to a selected operator group.
  • Invoice Automatically SO Release Documents (SOR) – default configuration of the process handles invoicing on monthly basis for all customers. For each release a separate sales invoice with Unconfirmed status is generated
  • Notify About Arrears – Dunning Letters (DL), Notify About Arrears – Late Fees (LF), Notify About Arrears – Payment Reminders (PR) – these processes enable an on-going verification of delayed payments for the whole organization or for a selected center (if selected center is not of a company type, the process refers to the first parent center of company type for the center indicated in the process) for all or selected customers, according to the parameters specified in the process definition
  • Notify About Cash Register Discrepancy– this process informs selected operator group that, when opening cash register turn on a POS workstation, a discrepancy between the actual cash register balance and the cash register balance registered in the system occurred
  • Notify About Tasks – with the use of this process, an employee with an assigned task, receives a notification regarding this event
  • Post documents automatically – this process enables automatic posting of confirmed documents in accordance with values set in the process parameters
  • Printable Invoices in JPK_V7M – This process automatizes the process of handling fiscal invoices in JPK_V7M file
  • Process Intercompany Delivery – this process is used for issuing POR documents in case of registering in the system, with the use of a SOR document, a delivery between companies within the same multi-company structure
  • Process Intercompany Warehouse Movement – this process is used for processing deliveries or returns in case of registering in the system, with the use of a WM- document, a warehouse movement within the same multicompany structure
  • Restock Shortages Automatically – the process automates generation of warehouse documents to sales invoices and receipts in which shortages have been registered.
  • Send Formatted E-mail – this process sends an e-mail message with a specific content and subject to the recipients indicated in the process
  • Submit SO to Another Center – this process allows for submitting (copying) a sales order document (SO) to another center
  • Subscribe BI Report Part 1 of 2 – processes Subscribe BI report allow for sending defined subscriptions of BI report to the task inboxes of employees selected as report recipients
  • Subscribe BI Report Part 2 of 2 – this process is responsible for sending the subscription defined in the process Subscribe BI Report Part 1 of 2 in accordance with the schedule defined in the report subscription
  • Unprintable Invoices for Natural Persons in JPK_V7M – This process automatizes the process of handling invoices for natural persons not subject to printing on fiscal printer
  • Update Attribute On Customer Form Upon Sales Complaint (SCL) Confirmation – this process updates the attribute on the customer form during the confirmation of a sales complaint (SCL) document
  • Update Exchange Rates – this process updates exchange rates for the exchange rate type indicated in ExchangeRateName parameter
  • Update Items Delivery Date On The Basis of BI Report – this process updates time of items delivery in currently valid price lists
  • Update Supervisor (Customer) on Contact Person Forms – it allows for replacing an inactive supervisor (customer) with a new one on the forms of contact persons
  • Update Supervisor (Employee) on Contact Person Forms – it allows for deactivating and adding a supervisor on contact person forms
  • Update Supervisor (Employee) on Customer Forms – it allows for replacing an inactive supervisor (employee) with a new one on the forms of customers/vendors
  • Update Thresholds (minimum quantity and optimal quantity) – this process updates thresholds: minimum quantity and optimal quantity for items from a specific group, on the basis of the following documents: SI, R, SOR, IR- and their corrections, in accordance with a given warehouse and for a given period.
  • Verification of Customer/Vendor VAT Status When Saving or Confirming a Document – this process checks customer VAT status on PI, API (vendor) and SI, ASI (customer) documents
  • Verify Bank Account For Selected Customers/Vendors – this process is used for checking bank accounts of customers who fulfil specific requirements and belong to the group from the level of which the process was started. Then, it sends a message to the operator’s inbox.
  • Verify VAT Status For Selected Customers-Vendors –this process is used for verifying VAT status for selected customers


Handling internal orders in intercompany processes

A process in which the headquarters orders particular shops to move items to another warehouse of their own or of an external company, can be executed with the use of an IO document issued between warehouses of different companies.

In case the IO document belongs to a center that belongs to a company with activated handling of intercompany transaction, any warehouse owned by another company handling intercompany transactions can be selected as the source warehouse. In the header of such document, under Date of Issue field, checked parameter Intercompany transaction is presented (without the possibility of changing it).

If on the IO document, as the source warehouse is set:

  • any warehouse owned by another company, then, like in the case of selecting a warehouse unavailable for the same company, the possibility of confirming orders, reserving resources and reserving quantities is blocked.
  • a warehouse that is a POS warehouse in another company, it is possible to check Process in POS


Intercompany warehouse movements resuming

On the list of WM+ documents, [Process] button is available. This function allows for finishing the process of generating documents in a delivery intercompany transaction or in a return transaction initiated by the issuance of a WM- document for a warehouse of another company.

The button [Process] is presented, if:

  • the current center belongs to a company with activated handling of intercompany transactions
  • on the list of WM+ document there is one or many documents marked as intercompany
  • the marked documents belong to the current center or to a center subordinated to the current center


Process at pickup point

Process at pickup point

In the SO document header, Process at pickup point parameter has been added, which is presented if:

  • a pickup point of warehouse type is selected
  • a pickup point of center type is selected

SO document header

Note
For databases converted from earlier versions, the parameter remains unchecked in all orders and it cannot be changed.

If in a SO, a pickup point of warehouse is indicated and the parameter Process at pickup point is checked, the verification of the compliance between the warehouse indicated in the order header and the warehouse being the pickup point is started. If they are:

  • compliant – the warehouse in the header and on subitems remains without changes
  • not compliant – the user is asked to confirm the change of the warehouse in the header and on subitems to a warehouse compliant with the pickup point. Depending on selected option:
    • Yes – if the warehouse associated with the pickup point is available on SO in the current center, it will be updated in the header and on SO subitems, resource/quantity/non-resource reservations are created and the parameter Process at pickup point remains checked.

Note
If the warehouse associated with the pickup point is not available on SO in the current center, after the operator confirms the update, the warehouse is changed in the header and on subitems and the reservations generated by the subitems are automatically changed to reservations without resources.

    • No – the warehouse selected in the SO document is not updated, created reservations remain unchanged and the parameter Process at pickup point is unchecked.

If in a SO, a pickup point of warehouse is indicated and the parameter Process at pickup point is checked, the system checks whether the warehouse selected in the order header is available for the SO document in the center being the pickup point. If it is:

  • available – the parameter Process at pickup point remains checked
  • not available – the user is asked to confirm the deletion of the warehouse in the order header and of the reservations on its items. Depending on selected option:
    • YES – the parameter Process at pickup point is checked, the warehouse in the order header and on its subitems is deleted and all reservations are released.
    • NO – the document is not updated and the parameter Process at pickup point is unchecked
  • no warehouse is indicated (option <All> selected) – the system verifies whether the warehouses on orders subitems are available in the center indicated as pickup point:
  • are available or no warehouse is indicated – the parameter Process at pickup point remains checked
  • there is at least one unavailable warehouse – the system asks to confirm the continuation of the operation with the options described in the previous point

In case of changing the warehouse in the header of a SO document on which a pickup point of warehouse/center type is selected, it is verified whether the parameter Process at pickup point is checked on the document – if yes, the system asks to confirm the continuation of the operation. Once the order is accepted, the warehouse is updated in its header and on its subitems and the parameter Process at pickup point is unchecked.

Changing the setting of the parameter Process at pickup point on a confirmed document

The value of the parameter Process at pickup point can be changed on orders with confirmed status by an operator who belongs to an operator group with granted permission to edit SO documents and on orders with pending status for which an advance payment was issued but no other document was generated. In case of:

  • unchecking the parameter – the document is not additionally updated
  • checking the parameter – the system verifies the compliance of the warehouse (in the case of a pickup point of warehouse type) or its availability for the SO document in the center associated with the pickup point (in the case of a pickup point of center type)

In relation to introducing the above mentioned changes, conditions regarding the visibility of ZS have been changed. On the list of sales orders in a given center, documents that fulfill the following conditions, are displayed:

  • their owner is a center to which the user is currently logged-in
  • their owner is a center subordinated to the center to which the user is currently logged-in
  • the current center is attached in the tab Visibility on the SO document in the center that is the owner of the document
  • the current center is selected on the SO as the pickup point
  • a warehouse available on the SO in the current center is selected as the pickup point

Whereas in Comarch POS, on the list of sales orders, documents that fulfill the following conditions, are displayed:

  • the document belongs to the current center
  • the current center is selected on the SO as the pickup point
  • a warehouse available on the SO in the current center is selected as the pickup point


Value corrections in intercompany transactions

Within intercompany transactions, it is possible to issue value corrections in the following paths:

  • SOR → POR
  • SI → PI

Documents SIVC→SORVC and PIVC→PORVC are generated automatically upon confirming a SIVC/PIVC document. An exception is made for SOR documents which have not been invoiced yet.

Note
In case an error related to generating SORVC/PORVC occurs, e.g., because of the lack of the permissions to objects belonging to another company, the system block also the possibility of confirming SIVC/PIVC and displays an appropriate message.

Automatically generated opposite corrections belong, like the other documents issued with the use of intercompany transactions, belong to a company/center selected in Intercompany transaction tab, available in the company form:

Tab Intercompany transactions in the company form


Defining customer/vendor

A new customer/vendor can be added by clicking on [Add] button placed in the main menu or ergonomic panel ?? above the list of customers/vendors and selecting one of the following options:

  • By Template – the status will be retrieved from the template of the group to which a customer/vendor is being added
  • Retail Customer
  • Entity

[Alert] After saving a customer/vendor form, it is possible to change his/her status only on condition that no contact person with dedicated relation type is associated with that customer/vendor. [/alert]

After selecting status, the form of newly created customer/vendor opens. On the left side of the form, there is customer/vendor form header containing the following fields and parameters completed by the user: Common elements for retail customer/vendor and entity:

  • ID – item identification number in the database, non-editable field, filled-in automatically by the system
  • Code – mandatory field, contains code used for a fast and easy identification of a customer/vendor (e.g. name abbreviation), can be composed of 50 characters maximum (letters and/or digits). Codes of customers/vendors must be unique.
  • TIN – it is possible to enter TIN in form of digits and letters, both without separators and with them. The field is preceded with a predefined list of country codes For a customer/vendor with Entity status it is mandatory to fill in the TIN field, if parameter Active Taxpayer is checked. Additionally, in case of checking the parameter Active Taxpayer and selecting PL country code, the type (digits only) and number of entered characters is verified in the field. The system also allows for retrieving and verifying customer/vendor data from Central Statistical Office of Poland (GUS) service and VIES service.
  • NIN
  • Type – drop-down list allowing for selecting the type of added customer/vendor from among the following options:
    • Domestic – customer/vendor running a business in a country in which the system is being used
    • EU – customer/vendor running a business within the European Union
    • Non-EU – customer/vendor running a business outside the European Union
  • Status – drop-down list allowing for selecting customer/vendor status, that is Entity or Retail Customer. The value of this field affects the calculation of VAT direction on a document, provided that the following option of calculating VAT direction is selected in the document definition: Depending on customer status
  • SAF-T Procedure Code – field allowing for selecting one of the values of a generic directory with the same name, which is available in the group of generic directories: Transactions

And parameters:

  • Customer/Vendor – these parameters are available when customer and vendors are displayed on the same list
  • Reverse charge – parameter used for marking customers/vendors as entitled to use reverse charge. The parameter is available after checking parameter Handle reverse charge, which is available in the system configuration (System -> Configuration -> Trade). More information reverse charge mechanism can be found in article  Handling reverse charge.
  • URL – customer’s/vendor’s website

Fields with address data which are available on the forms of both types of customers/vendors are filled-on automatically on the basis of information entered in Addresses tab.

Fields and parameters available for customers/vendors with Entity status:

  • Name – mandatory field, a name can be composed of any number of characters (digits and/or letters) Names of customers/vendors can repeat.
  • REGON
  • Associated unit – parameter allowing for marking the customers/vendors who are associated both in terms of capital and organization. The parameter is checked by default and it can be unchecked at any moment during work with the system.
  • Active taxpayer – this parameter allows for marking a customer/vendor as an entity obliged to calculate, collect and pay tax due within due time
  • In liquidation – this parameter allows for marking a customer/vendor as an entity being in liquidation. Setting   of the parameter is verified while adding VAT-ZD notification

Fields and parameters available for customers/vendors with Retail Customer status:

  • First Name – mandatory field
  • Second Name
  • ID Card Number – number of identity document identifying a customer/vendor
  • Date of Issue – date of issue of selected identity document
  • Issuing Authority – institution that has issued the identification document
  • Date of Birth

The customer/vendor form contains also the following tabs: Address, Groups, Trade, Credit Limits, CRM, Contact Persons, Accounting, Bank Accounts, Analytical Description, Availability, Attributes, Attachments, Change History

Tab Addresses

In the tab Addresses, the user can define and add different types of customer’s addresses. The following types of addresses are available:

  • Main
  • Delivery
  • Subsidiary
  • Mailing
  • Billing
  • Residence

The list of addresses contains default address of Main type generated by the system and it can be freely modified by the user, however it cannot be deleted. The user can add any number of customer’s/vendor’s addresses but only one of them can be marked as default. If the parameter Active placed next to an address is checked, it means that such address can be used in other places of the system. Addesses can be deactivated (archived) manually by unchecking the parameter Active. If an address, which has already been used in the system, gets modified on the form of an employee or on a document, it is automatically archived by the system. An address marked as default for a the main type cannot be deactivated or deleted. Also the addresses which have already been used in the system (e.g. on a document) cannot be deleted. In order to issue a sales/purchase invoice, it is necessary to fill in the City field in customer’s/vendor’s address data. Otherwise, when confirming such document, the system will display a relevant message. It will then be possible to complete the missing data from a document level.

[Alert] Deactivation of an address is irreversible. [/alert]

In the Addresses tabs, there are also available the following subtabs:

  • Customer’s/Vendor’s Contact Details – contains a list of contact data (e.g. phone number, e-mail, messenger) related to the address and allows for adding new ones
  • Consents To Personal Data Processing – the consents to personal data processing have been described in detail in article <<Consent register>.
  • Contact Person’s Contact Details – contains contanct details of contact persons entered in the tab Contact Persons on customer’s/vendor’s form

Tab Groups

The tab Groups contains groups to which a given customer/vendor belongs. Here, the user can edit groups to which a customer/vendor belongs.

Tab Trade

The tab Trade allows for defining parameters and data used during trade transactions with a customer/vendor, that is:

  • Payment – payment form assigned to a customer/vendor The value of this field is suggested automatically on a document issued for a given customer/vendor.
  • Due Date – payment due date default for a given customer/vendor. When issuing a trade document for a given customer/vendor, the payment due date is set on the basis of the value deriving from that field and the date of issue of the document.
  • EOM – parameter allowing for for designating a due date based on the end of the month.
  • Correct By – parameter determining by how many days the due date that falls to the end of month should be corrected. The parameter can be edited only when EOM field is checked.
  • Split payment – parameter available upon checking parameter Handle split payment ?? on the form of company definition (Configuration -> Company Structure -> Company). Allows for processing payments with the use of the split payment parameter which has been described in detail in article <<Split Payment mechanism>>.
  • Currency – drop-down list for selecting a currency for a customer-vendor. The list contains all currencies defined in the system.
  • Terms – allows for assigning default terms for a customer/vendor
  • Delivery Method – method of merchandise delivery assigned to a customer/vendor. Drop-down list, contains default value Personal Collection. The user can define his/her own institution groups, form the level of <<generic directory>> Transactions -> Method of Delivery.

Section Applications relates to the Comarch B2B application, allowing customers for the preview of available stock levels and for placing sales orders using web browser. From B2B Warehouse drop-down list the user can select a warehouse to which the order will be sent. The section is not available for vendors.

Section Price Types for Released Items allows for adding <<price types for released items>> for a customer. The section is not available for vendors.

In field EDI Formats, it is possible to add formats of electronic exchange of documents (invoices and orders).

Tab CRM

The tab CRM Data contains the following fields completed by the user:

Section General:

  • Type -drop-down list containing predefined values: Customer, Lead, Partner, Prospect. The user can also define new types in generic directory CRM -> Type.
  • Legal Form -drop-down list containing predefined values: Co-op, General Partnership, Joiny-Stock Company, LLC, LP, Other Business, SOE, Sole Proprietorship. The user can also define new types in generic directory CRM -> Legal Form ?
  • Industry – drop-down list allowing for indicating the industry in which contact person operates. The user can also define new industries in generic directory CRM -> Industries.
  • SIC (Polish Classification of Activities) – inserting an appropriate number of SIC causes that the system selects an industry corresponding to it in the field
  • Customer Acquisition Soruce – drop down list allowing for selecting customer acquisition source. The user can also define new sources in generic directory CRM -> Source of Origin.

Section Loyalty:

  • Number of Points – field provided for information purposes, presents the number of loyalty points accumulated by a customer. The points are assigned to items in <<price lists>>.
  • Loyalty Card Number – field in which it is possible to select customer’s loyalty card from among cards registered in the system.
  • Current Card Status

Section Comapny Situation:

  • Employment – number of eployees assumed by a customer/vendor
  • Revenues – amount of customer’s/vendor’s revenues for the previous year
  • Level of Finances – drop-own list allowing for specifying financial situation of a company. The following values are defined in the system by default: Bad, Good, No data. The user can define his/her own values in generic directory CRM -> Level of Finances.

Section Gaining New Customer (information facilitating estimation of costs related to establishing cooperation with a customer/vendor registered in the system)

  • Status – drop down list with predefined values: Attempted to Contact, Contact in Future, Contacted, Junk, Lost, New. The user can define his/her own values in generic directory CRM -> ???
  • Estimated Costs in Period From-To – forecast costs of establishing cooperation with a customer/vendor

In section Supervisors, it is possible to select customer’s/vendor’s supervisors from among employees registered in the system.

Detailed information regarding the functionality can be found in category <<CRM and RODO>>.

Tab Bank Accounts

The tab Bank Accounts presents a list of bank accounts assigned to a customer/vendor and allows for adding/editing/deleting them.

To save a new bank account, it is necessary to fill-in the following fields:

  • Bank – list of banks defined from the level of Main – Banks.
  • Account Number
  • Account Type – drop-down list allowing for selecting the type of added bank account (IBAN, NRB_PL, Other)

On the list of bank accounts, besides the above-mentioned fields, there is also information about executed verification of a given bank account (column Reported) and its date.

Bank account verification

Dla firm rozliczających podatek VAT w Polsce, z poziomu zakładki Rachunki bankowe, istnieje możliwość weryfikacji rachunku na tzw. Białej liście podatników.

The bank account verification is available, if:

  • the parameter is checked on company form
  • at least one bank account is assigned to a customer/vendor
  • cusotmer/vendor has TIN or NIN? number defined

After selecting the button, the system displays message about the result of the verification.

[Alert]

Verification of bank account is only possible in online mode. The service is only available for users having valid license key.

Activation of bank account verification is registered on customer/vendor form and in Change History tab, available on bank account forms. It presents changes regarding:

  • bank account number which was subject to verification
  • date of activated verification
  • customer’s/vendor’s TIN or NIN number
  • Verification result – Reported:Yes/No.

Other tabs

Tab <<Credit Limits>> allows for adding credit limits which affects transactions concluded with a customer.

[Alert]

The tab is available for customers only.

Tab Discouints presents information about current discounts associated with a customer. More information regarding functioning of the discounts can be found in category <<Discounts>>.

Tab Coupons presents information about coupon-based promotions currently available for edited customer. More information regarding units of measure can be found in <<Coupon-based promotions>>.

Tab Contact Persons allows for associating contact persons with a customer/vendor. More information regarding contact persons can be found in category <<Contact persons>>.

The tab Accounting presents default bookkeeping accounts assigned to a given customer/vendor.

Tab Availability contains tree of centers for which a given customer/vendor is available and allows for attaching/detaching them.

Detailed description of the tabs Analytical Description, Attributes, Attachments, History can be found in <<article>>.


Integration with Comarch e-Shop

Comarch e-Shop was created in order to meet on-line sales-related market needs of companies. Comarch e-Shop is dedicated to companies which want to extend the possibility of reaching clients by offering their merchandise in a widely available on-line store.

The cooperation of Comarch ERP Standard with Comarch e-Shop consists in:

  • Exporting data regarding items, item groups and clients/customer to Comarch e-Shop
  • Importing data regarding new customers/vendors saved in Comarch e-Shop
  • Importing orders submitted in Comarch e-Shop

Store owner uses only one program during the work: Comarch ERP Standard. In this approach, Comarch e-Shop is used only as a tool allowing for conducting sales activity via Internet.

The functionality is a great and modern tool for conducting sales through the web and its internal configuration mechanisms and the possibility of an autonomous creation of the structure of the site permit to fully adapt e-Shop to user’s needs.

Through Comarch e-Shop, the user can put his/her merchandise on auctions, publish them in auction platforms, both Polish and foreign ones.

System requirements

To enable the cooperation with Comarch ERP Standard, it is necessary to have .NET Framework 4 environment, Microsoft Web Services Enhancements (WSE) 3.0 Runtime add-on and SQLXML component.

Note
The cooperation with Comarch e-Shop is impossible on computers with Windows 98, Windows ME, Windows XP and Windows 7 operating systems.

Creating a Comarch e-Shop center

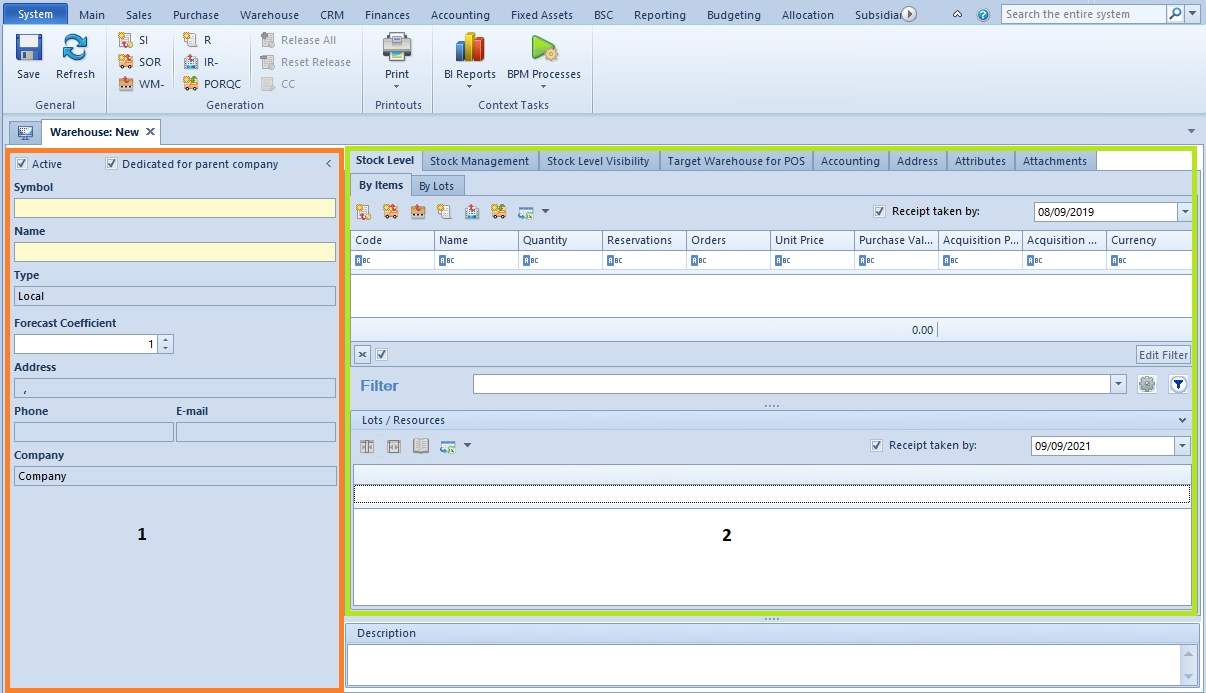
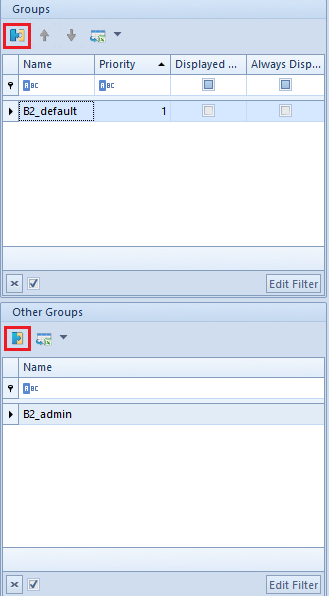
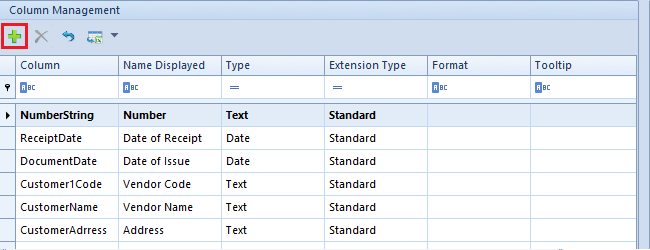
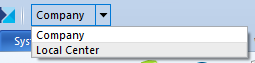
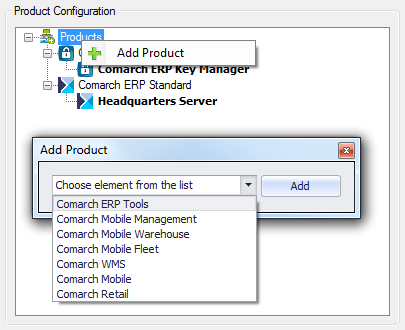
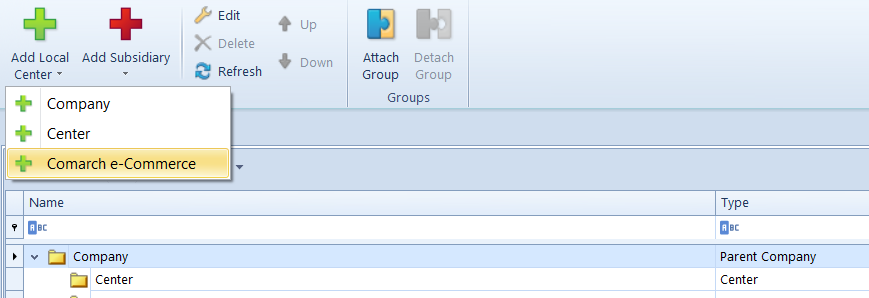
To create a center of Comarch e-Shop type, it is necessary to open Company Structure tab and select option Add Local Center Comarch e-Shop, which is available on the ribbon.

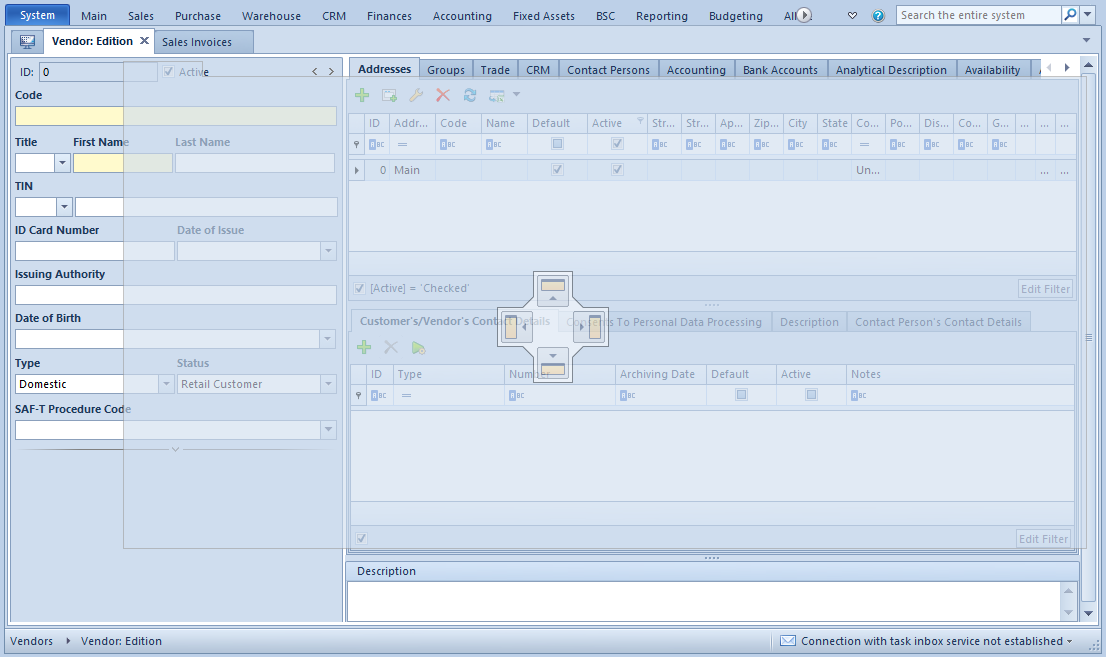
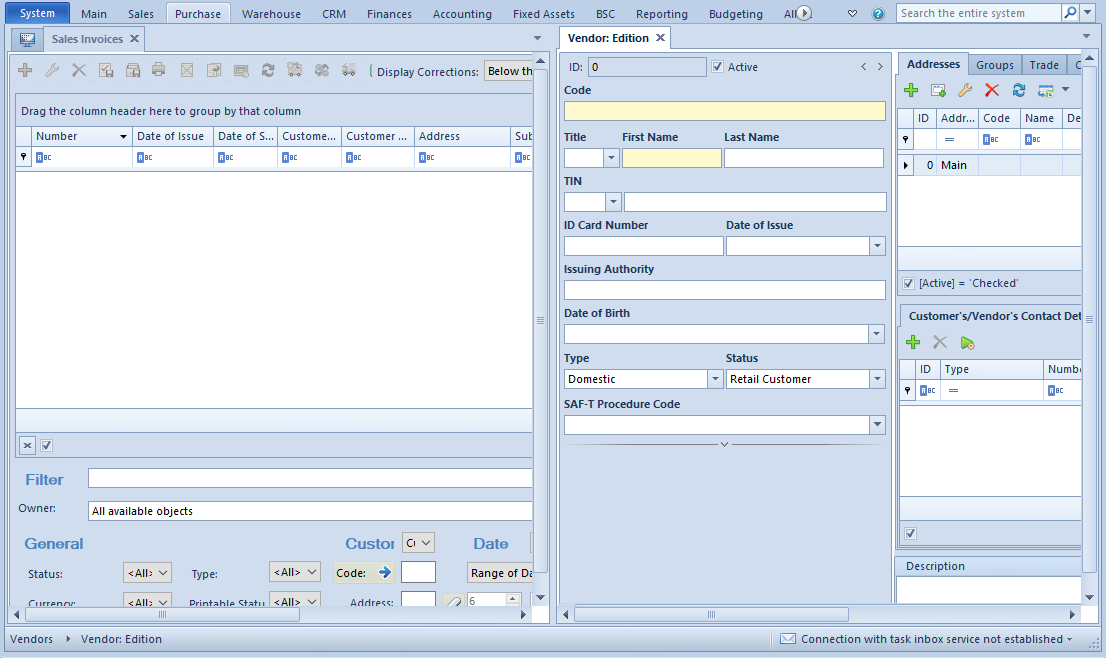
A new form, composed of tabs described below, will be opened in the system.

Comarch e-Shop center form

Tab General

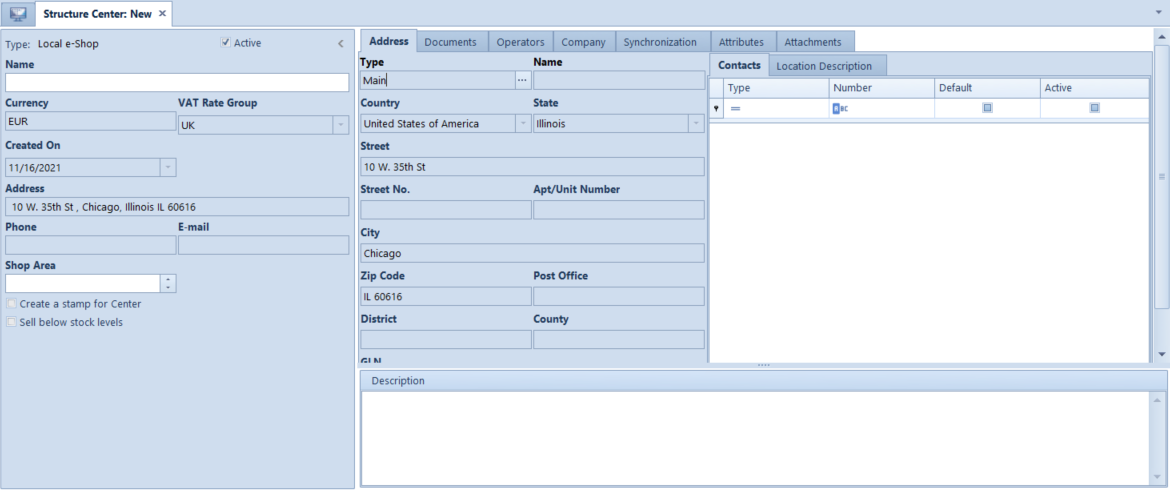
In this tab, the user can define general information about a center of e-Shop type. The most important fields of this tab are:

  • Name – name of the center of e-Shop type
  • Type – center type
  • Descriptions – description composed of any type of characters
  • Active – parameter informing whether a given center is active
  • Created On – date on which the center was created, the field is filled-in automatically and cannot be edited
  • Currency – center’s system currency. The field is filled-in automatically in accordance with the settings of the company to which the center belongs and cannot be edited. The currency indicated in the field is the store’s currency.
  • VAT Rate Group – this field presents a default VAT group assigned to the company to which the center belongs and it cannot be edited. The group indicated in the field will be sent to the store.

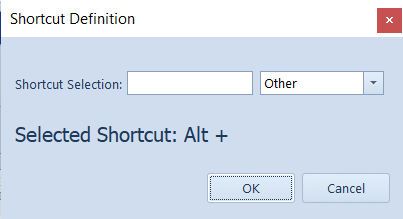
In addition, in the tab, there are fields allowing for defining address data of the e-Shop. Address fields present the main address of a given center but cannot be edited directly from the level of the tab

General. To change the main address of the structure, it is necessary to select the button with three dots przycisk-z-trzema-kropkami , placed next to the Type field. The same applies to contacts and description which are assigned to addresses and can be edited only upon selecting [Change Address] button.

Button przycisk-z-trzema-kropkami

After selecting przycisk-z-trzema-kropkami , Addresses window is opened.

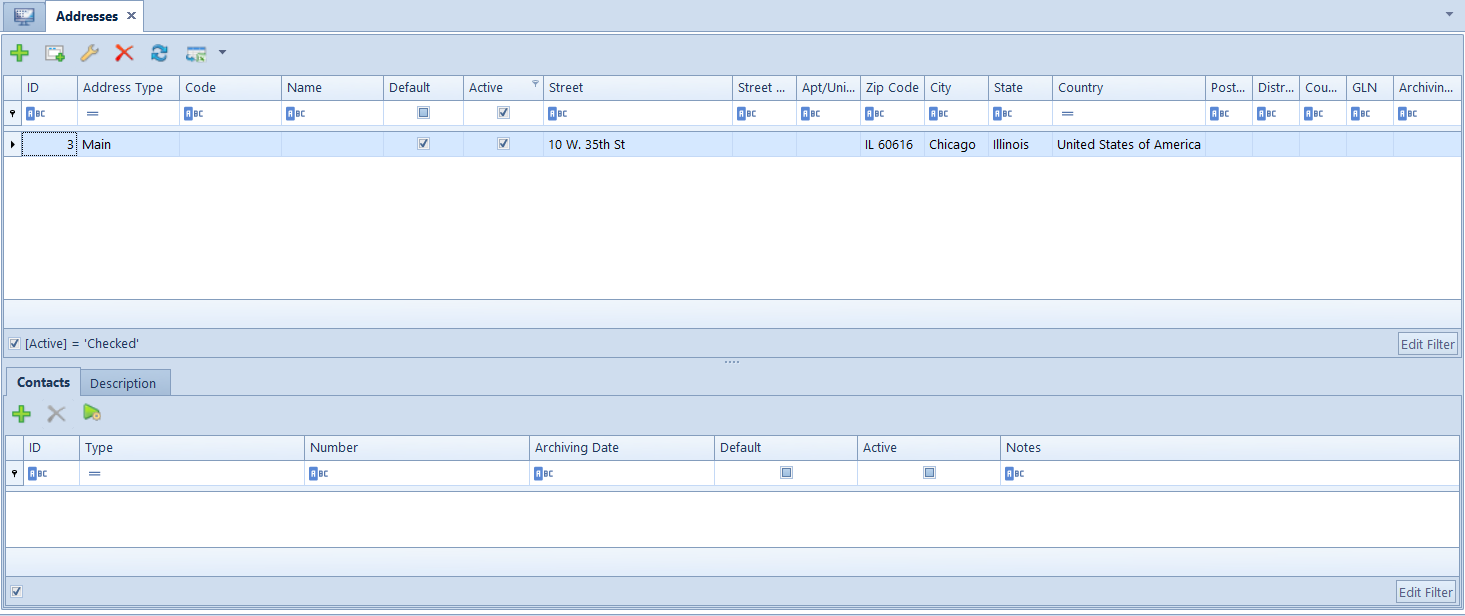
The window is composed of a list of addresses to the center which contains:

  • Type – one of the following address types can be selected: Main, Shipping, Subsidiary, Mailing, Billing,
  • Code – code defined in order to facilitate address identification,
  • Name – name defined in order to be able to correctly identify the address in case of its archiving,
  • Address – City, Street, Street No., Apt/Unit Number,
  • Default – for each address type, e.g., Delivery, there can be only one default address,
  • Active – option defining whether a given address is active,

and configuration panel. On the list, it is possible to perform the following actions:

  • [Add] address – allows for adding an address of any type,
  • [Delete] address – deletes an address selected from the list,
  • [Refresh] the list of addresses,
  • [Export To Spreadsheet] – allows for exporting the list of addresses.

To change data in an existing address, it is necessary to use the panel placed below the list of addresses. It presents data of the address marked on the list. The modified data is transferred to the center upon selecting [Select] button, available in the upper menu.

Analogically, it is possible to edit and change contact data (phone number, e-mail etc.) and descriptions assigned to a given address,

Tab Documents

From the level of this tab, it is possible to define parameters (e.g., series, warehouses, numbering schemes, VAT accounts, as well as other parameters related to terms of trade) for documents issued by the e-Shop center.

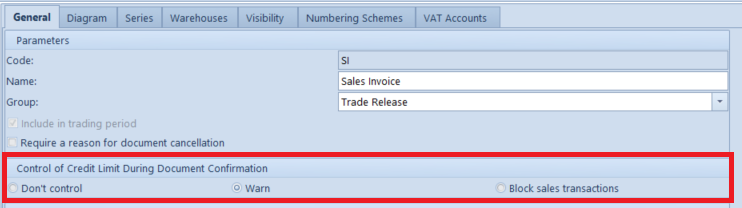
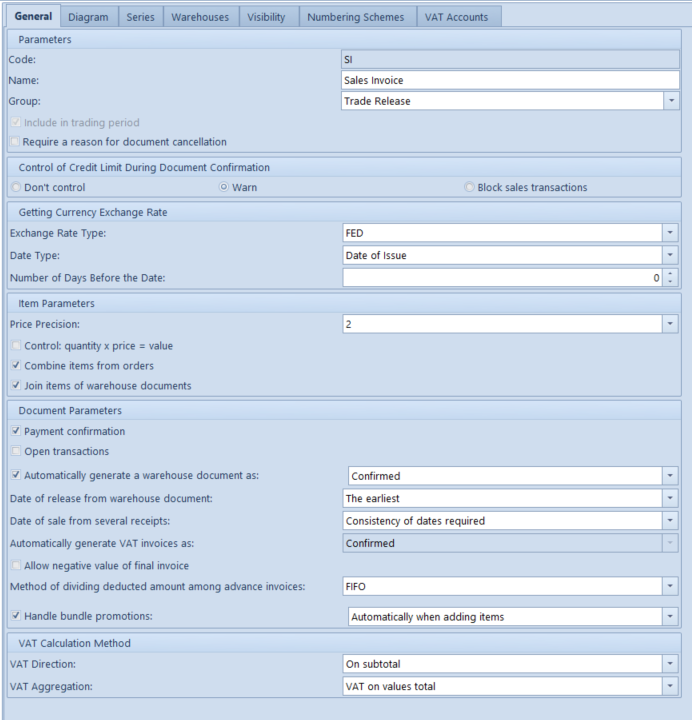
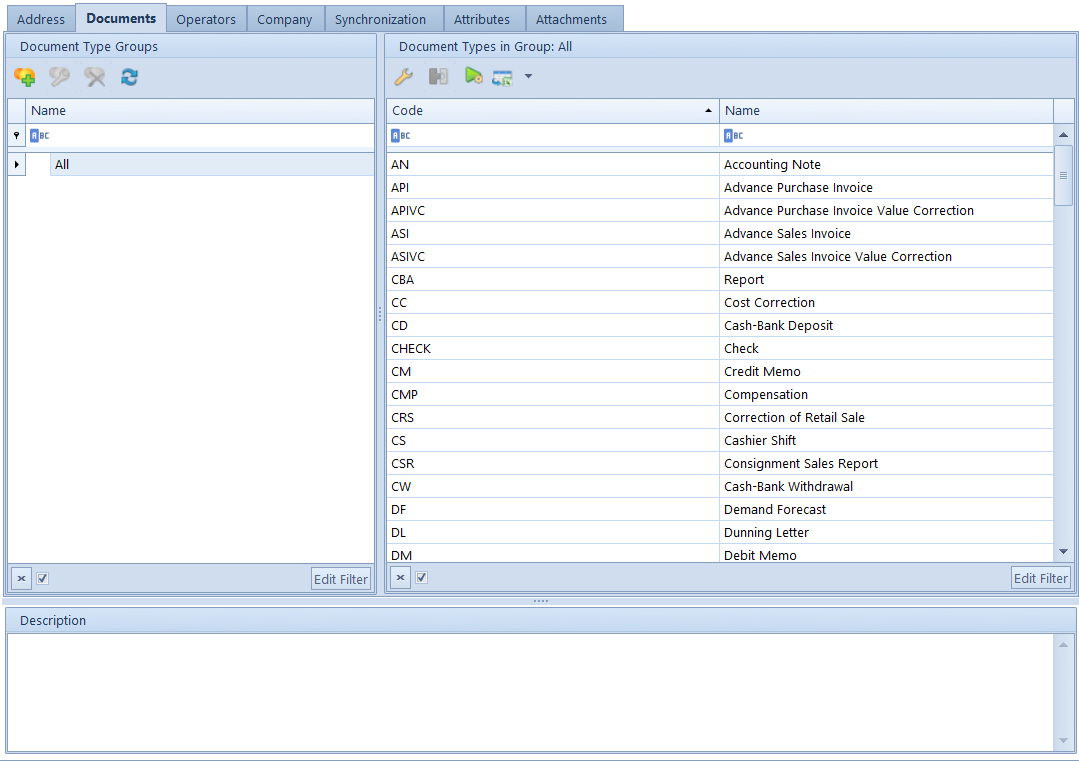
After editing a document type (e.g., sales invoice), in the tab General, the user can access additional document parameters, such as:

  • Payment confirmation  – if this option is activated, payment confirmation window is displayed each time the document is confirmed.
  • Automatically generate a warehouse document as  – if this option is checked, then, when confirming a trade document, at the same time a warehouse document will be generate with the same status as the one selected from among the statuses displayed in the drop-down list available below the option.
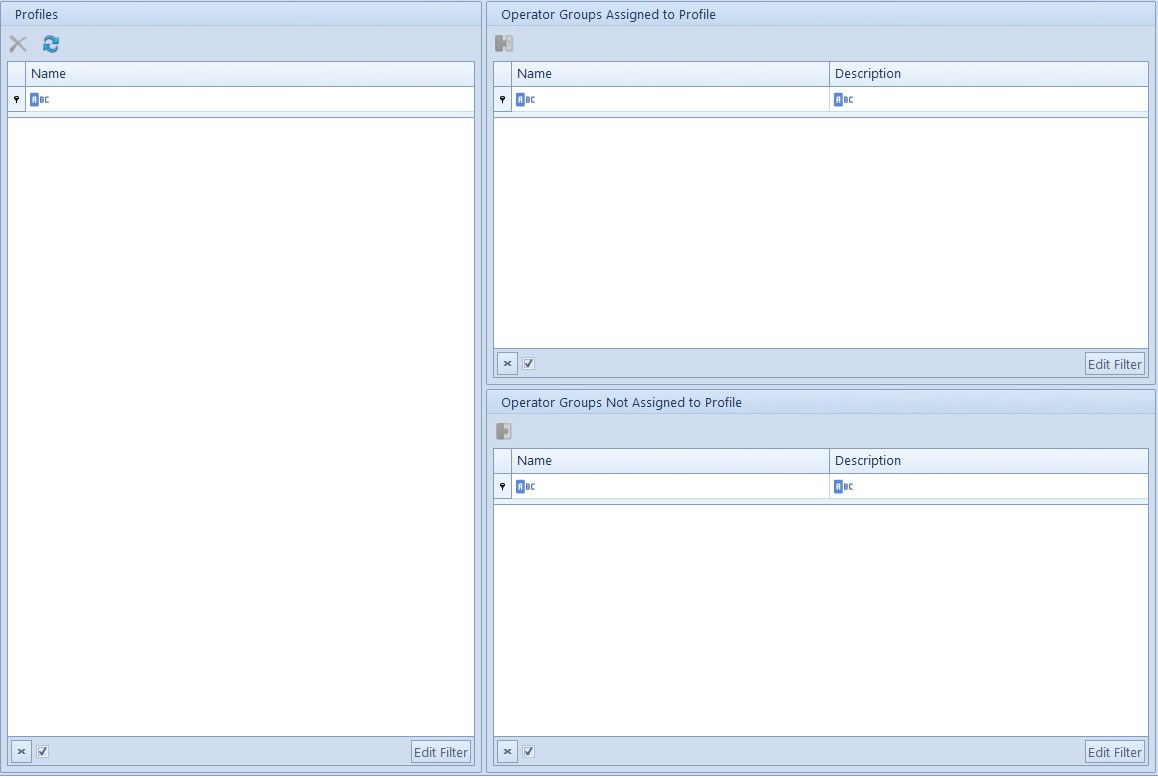
Tab Operators

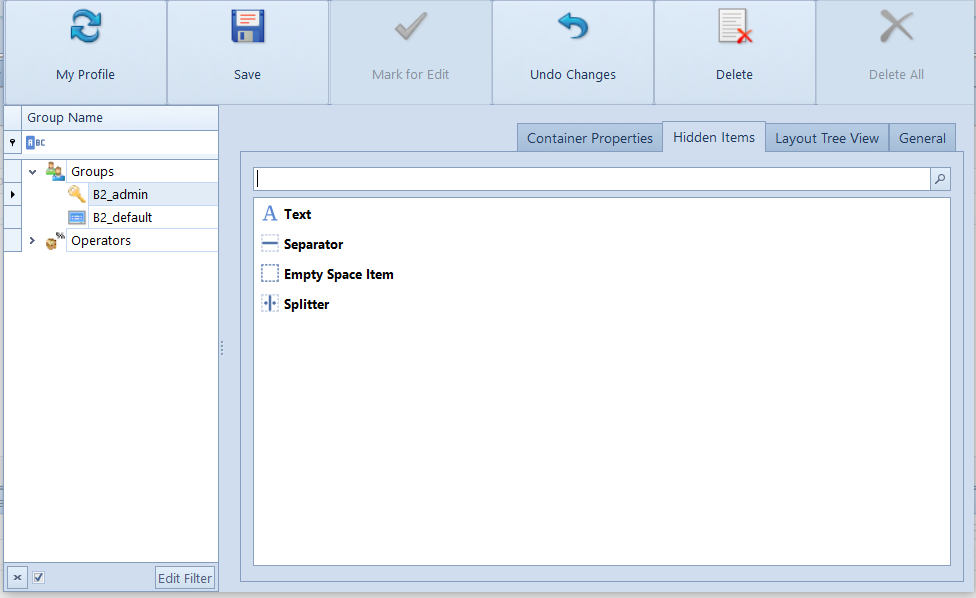
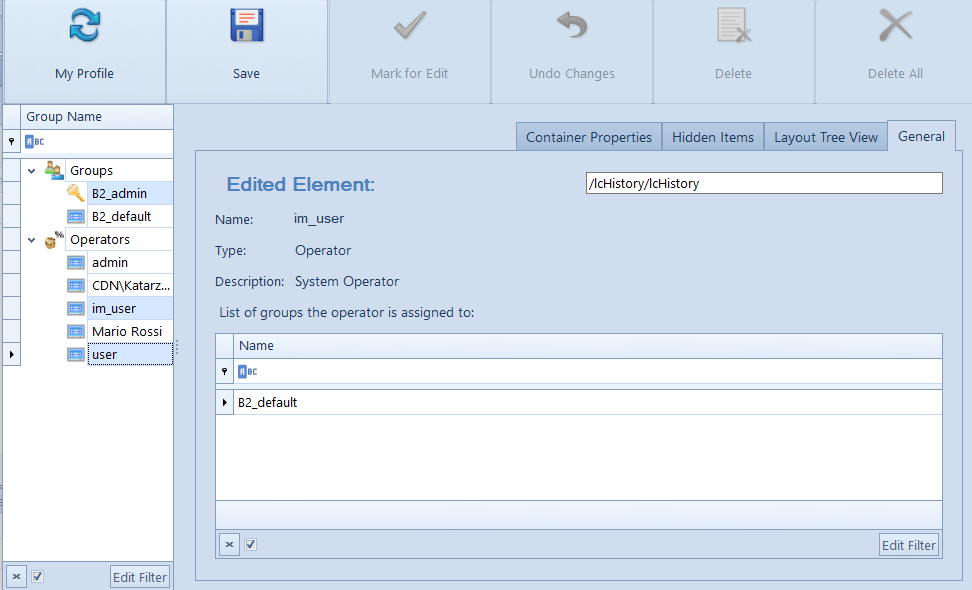
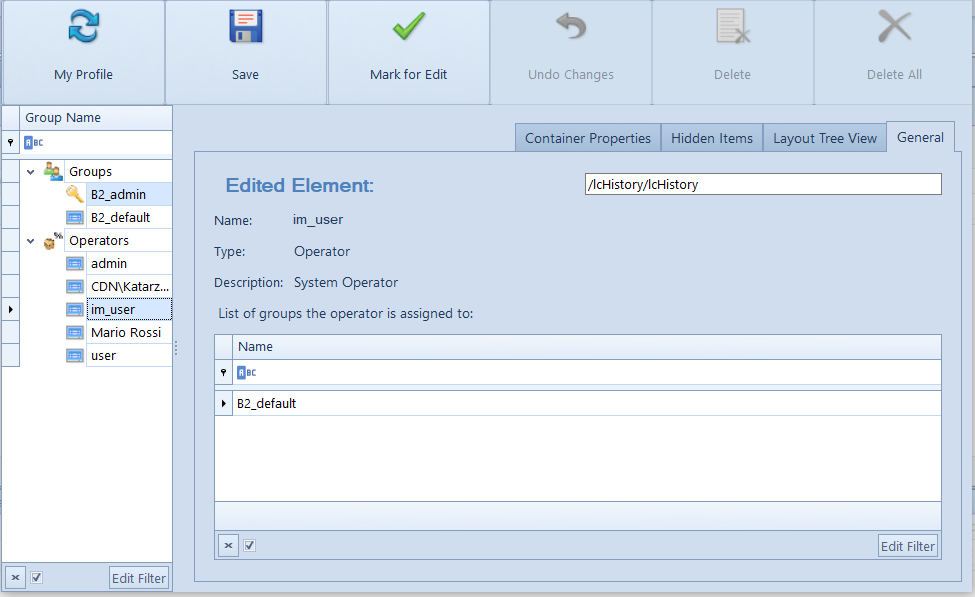
Operator groups must be added to the center according to rules described in article Defining new operator group.

Tab Attributes

Attributes can be added to the center according to rules described in article Defining an attribute.

Tab Attachments

Attachments can be added to the center according to rules described in article Defining new attachment

Tab Company

This tab contains information about the company. Detailed description of the tab is available in article Company structure – Company.

Tab Synchronization

In this tab, the following fields and parameters are available:

  • Synchronization Service Host – address of access to the webservice on which Comarch e-Shop is hosted. For on-line stores the address is as follows: https://serwis.isklep24.pl/comarchsrv/comarchshopsrv.ashx
  • Comarch e-Shop Version – field in which it is necessary to indicate the version of Comarch e-Shop with which the system will be synchronized.

[/alert] Comarch ERP Standard 2016.5 collaborates with Comarch e-Shop in versions 2021.5, 2015.5.2, 2016, 2016.2 and 2016.5. [/alert]

  • Shipping Costs Service – service which must be added and which does not have a determined price (it cannot have price determined in any price list). This service will be added to each synchronized sales order and its price will be determined depending on the shipment type selected by the customer in Comarch e-Shop.
  • Import customers to the group – in this parameter, a group of customers/vendors from a specific classification category is indicated, to which customers registered in Comarch e-Shop will be imported.
  • Upload previous prices for type – allows for indicating a type of price different than default price type (for e-Shop center) from which previous prices will be uploaded for items exported to e-Shop.
  • Upload stock levels of shared warehouses – allows for sending to e-Shop stock levels available in warehouses whose stock levels are available for the e-Shop center. When the parameter is checked, during the synchronization the total of stock levels available for a center of e-Shop type and of warehouses which are not available in that center but for which, in the tab Stock Level Visibility a center of e-Shop type is indicated, is sent. If the parameter is unchecked, during the synchronization level stocks for warehouses available for an e-Shop center, are sent.
  • Parameters – data which will be sent to the Comarch e-Shop application is defined in the Parameters area. For selected data synchronization will be performed within defined schedules and these settings will be suggested as default during the synchronization started manually.

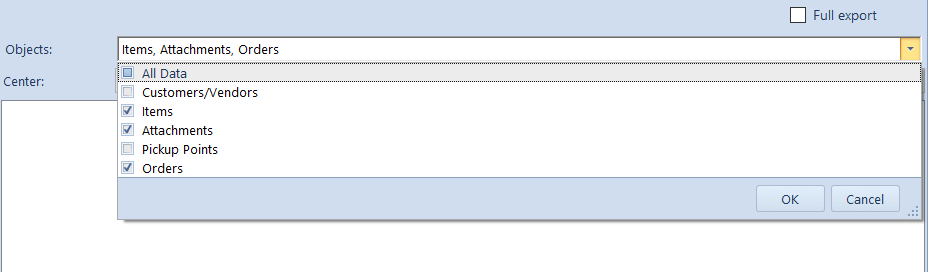
In case Full export parameter is checked, full synchronization of all selected objects is performed. If the parameter is unchecked, only a difference synchronization is performed, that is only objects whose value has changed since the last synchronization, are sent

In addition, users can limit the number of synchronized elements by indicating these which are supposed to be sent to the application. It must be remembered that resources and item groups are always exported to Comarch e-Shop, regardless of the selected synchronization type.

  • Export customers – if checked, customers will be exported from Comarch ERP Standard and those, who fulfill appropriate conditions, will have accounts created in e-Shop. More information about export of customers can be found in paragraph Export of customers from Comarch ERP Standard to Comarch ERP e-Shop of this document.
  • Export items – if checked and if Full export parameter is unchecked, only newly added items are uploaded or those whose data, e.g., price, group, etc., has been changed.  During full synchronization, all items are uploaded. If both parameters are unchecked, items will not be synchronized.
  • Export related items – if checked and if Full export parameter is unchecked, only newly added sets and substitutes are uploaded.  If both parameters are checked, full synchronization of sets/substitutes takes place. Export of related items will be performed for items which fulfill conditions for Comarch ERP e-Shop – are available for e-Shop. If the parameter is unchecked, related items will not be synchronized,
  • Export attachments – if checked and if Full export parameter is unchecked, only newly added attachments are uploaded or those whose data has been changed.  If the latter parameter is checked, full synchronization of attachments fulfilling conditions for Comarch ERP e-Shop (attachments available for e-Shop) takes place. If the parameter is unchecked, attachments will not be synchronized.  In case of export of attachments, items are synchronized along with them.
  • Synchronize orders – even if the parameter is not checked, it is possible to import sales orders from Comarch e-Shop to Comarch ERP Standard. However, checking of the parameter allows for importing and exporting data from sales orders:

– import of customers/vendors, if the order was submitted by a customer newly registered in Comarch e-Shop,

– import of orders submitted in Comarch e-Shop,

–  import of order confirmations submitted in Comarch ERP e-Shop,

– export of order status

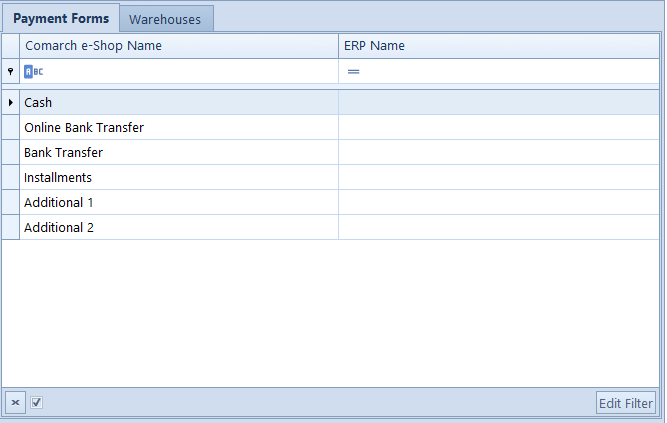
For synchronizations started from a schedule, values of the above parameters will be uploaded from settings specified on the form of center of e-Shop type.  Additionally, in Synchronization tab there is Payment Forms panel available, in which payments forms from e-Shop are mapped with payment form available for a center of Comarch ERP e-Shop type in Comarch ERP Standard. Depending on the configuration, for payment forms selected in e-Shop, on synchronized orders there will be payment forms assigned to them which are available in the ERP system.

Note
A center form cannot be saved if not all the payment forms have been mapped.

Object availability

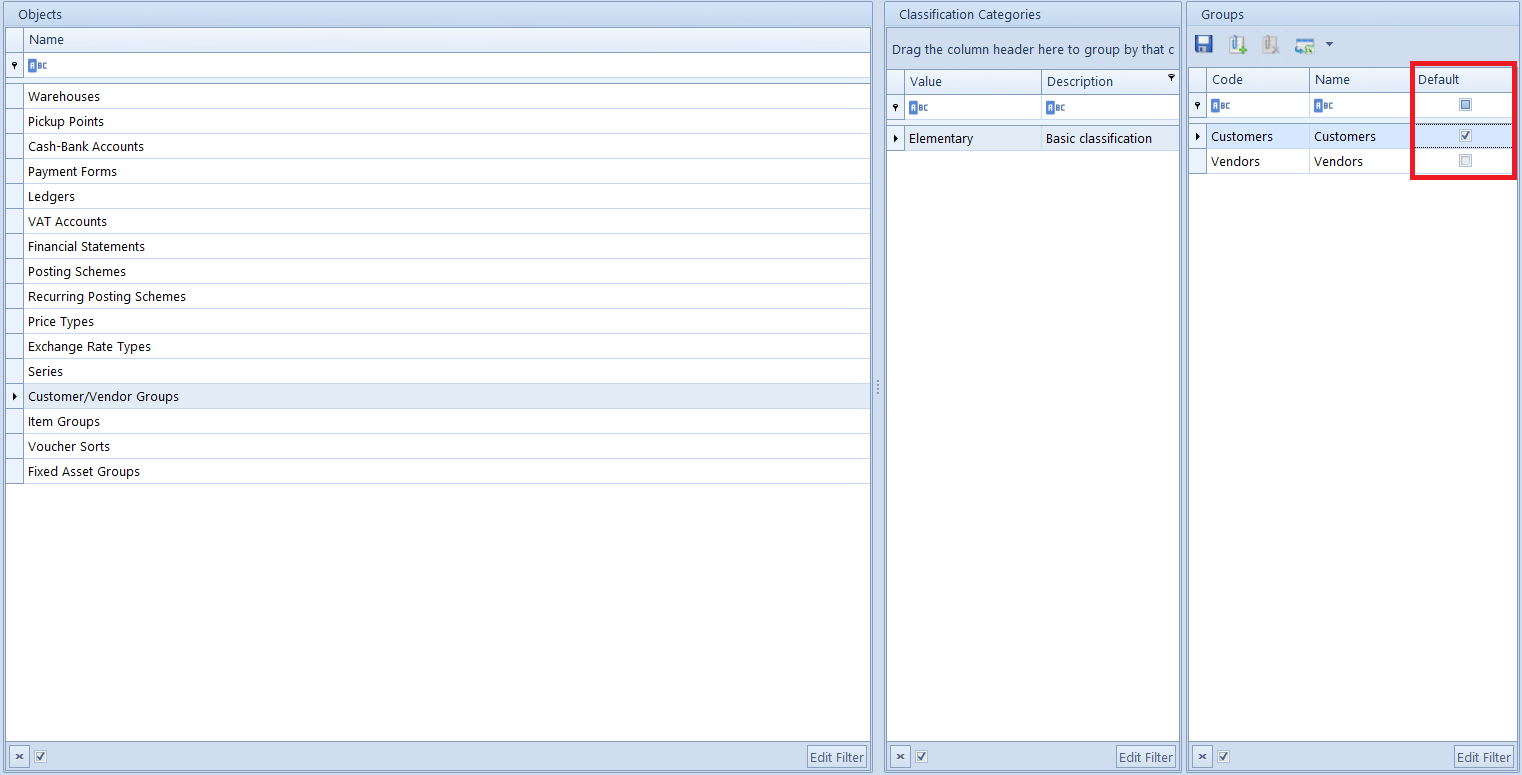
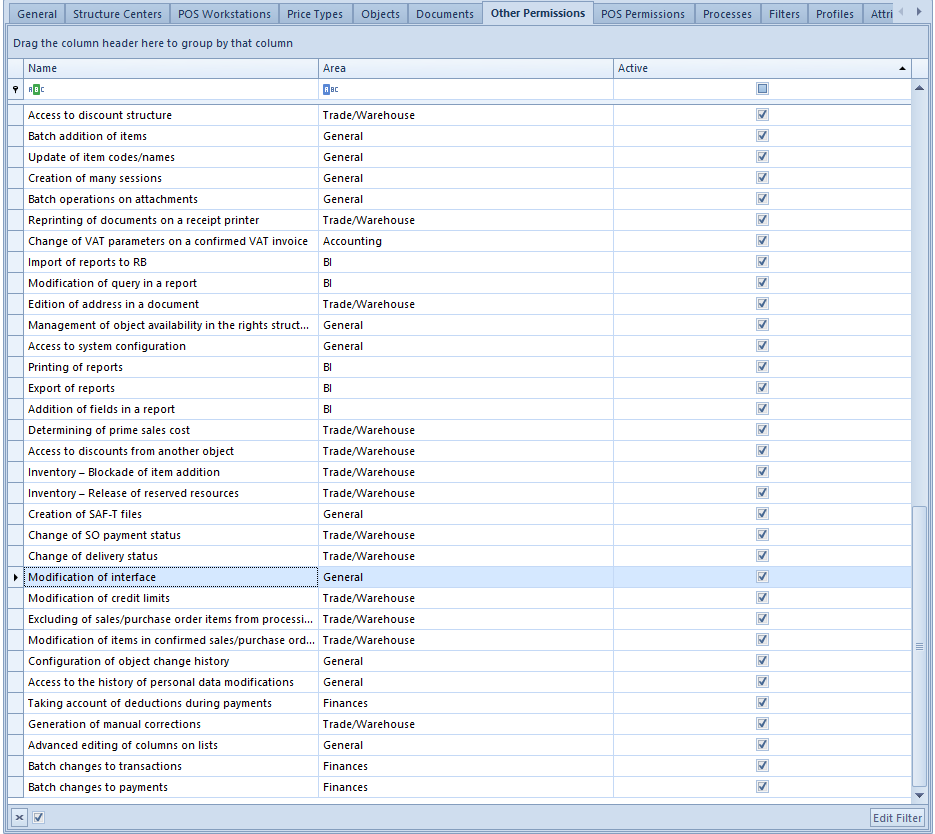
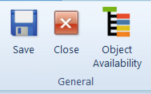
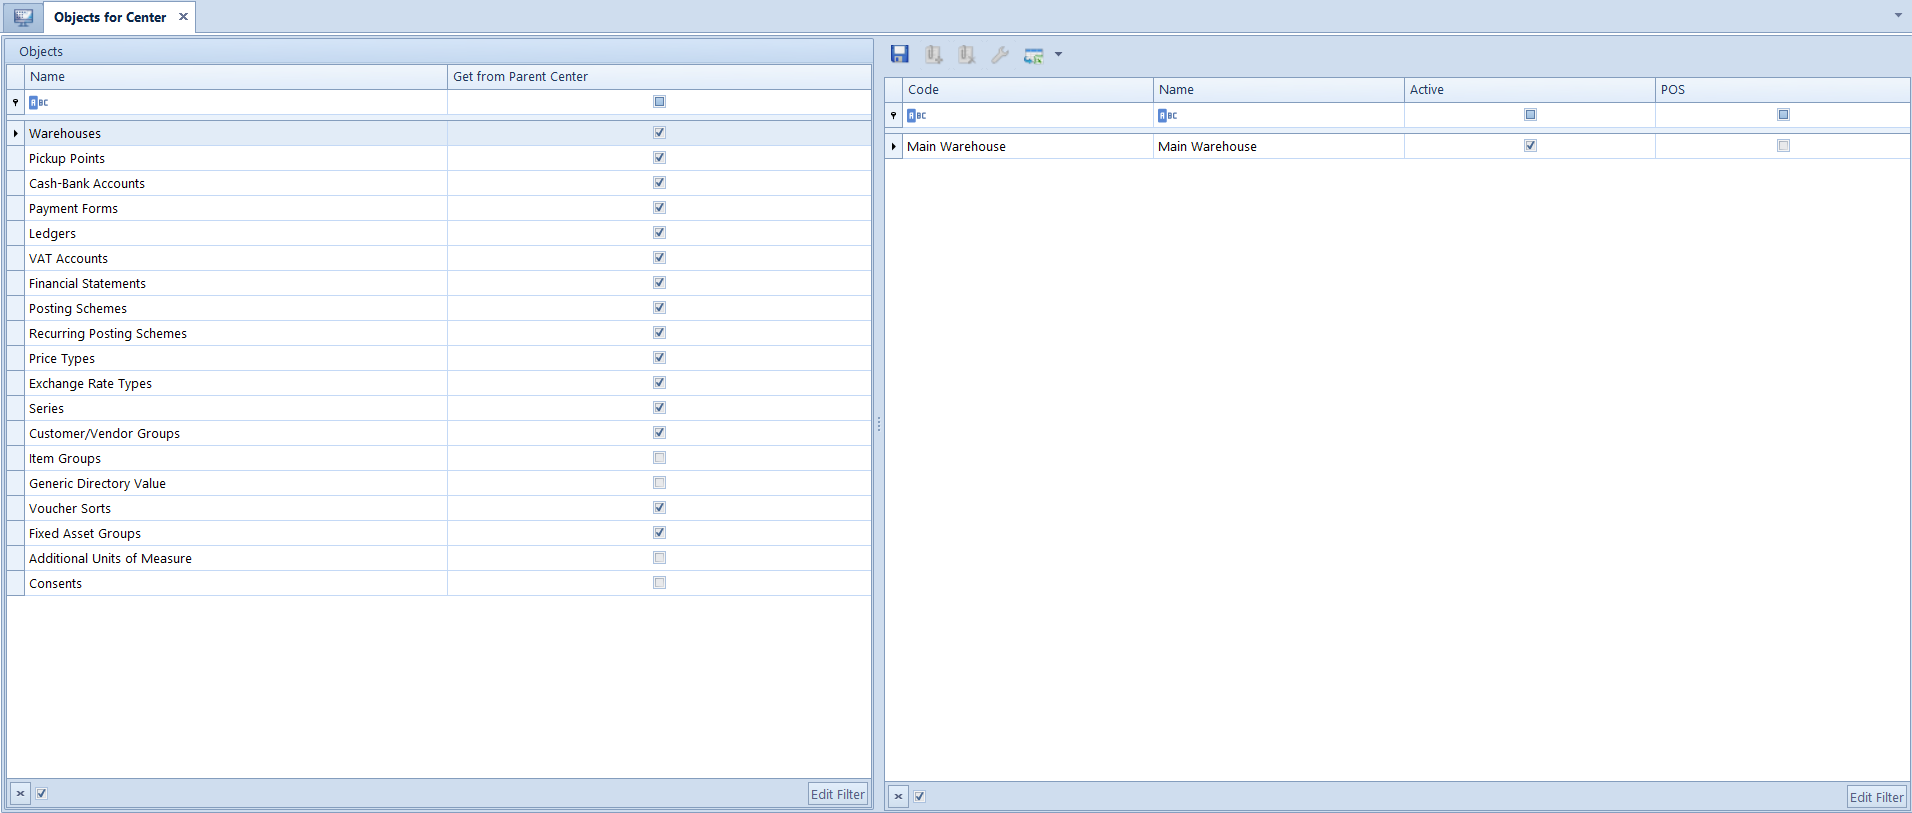
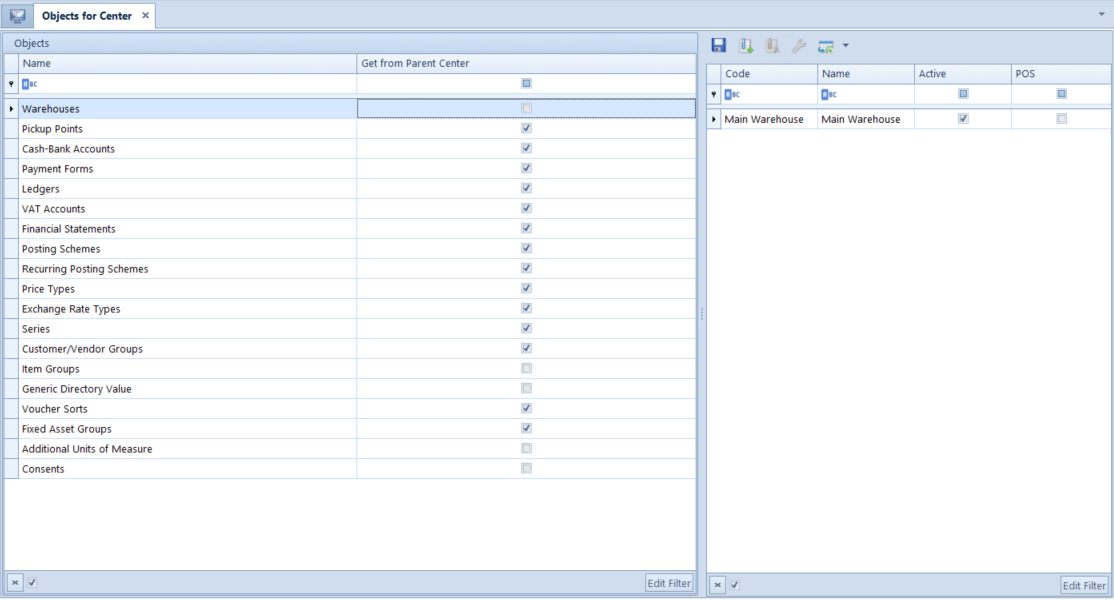
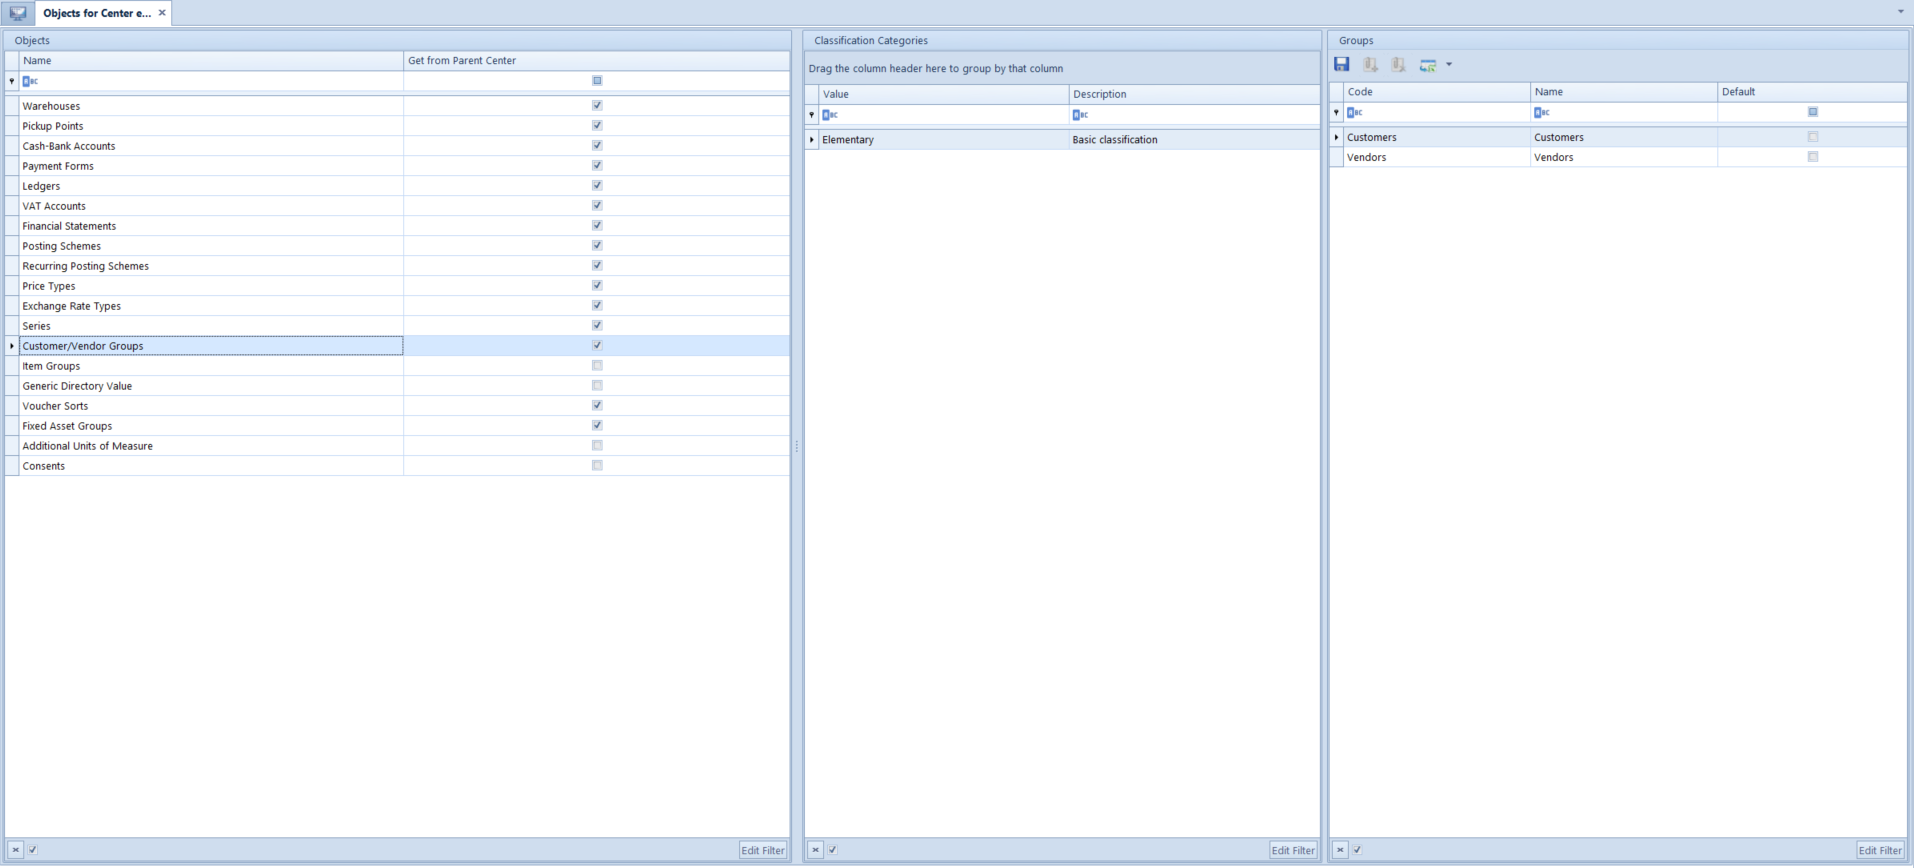
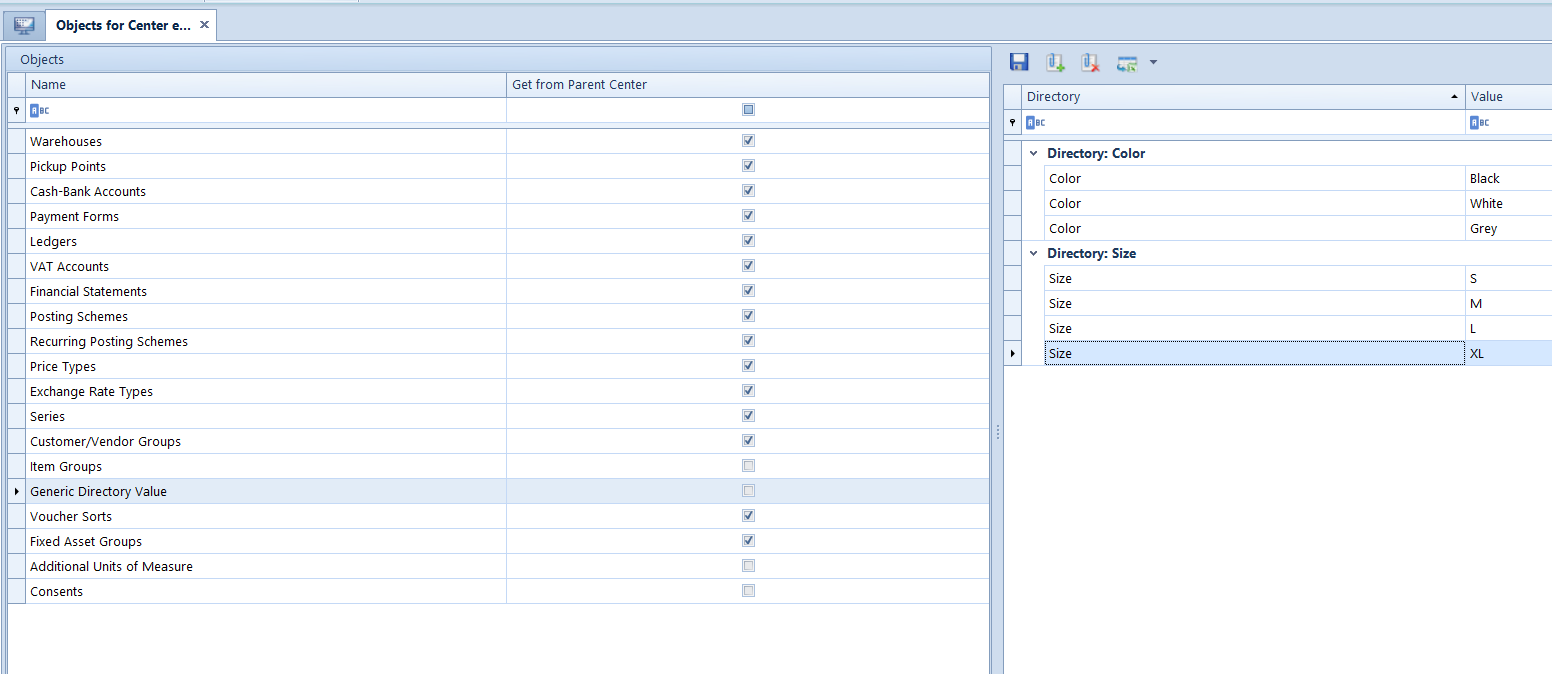
For a company structure center, there is button [Object Availability] available on the ribbon in General button group. Clicking on the button redirects a user to the configuration panel in which availability of system objects is defined for a center for which the panel is opened. The objects are inherited, by default, from the parent center, except for item groups and values of generic directories. If parameter Get from Parent Center is unchecked, the objects will not be inherited from the parent center.

More information regarding objects availability can be found in article Objects availability – general information.

For a center of e-Shop type, the following objects must be defined:

Warehouses

On the right side of the window, there is a list of warehouses available in a given center displayed. In case of a center of Comarch ERP e-Shop type, stock level of resources uploaded to the application will be the total of stock levels from available warehouses.
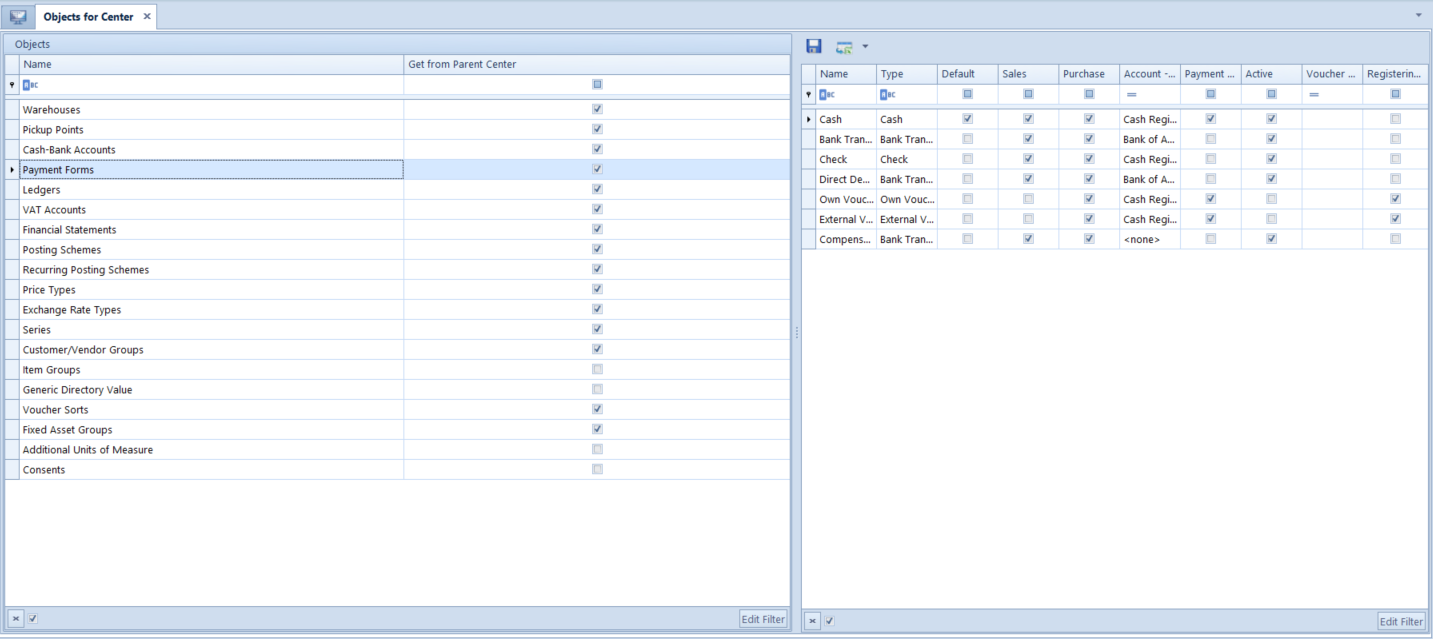
Payment forms

List of payment forms defined in Configuration → Finances → Payment Forms is valid for the whole company structure. A user can, however, specify individual parameters concerning particular payment forms separately for each center. Additionally, for a center of Comarch ERP e-Shop type, it is necessary to associate payment forms from ERP system with those defined in Comarch ERP e-Shop application. Such association is configured in the tab Synchronization of a center of e-Shop type.
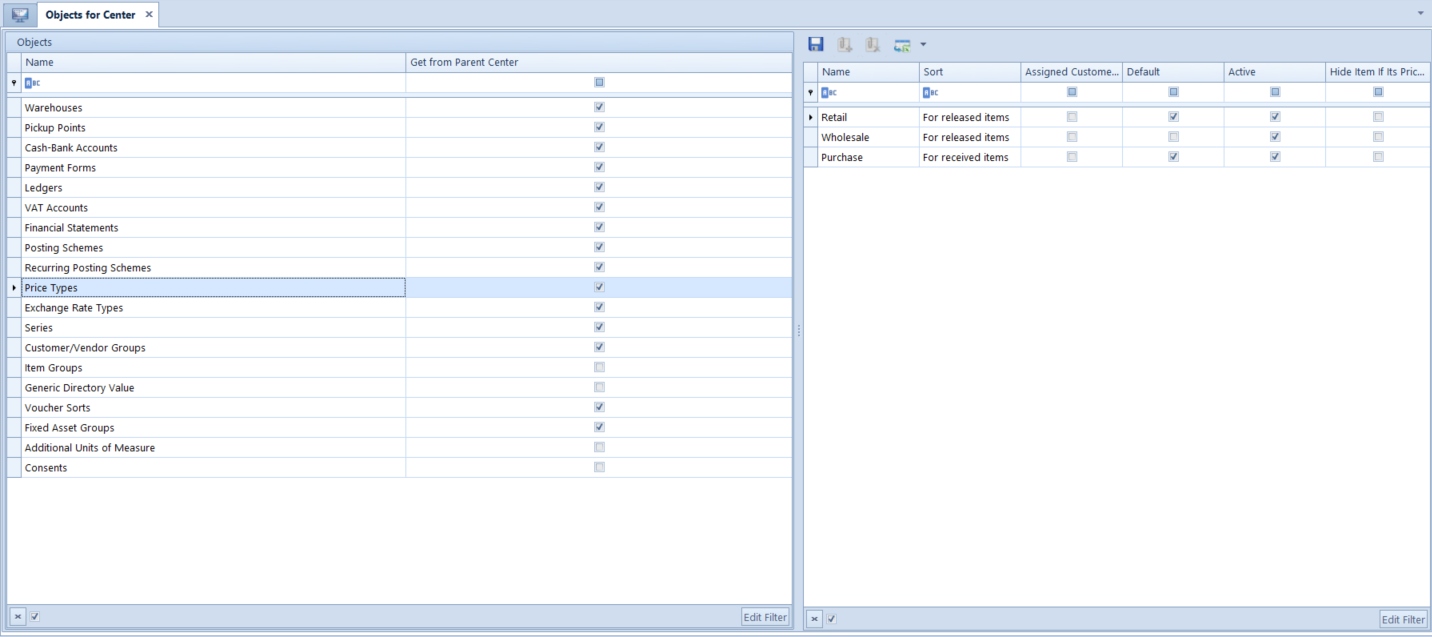
Price types

Availability of price types depends on parameter Get from Parent Center.  For items exported to Comarch ERP e-Shop, the most recent price list for released items basing on default price type assigned to a center of Comarch ERP e-Shop type will be uploaded. Here, it is also possible to attach other price types from which price type of the previous price list is later selected (parameter Upload previous prices for, in the tab Synchronization of a center of e-Shop type).

Series

Availability of series depends on parameter Get from Parent Center.  Series can be used, in dependence of the applied numerator, for marking of documents issued in Comarch ERP e-Shop or in any other center.

Customer/vendor groups

Here, it is possible to determine availability of customer groups in a given center. Additionally, for customers included in groups attached to a center of Comarch ERP e-Shop type, if parameter Export customers is checked, accounts will be created in e-Shop. Conditions which must be fulfilled for such account to be created, are described in paragraph Export of customers from Comarch ERP Standard to Comarch ERP e-Shop.

Item groups

The object allows to determine availability of item groups in a given center.  Attached groups will be synchronized, along with items assigned to them, to Comarch ERP e-Shop. It is possible to attach different item groups belonging to different categories, which also allows for displaying the same item in e-Shop in different categories.

To attach an item group, select a classification category and click [Attach].  As a result, a new window opens in which it is possible to select item group(s).  Confirm the selection by clicking [Select]. Displaying all classification categories provides possibility of selecting item groups from different classification categories.

Note
If only the main group is attached, then only this group, without its subgroups, will be uploaded to Comarch ERP e-Shop.  To upload also subgroups of the main group, they must be attached as well. In order to exclude a given item group from synchronization to the e-Shop, it must be detached from the center.  To do so, select a group and click [Detach].

Note
Item groups in Comarch ERP e-Shop application will be displayed in the order determined by No. parameter on item group from in Positioning tab.  In case if No. is not specified, groups will be displayed in the order they were attached.

Note
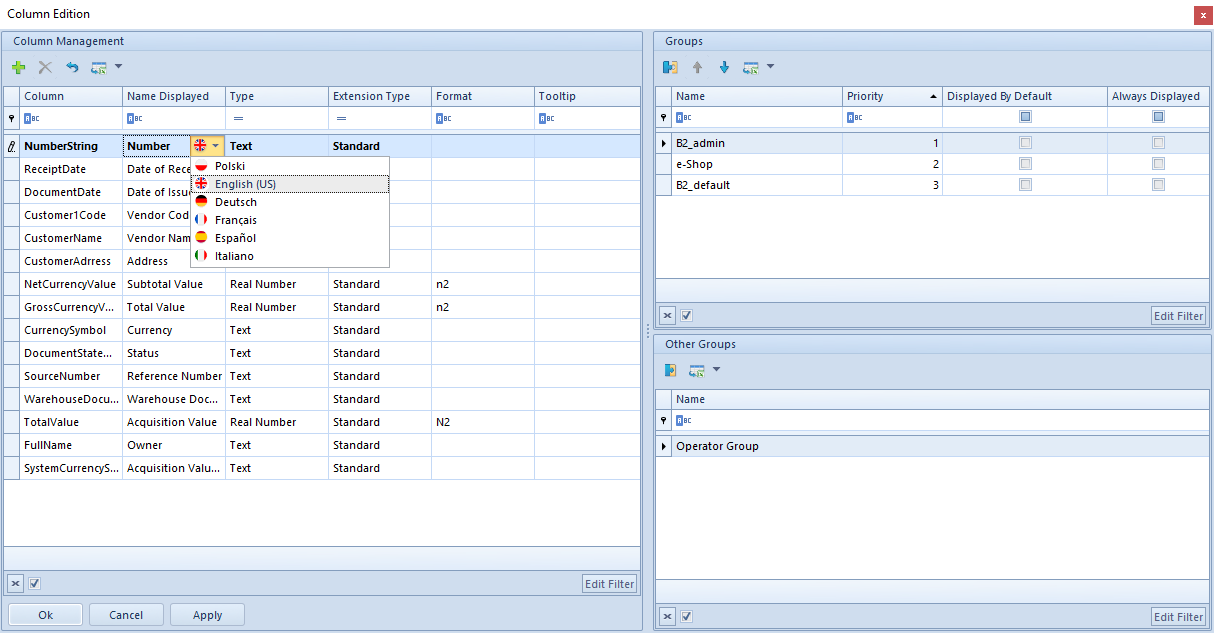
The group names and not the group codes are uploaded to Comarch ERP e-Shop.  Therefore, it is important to specify the name of each group that must appear in Comarch ERP e-Shop. This enables to clearly describe each group for presentation purposes in Comarch ERP e-Shop.

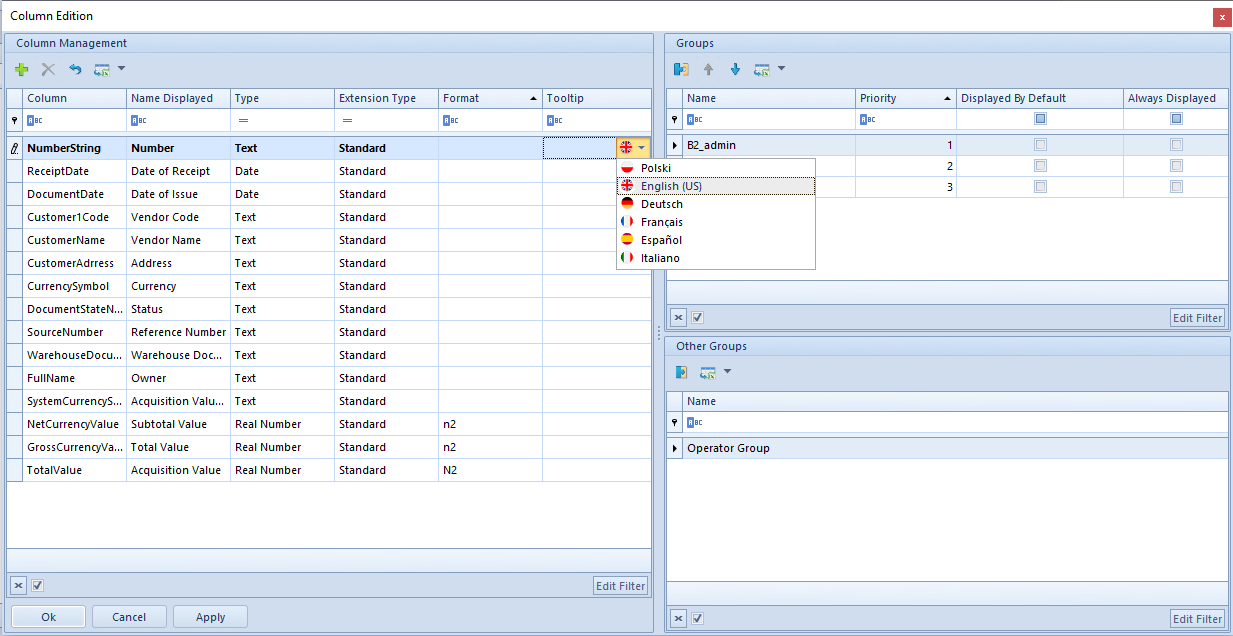
The users of Comarch ERP Standard may export the translated names of item groups specified in Polish, English, German, French and other previously defined languages. That data must earlier be properly entered on group forms by selecting appropriate option in Language parameter, for which the value will be defined.  If the name of a selected group is not specified in the language in which Comarch ERP e-Shop is running, the group name will then appear in the default language.

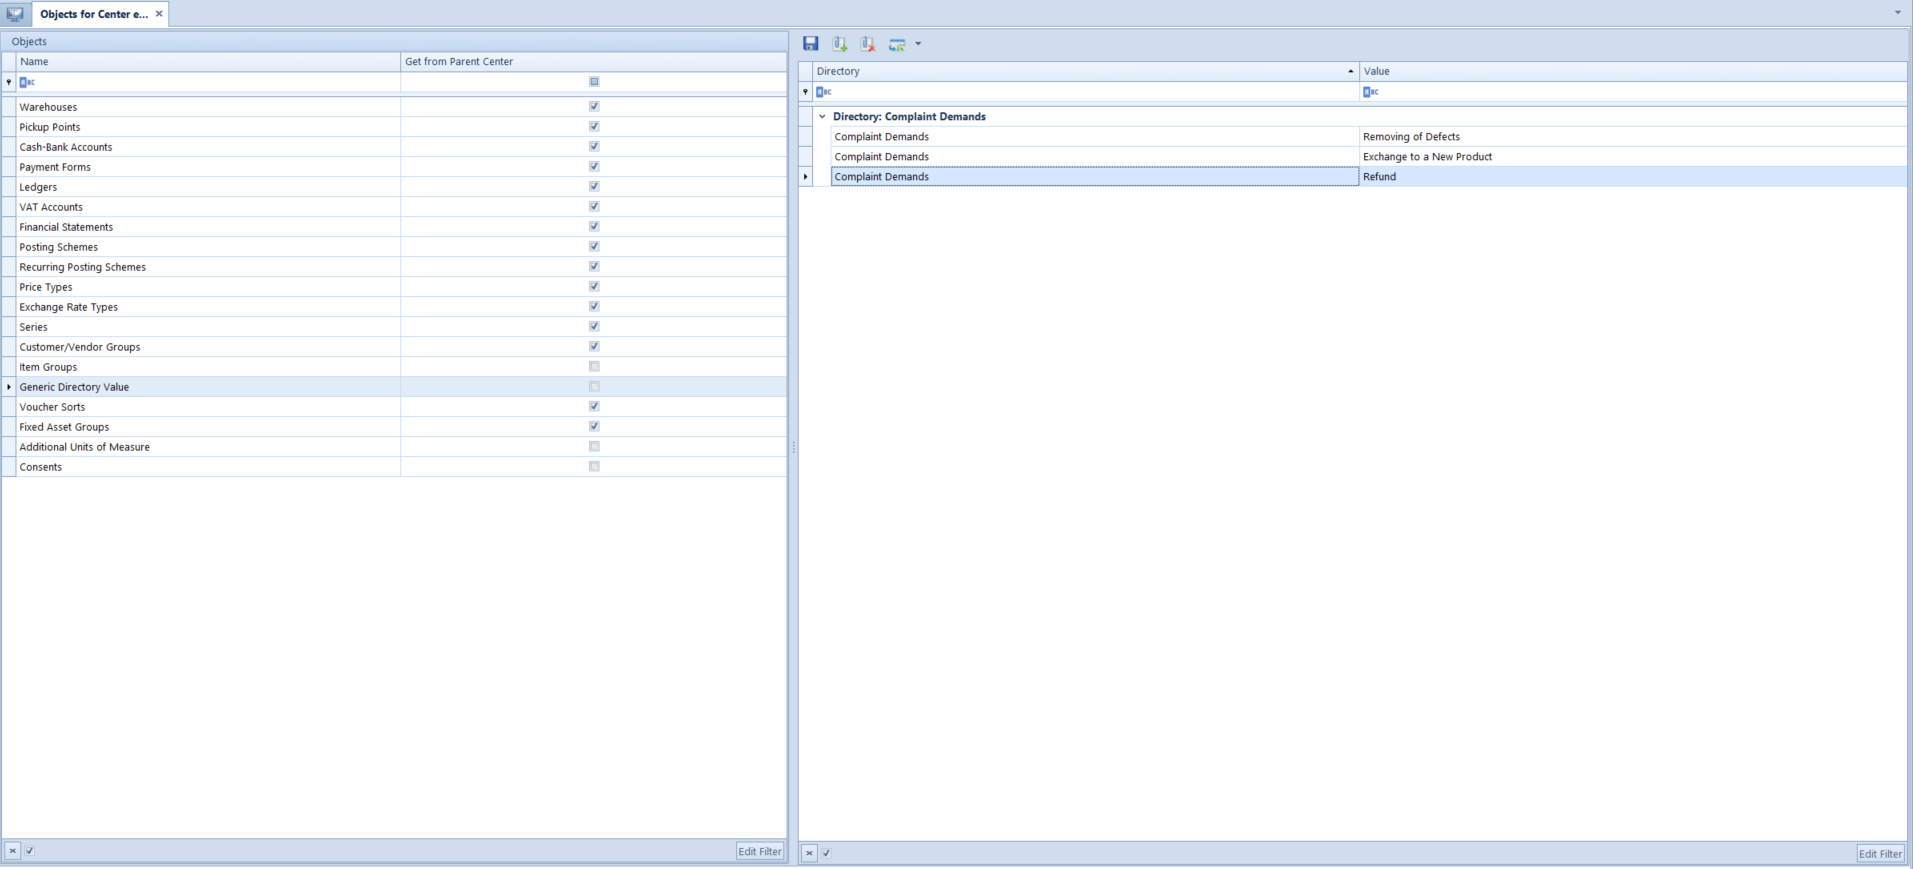
Generic directory values

Here, it is possible to add features which will be synchronized to Comarch ERP e-Shop.

Clicking the button [Attach] opens a list of generic directories from which a feature directory must be selected by clicking on the button [Select].

The features which are synchronized to Comarch ERP e-Shop are only those attached to a corresponding center in the company structure.

Note
A feature value <<Undefined>> is not synchronized to Comarch ERP e-Shop.

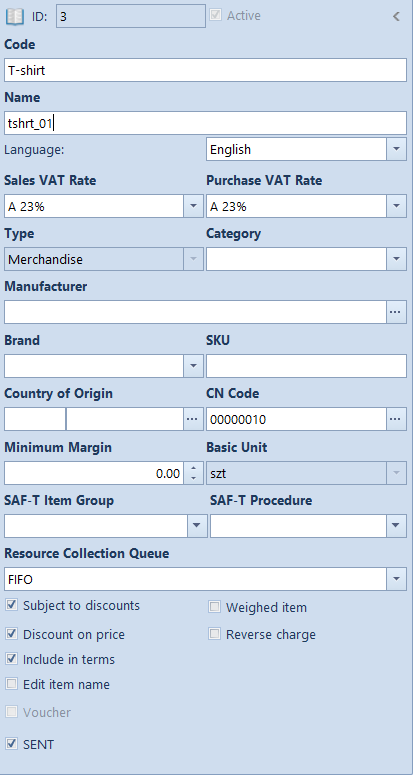
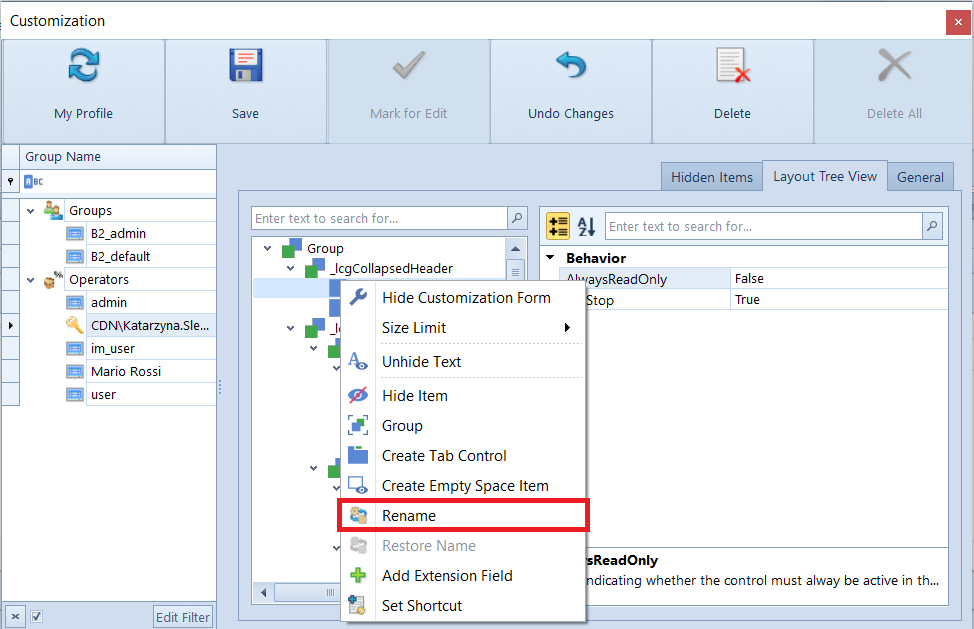
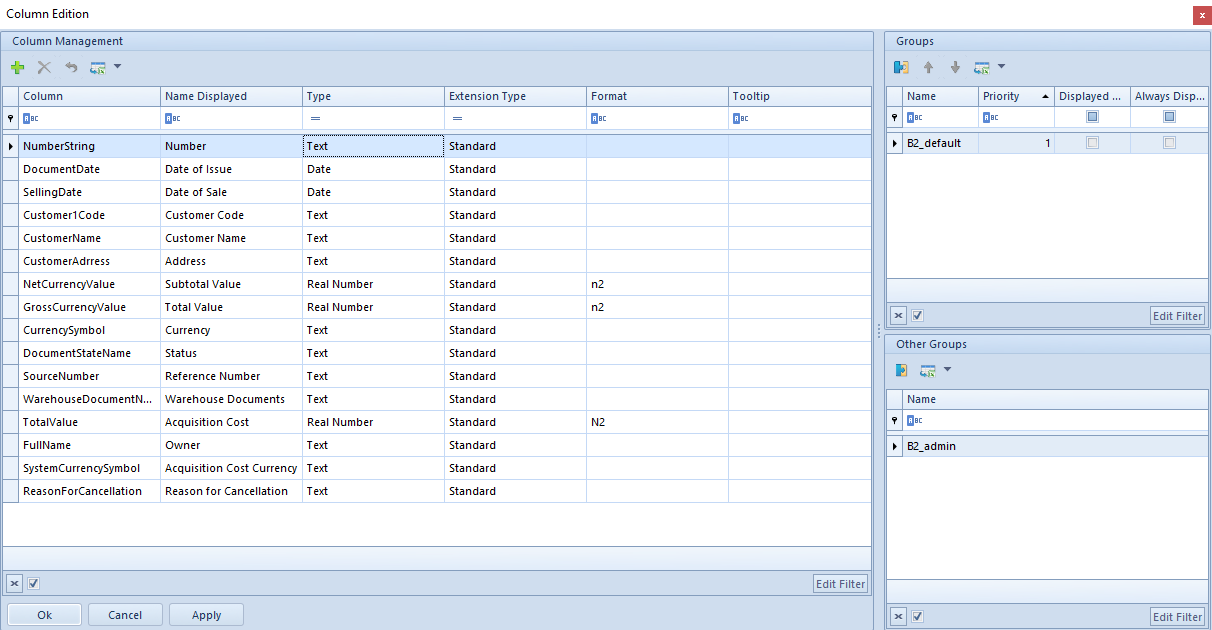
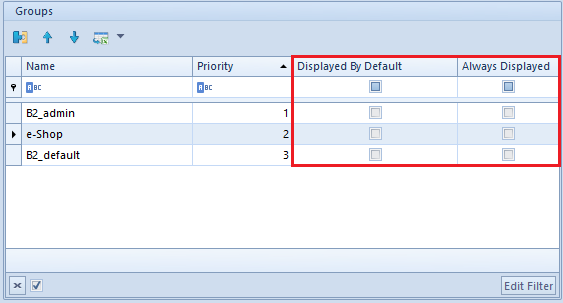
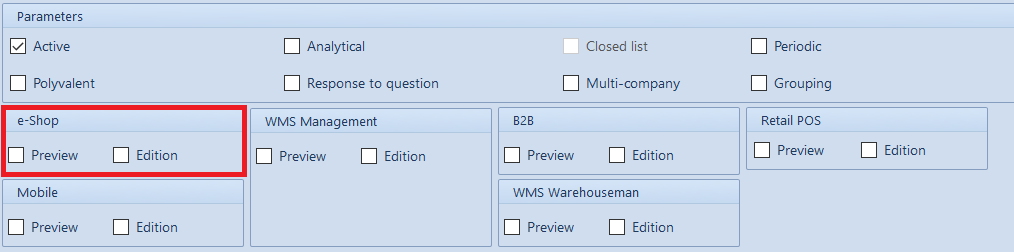
Status and availability of items

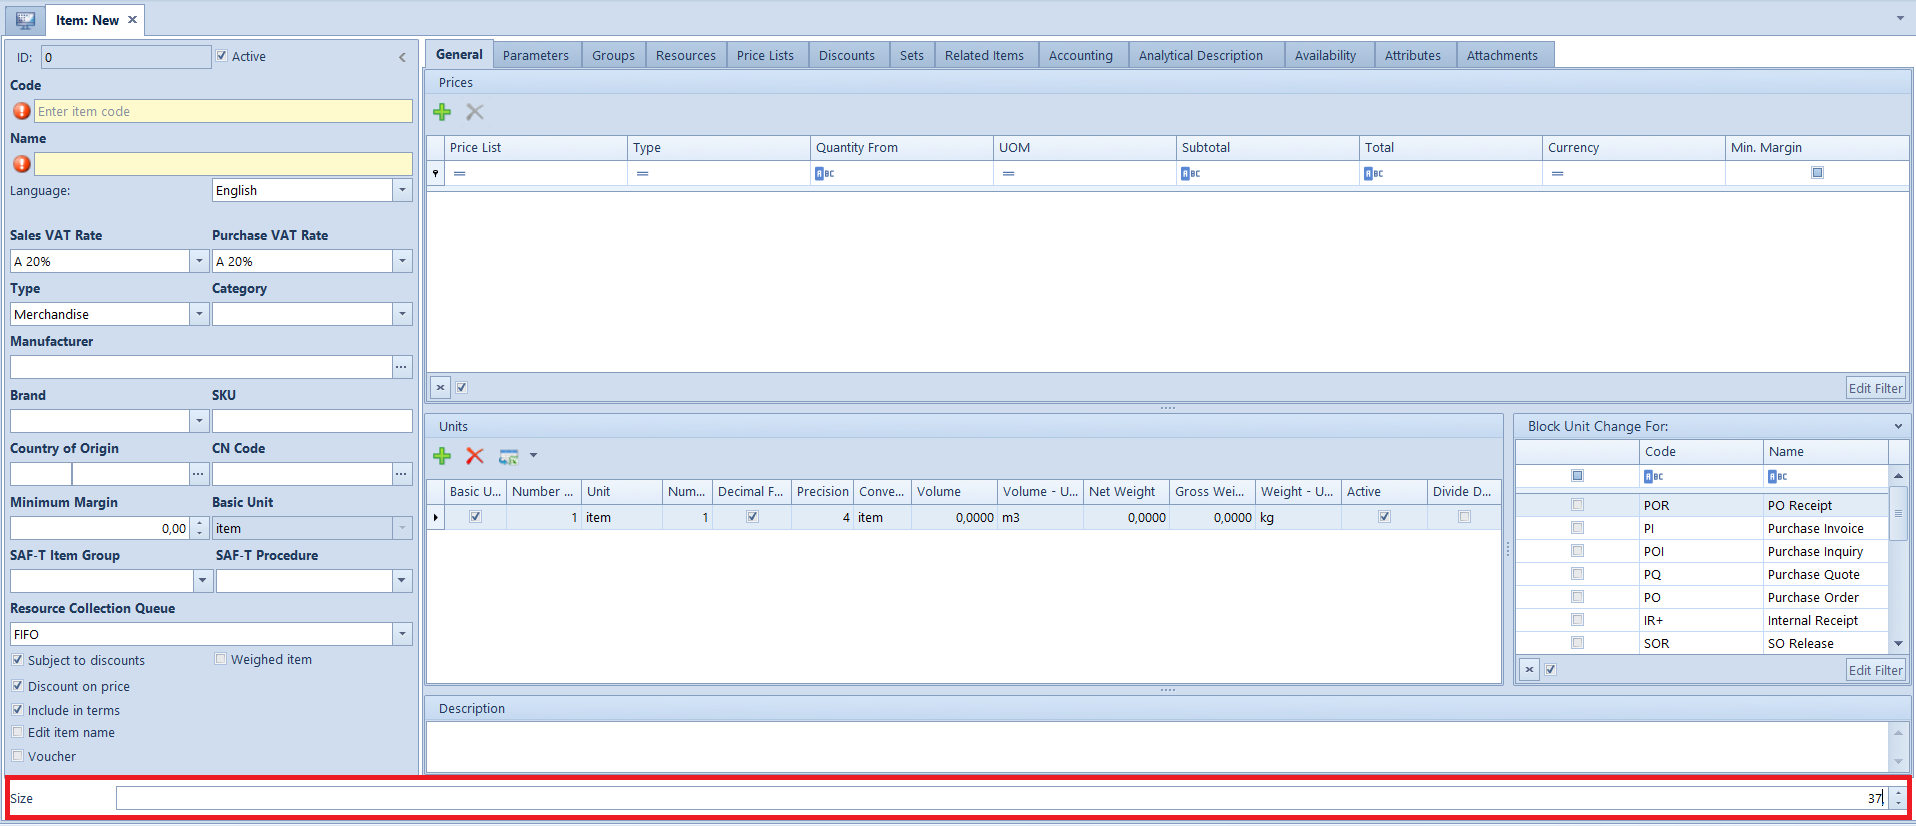
Assortment presentation method in e-Shop is set on the item form in subtab Presentation of the Applications tab.

The user can differentiate name, description and parameters for positioning, individually for each e-commerce application added in the rights structure. Thanks to that, it is possible to customize items in accordance with the e-shop in which it is being sold. If in the company structure, there are more centers of Comarch e-Shop type, in the tab Application, additional tabs corresponding to the added centers will be presented.

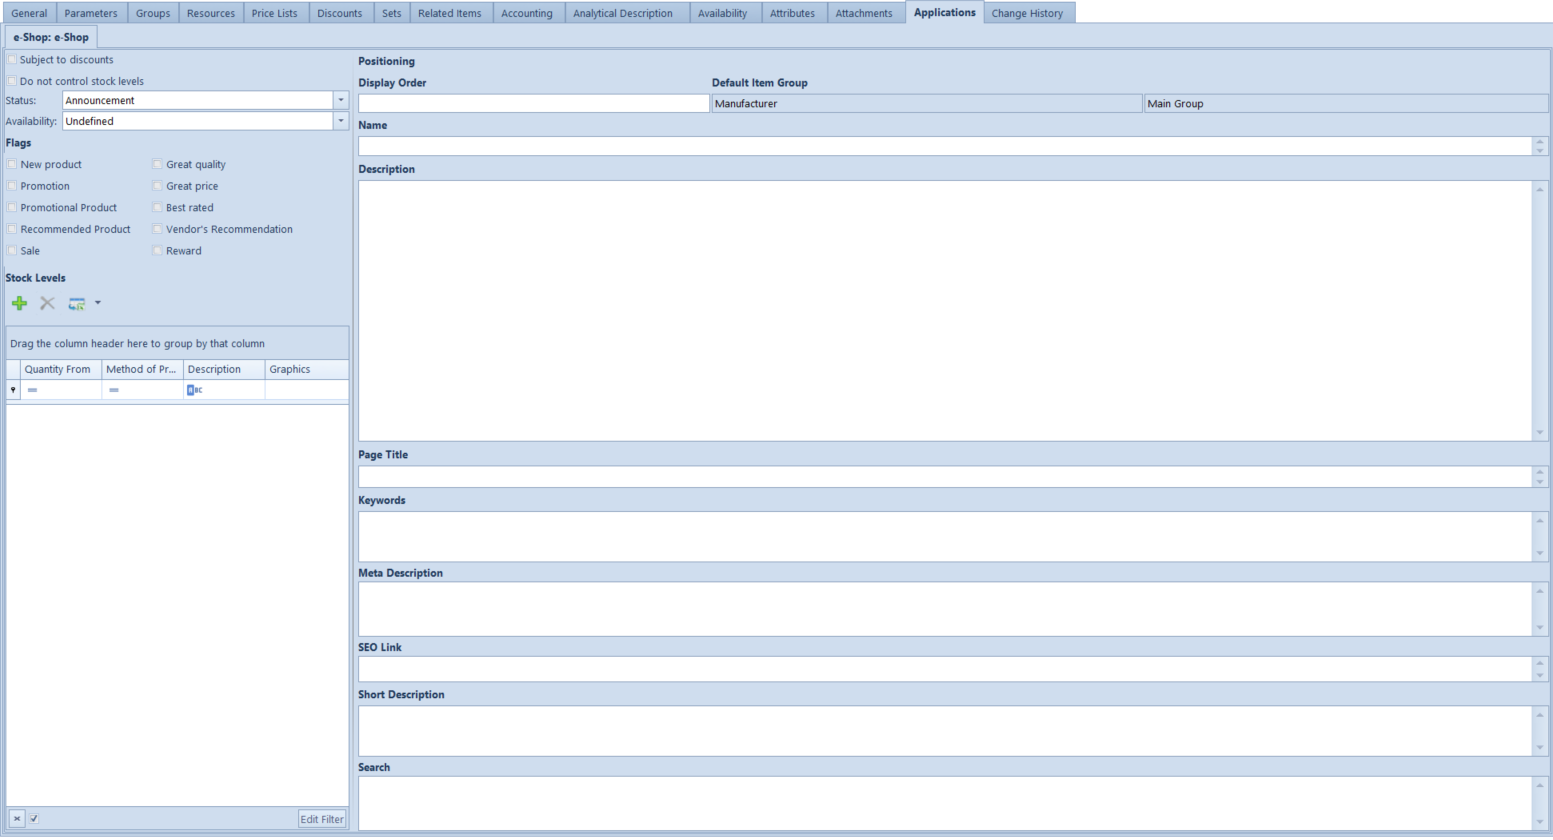
This tab is composed of three panels.

Subject to discounts – it specifies whether an item will be subject to discounts

Do not control stock levels – if checked, it is possible to order items in the e-Shop, regardless of available stock levels

Status – predefined values with which it is possible to determine a given item status:

  • Announcement
  • Available
  • Available on Request
  • Unavailable

 Availability – this parameter allows for determining time which is necessary to collect a given order item:

  • Undefined
  • In stock
  • Available within 24h
  • Available within 48h
  • From 3 to 5 days
  • Up to 7 days
  • Up to 14 days
  • Over 14 days

Flags – tags with which an item presented in the e-Shop can be additionally marked. This parameter is not mandatory. The following flags are available:

  • New Product
  • Promotion
  • Promotional Product
  • Recommended Product
  • Sale
  • Great Quality
  • Great Price
  • Best Rated
  • Vendor’s Recommendation

The above parameters can also be defined on item pattern (item group) and move items included in a given group.

Note
In case of updating items with the use of patterns for parameters from the tab Applications, values of parameters for all centers of Comarch e-Shop to which the item belongs, will be updated.

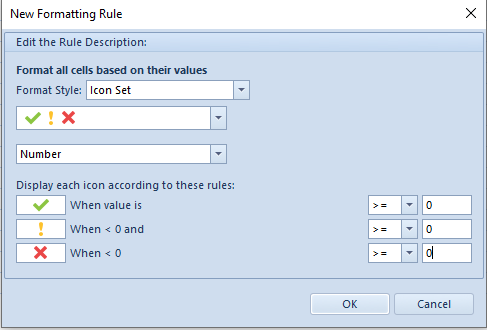
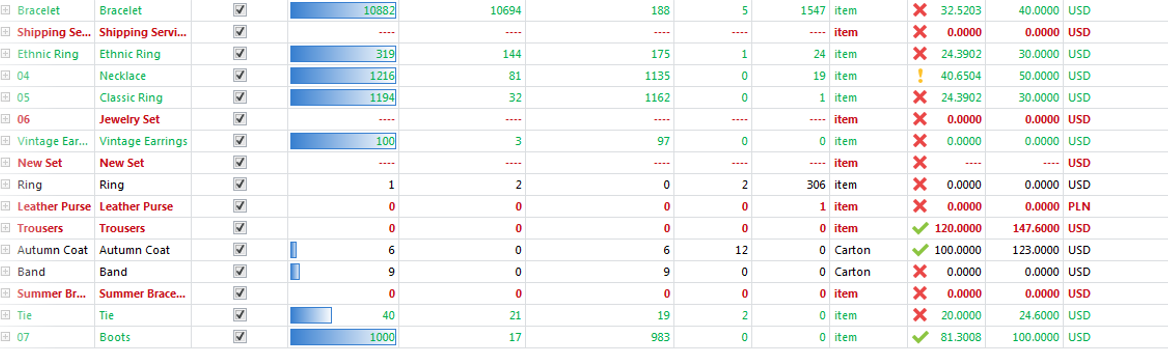
On the list in Stock Levels panel, it is possible to define presentation method of a given item stock level:

  • Quantity From – value determining threshold describing item availability
  • Method of Presentation – it contains a predefined list. Available options are:
  • Description and Graphics – in Comarch ERP e-Shop the availability of item will be presented with the use of values from Description field and added graphics
  • Graphics – item availability will be presented only in a graphic form
  • Description – item availability will be presented only in form of a description
  • Description – the field is active if value Description or Description and Graphics has been selected in Method of Presentation field
  • Graphics – this field presents thumbnail of selected graphics; it is active if value Graphics or Description and Graphics has been selected in Method of Presentation field

The defined thresholds, in dependence of a given item stock level in Comarch ERP Standard system, will differentiate item presentation by displayed information and graphics.

Note
In case of lack of continuity between item availability thresholds, exiting Applications tab results in displaying of appropriate warning message.

.The following buttons are available in Stock Levels panel:

  • [Add Threshold] – adds a new threshold
  • [Delete Threshold] – deletes an existing threshold
  • [Export To Spreadsheet] – exports data to a spreadsheet

Threshold presentation of stock level can also be defined on item pattern. To do so, open item list, edit an item group and go to e-Shop subtab of the General tab.

Description of particular update options in regard to thresholds is presented below:

  • Changed fields – Conditional – if values of thresholds for an item have been the same before the change as for a pattern, a threshold will be updated according to change made on the pattern
  • Changed fields – Unconditional – if there are thresholds for an item whose value of fields Range From is the same as on a pattern, values for the thresholds will be updated according to change made on the pattern
  • All fields – Unconditional – thresholds defined on item forms in a given group will be deleted and new ones will be added in accordance with the pattern

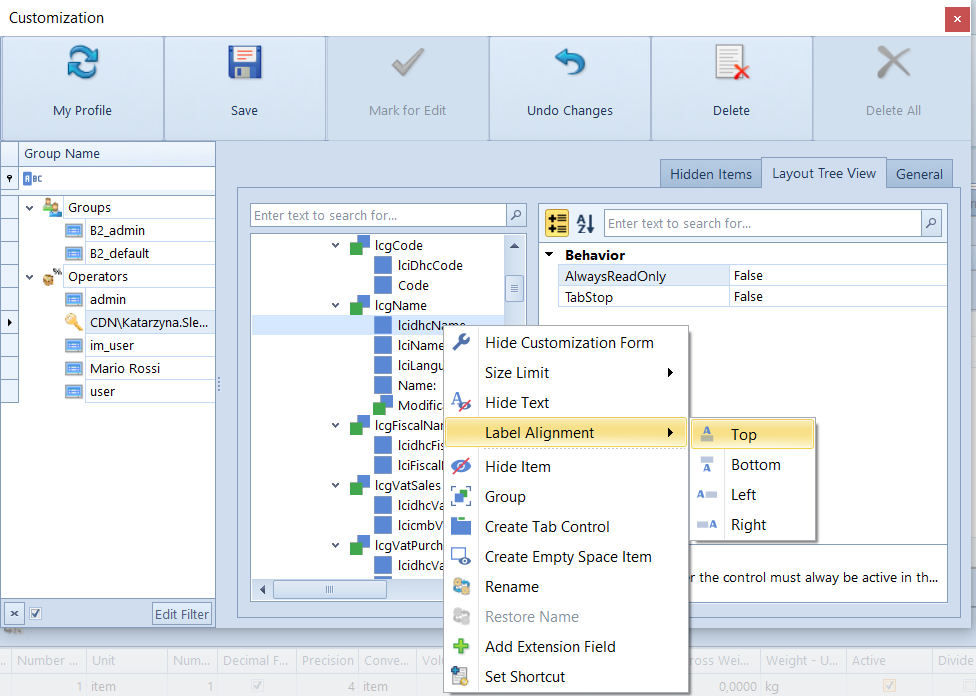
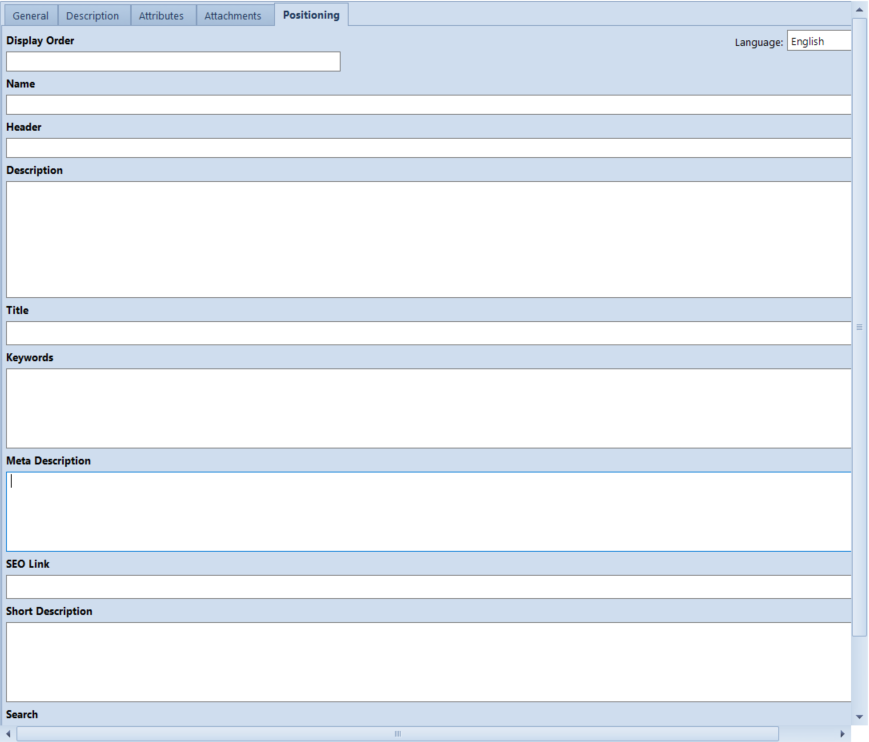
Subtab Positioning contains fields concerning positioning of an item:

  • Language – selection of a language for which values of parameters will be specified
  • Name – name of an item displayed in e-commerce applications
  • Description – description of an item displayed in e-commerce applications
  • Page Title – name of an item used in page title and for creating a friendly link to page with item details
  • Keywords – used for positioning of page with item details
  • Meta Description – item description used in item details
  • SEO Link – allows for adding to item form a link dedicated for SEO
  • Short Description – short description of an item used in lists
  • Search – field for entering keywords for e-Shop search engine; subsequent values must be separated with a semicolon

In case if name or description in tab Positioning is not filled in, default information from item form will be uploaded to e-Shop – item name from field Name in General tab and description from Description tab.

For fields Name and Description, there is an HTML editor available. To be able to use it, during the edition of these fields it is necessary to select [Use HTML] button from the ribbon. Upon selecting that option, description/name is sent in the form of an HTML code generated by the editor. The editor allows for text formatting which is also visible in the system interface, as well as for previewing of the generated code – button [Switch].

Parameters from Positioning tab can also be specified for an item group. Additional parameter to define in this case is:

No. – this parameter allows for determining the order of displaying a given item group in Comarch ERP e-Shop application\

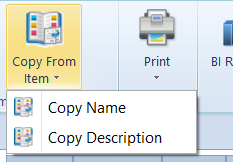
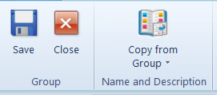
On the ribbon, there is button group Name and Description. Similarly, as in case of items, option [Copy from Group] allows for copying name or description of an item group already existing in the system.

In case if name or description in tab Positioning is not filled in, default information from item group form will be uploaded to e-Shop – item group name from field Name in General tab and description from Description tab.

Export of customers from Comarch ERP Standard to Comarch ERP e-Shop

Comarch ERP Standard system allows for exporting customers to Comarch ERP e-Shop. To be able to do so, the following conditions must be fulfilled:

  • Parameter Export customers must be checked in Synchronization tab on the form of a center of Comarch ERP e-Shop type
  • The center of Comarch ERP e-Shop type must be attached in Availability tab on a given customer form
  • The customer must have Active parameter checked
  • The customer must have all the data specified, which is required during registration in Comarch ERP e-Shop
  • Comarch e-Shop is in Enterprise version

Due to requirements resulting from registration in Comarch ERP e-Shop, only customers with the following data specified will be added in e-Shop:

Customer data:

  • Code
  • Name
  • TIN/NIN – if customer is a taxpayer

Address details, main address:

  • Country
  • State
  • Street
  • Street No.
  • Apt/Unit No.
  • City
  • Zip Code
  • Post Office

 Address details, shipping address:

  • Country
  • State
  • Street
  • Street No.
  • Apt/Unit No.
  • City
  • Zip Code
  • Post Office

 Customer contact details:

  • E-mail – it must be active and default, with the use of this address the customer will login to e-Shop
  • Phone No. – it must be active and default

Customers uploaded from Comarch ERP e-Shop to Comarch ERP Standard will be added to customer group selected in Synchronization tab on the form of the center of Comarch ERP e-Shop type.

Note
Due to the change regarding determination of customer availability for centers, assigning customer groups in Object Availability panel does not result in exporting them to Comarch ERP e-Shop. It is required to assign a center of Comarch ERP e-Shop type in tab Availability on a customer form.

Description of assortment

Export of attachments to Comarch ERP e-Shop

Items and item groups can be presented in Comarch ERP e-Shop with images (photos, graphics, etc.) showing the item appearance, status, etc. It can be performed by assigning an attachment of Image type to an item group or item. It is also necessary to check the attachment as available for Comarch ERP e-Shop on the list of attachments assigned to a given item group or item.

To add an attachment on item/item group form, go to Attachments tab and select a file from attachment list or upload it from disk.

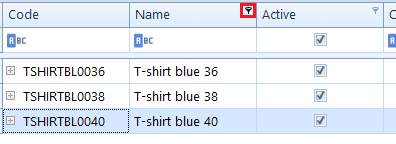
It must be remembered to check a given attachment as available for Comarch ERP e-Shop. Selecting an attachment which will be presented as first (main) is performed through a triple-click on a checkbox – its frame will be highlighted. It means that a given attachment will be displayed as the main one. If none of the attachments is marked this way, the first attachment on a given item attachment list will be displayed as main.

Note
In the synchronization of Comarch ERP Standard and Comarch e-Shop it is not possible to send binary attributes. Images of items are uploaded only as attachments.

Hint
From the eversions 2019.5, compressed binary data in the form of photos are not imported to the Comarch e-Shop system.

Export of attributes to Comarch ERP e-Shop

Video presentation

Comarch ERP Standard integrated with Comarch ERP e-Shop allows for the presentation of videos on item details page in Comarch ERP e-Shop. To synchronize a video, add an attribute called PRODUCT_MOVIE of text format in Comarch ERP Standard system. Such attribute must be also assigned to an item. Upon performing these actions, it is possible to add to the attribute a link to YouTube from which Comarch ERP e-Shop will be presenting item videos. An exemplary link is:

http://www.youtube.com/user/cdn4company#p/u/2/J3kBRWohckg. Such link, entered as attribute value, will be presenting a video on a selected item details page after being synchronized to Comarch ERP e-Shop.

Context search

On item group form in tab Attributes, it is possible to add attributes which will later be used in Comarch ERP e-Shop for searching items in a given category in Product List Filter plugin. Context search will be applicable in e-Shops whose item groups contain items with similar attributes (of color or size type, for instance) and allow a customer to find specific items (e.g., leather shoes up to 200 USD, black, size 38, in stock).

In order to properly apply Product List Filer plugin in e-Shop, item groups and items must be first appropriately prepared in Comarch ERP Standard, that is, these groups and items must have the same attributes assigned. For instance: if items have an attribute of List type called Color assigned, the same attribute must be added to a group containing these items.

Only those attributes associated with item groups, which have parameter e-Shop Preview checked are uploaded from Comarch ERP Standard to Comarch ERP e-Shop. To e-Shop, there are always values of the attributes defined for items uploaded as values of attributes assigned to groups (and not the values which are selected for a given attribute on item group form in tab Attributes).

Note
Even if an attribute value has been specified for an item group, it will not be uploaded to e-Shop; in this section only values for items having this attribute assigned will be uploaded.

Only the following attributes are uploaded to e-Shop:

  • Attached to item group from a given classification category, sent to e-Shop
  • Those of List, Date, and Text type
  • Those which have at least one value sent to e-Shop together with items assigned

Information about items can also be uploaded to Comarch ERP e-Shop in the form of attributes. It is possible to upload any set of additional item attributes to an online shop.

Note
Attribute names and not attribute codes are uploaded to Comarch ERP e-Shop. Therefore, it is important to specify the name of particular attributes. If the name is not specified, then the attribute will appear in Comarch ERP e-Shop without information of what it refers to.

It is possible to define attributes for different language version of the e-Shop. The options of language selection allow for the specification of attribute name and its values in different languages. On the form of attribute, in tab General, there is a drop-down list of languages. A language that is suggested by default for the newly created attributes is Polish. During synchronization, all the data referring to attributes along with the information about the attribute language is uploaded to Comarch ERP e-Shop.
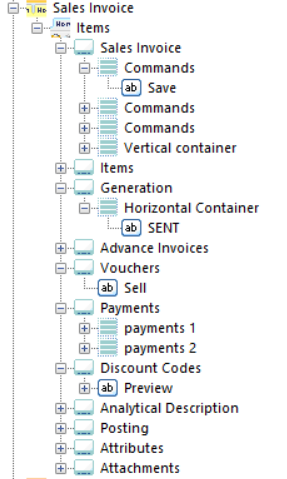
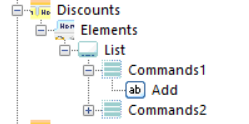
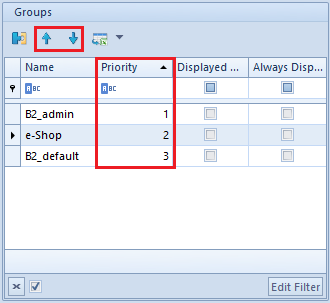
Display order

The order of displayed attributes is determined in the ERP system. On the list of attributes, there are buttons (located directly on the list of attributes, on the ribbon and in context menu) allowing for managing the order of attributes assigned to objects.

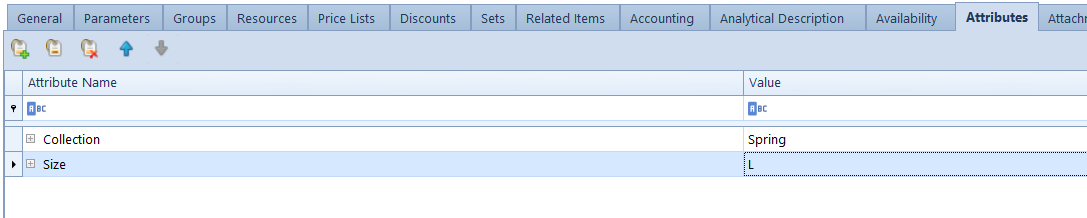
Order of attributes is maintained with button [Move Up] and [Move Down], which move selected attribute one level up or down.

Handling of polyvalent attributes

Comarch ERP Standard allows for sending polyvalent attributes to Comarch e-Shop. For an attribute to be presented in Comarch e-Shop, analogically as in the case of other attributes, it must have the parameter Preview checked. To check the parameter, go to Configuration -> Attributes and edit selected attribute.

Example
 

Polyvalent attribute Occasion with values: Business, Free time, Smart casual, Formal, Wedding, Casual, Travel

Several attributes are assigned to item Blazer, e.g., Formal, Wedding, Smart casual

In the store it will be presented as:

Occasion: Formal, Wedding, Smart casual [/example]

Export of prices to Comarch ERP e-Shop

Prices of items are determined on the basis of the most recent price list for released items default for a center of Comarch ERP e-Shop type.

In case if no price list is found for an item, price 0 is uploaded to Comarch ERP e-Shop and option Ask about price is displayed in Comarch ERP e-Shop application instead of price.

Note
Only prices defined in Comarch ERP Standard system currency are synchronized from a center of Comarch ERP e-Shop type to Comarch ERP e-Shop.

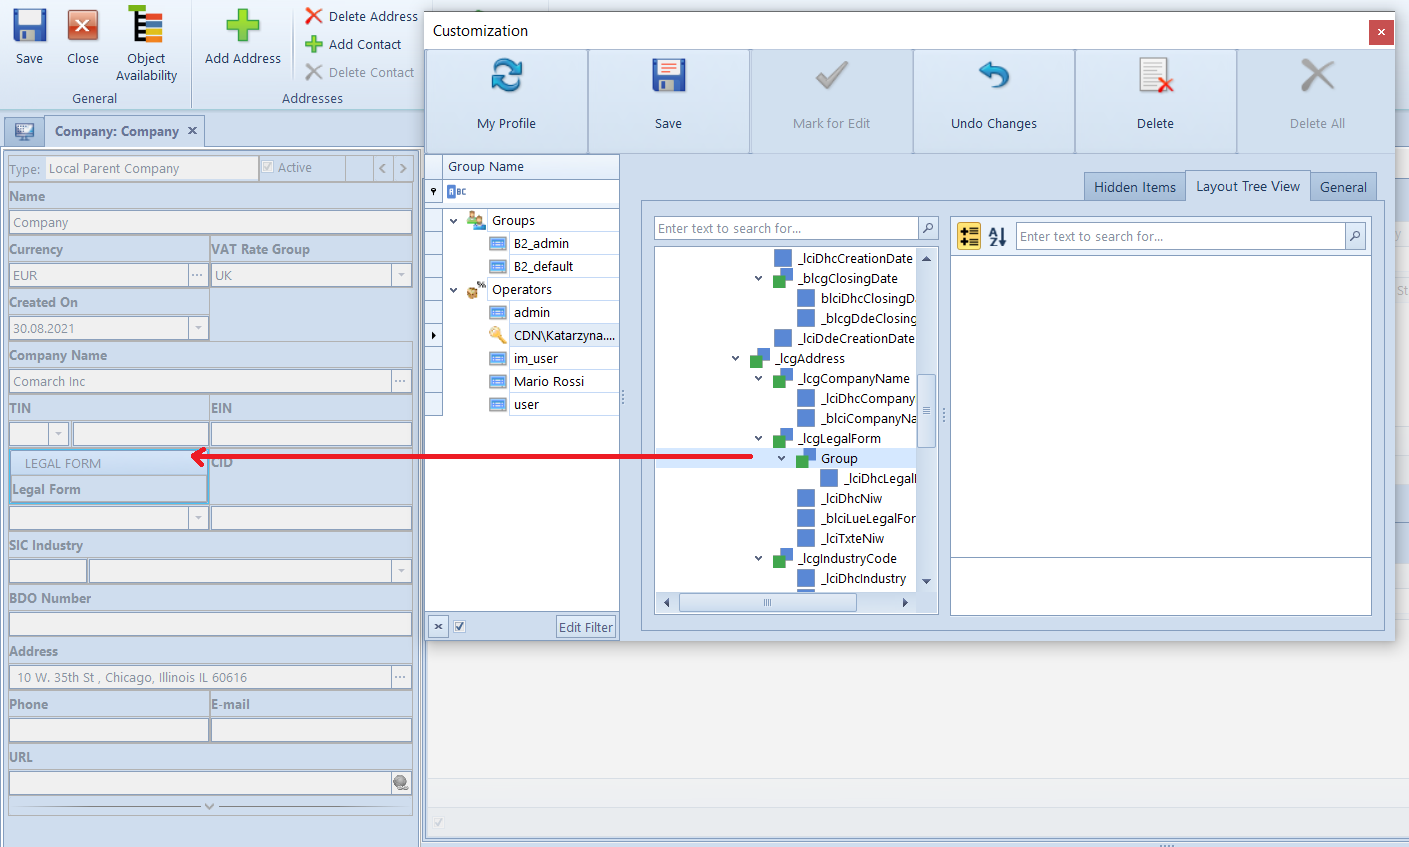
Export of units of measure to Comarch ERP e-Shop

A default unit of measure in Comarch ERP e-Shop is item. This unit can be changed to other unit from Comarch ERP Standard by selecting the parameter Unit of measure assigned to product (uploaded from Comarch ERP Standard system) which is available in Comarch ERP e-Shop in the Administration PanelConfigurationAssortment Presentation.

Export of features to Comarch ERP e-Shop

To Comarch ERP e-Shop those features are exported which have been assigned to items added in Object Availability panel to a center of Comarch ERP e-Shop type to Generic Directory Value object.

Export of related items to Comarch ERP e-Shop

Relation of Accessory and Substitute type

In Comarch ERP e-Shop, it is possible to synchronize related items whose relation type is Accessory

and whose relation type is Substitute.

To make related items visible in Comarch ERP e-Shop, both items must be included in groups attached to a center of Comarch ERP e-Shop type. In addition, the item must have photo on the item form, in the tab Attachments (with checked availability in e-Shop). Related items will be presented in the e-Shop in the following way:

  • If the relation type is Substitute, the related item will be presented below item details in Similar Products
  • If the relation type is Accessory, the related item will be presented below item details in Accessories

Relation of Base Product type

One of the requirements of e-commerce is the possibility to create groups for the same item having different features, e.g., size or color, in case if for each of the items differentiated by that feature there are separate item forms created in the system, for instance: for a shoe model there are as many item forms defined as there are sizes of that shoes. For this purpose, items associated with Base Product relation type are used.

An item defined with this type of relation becomes superior to an item associated with it. After synchronization with Comarch ERP e-Shop is carried out, the base item will be displayed as default in the e-Shop. Only one item in a group can be superior to others. An item already having a superior item cannot be defined as superior item.

Note
This type of relation is not displayed on lists of related items for sales documents.

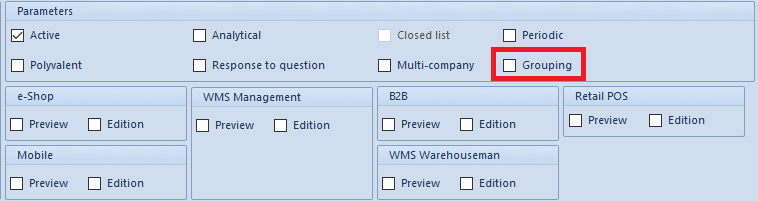
To enable presenting additional features of grouped items, it is necessary to check parameter determining which attributes will define the grouped items.

Parameter Grouping allows for determining attributes which will be displayed in e-Shop for grouped items – base products. Attribute of List or Text type can be set as a grouping attribute.

Note
The first grouping attribute should be the attribute defining a feature which differentiates items in a given group. That attribute will determine selection of other grouping attributes.

Note
If subordinate items are to be displayed in e-Shop, a grouping attribute must be added for each of them. Owing to that, by changing the attribute value, appropriate subordinate item is selected.

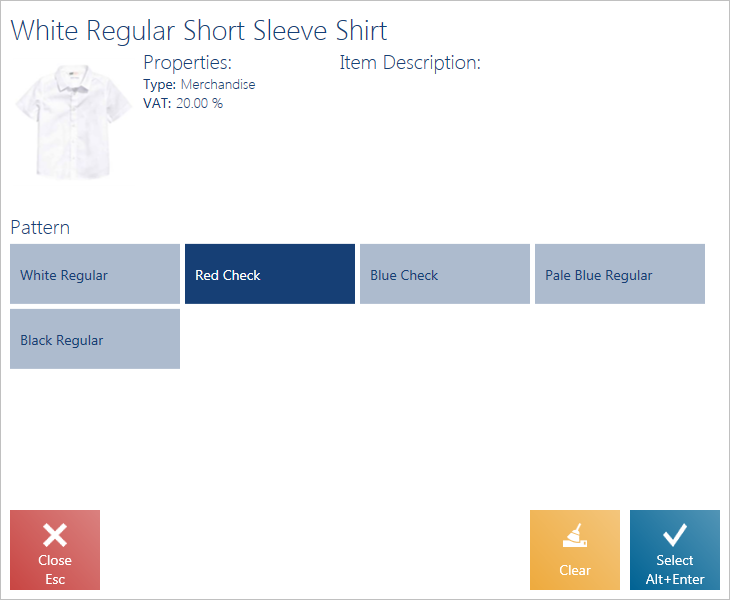
In Comarch e-Shop, articles grouped into a grouped item are presented on one item, with the possibility of selecting a feature from a drop-down list.

Export of information about currencies to Comarch ERP e-Shop

In Comarch ERP e-Shop application, it is possible to retrieve information about currencies defined for a company to which the center of Comarch ERP e-Shop type is assigned. During synchronization, system currency marked as default currency of the e-Shop is uploaded, along with currencies available for default exchange rate type. The uploaded currencies can be associated in the e-Shop with languages in which e-Shop is available.

In case of currency exchange rates, synchronization of default exchange rate according to settings for SO document type in a center of Comarch ERP e-Shop type is provided.
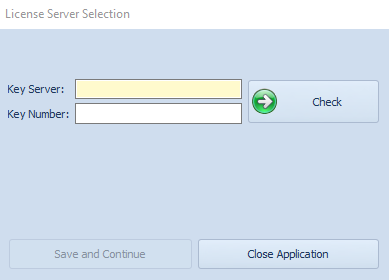
Exchange key

The purpose of the exchange key is to secure the exchange of data between Comarch ERP Standard and Comarch ERP e-Shop. In order to generate an exchange key, click the [Generate Exchange Key] button in the Subsidiaries menu.

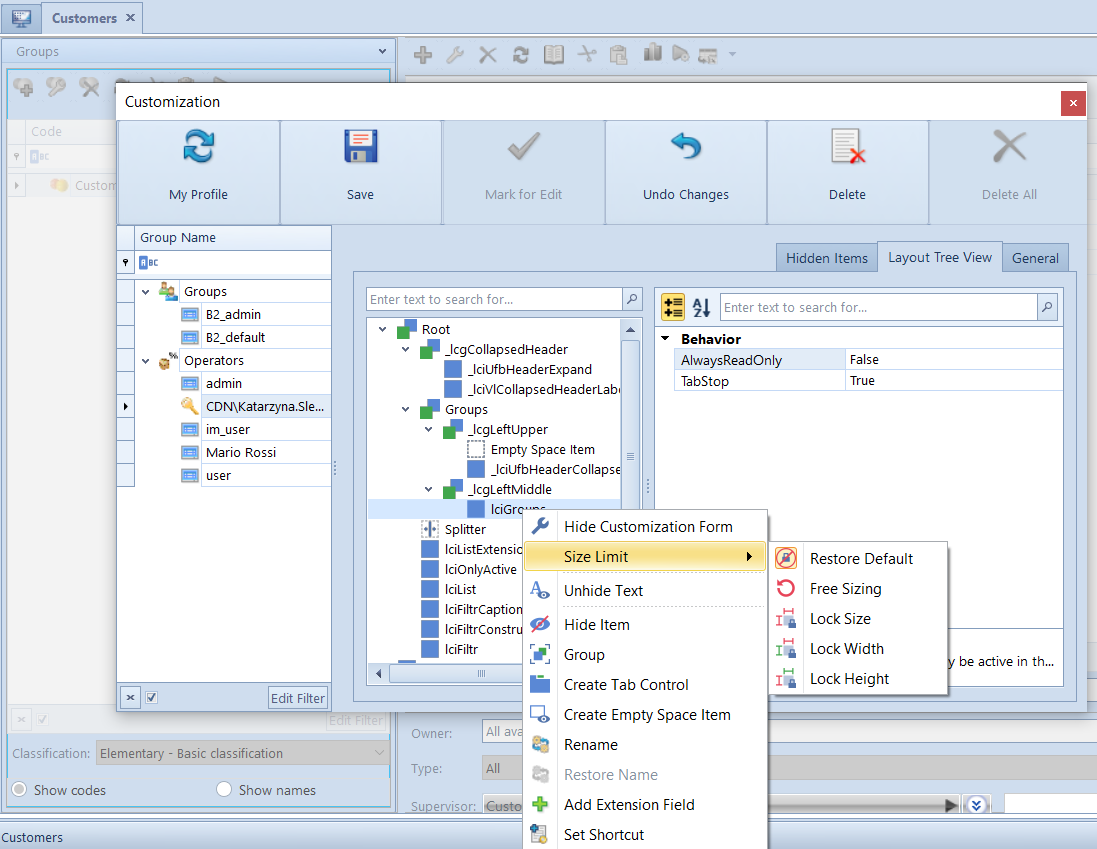
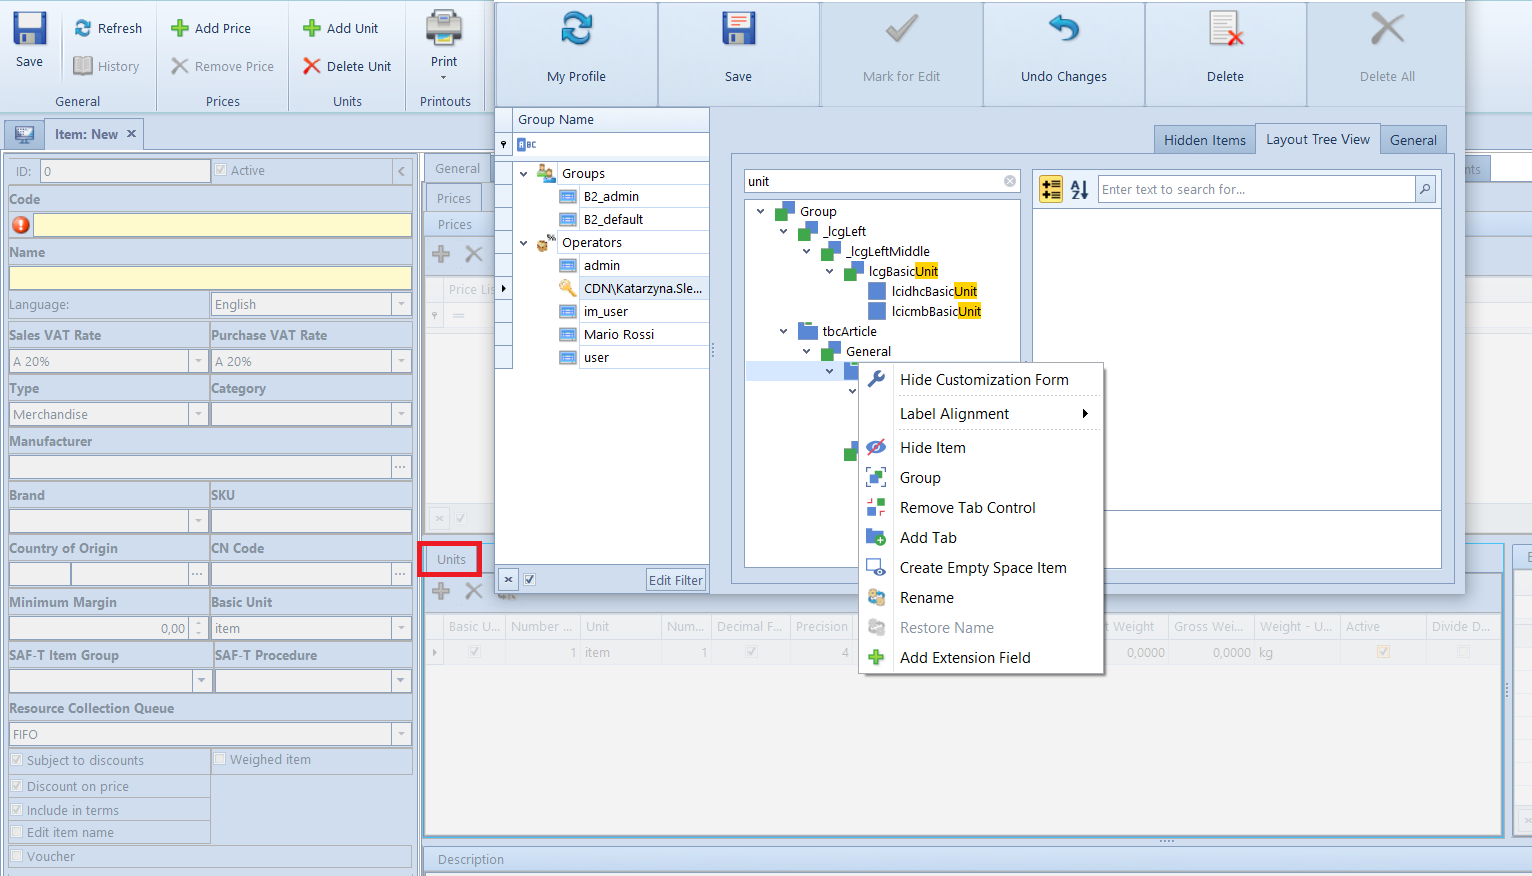
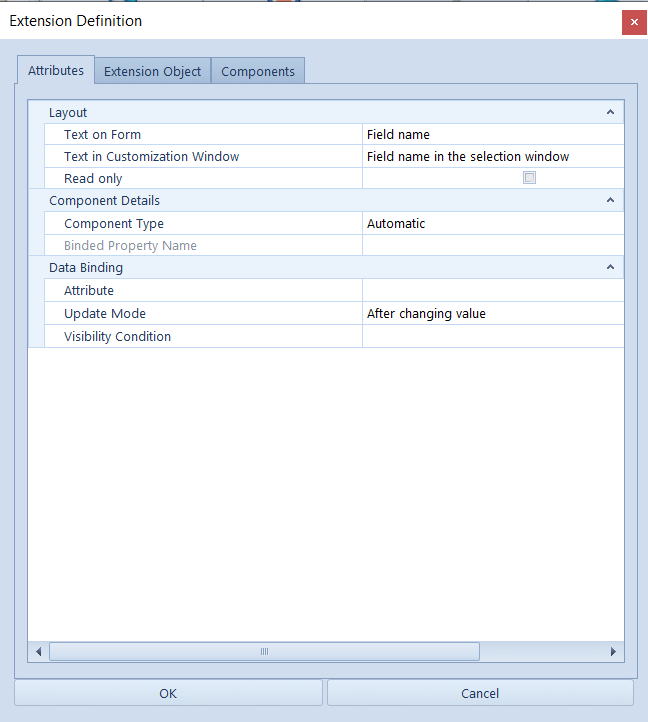
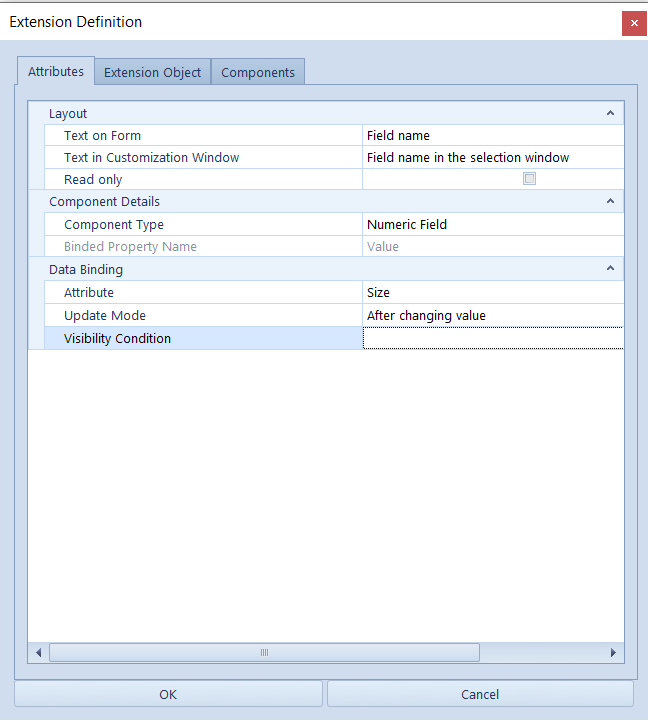
In the opened window, you can find all the information necessary to generate correctly an exchange key for e-Shop. In order to generate an exchange key, the following fields need to be filled in:

  • Center – name of Comarch ERP e-Shop center for which the exchange key is retrieved
  • Server Address – address of exchange key server. Exemplary address is: https://esklep.icomarch24.pl/COMARCHShopSrv
  • Company Name – company name obtained while generating Comarch ERP e-Shop databases
  • e-Shop Name – e-Shop name obtained while generating Comarch ERP e-Shop databases
  • Password – password to the exchange key

Note
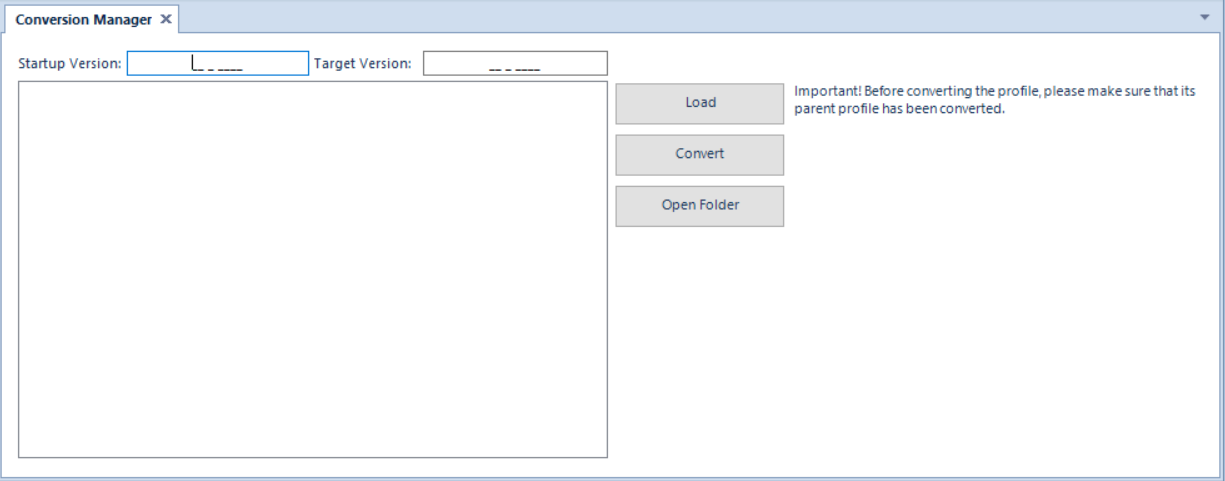
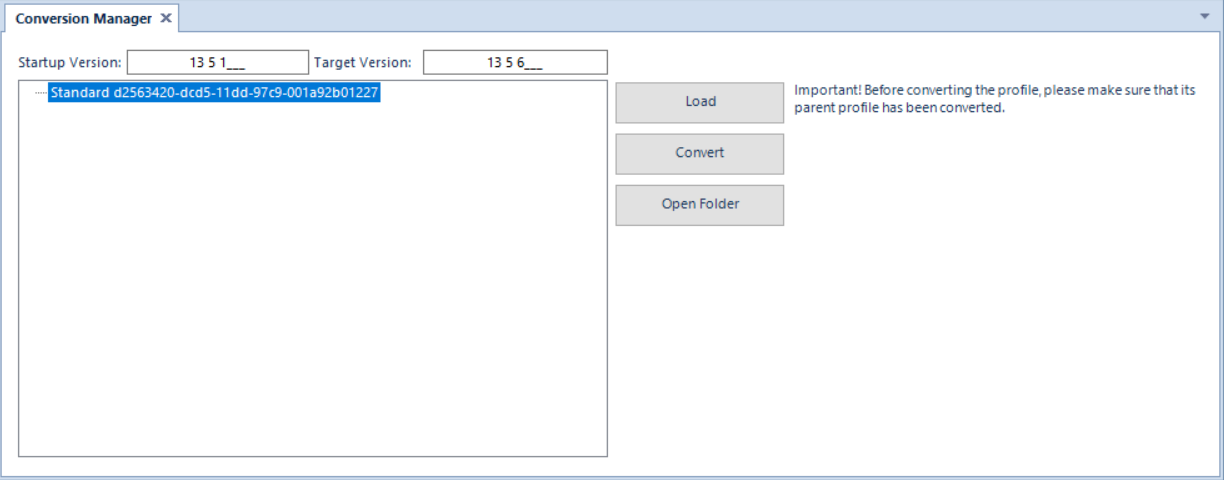
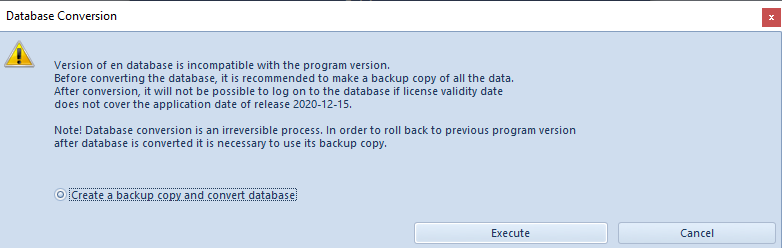
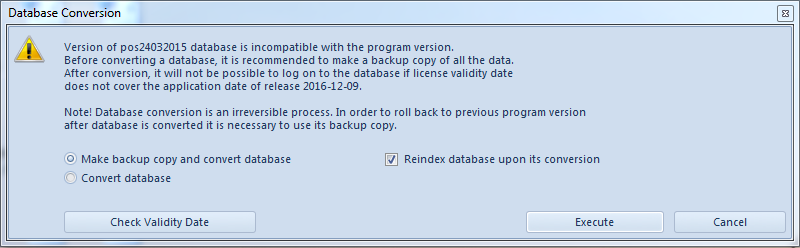
In the case of databases being converted from an earlier version of Comarch ERP Standard than the version 5.4, after the conversion it is necessary to manually get an exchange key for a Comarch ERP e-Shop center to ensure proper data synchronization. If an exchange key is not retrieved, the following message will be displayed during synchronization: “Unable to synchronize. Please generate an exchange key”.

Synchronization between Comarch ERP Standard and Comarch ERP e-Shop

Synchronization of Comarch ERP Standard and Comarch ERP e-Shop consists in exchanging of data:

  • Exporting from Comarch ERP Standard to Comarch ERP e-Shop the information about items, item groups, price lists, images, customers, and attributes
  • Importing from Comarch ERP e-Shop to Comarch ERP Standard the information about customers registered in Comarch ERP e-Shop and submitted orders

From the eversions 2019.5, compressed binary data in the form of photos are not imported to the Comarch e-Shop system

From the version 2019.5, have been introduced changes to the mechanism of synchronization which allow for faster processing of XML file in e-Shop. Now, import of offers (items, item groups, attributes, photos) and import of customers take less time.

From the version 2020.1, has been introduced an additional control during the execution of the synchronization from the ERP system to e-Shop. Now, if during the synchronization, unexpected events occur when it comes to:

  • Missing item name
  • Missing item availability settings
  • Incorrect default item group

In the administration panel, an appropriate message informing about that event will be displayed.

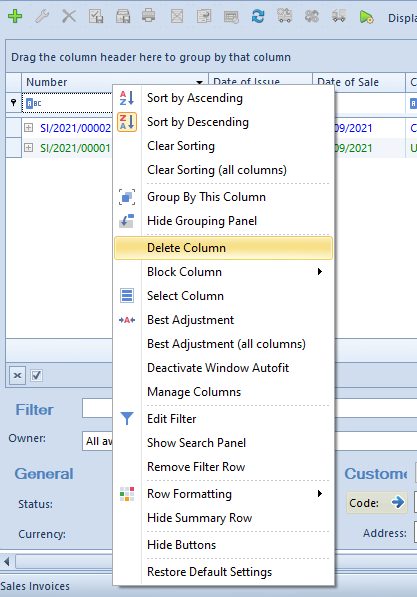
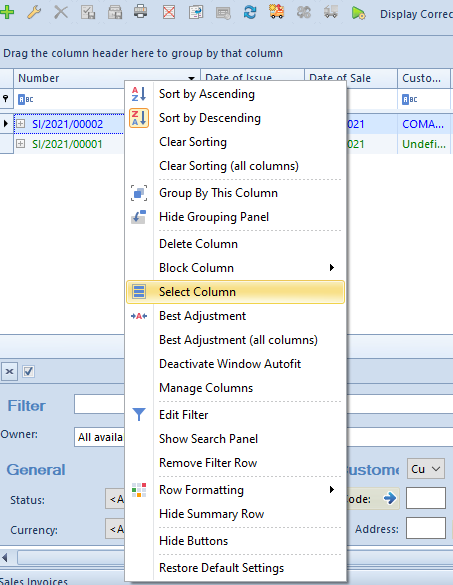
After the synchronization process is finished, information regarding the process is saved in the form of logs. To open synchronization logs, it is necessary to select from the menu Subsidiaries option Logs which is placed in Comarch e-Shop group of buttons.

A new window is opened, where the user can read detailed data from logs presented on a list.

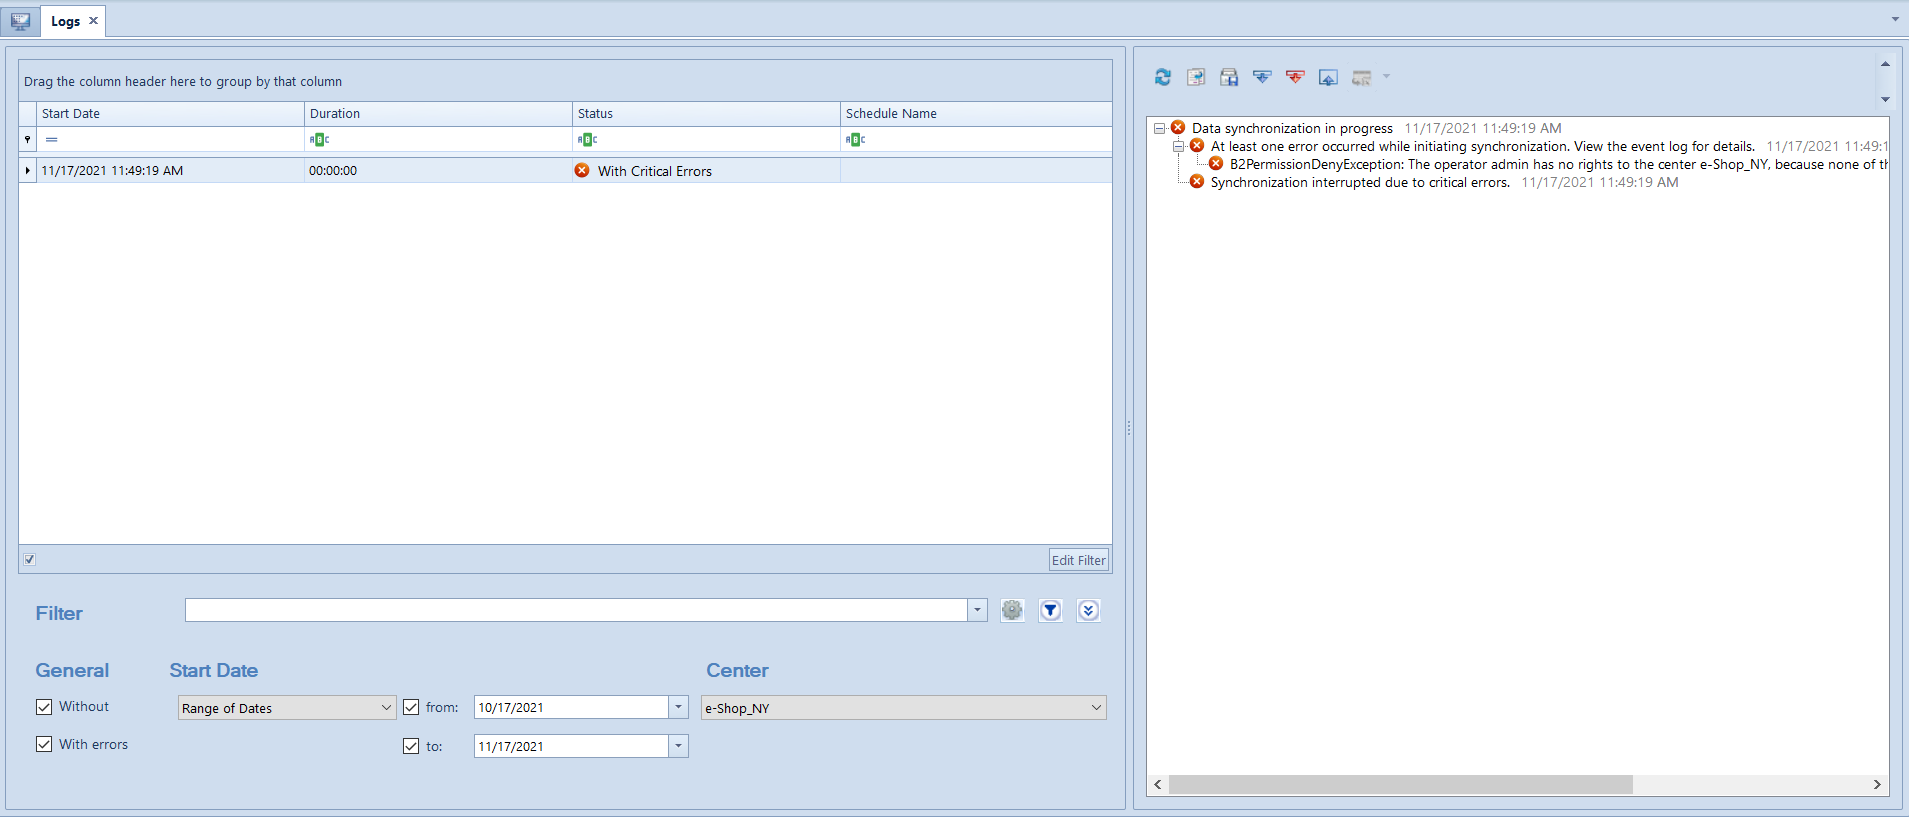
The window is divided into three panels. The first one presents table with logs. The table is composed of the following columns:

  • Start Date – synchronization start date
  • Duration – synchronization duration
  • Status – informs whether synchronization was carried out without errors, with warnings or with errors
  • Schedule Name – presents name of a schedule if synchronization was started by a schedule task

Logs button group on the ribbon contains the following buttons:

  • [Close] – closes the window
  • [Refresh] – refreshes the list of logs

The second panel contains detailed information about progress of the synchronization process, read from a log marked in the first panel. In the log details, it is saved, among other, what are the synchronization parameters, which objects are imported and exported and in what quantities they were uploaded.

Buttons available for this panel are:

  • [Refresh] – refreshes data saved in a log
  • [Copy All] – allows for copying data saved in a log
  • [Save All] – allows for saving data to a file
  • [Expand All] – expands all branches of the tree
  • [Expand All Errors] – expands only those branches of the tree in which information about an error is saved
  • [Collapse All] – collapses all branches of the tree
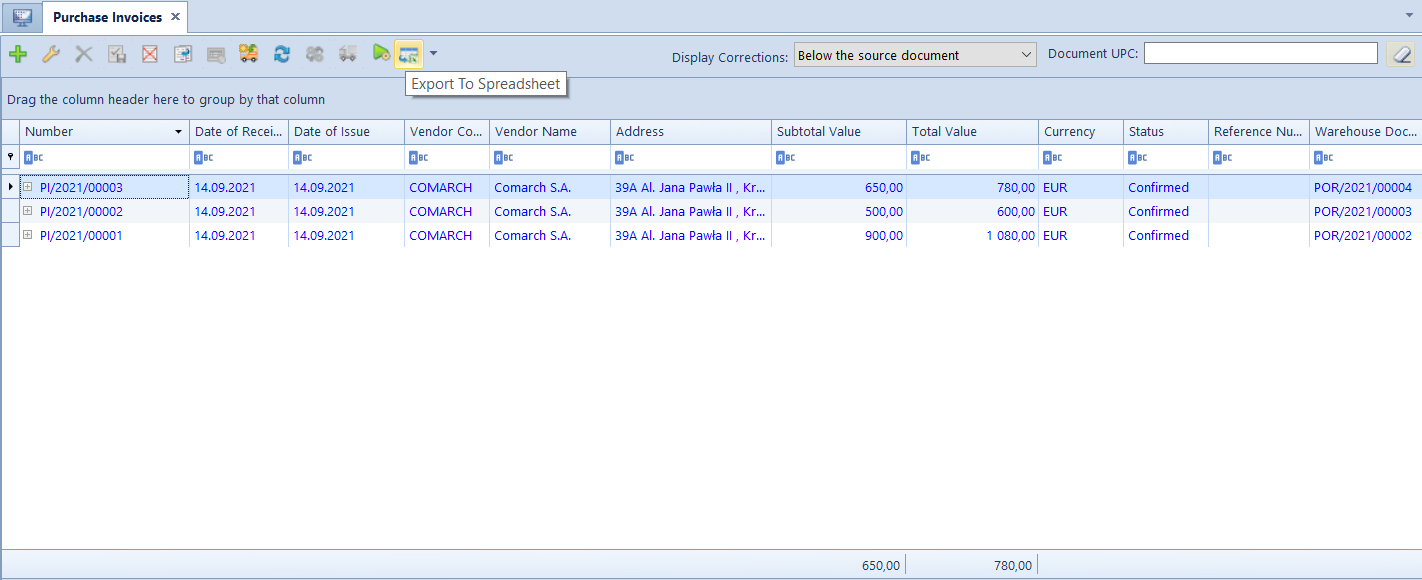
  • [Export To Spreadsheet] – allows for exporting data to a spreadsheet

The third panel is composed of a set of filters. Logs can be filtered by:

  • Status – without errors or with errors
  • Start Date – values available for selection:
  • Range of dates with possibility of setting dates in fields From and To
  • Specific day with possibility of setting a specific date in field From
  • Any date
  • Center – center of Comarch ERP e-Shop type

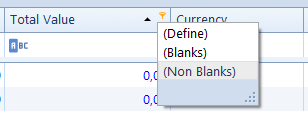
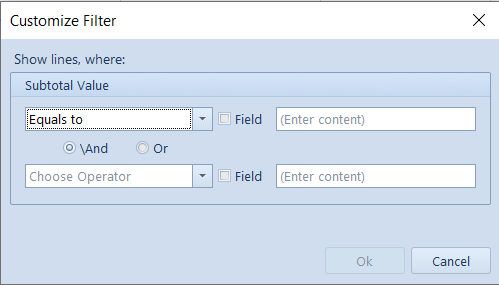
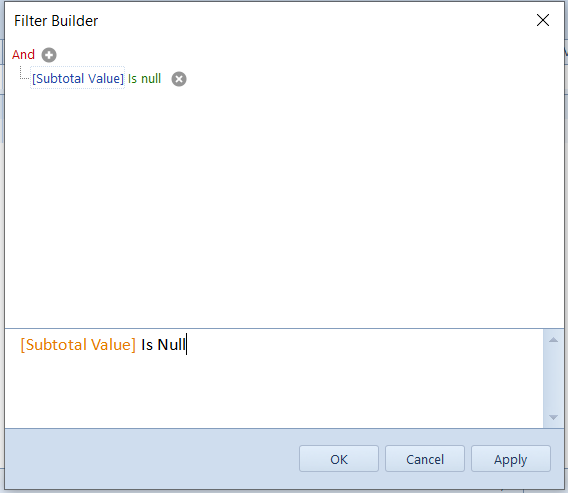
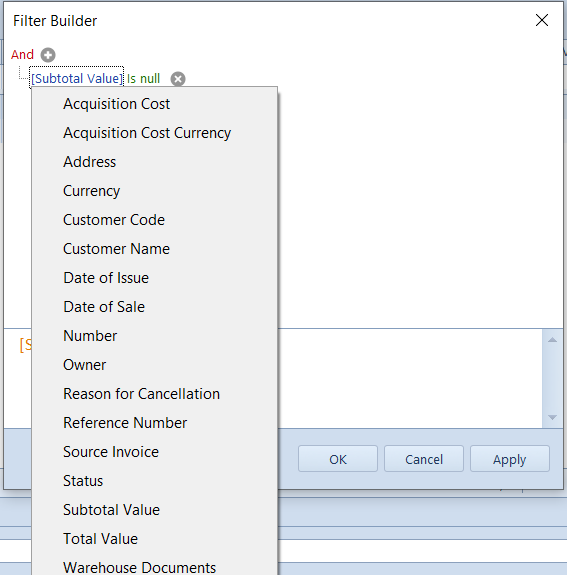
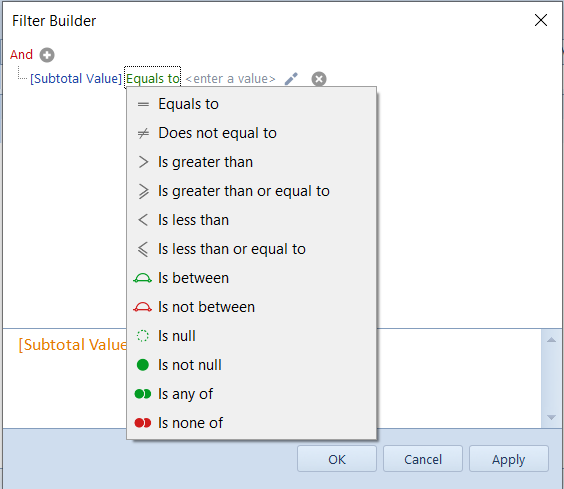
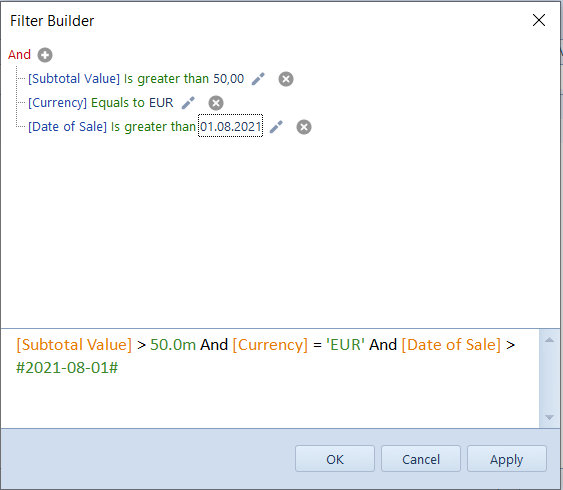
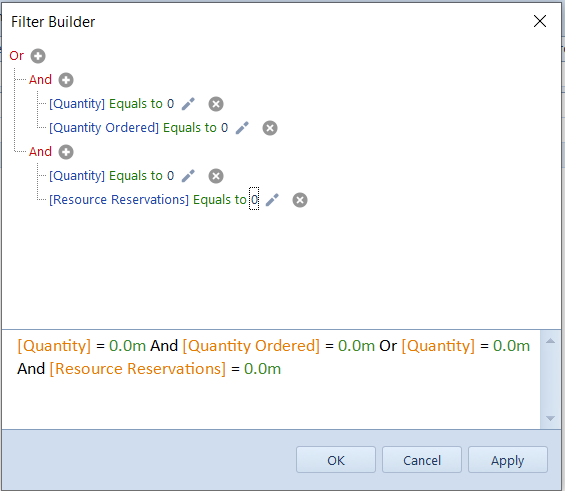
There is also Filter field available along with filter builder which enables constructing and saving own filter.

On the ribbon, in Log Details group of buttons, the following buttons are available:

  • [Copy All] – allows for copying data saved in a log
  • [Save All] – allows for saving data to a file
  • [Expand All] – expands all branches of the tree
  • [Expand All Errors] – expands only those branches of the tree in which information about an error is saved
  • [Collapse All] – collapses all branches of the tree
  • [Refresh] – refreshes data saved in a log

Synchronization methods

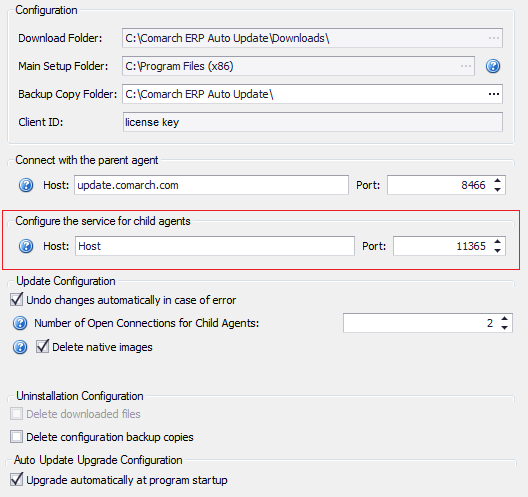
The synchronization process can be started manually by the user or automatically on the basis of a task schedule. To be able to start manual or automatic synchronization, first, it is necessary to fill in all information in Comarch ERP Standard configuration tool in tab e-Shop Synchronization Client.

Note
After saving the changes and before proceeding to the next configuration step, it is necessary to restart Comarch ERP Standard system.

Manual synchronization

To start the synchronization manually, click [Synchronize] in Comarch ERP e-Shop button group, in tab Subsidiaries.

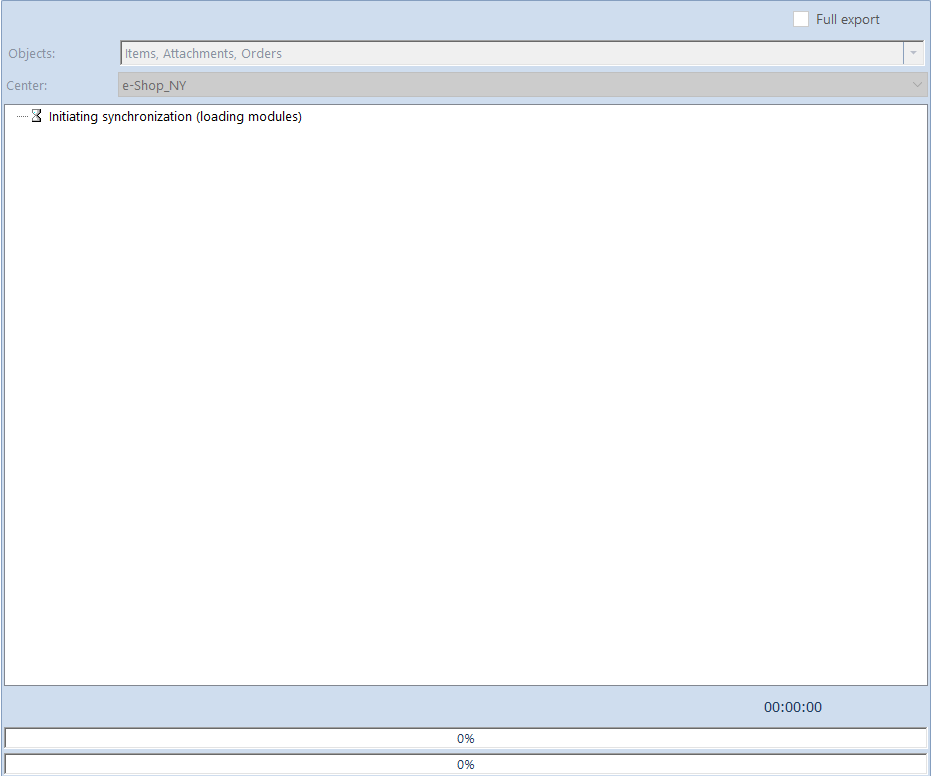
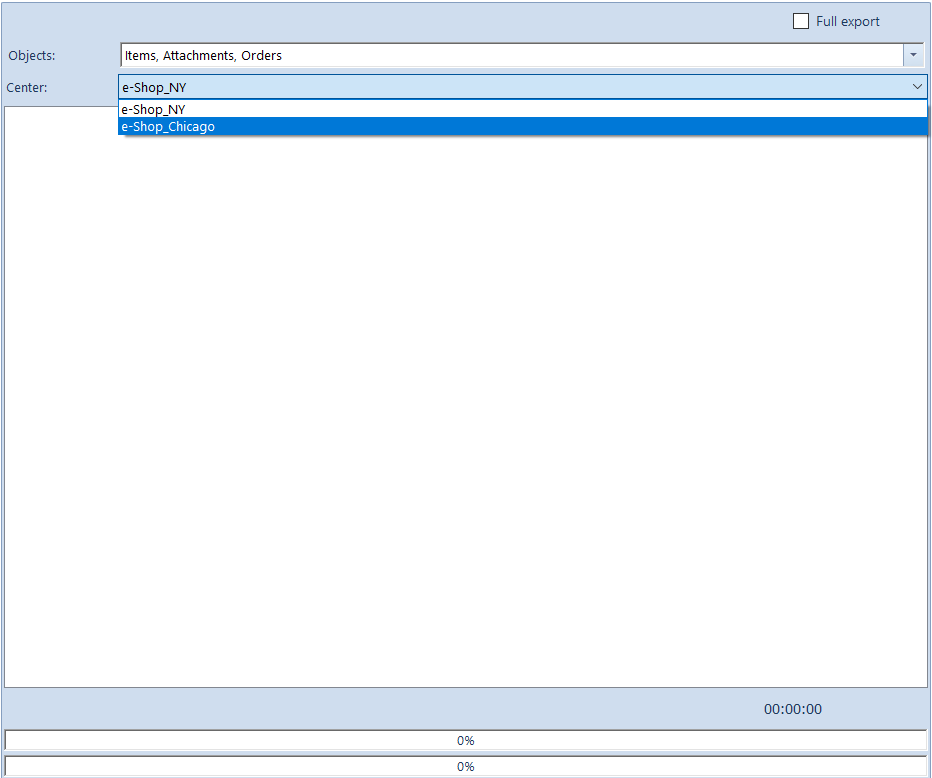
To start synchronization, in field Center select center of Comarch ERP e-Shop type for which the synchronization must be performed, determine objects to be synchronized and click on the button [Synchronize with Comarch ERP e-Shop] which is available in the Synchronization button group.

After starting the synchronization, all the information about the progress of the synchronization process will be displayed.

Upon properly completed synchronization, the items available in the item groups attached to the center as well as objects associated with them will appear on Comarch ERP e-Shop website. Depending on synchronization type, the selected objects will be completely updated – full synchronization, or the update will concern only those objects selected by a user, which have been modified in the system – differential synchronization. After making a purchase in Comarch ERP e-Shop, the following synchronization will create a sales order containing data provided by a customer and the selected items along with shipping costs.

An e-Shop customer is regularly informed about the processing of the order. A registered customer, upon logging in to his or her account in the e-Shop application, can preview status of an order in tab Orders of the Customer Profile. Registered as well as occasional customers are informed about the processing of an order via e-mail. Once the sales order is confirmed and synchronized, the order status is updated on the customer form accordingly. Changing of processing status is also updated when canceling or generating a sales invoice and closing the order.

Schedules

Automatic synchronization is based on defined schedules. Schedules are executed basing on synchronization parameters defined in a center of e-Shop type. To define schedules in Comarch ERP Standard, go to tab Subsidiaries and select option [Synchronization Schedules].

Then, a window opens which allows for, e.g.:

  • Verifying of existing synchronization schedules
  • Adding a new synchronization schedule
  • Deleting a synchronization schedule
  • Editing an existing synchronization schedule

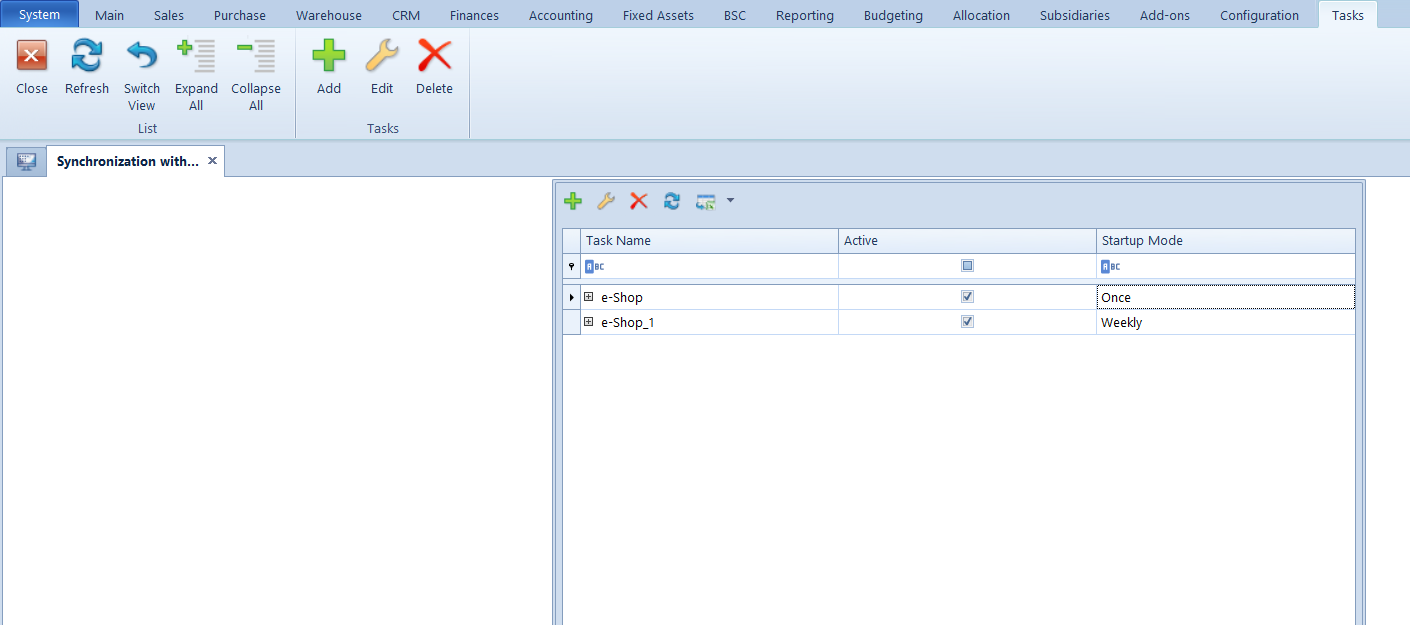
Upon clicking [Add] a window allowing for addition of a new synchronization schedule opens.

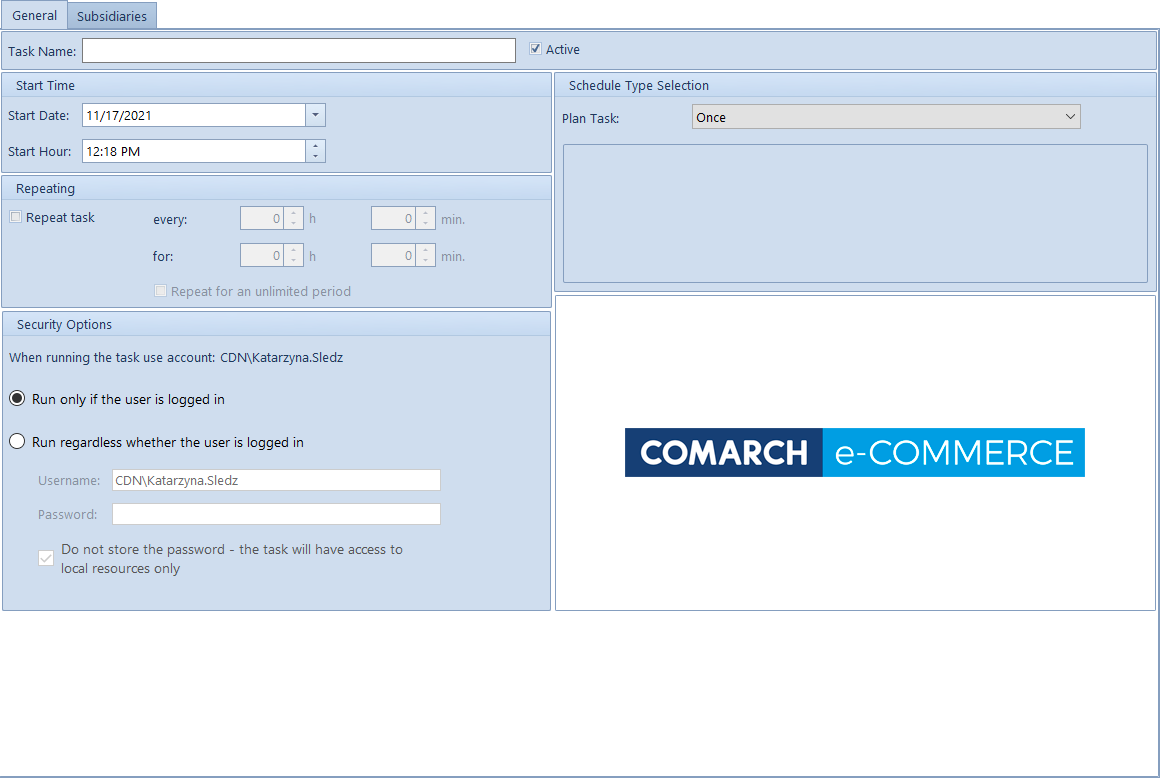
Tab General comprises the following sections:

Header:

  • Task Name – mandatory field. A user is obliged to specify name of the schedule being created
  • Active – parameter determining whether a schedule is active or not

Start Time:

  • Start Date – synchronization start date
  • Start Hour – synchronization start hour

Repeating:

  • Repeat Task – checking of this parameter allows for running of synchronization in specified time intervals. The following fields must be defined for this purpose:
    • every – how often (number of hours/minutes) the synchronization is to be carried
    • for – for how long the synchronization is to be carried out

Security Options:

Run only if the user is logged in – synchronization will be carried out only if a user is logged in

Run regardless whether the user is logged in – synchronization will be carried out regardless whether a user is logged in or not

Schedule Type Selection

Plan Task – determines frequency of synchronization schedule execution. A user can select from among the following options: Once, Daily, Weekly.

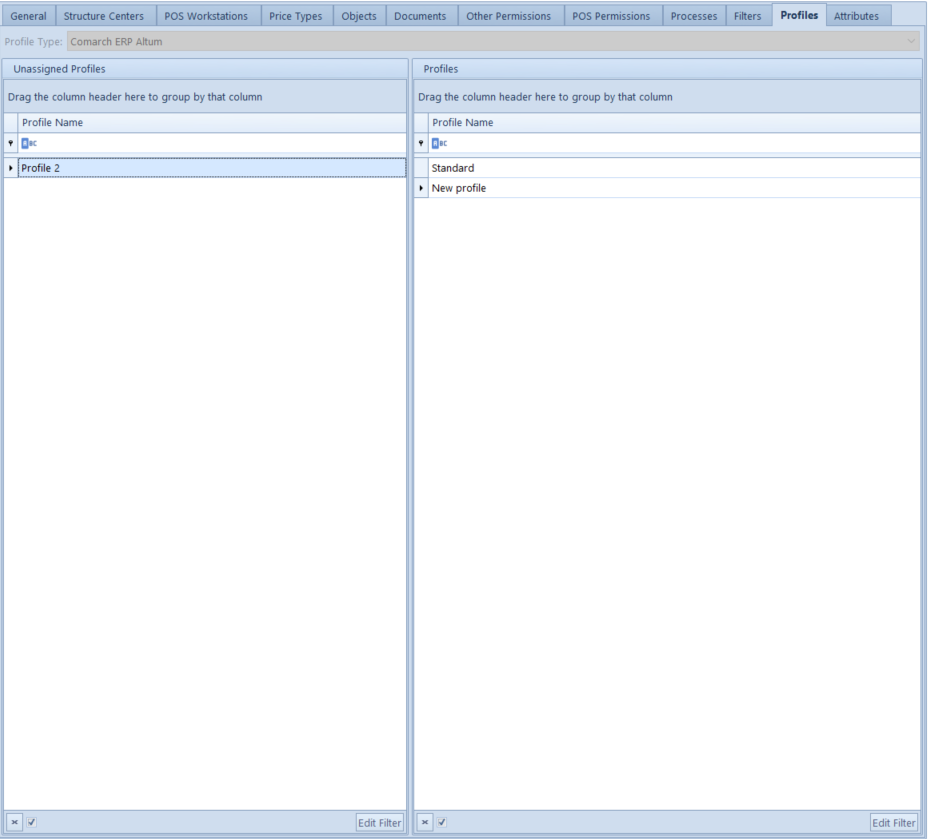
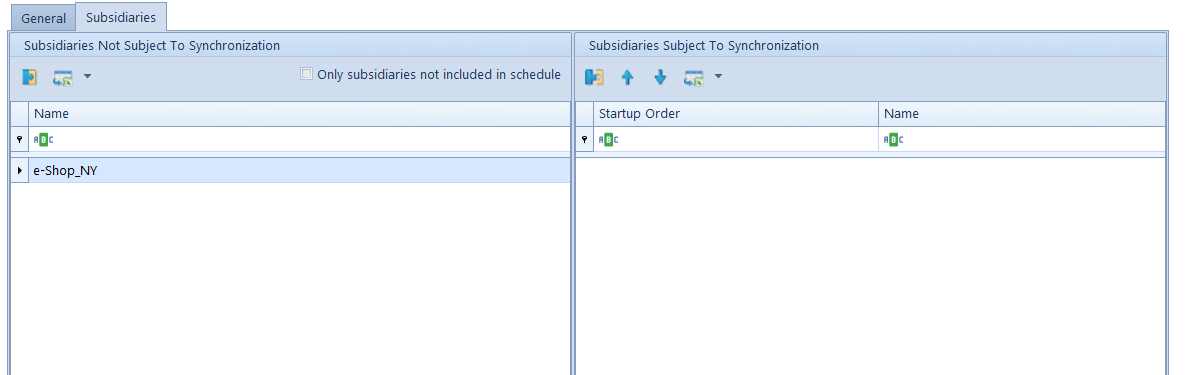
The other tab which must be specified is Subsidiaries tab. Section Subsidiaries Not Subject To Synchronization contains subsidiaries which are not included in the schedule being edited. In order to include a given subsidiary in the synchronization performed according to the schedule, mark that subsidiary in the mentioned section and click [Attach]. Then, appropriate entry appears in Subsidiaries Subject To Synchronization section. To remove association between the schedule and a subsidiary, click [Detach].

It is possible to define one schedule for several subsidiaries simultaneously. In order to set such synchronization, the subsidiaries selected in section Subsidiaries Not Subject To Synchronization must be assigned to Subsidiaries Subject To Synchronization section.

Multi-company approach

Comarch ERP Standard enables support of many e-Shops using one database. For each e-Shop it is necessary to add a structure center of Comarch ERP e-Shop type, according to chapter Creating a Comarch e-Shop center.

When generating an exchange key, it is necessary to indicate a center of Comarch ERP e-Shop type for which it is to be generated. Similarly, before synchronization is started, it is necessary to select a center of Comarch ERP e-Shop type for which it will be performed.

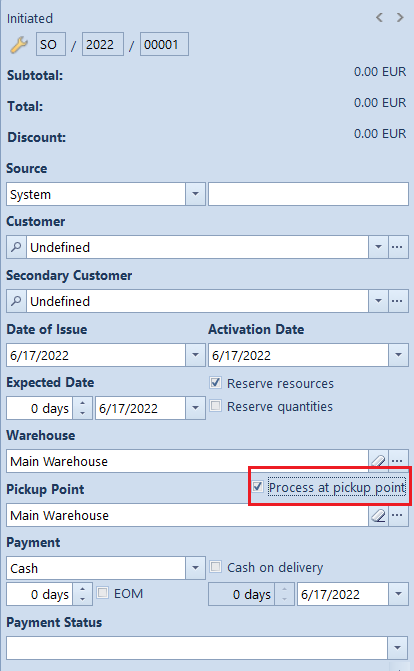
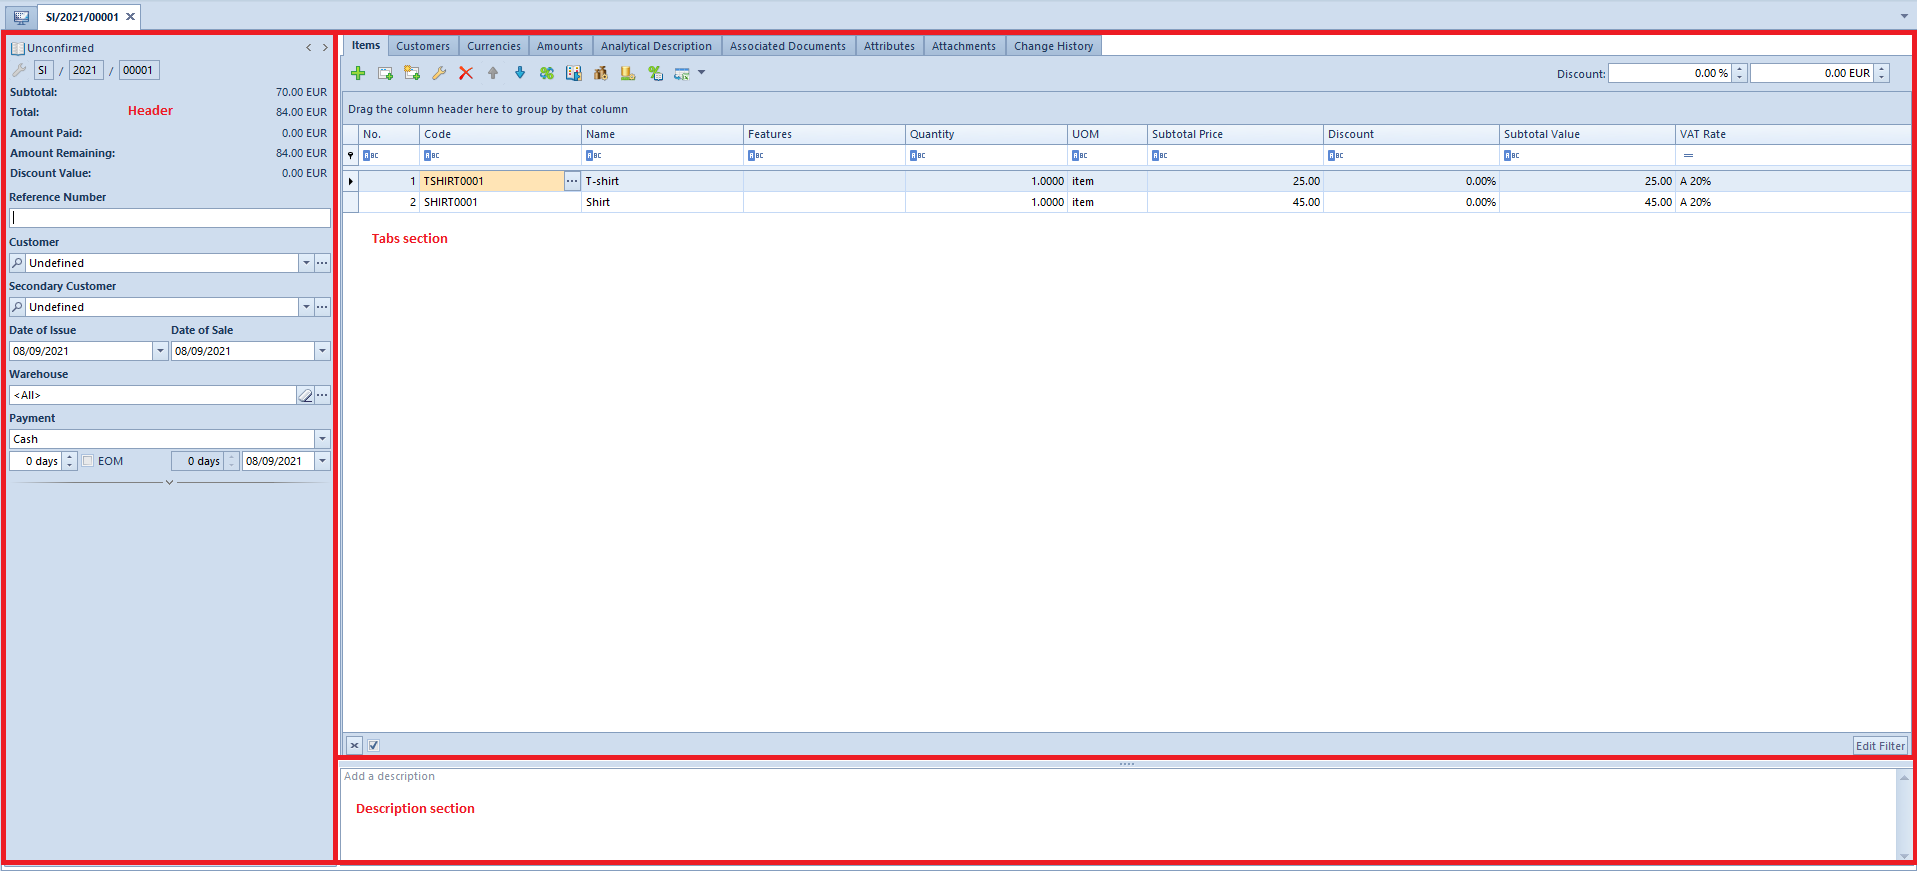
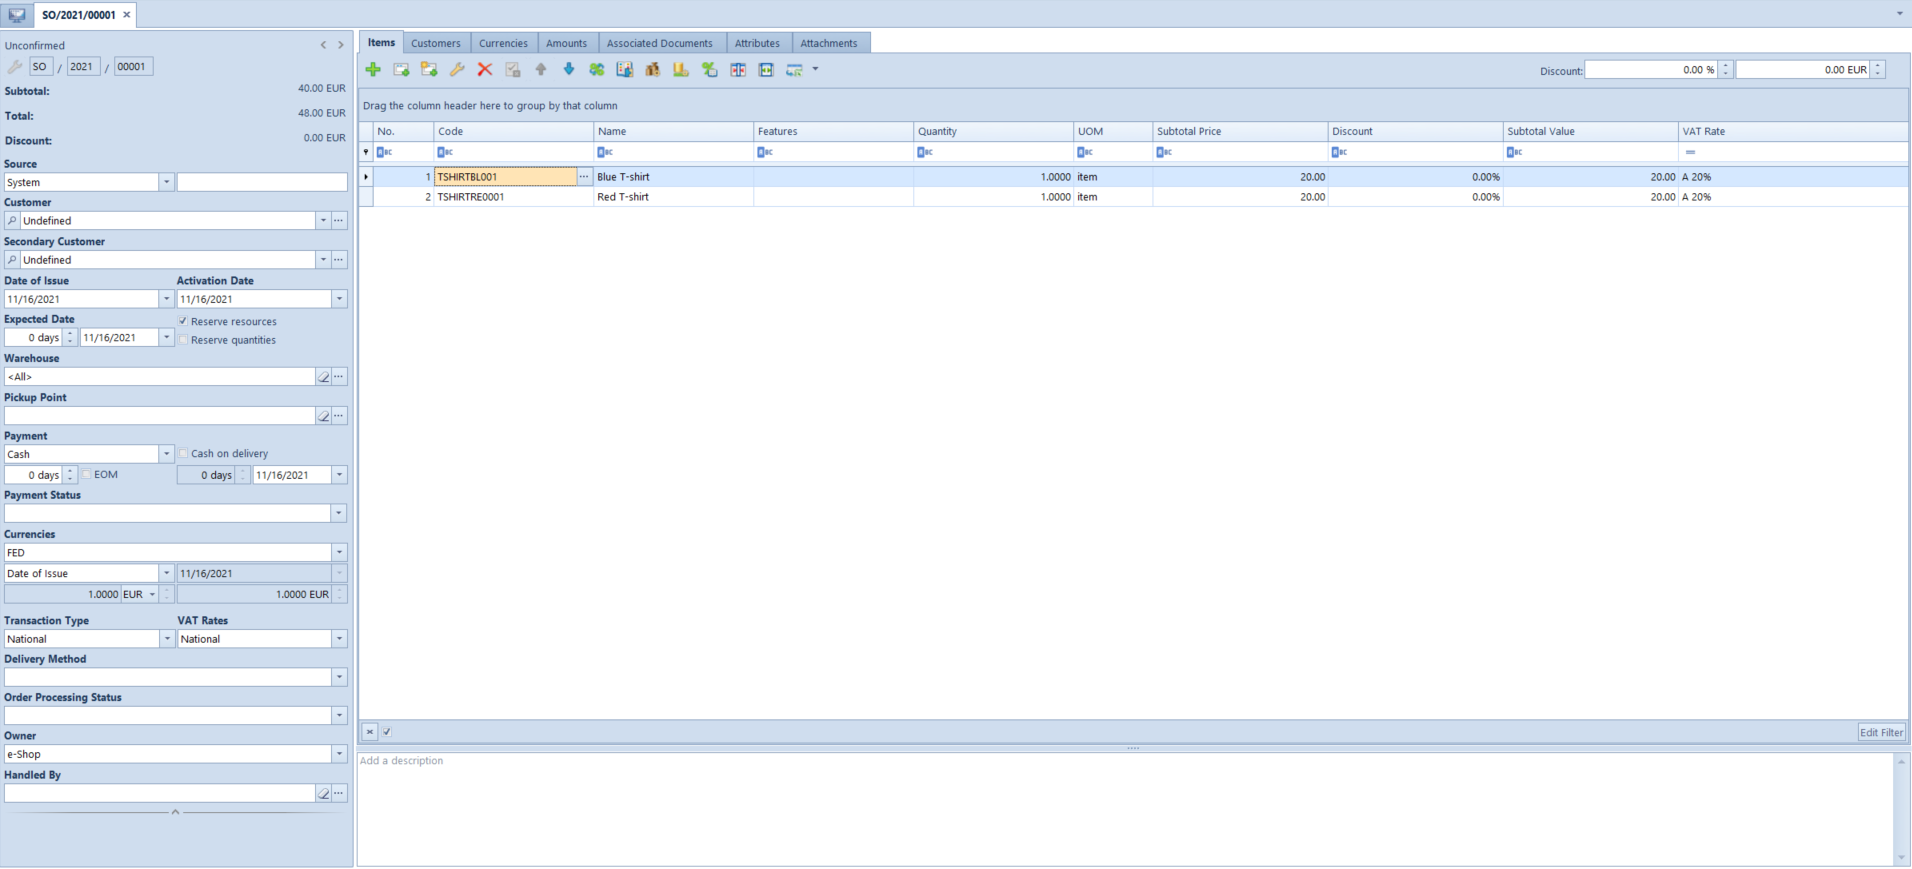
Taking receipt of orders from Comarch ERP e-Shop

All the orders registered in Comarch ERP e-Shop are registered in Comarch ERP Standard database on the list of SO documents. Orders receive a subsequent number in accordance with the SO numerator settings in a center of Comarch ERP e-Shop type.

Note
In demo version of Comarch ERP e-Shop it is not possible to take receipt of orders and to save them to Comarch ERP Standard database.

Date of order is uploaded from Comarch ERP e-Shop and it agrees with the order confirmation date. An expected date is always specified as current date.

Customer details are imported on the basis of the data filled out in Comarch ERP e-Shop under contact details.

Occasional customer

If a Comarch e-Shop customer does not have his/her account, that is did not register on the Comarch e-Shop website, such customer is considered an occasional customer. The data of that customer is uploaded to a SO document but customer form is not created in Comarch ERP Standard database. Occasional customer’s address data is saved on the form of Undefined customer and archived.

Registered customer

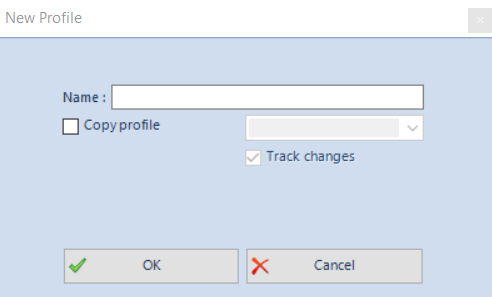
If an e-shop customer has his/her profile (account) in Comarch ERP e-Shop, then during the synchronization of his/her first order to Comarch ERP Standard, a new customer form is created for him/her in the ERP system. The customer forms receive a specific code that is composed of the e-Shop segment followed by a subsequent number, e.g., e-Shop153. Data registered on the customer form is retrieved from data entered by the e-Shop user during the registration.
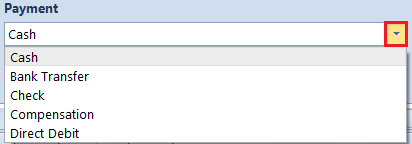
Payment form

The payment form is imported from the Comarch ERP e-Shop and set in accordance with payment configuration defined in Comarch ERP Standard.

Order items

Items included on an order are uploaded along with their prices from the order placed in Comarch ERP e-Shop. Prices are saved according to those that are uploaded from Comarch ERP e-Shop, regardless of the change of price list.

Hint
From the version 2019.1 of Comarch e-Shop, has been introduced the option of saving price list ID on order. Prices are saved in accordance with those saved from Comarch e-Shop regardless of price list change.

Delivery method

Methods of delivery are defined in Comarch ERP e-Shop application by a user (any number of new delivery methods can be added). To ensure successful synchronization of delivery methods, the same values must be added in appropriate generic directories in Comarch ERP Standard and in Comarch ERP e-Shop application integrated with it. If a value uploaded from e-Shop is not found in Comarch ERP Standard directory, method of delivery value will be empty on a synchronized order.

Freight/shipping costs

The costs related with the delivery of goods to a customer are included on an order synchronized from e-Shop. In order to properly include this data on the SO document, it is necessary to create a form of item of Service type with the price set to zero (the price is assigned automatically, depending on the selected shipping form) and then select this item as Shipping Costs Service in tab Synchronization on the form of a center of Comarch ERP e-Shop type.

Note
If service value on an order in Comarch ERP e-Shop equals 0, it will not be displayed on the order imported to Comarch ERP Standard.

Transaction description

A customer placing an order in Comarch ERP e-Shop may provide any comments which next will be copied to Description field on SO document.

Information about online payments

In Comarch ERP Standard, information about payments, their status and payment creation date are added to description of a sales order uploaded from Comarch ERP e-Shop.

Order confirmation

An order imported from Comarch ERP e-Shop is registered as unconfirmed. However, the document needs to be previously confirmed by the e-Shop customer and its status must be Expecting confirmation from e-Shop. If the order status is Expecting confirmation from customer, then it will not be imported to Comarch ERP Standard. After the order is registered in the ERP system and verified, it will be possible to confirm it. During the next synchronization, information about order confirmation will be uploaded to Comarch ERP e-Shop. The order will then receive the status Confirmed in the e-Shop.

The processing of order consists in generating trade or warehouse documents to the order. When synchronized to Comarch ERP e-Shop an order which has trade/warehouse documents assigned, the information about completing the order will be uploaded and the order status in e-Shop will change to Processed.

Note
If the processing of order needs to be canceled for any reasons, it is not enough just to delete the invoice or the SOR document. The order status in e-Shop will still remain as Processed. If the order is not to be processed, it is necessary to cancel the SO document. Information about canceling the order will be uploaded to Comarch ERP e-Shop.

Invoice to an order

An invoice printout, which is associated with an order issued in e-Shop, can be uploaded to Comarch ERP e-Shop in the form of pdf file.

In order to do so, add to the order an attachment in the form of pdf file of that invoice and mark that attachment as available in Comarch ERP e-Shop. During the next synchronization, it can be uploaded to Comarch ERP e-Shop.


Data Service synchronization logs

In Data Service synchronization logs, information regarding all objects uploaded from Comarch Retail POS to Comarch ERP Standard is saved. On the basis of such logs, it is possible to tell whether an object has been uploaded correctly or some errors occurred.

Service synchronization logs are saved in the path indicated in DS.exe.config file, which is available in the installation directory of Comarch ERP Standard, in LoggingDirectoryPath field.


Currencies

Parameter Sales in different currencies by currency exchange rate option allows for carrying out of transactions (sales) in all defined currencies. By default, in Comarch ERP Standard system denominations are defined for PLN, EUR and USD currencies. If a new currency is added in the system, it is possible to define appropriate denominations from the level of Configuration → Currencies. In order to do so, edit a currency and in tab Denominations enter data referring to denomination symbol, conversion calculator in relation to the unit denomination and, optionally, specify additional description. The entered changes must be saved. For the defined denominations to be available in the functionality of counting cash register balance, it is necessary to update data on a POS workstation or restart the application.

Currencies in the payment window

After displaying the payment window, amount from field To Be Paid will be automatically transferred to the field located above the numeric keyboard, owing to which the amount can be immediately changed by using the keyboard. Button [Assign] visible on the left side of the field allows for reassigning full amount to be paid. Amount is displayed in the system currency, by default. Currency can be changed by selecting other currency from a drop-down list of currencies available in the system. In such case, amount to be paid is displayed in the selected currency and its value is recalculated by exchange rate defined in Comarch ERP Standard system.

Assigning of amount to a payment form is performed by clicking on a tile with given payment form, e.g. [Cash] or [Bank Transfer]. In the payment window, there are all active payment forms displayed which were defined for the POS workstation. Deactivating a given payment form or detaching it from POS workstation makes it invisible in the payment window.

Payment in various currencies assigned to one payment form, e.g., Cash, will be presented as a sum of payments, separately for each currency.

Displaying of amount in field Remaining/Change depends on sum of all payments recalculated into the system currency. If amount to be paid is not assigned in full to the selected payment form, field above the numeric keyboard is automatically filled in with amount remaining to be paid.

Window of the start and of the end of the day

In the window of the start of the day, the beginning cash register balance for the Cash payment form is displayed within the currencies available in the system, The end of day window includes a list of all payment forms available on a POS workstation, displayed in division into available currencies

In the Cash Register Counting window displayed for Cash payment form, a user enters counted number of banknotes/coins in a given denomination which are stored in the cassette/drawer.

Cash deposits and withdrawals

Cash deposits and withdrawals in Comarch Retail POS application can be processed in different currencies (provided that an account supporting currency other than system currency was attached) in a selected form and issued for a customer or an employee.


Document types

Working with documents on POS workstations

To be able to preview, add, modify or delete a document on a POS workstation, the operator must possess appropriate permissions to objects which are granted in the Comarch ERP Standard system.

Depending on the setting of the parameter Method of Searching for Documents, available in the POS workstation configuration, in the Comarch ERP Standard system, documents can be searched:

  • locally, in the database of the POS workstation
  • locally and in the ERP system

After opening tab Documents on the form of a given center/company, it is possible to open for editing any document type in order configure different parameters which are used also on POS workstations, e.g., VAT direction.

Trade documents

Once the tile [Trade Documents] is selected, the application displays the list of all trade documents issued on a given POS workstation. To issue a receipt or invoice, it is necessary to click on the tile [New document].

In trade documents, the due date is set as the current date. In the case of payments without deposit, the due date is retrieved from the customer form (Trade tab) in the Comarch ERP Standard system.

To be able to add corrections of documents, the user must possess the permission Validation of refund which is granted in Comarch ERP Standard. It is not possible to confirm a correction without specifying it reason. Clicking on [Reason for Correction] button opens window for selecting values which are defined in Comarch ERP Standard system in Reason for Corrections generic directory.

Note
If parameter Allow exchange to items of lower value is unchecked for a given POS workstation and item of lower values is to be exchanged, the following message is displayed upon confirming the document: “Cannot confirm the exchange. Return value is greater than value of new items.”.

Orders and quotes

The list of available sales orders is displayed upon clicking on tile [Sales Orders and Quotes] in the main menu. In the case of sales orders, it is also possible to process orders issued originally in Comarch ERP Standard and Comarch e-Shop systems. This allows a user to comprehensively handle orders submitted by a customer in a given store or other subsidiary of a company or in online store. Moreover, Comarch Retail POS application enables full or partial processing of sales orders, in case if, for instance, a customer resigns from a given item or that item is not available in a warehouse.

Sales quotes issued in Comarch ERP Standard are handled both in Comarch ERP Standard and at POS workstations. It is not possible to retrieve quotes issued in a different store. All confirmed SO, issued in the center to which a given POS workstation is attached, are uploaded to that POS workstation from Comarch ERP Standard.

Sales orders from Comarch ERP Standard or issued in other subsidiaries (on other POS workstations) are visible on the list of sales orders if

  • their status is Confirmed, Processed or Pending and their owner is a center to which the given POS workstation is attached
  • center to which the given POS workstation is attached or a warehouse available in that center is specified as pickup point and their status is Confirmed, Processed or Pending
  • store/center to which the given POS workstation is attached is specified as pickup point and their status is Confirmed, Processed or Pending

Pickup point can be selected in the header of sales order form, both in Comarch ERP Standard and in Retail POS. Pickup points are defined in Comarch ERP Standard only.

If a sales order synchronized with a POS workstation is closed, canceled or modified in Comarch ERP Standard system, such changes are also synchronized to that POS workstation. Therefore, it is possible that order document with status Closed or Canceled is displayed on the list of sales orders in the application.

On a POS workstation, it is not possible to exclude order items from processing, but the user of the application can continue processing a document that has been modified in this way. Changes made in Comarch ERP Standard system that pertain to excluding items or modifications in a confirmed SO document are transferred to Comarch Retail POS. Modification of a confirmed order and excluding items from processing require a special permission.

Operations performed with regard to:

  • orders issued in Comarch Retail POS and synchronized in Comarch ERP Standard,
  • orders issued in Comarch ERP Standard and transferred to a POS workstation,
  • synchronized orders issued on another POS workstation,

require connection with Data Service. In the case of such orders, an attempt to:

  • change the status,
  • open,
  • close,
  • cancel,
  • generate a receipt, sales invoice, advance sales invoice,

will create online connection with Comarch ERP Standard in order to verify the possibility of performing a selected operation, to activate the blockade, and to retrieve the current version of the order. If the blockade of the sales order is active (activated on another workstation or in Comarch ERP Standard system), the user will receive the following message while trying to perform one of the abovementioned operations: “The operation cannot be performed. The document is being modified on another workstation”.

With the online handling active, order versions should be the most current in Comarch ERP Standard. Blocking an order while performing a particular operation guarantees that the order will not be meanwhile modified in a different place (from the level of Comarch ERP Standard or another POS workstation). The blockade is deactivated once the operation is finished.

If there is no connection, it is still possible to:

  • issue a new order, generate trade documents to it, and modify it
  • issue trade documents for an order synchronized from Comarch ERP Standard. These documents will not be associated with the order and advance invoices will not be created. However, in this case it will be possible to enter a given order number in a receipt or invoice, owing to which the associated documents could be easily identified later on

SO documents that have the status Unconfirmed are not synchronized on POS workstations.

If there is no connection with Data Service, the following message will be displayed upon generating trade documents to a synchronized sales order: “Connection with data service is not established. The document will not be associated with the order and advance payments will not be deducted. Would you like to continue?”. If the option Yes is selected, the generated document displays the number of a SO document in order to make it easier for the operator to associate the documents later.

Note
During the attempt to generate a trade document to a SO document for which a R/SI has been already generated in Comarch ERP Standard, the following message will be displayed: Cannot generate a document. The order has been changed on another workstation.

 Warehouse documents

The tile [Warehouse Documents] displays the list of warehouse documents issued in the Comarch ERP Standard system within a given POS workstations. The list contains both receipt and release documents.

Warehouse movement documents can be generated and handled between the Headquarters and warehouse subsidiaries in two ways:

  • By generating a WM- document in Comarch ERP Standard and processing it further at POS workstation. This option is used in companies running a central resource allocation unit
  • By generating a WM- document at POS workstation for both the Headquarters’ warehouse and other subsidiary warehouses. If this is the case, movements of warehouse releases and receipts are handled at POS workstation

A single warehouse can only be available for WM- documents within a single center to which POS workstations are attached. More information regarding sharing a warehouse for WM- documents can be found in article Adding new POS workstation.

For WM-/WM+ document to be uploaded to POS workstation, it should fulfill one of the following conditions:

  • WM- is unconfirmed with selected parameter Process in POS and a source warehouse associated with a WM- document issued in the center to which POS is attached
  • WM- is confirmed with a source warehouse assigned to a WM- document in the center to which POS is attached. In this case, uploading of certain quantity from a shop is forced by the Headquarters
  • WM- is confirmed and issued for a target warehouse in the center to which POS is attached. The warehouse must be assigned to WM+ document in the same center
  • WM+ is confirmed and issued for a target warehouse assigned to WM+ document in the center to which POS is attached

The functionality of receiving and releasing deliveries is available for users having permissions to modify warehouse movement documents and receiving and delivery report (in case of receiving deliveries).

A WM- document, issued in Comarch ERP Standard, receives appropriate document number. During its confirmation in POS, it is renumbered according to the POS numbering. Its previous number is registered in Source Number field, which makes possible to find the associated WM- documents both at POS workstation and in Comarch ERP Standard.

Cash register documents

The list of CD/CW includes all cash register deposits (CD) and cash register withdrawals (CW) issued manually on a POS workstation, that is, not associated with a trade document, e.g., a receipt or a sales invoice.


Context scanning

Comarch Retail POS, it is possible to identify a scanned object based on a code format defined for it.

Example
A trade document is issued, and the operator scans a customer’s card. It results in the automatic assignment of this customer to the active document. Scanning a card in a different place in the application opens the customer form.

The section POS Workstations on the ribbon (in the tab POS Workstations available upon editing a center of the Company type) has been provided with a new button [Barcode Templates].

Barcode Templates button

Selecting this button opens a list enabling the definition of code format templates for particular objects. Code formats have the form of a regular expression. The list is composed of three columns:

  • Object Name – a selection field for the available types of objects: Item, Document, Customer, Voucher, Employee
  • Code Format – a text field where a regular expression can be entered
  • – this column is hidden by default

 Code format templates are defined within a company, and once they are saved, they are automatically sent to all POS workstations attached to centers subsidiary to a given company.

Note
If barcode templates are configured for the parent company, they will not be sent to subsidiary centers of the Company type.

Note
Places  where scanning an object barcode will not result in any action are:

  • Logon screen
  • Modal windows (e.g. messages, adding customer address)
  • The view of starting/ending a day (unless a customer is scanned)

Except for defining code formats, it is also necessary to activate the functionality of context scanning by selecting a relevant parameter on the center form in the tab POS Workstations.

Parameter Scan barcodes according to context

Context scanning of a customer

If a customer code is scanned:

  • The indicated customer is added as Customer/Secondary Customer in a document (R, SI, SQ, SO, ASI, SCL, TF, or in a manual correction). Context scanning for the Customer object is deactivated in the case of export confirmations in TF documents
  • The indicated customer is added to CD/CW documents as Payer
  • The indicated customer should be searched on the list of customers
  • The indicated customer’s form will open in any other place in the preview mode

Context scanning of an item

If an item code (or lot number) is scanned:

  • The indicated item should be searched on the list of items
  • In any other place, the application will open the list of items narrowed down to the selected item/lot
  • The indicated item will be added as a document item in a document (it does not refer to TF documents)

Upon scanning a lot number in the window Select Properties (feature selection), the application will search for a relevant lot of a given item and substitute it on the list of document items.


Context scanning of an employee

If an employee/operator card is scanned:

  • The indicated employee will be added in the field Handled By in R, SI, corrections, SO, SQ, WM-, RDR, CD, CW, ASI, SCL, TF
  • The indicated employee will be added in the field Handled By in the window of starting/ending a day
  • In any other place, this action will not give any results

Note
Scanning an employee will not select him/her in the field Payer in CD/CW documents.


Context scanning of a document

If a document number is scanned:

  • The indicated document will be searched on the list of documents of a given type
  • The document will be searched locally in any other place (also among parked documents). After the search, a window with the preview of a given document will be displayed. If the searched document is parked, it will be opened in the editing mode.

Context scanning of a voucher

If a voucher is scanned (as long as it is not associated with a customer as a loyalty card):

  • In a trade document, the voucher will be added as an item for sale
  • In CD/CW documents, payment form will be defined as Own voucher
  • In the payment window the application will open the window of adding own vouchers and the indicated voucher will be added to it
  • In other places of the system, the list of items narrowed down to the indicated voucher is opened


If a voucher associated with a customer as a loyalty card is scanned (in the same way as a customer code):

  • In documents, the customer associated with the indicated voucher will be set as Customer/Secondary Customer
  • In other places of the system, the application opens for preview the form of of the selected customer


Drawer configuration

Tile [Open Drawer] allows for opening cash register drawer directly from the level of Comarch Retail POS application. In order to take advantage of this functionality, it is necessary define a device of Drawer type from the level of Configuration → External Devices and select the defined device in the configuration of POS workstation in Comarch ERP Standard system. Next, it is necessary to check parameter User drawer, available in the configuration of a given POS workstation.


Configuration of basic items

The functionality of base products allows a user to associate items which are differentiated by some feature (e.g. size, color) in case separate item forms are created for each of these items. Base products are related through a grouping attribute assigned to items and by relation of Base Product type.

To be able to display grouped items in dependence of a given feature, parameter Grouping must be checked for a given attribute from the level of Configuration → Attributes in Comarch ERP Standard system.

A grouping attribute can be an attribute of List or Text type. Such attribute must have parameter Preview selected in Retail POS section.

Note
The first grouping attribute should be an attribute marking a feature which distinguishes items within a given group. That attribute will determine selection of subsequent grouping attributes.

Grouping parameter for an attribute

Note
Information about adding and defining of attributes can be found in article Defining attribute.

After a grouping attribute is defined, items must be related with Base Product relation type. An item determined by this type of relation becomes parent for item related to it. Only one item in a group can be parent to others. An item already having a parent item cannot be a base item.

Example
A company sells short sleeve shirts which come in various patterns. Depending on selected pattern, different discount is granted.

In Comarch ERP Standard system, attribute Pattern of type Text is defined and it has parameter Grouping checked as well as option Preview in section Retail POS.

In the system, there is item Shirt available as well as items with attached Pattern attribute:

  • White regular short sleeve shirt. Value of Pattern attribute: White Regular
  • Red check short sleeve shirt. Value of Pattern attribute: Red Check
  • Blue check short sleeve shirt. Value of Pattern attribute: Blue Check
  • Pale blue regular short sleeve shirt. Value of Pattern attribute: Pale Blue Regular
  • Black regular short sleeve shirt. Value of Pattern attribute: Black Regular

White regular short sleeve shirt item is related to other items with relation of Base Product type.

Item Shirt is related with item White regular short sleeve shirt with relation of Substitute type.

Item Red check short sleeve shirt has 15 % discount defined.

Upon adding item Shirt onto a trade document, in related items section there is item White regular short sleeve shirt presented. After selecting that item, a window with selection of Pattern attribute values is displayed.

Upon selecting a value, e.g. Red Check, item Red check short sleeve shirt is added onto a document with 15 % discount.


Customers

Availability

The tile [Customers], available in the main menu or in the side menu, displays the list of active customers defined in company database of Comarch ERP Standard system and shared on the POS workstation. All classification categories of customer groups active in ERP system are synchronized to the application. The user can define his/her customer classification categories, form the level of generic directory General  → Customers/Vendors Classification Categories. Sharing of a classification category is possible in Comarch ERP Standard from the level of Configuration → Company Structure → Object availability, after indicating an appropriate center and Customer/Vendor Groups.
From the level of the list of customers in Comarch Retail POS, it is possible to add new customers or edit already existing ones as well as add new and change current address of a selected customer. These options are available only for users having POS permission Addition and edition of a customer assigned for the POS workstation.

Note
If in Comarch ERP Standard, on the form of a given customer, in the tab Availability, parameter Modification is unchecked for the center to which POS belongs, then, when trying to edit that customer, the following message will be displayed on the POS: Insufficient permissions to edit customer [Customer name].

Note
In case of in case the parameter Addition and edition of a customer is unchecked on the group of operators, the permission in the tab POS Permissions gets automatically unchecked. Addition and edition of a customer.

Consents

Consents defined in Comarch ERP Standard system are presented when adding/editing cusomers in Comarch Retail POS.
The possibility of <<registering consents on the POS workstation>> depends on whether a currently logged-in operator has an appropriate permission granted.

Credit limit

The functionality of credit limit allows a user to issue trade documents for a customer with specified credit limit without the necessity to register payment.
Credit limit handling for a POS workstation is configured in Comarch ERP Standard system in the POS Workstations tab.  More information regarding configuration can be found in article <<Configuration parameters>>
Settings concerning credit limit amount and its validity dates are uploaded from tab Credit Limits of a customer form in Comarch ERP Standard system.
Behavior of the Comarch Retail POS application in case of exceeding credit limit for a customer can be set for document definitions available from the level of Configuration → Company Structure → Rights Strucutre after opening for editing the center to which the POS workstation belongs and opening the Documents tab. In the tab General, for Control of Credit Limit During Document Confirmation parameter, it is necessary to select one of the following options:

  • Don’t control – confirming document without checking credit limit of the customer for which it is being issued
  • Warn – in case a customer does not enough funds to cover the debt, a message informing about exceeding the limit will be displayed
  • Block – confirmation of a document issued for a customer whose credit limit has been exceeded will be impossible
    Parameter Control of Credit Limit During Document Confirmation on the definition of SI document Changing the settings of control of credit limit is available for Receipt (R), Sales invoice (SI) and Sales order (SO) document types.

Information regarding customer’s credit limit is presented in the application, on a customer form, in Credit limit section, as two fields: Maximum Limit and Available Limit  fields: Maximum Limit and Available Limit. In the case of open credit limit, the following information is displayed for both fields: Open
In a trade document upon specifying a customer as well as in the payment confirmation window, depending on setting of Presentation of Available Credit Limit, value of available limit is decreased when adding amount for payment form in the payment window, decreased when adding an item or is not presented. The same applies to a correction document, but in this case, amount value is increased.

Note
To enable payments with the use of a credit limit on a POS workstation, it is necessary to open the configuration of POS workstations belonging to a given center in Comarch ERP Standard system and select a specific payment form in the field Payment Forms without Deposit.

Note
In case handling of credit limit is enabled, payment forms without deposit are presented in the payment window for a customer assigned with credit limit.  In turn, if a customer does not have credit limit granted, those payment forms are not displayed.

Handling of credit limit on a POS workstation requires on-line mode. Specifying the time since the last connection to the synchronization service after which the handling of the credit limit should be blocked, it possible thanks to Max Time Since Last Synchronization (m) parameter, which is available in Comarch ERP Standard, in the configuration of POS workstations for a given center.

Default customer group

From the level of Comarch ERP Standard system, the operator can define default customer/vendor groups within each classification category.  By means of a default customer group, the operator may determine a group to which customers created in Comarch Retail POS are to be added.
The user can mark a group as the default one for a given category in a center’s Object Availability menu, in the object Customer/Vendor Groups. On the list, it is necessary to select the checkbox in the column Default of the Groups window.

Default customer group in Object’s availability

Reverse charge

The reverse charge functionality allows the user to transfer the responsibility for paying a transaction tax from the vendor to the customer. The Handle reverse charge parameter activating the functionality in Comarch ERP Standard system is available from the level of System → Configuration → Trade, in section General Parameters>.  Upon its selection, on the form of customer parameter Reverse charge is available.

Note
The parameter can no longer be deactivated once synchronization with Comarch Retail POS is performed.

In Comarch Retail POS, a VAT rate for an item subject to reverse charge is set according to the configuration of the parameter VAT rate for reverse charge available in Comarch ERP Standard system from the level of Configuration → VAT Rates.

Due Date

In the case of payments without deposit, the due date is retrieved from the customer form, from Trade tab.

Setting default due date on a customer form

Price types

Detailed description regarding sharing of price types in specific centers can be found in article Object availability.
For each customer, it is possible to specify the availability of a given price type. More information regarding price types can be found in articles Price types for received items and Price types for released items
An operator logged-in to a given POS worksation can see only those price types which are assigned to the center to which that POS workstation belongs and, at the same time, are associated with a group or groups of operators to which that operator belongs.
If a price type does not have any customers assigned and it gets marked as default in a given center, then, a newly added customer on the POS workstation is automatically assigned to that price type.

Personal data anonymization

Anonymization of customer’s personal data is available from the level of Comarch ERP Standard. More information regarding performing of the operation on a POS workstation is available in article Personal data anonymization. Configuration instructions for this functionality cna be found in article Personal data anonymization.


Profiles

All changes made in interface configuration and views are saved in themes. It is not possible to change default theme for Comarch Retail POS application. When attempting to save the entered modifications of that theme with the use of [Save] button, the following message is presented: “Cannot edit the default theme. Changes will be saved as its copy.”. Then, name with which a theme will be saved must be specified in the displayed window.

Clicking on button [New Theme] allows for entering name of a new local theme, that is a theme available only on given POS workstation. To make a local theme available for selection on other POS workstations, click on button [Export Theme] and select folder in which file with .layout extension will be saved. Next, in Comarch ERP Standard, edit center to which the theme should be imported and go to tab POS Workstations. In the main menu select button [POS Profiles] which opens configuration window of POS profiles. With the use of [Import from ZIP] button, it is possible to select the file with saved Comarch Retail POS theme. The selected profile will be displayed on the list on the left side of the window. The right window part is divided into sections including operator groups assigned and not assigned to the profile. In order to attach or detach a group from profile, mark such group and click on button [Attach]/[Detach].

POS profiles configuration window

After performing synchronization between Comarch ERP Standard system and Comarch Retail POS application, operator included in a group assigned to the selected profile can select the saved theme in the interface configuration of a POS workstation.


Discounts

The list of discounts handled in Comarch POS is available in article Discounts. Discounts are defined in Comarch ERP Standard.
Rules and order of discount calculation are described in article Discounts – General information.
To define a new discount, it is neccessary to select in Comarch ERP Standard Sales → Discounts and add new discount. In Discount Type field, te user selects one of discount types available in the system, depending on the type of defined promotion.

Defining new discount in Comarch ERP Standard

The method of calculating bundle promotions is determined by parameters in definitions of the following document types: Receipt (R), Sales Invoice (SI), Sales Quote (SQ) and Sales Order (SO).  To change the value of parameter Handle bundle promotions, edit a given center, select R, SI, SQ or SO document type in tab Documents and then, choose one of the following value for the parameter in section Document Parameters of a given definition:

  • Automatically when adding items – calculated bundles are verified each time upon adding an item. Default value.
  • Manually – bundle discounts are calculated only after clicking on the button [Calculate Promotions]

In the case where the Handle bundle promotions parameter is deselected in a document definition (SQ, SO, SI, R), bundle promotions are not calculated in a given document type – the system does not verify items, during their addition, in terms of applied bundle promotions Discounts are not calculated when confirming or modifying data in a document.


Attributes

Attributes are used for collecting additional information about the following objects existing in Comarch Retail POS application: customer, item, trade document, correction, complaint, CD/CW.
An attribute will be available for previewing/editing on a POS workstation if parameter Preview/Edition is checked in the attribute definition in section Retail POS from the level of Configuration → Attributes in Comarch ERP Standard system. Checking parameter Edition automatically checks the Preview option.

Area Comarch POS on the form of attribute

Highlighted Retail POS section in the form for adding/editing attribute

The following types of attributes are handles on POS workstation:

  • Text
  • Number
  • List
  • Date
  • Logic Value
  • Directory

Note
By default, attributes are not shown in customer form. In order to display them, relevant view must be modified. Modification of a view is described in category Layout management.

Note
Polyvalent attributes are not handled at POS workstations.

Document attributes

From the level of trade or complaint document views, there is a field available which presents attributes assigned to a document type.  Attributes with checked option Retail POS – Preview will be displayed in the application without the possibility to edit their value, whereas value of those with option Retail POS – Preview and Edition will be editable. Values of attributes synchronized to Comarch ERP Standard system are visible when previewing a given document.
Comarch Retail POS application is equipped with functionality of transferring values of attributes from customer form onto a document or from item form onto a document item. In case of transferring attributes from customer form onto a document, it is necessary to attach the same attributes both to the customer form and the document. Value specified for an attribute on customer form is rewritten when that customer is selected in a document. In case a user has previously specified values of those attributes in a document, then changes the customer and updates that data, the values of shared attributes will change to values specified in the customer form. Other values of document attributes will not be changed.

Transferring of attributes from an item form onto a document item is performed the same way. The condition which must be fulfilled is that the same attributes along with their values specified are attached both to item form and document item. Transferring of values takes place while an item is added onto a document. However, values of attributes transferred from item are not editable.

The functionality of transferring attributes is also available when generating invoices from receipts and creating corrections to receipts and invoices. Values of attributes are transferred from a source document and its items into a generated document and its items only for attributes attached to both type of documents or document items. Attribute values transferred onto target document are not editable.

In case of attributes with checked option Required, it is not be possible to confirm a document without specifying values for them. Then, the following message is displayed: “Fill in field [attribute_name]”. When modifying layout of a view, it is possible to determine a given attribute as required.


Items

Availability

Selecting [Items] tile in the main window or from a side menu displays the list of items defined in Comarch ERP Standard system which are shared for the structure center to which a given POS workstation is attached. The application synchronizes all item group classification categories that are active in Comarch ERP Standard system. The user can define new item classification groups in generic directory General → Item Classification Categories. A category can be made available in Comarch ERP Standard from the level of Configuration → Company Structure → Object Availability, after selecting an appropriate center and Item Group object.

Sets

Comarch ERP Retail handles items of the Set type in trade and warehouse documents. Sets are defined in ComArch ERP Standard system. Because of differences in handling, it is possible to specify two types of sets:

  • Items of the Set type with the parameter Retrieve elements onto document selected
  • Items of the Set type with the parameter Retrieve elements onto document deselected

Description of the above-mentioned items of Set type can be found in article Item of Set type.

Buy-back

This functionality allows a user to buy back items appropriately marked in the system.

The parameter Handle buy-back enabling this functionality in Comarch ERP Standard system is available in Comarch ERP Standard, from the level System → Configuration → Trade, in section Items. If this parameter is checked, the parameter Buy-back is available on item form, enabling the user to determine a given item as merchandise or service subject to buy-back.

An operator can confirm a sales document including items of Buy-back type only if possesses Confirm buy-back permission, which is granted in Comarch ERP Standard system, in tab POS Permissions, upon opening his/her group for edition.

Reverse charge

The reverse charge functionality allows the user to transfer the responsibility for paying a transaction tax from the vendor to the customer.

The Handle reverse charge parameter activating the functionality of reverse charge in Comarch ERP Standard system is available from the level of SystemConfigurationTrade. Once it is selected, the Reverse charge parameter is displayed on the item and customer/vendor form.

Note
The parameter can no longer be deactivated once synchronization with Comarch Retail POS is performed.

In Comarch Retail POS, a VAT rate for an item subject to reverse charge is set according to the configuration of the parameter VAT rate for reverse charge available in Comarch ERP Standard system from the level of Configuration VAT Rates.

Images

Item images presented in Comarch Retail POS are defined in Attachment’s tab, available on item form. Defining of new attachments has been described in article <<Defining new attachment>>. An appropriate attachment must be <<assigned to an item>>. It is also necessary to specify the availability of the attachment, by checking Retail parameter on the list of attachments. To display one of the photos as a thumbnail, it is necessary to set the parameter in the Retail column as default for it. An attachment is set as default for an item by triple-clicking in the checkbox, which checks and frames the parameter.

Analytical group of items

<<Sales per item group>> is configured in Comarch ERP Standard system from the level of Object Availability à Item Groups. In order to present information for a given item group in a POS workstation summary which is created on a POS workstation, it is necessary to select a checkbox in a relevant row of the column POS Analytical Group.

POS Analytical Group column displayed for the object Item Groups

Editing item name on unconfirmed document

At POS workstations, it is possible to <<change the name of an item>> in unconfirmed R, SI, SO, and SQ documents, and in manual correction. If the parameter Edit item name has been selected on the form of a given item, the user may change the item name displayed in a document. To do so, it is necessary to check parameter Edit item name on the <<form of a given item>>.

A modified name is available only in a document in which it has been entered and documents generated from it later. For more information about editing item name in unconfirmed documents, refer to <<Name edition>> article.

Features

Items with a defined feature (affecting lots) are presented as separate list items for each lot.

<<Features are defined>> in Comarch ERP Standard, on item form, in Parameters tab. More information regarding selecting of item features on an issued document can be found in article <<Selecting lot features>>.

<<Text filter>> field available on the list of items allows for searching items basing on defined features.

Barcodes

Item barcodes which uniquely identify items and allow for scanning them with the use of SKANER?, are defined in Comarch ERP Standard system, on item form, in Parameters -> Codes tab.

Related items

The functionality of related items allows for associating items which are often sold together. <<Associations between items are created>> in Comarch ERP Standard.

<<Related items>> are presented in Comarch Retail POS for a selected item of a document being issued, in the workspace on the right side of the window. This section will not be displayed if a selected item does not have related items defined.


DS synchronization service configuration

Operator to POS workstation

An operator, in order to be able to log in to a POS workstation, must fulfill the following criteria:

  • Belong to a group of operators available in the Operators, in section Groups.
  • Be of Universal or External type
  • Be associated with an employee
  • Have external password set

Note
A user, with the help of whom the data service connects to the database, must be able to log on to all POS workstations and belong to the group of Comarch ERP Standard administrators (by default, it is B2_admin group).

Note
For databases converted from versions previous to 2016.5.5, external password must be defined for an operator.  To do so, go to Configuration → Company Structure → Operators, select a given operator and click [Change Password/PIN].

Note
In case more than one operator has the same employee assigned, when converting system to version 2016.5 or higher, such operators will have Internal type assigned and they will not be able to log in to the Comarch Retail POS application.

Service configuration

Comarch Retail POS Data Service is used for synchronizing data between databases of Comarch ERP Standard system and Comarch Retail POS application.  Moreover, through that service, it is possible to verify availability of items in other warehouses/other stores or pay with the use of vouchers.
Comarch Retail POS Data Service is configured with the use of Comarch ERP Standard configuration tool, which is started from the Windows start menu or directly in Comarch ERP Standard setup directory by NewAltumConfigurator.exe file.
Upon running Comarch ERP Standard configuration tool, the language selection window is displayed.

Language selection window

Upon selecting appropriate language version of the configuration tool, first go to tab Key Server in order to the server details, on which Comarch ERP Standard is installed and a license number.

Server Key tab

Next, go to tab POS Data Service in order to configure the service for POS.

POS Data Service tab

In Database section, it is necessary to specify:

  • Server – name of SQL server or its IP, on which company database of Comarch ERP Standard system is stored
  • SQL Login – login to SQL server having administrator permissions
  • Password
  • Database – Comarch ERP Standard company database

In section General, it is necessary to specify:

  • Language – Comarch Retail POS Data Service culture language
  • Log Directory – access path to directory in which service logs will be saved
  • Port – port on which the service is running and through which POS workstation connects to the data service. It must be noted that the port cannot be blocked, for instance, by Windows firewall
  • Operation Timeout (S) – this parameter determines maximum time of the service operation. It is defined in seconds and its default value is set to 3600 seconds

In section Attachments, there is parameter

  • Thumbnail Size – allows for setting height and width of image thumbnail in pixels.

In section Document Processing Notifications, it is necessary to specify:

  • Recipient Address(es) – mail address(es) of recipient(s), to which messages are to be sent
  • SMTP Server – address of a mail server, to which the user logs in with a login and password
  • SMTP Server Port – a number used by the outgoing mail server during communication
  • SSL – communication is encrypted with the use of SSL certificates. This parameter is deselected by default
  • User – mail address which will be used to send messages
  • Password – password used to access relevant mail account

The functionality of document processing notification enables the user to receive e-mail messages about errors upon document synchronization.

After all the mandatory fields are filled in, configuration of the service must be saved. From the level of Services tab, it is possible to manage Comarch Retail POS Data Service, that is: refresh, install, run, stop or uninstall it. If any changes are made, it is necessary to restart the service.

Service synchronization logs are saved in C:\Retail\DS2\Logs path.

Tab Services


Adding new POS workstation

Necessary requirements

POS workstation is added in Comarch ERP Standard system, in POS workstation tab, which is available on the form of company or local center edition. Before adding a POS workstation, it is necessary to define objects, such us cash-bank accounts or numeration series which are necessary to be able to work with the application.

Cash-bank accounts

For the purpose of financial registration, it is required for each POS workstation to define separate cash-bank   accounts. In order to do so, from the level of Finances → C/B Accounts it is necessary to add new cash and bank account with column Sort set to Local.

Example of cash-bank accounts for a POS workstation

Next, it is necessary to attach defined accounts to the center for which the POS workstation is being defined. It can be done from the level of Objects Availability, available after opening a selected center to editing. A separated cash/bank account must be defined for each POS workstation.

Series

A separate series for POS workstation must be defined in order to maintain unique numeration of documents in the system and to identify easily a point of sale at which a given document was issued.  Series is added from the level of Configuration → Series. The same as in case of cash-bank accounts, a new series must have option Local set in Type column.  Additionally, option POS must be selected in column Application.

Example of a series for a POS workstation

Also in this case, a series must be made available for the center for which the POS workstation for which the POS workstation is being created. It must be remembered that attached series must be edited in order to assign document types for which it will be available. If this operation is no performed, when saving a newly added POS workstation, the following message is displayed: “NOTE! Not all the document types required at POS workstation have been assigned to selected series [series name]. It may not be possible to continue working at this point of sale. Would you like to assign those document types now?”. Upon selecting option [Yes], document types are assigned automatically by the system.

Warehouse for WM- documents

Creation of a POS workstation is only possible upon assigning a dedicated warehouse to it. The assignment can be done from the level of the Objects Availability for Warehouses object. Otherwise, when saving a newly created POS workstation, the following blocking message is displayed: “Cannot save the POS workstation. A warehouse dedicated for center [center name] is missing. To save the POS workstation it is necessary to assign a warehouse to the center.
To enable creating of new WM- documents on the POS workstation, it is necessary to assign the target warehouse to it. To do so, open tab Warehouse -> Warehouses and open selected warehouse for edition. Next, in POS Target Warehouse (?) tab, attach selected center to the list. If no warehouse is assigned to the center, the following message is displayed when saving a newly created POS workstation in it: “NOTE! No target warehouse has been assigned to the WM- document. It will not be possible to create new WM- documents. Would you like to automatically assign all warehouses available for a given company?” Upon selecting [Yes], the system will automatically assign all available warehouses.
A warehouse can be available for WM- documents only in one of the centers to which POS workstations are attached. From the level of the Object Availability, when trying to share WM- documents for a given warehouse in another center with POS workstation assigned, the following blocking message will be displayed: “This warehouse will not be available/set as default in WM- document definition. The warehouse has already been assigned to WM- document definition in another center owing a POS workstation.”

Adding POS workstation

Note
During the configuration of a POS workstation, it is necessary to complete Data Language field, in the tab POS Workstations on the definition of a specific center/company. After performing first synchronization of POS to Comarch ERP Standard, it will not be possible to change it.

The necessary condition for adding a POS workstation is enabling sales below stock levels. Parameter Sell below stock levels is available in the definition of a given center company (Company Structure -> Rights Structure -> center/company edition), from the level of which such sales model is to be enabled.
In the tab POS Workstations, on the edition form of a given center, there is a list of all POS workstations which are attached to that center. To add a POS workstation, click on [Add] button. The system will verify if the option of sales below stock levels was enabled in the configuration.  If not, the following message is displayed: “Sell below stock levels option has not been enabled for the center. Would you like to do it now?”. Next, the system checks if all defined numerators include Series segment which affects numbering of documents. If not, the following message is displayed: “Either the numerators do not have a Series segment or this segment does not affect the numbering. Do you want to modify appropriate numerators for this workstation?”. Upon confirming, the system creates new numerators with _R suffix and assigns them automatically to appropriate document types.

Button for adding a POS workstation

Note
The icon of adding new workstation is unactive if no cash/bank account and series are defined for a given center/company.

Window for adding new POS workstation

The following data must be specified in the window for adding POS workstation:

  • Code – used for identifying a POS workstation, must be unique
  • Name – name given to a POS workstation
  • Series – used in the numerator of documents issued on a POS workstation. It clearly determines from which POS workstation documents originate

Note
When saving a POS workstation, the system verifies if the specified series has been assigned to appropriate document types. If not, the following message is displayed: “NOTE! Not all the document types required at POS workstation have been assigned to selected series. It may not be possible to continue working at this point of sale. Would you like to assign those document types now?”. Upon confirming, the system saves the POS workstation and automatically assigns series to document types handled on POS workstation.

Cash-bank accounts for payment form

In tab General, in Payment Forms section, from among all payment forms defined it the system those must remain which will be used on a POS workstation. Payment forms are detached/attached by selecting them on the list of available forms followed by clicking [Detach]/[Attach]. For the selected payment forms, cash-bank account must be chosen from the drop-down list contained in column Account – Payment. Selecting a check box in the column Clear after session is closed will reset the balance of cash register for a given payment form after ending a day.  This option is not available for the cash payment form, whose ending balance equals to opening balance for the following day.
Button [Export To Spreadsheet] enables exporting the table with payment forms to a spreadsheet.

Note
Only one payment form of Cash and Own Voucher type can be attached to a POS workstation.

Operators for a POS workstation

In tab Operators, it is necessary assign appropriate groups of operators which should have access to the POS workstation.


Consent record

Consent record allows for managing all consents for processing personal data registered in the system and makes it possible to quickly verify all received consents.

The consent record is available from the level of the menu CRM → Consent Records. After selecting [Add] button a consent form is opened.

Before adding a consent, first it is necessary to define values of generic directory Consents (Configuration → Generic Directories → Processing of personal data → Consents). Consents can be associated with consent categories, selected regulation or related communication channels.

Consent form

To save a new consent, it is necessary to fill in the following fields:

  • Person Giving Consent – in this field, it is possible to open the list of customers/vendors/employees/contact persons
  • Consent Category – it is filled out with a value retrieved from a generic directory (Configuration → Generic   Directories → Processing Personal Data → Consent Categories).  The operator can add new values to the directory and to define one of them as the default one.
  • Title – it is filled out with a value retrieved from a generic directory (Configuration → Generic Directories → Processing Personal Data → Consents).  The list is narrowed down to consent titles associated with a previously selected consent category, and whose date specified in the field Effective From is no later than a current date.

In addition, the following fields are also available on the form:

  • ID – a unique consent number assigned automatically consent’s creation
  • Consent Date – by default, it is the current date (it cannot be later than the current date), determining the   date when a given consent has been entered
  • Source – a single-choice selection list containing values defined by users in a generic directory (Configuration   → Generic Directories→ Processing Personal Data → Sources of Consent). By default, the field is filled out with a value specified as default in the directory or, if there is no default value, it is filled out with a center to   which the operator is logged on.
  • Related Address – a single-choice selection list where it is possible to select one of active addresses of a given object. This field remains empty and greyed out if:
    • no value has been entered in the field Title
    • the option Addresses has not been selected for the parameter Refers To Communication Channel in the generic directory Consents. The directory is available from the level of Configuration → Generic Directories → Processing of personal data → Consents.
  • Related Contact – a single-choice selection list where it is possible to select active contact details of a given object. This field remains empty and greyed out if:
    • no value has been entered in the field Title
    • the option Contacts has not been selected for the parameter Refers To Communication Channel in the generic directory Consents
  • Related Regulations – this field allows adding an attachment. By default, the field presents the name of an attachment selected in the column Related Regulations in the generic directory Consents.

Example
During the creation of a loyalty account, client Store ABC has sent to the company by e-mail a consent for sending marketing information on e-mail address associated with the account. To register the consent in the system, it is necessary to:

  1. Add new value to the generic directory Consents (Configuration → Generic Directories → Processing of personal data → Consents), for example:
  • Title: Receiving of promotional offers
  • Consent: Consent for receiving marketing offers through e-mails.
  • Category: Marketing
  • Effective from: current date
  • Related Regulation: none
  • Refers To Communication Channel: Yes – Contacts
  • Related Communication Channels: e-mail
  1. Add new value “e-mail” to the generic directory Sources of Consents
  2. Add new consent form
  • Consent Giver: ABC Store
  • Consent Date: current date
  • Consent Category: Marketing
  • Title: Receiving of promotional offers (generic directory value defined in point 1)
  • Source: e-mail (generic directory value defined in point 2)
  • Related Address: none
  • Related Contact: e-mail address retrieved from the form of the customer ABC Store

After saving the form, the consent will be registered in the system.


Consent batch addition

From the level of the consent record list (CRM → Consent Records) and the tab Consents To Personal Data Processing available on the forms of:

  • customer/vendor
  • contact person
  • employee,

it is possible to add and withdraw consents for a selected consent giver. Selecting the button [Add In Single Batch]/[Withdraw in Single Batch] opens a window enabling the ergonomic registration of   received consents.

Window of batch addition of consent contains the same fields as the consent form.

To add consents in batch, it is necessary to:

  • select Consent Giver
  • check selected Consent Categories
  • complete associated addresses/contacts, in case for a given Consent Wording option Refers To Communication Channel has been checked in the generic directory.

Note
Only those consent categories, to which at least one value has been assigned in the generic directory Consent Wording, can be added to the list of consent batch addition.

Consent batch addition

After completing mandatory fields and checking Create parameter, [Generate] button will be activated. Upon clicking on it, consents presented on the list of consent records will be generated

To withdraw selected consents in batch for a specific consent giver, it is necessary to select the button [Withdraw in Single Batch]. A window with all valid consents is open. To withdraw selected consent, it is necessary to check Withdraw parameter.

Consent record


Consent withdrawal

To withdraw a registered consent, it is necessary to uncheck parameter Active on a selected form.

Consent form is available from the level of the menu CRM → Consent Records.

Form of a withdrawn consent

After deactivating a consent, the following fields appear on the form:

  • Withdrawal Date – field defining the date when a consent has been withdrawn

Note
 The withdrawal date cannot be later than the consent date or the current date.

  • Reason for Withdrawal – field filled out with values retrieved from a generic directory (Configuration → Generic Directories → Processing Personal Data   → Reason for Withdrawal of Consent). The operator can add new values to the directory and to define one of them as the default one.
  • Withdrawal Source – values for this field are retrieved from a generic directory (Configuration → Generic Directories → Processing Personal Data → Source of Consent Withdrawal). In case there are no values in the directory, the name of the center to which the operator is currently logged-on, is indicated on the form.


Breach records

Breaches allows inspector for registering cases of breaches in personal data protection and generate a printout   containing information on the registered breach.

Breaches are available from the level of the menu CRM → Records of processing activities and breaches → tab Breaches. Selecting the button [Add] opens a breach details form which   is composed of the following sections:

The header contains basic information regarding breach, such us:

  • Protection Officer – a field opening the list of customers/vendors/employees in the selection mode.  By default, a protection officer selected in Processing activity records is retrieved. The field is mandatory.
  • Number of records concerned – a numeric field specifying the number of data records in connection to which a breach has been registered
  • Date of Breach – the date of a breach in personal data protection; it can be later than neither the notification date, nor the current date
  • Breach reported – this parameter is deselected by default; once it is selected, the user is enabled to fill in details relevant for the report
  • Notification Date – a date presented upon selecting the parameter Breach reported; it cannot be later than the date of breach. By default, it retrieves the current date.

Tab General contains text fields, in which the operator can describe breach details, such us:

  • Nature of personal data breach
  • Category and approximate number of data subjects concerned
  • Likely consequences of personal data breach
  • Measures taken/proposed to be taken to address the breach or to mitigate its adverse effects

Breach form

Additionally, if the parameter Breach reported has not been selected, the tab presents another field, Reason for failure to notify a breach


Processing activities records

Records of processing activities and breaches allow for keeping records of personal data processing activities, such as defining o persons responsible for personal data administration or specifying data processing category.

The record is available from the level of the tab CRM → Activity and Breach Records.

After selecting [Add] button a form for entering data related to the scope and character of personal data is opened.

Side panel contains the following fields:

  • ID – a unique ID of an activity record in the YYYY/MM/DD/ID format
  • Registry Name – a text field enabling the user to enter a specific record name (optional)
  • Basic fields allowing for selecting persons responsible for personal data administration: Controller, Representative and Data Protection Officer, who may be persons selected from the lists of customers/vendors and employees defined in the system.  Selecting a customer/vendor/employee from the list displays another list, where it is   possible to select address data assigned to a given object.
  • Get Data from Company Stamp – this parameter is deactivated by default, available under the field Inspector. It is only possible to select it if a company name is defined on the form of a center of the Company type to which the user is logged on.  Selecting the parameter automatically sets the inspector on the basis of a company name and sets the company’s address details as inspector details.

Note
Once the Get Data from Company Stamp parameter is selected, it is no longer possible   to change an activity record’s inspector – the relevant field will be grayed out.

Processing activity record

The tab Processing Activity Records is composed of two sections:

  • Joint Controllers – it makes it possible to define customers/vendors/employees as the joint controllers of personal data processing. Above the list, there are standard buttons allowing attaching or detaching objects, and exporting them to a spreadsheet. This section presents:
  • Name of customer/vendor or employee full name
  • Dates From/To specifying the duration of the joint controller function
  • Contact Details of a customer/vendor/employee selected by the operator while defining a joint controller
  • Description – this field enables the user to define additional information about a joint controller

Processing Activities section makes it possible to specify the categories of personal data, data subjects, and   recipients, as well as to register the validation of the transfer of personal data, and determine an envisaged date of their erasure.   Selecting the button [Add] opens the activity details form, which contains:

  • Number – a unique ID number of activities, assigned automatically upon saving
  • Activity Name – a field texts enabling the user to enter an activity name
  • Data Processing Purpose – a field text enabling the user to specify the aim of registering a given activity
  • Data Subject/Personal Data/Recipient Categories – text field limited to 4000 characters
  • Envisaged Data Erasure Dates – text field limited to 4000 characters

In the tab Third Countries – Data Transmission, moreover, the operator may select countries to which personal data will be transferred and add a relevant validation.  One country can be selected only once on a given form.

Processing activity record

The column Validation is filled out with values retrieved from the generic directory: Reasons for Data Transmission (Configuration → Generic Directories → Processing Personal Data).  The user can define own values from the level of the directory.

Additional information for validation can be entered also in Validation Details field.


Personal Data module activation

Section Personal Data contains a set of tools facilitating complex management of personal data stored in the system by designated users (so-called personal data administrators).

The section is available from the level of CRM → Personal Data.

To activate buttons dedicated to records and data export, it is necessary to:

  • associate a currently logged-in operator with a selected employee
  • check permission Personal data – Management for the operator group to which the currently logged-in user belongs (Configuration → Company Structure → Operator Groups → tab Other Permissions)

To activate data anonymization available in Personal Data section, in tab CRM, it is necessary to:

  • check permission Personal data – Management for the operator group to which the currently logged-in user belongs (Configuration → Company Structure → Operator Groups → tab Other Permissions)


User’s CRM area

All the CRM data is shared not only on the lists of particular objects they refer to. The data can also be reviewed on the lists dedicated to a logged-in operator. In those lists, there are objects (customers/vendors, persons, activities) assigned to an employee who is, in turn, assigned to a currently logged-in operator. The visibility of objects depends on granted permissions to preview selected objects of other employees.

User’s CRM area

Tab CRM contains:

  • My Companies – list of customers/vendors being supervised by a given employee. Defining of supervisors on a customer/vendor form is described in article defining customer/vendor.
  • My Persons – list of contact persons being supervised by a given employee.
  • My Activities – list of CRM activities assigned to a given employee. It allows for adding and modifying of contacts, meetings and questionnaires.
  • Calendar – presents employee’s calendar.
  • Tasks – list containing all tasks of an employee.
  • CRM Panel – presents the most important information regarding customers and vendors of the company, all contacts, tasks and opportuinities related to them. The [CRM Panel] window is composed of employee’s calendar view and a list of his/her contacts (Contact Persons, Customers/Vendors).

CRM Panel


Subordination structure

Subordination structure allows for defining hierarchy between employees and company units on the asis of which are assigned permissions related to CRM functionalitires. The structure tree is available from the level of Configuration → Company Structure → Subordination strucutre.

If the subordination structure has not been defined, then it will be possible to view only those objects that are associated with the employee on whom a user is logged on. However, the activities, tasks, calendar, contact persons, companies of other employees will not be visible.

The structure is created by adding new units (centers) and adding employees defined in the system to that units. Under [Add] button, the following options are available:

  • Add Unit
  • Add Employee

[Show Subordinates] – this button is active when the manager is marked on the structure tree. Clicking on the button opens the list of employees assigned to his/her unit (center).

Subordination Structure


Operator permissions

From the level of Configuration → Company Structure → Operator Groups → tab Other Permissions, are available permissions to:

CRM area and its permissions are based on companies defined in the subordination structure. In this case, groups of persons specified for these permissions should be intended as:

  • all employees – all employees defined in the system
  • all co-workers – group of employees within one unit defined in the subordination structure to which belongs the employee associated with a currently logged-in operator
  • employees in child centers – group of employees within one unit defined in the subordination structure to which belongs the employee associated with a currently logged-in operator and groups of employees assigned to child units of that unit


Activation of CRM module

CRM objects are available from the level of:

  • dedicated CRM menu
  • Main menu
  • list of customers/vendors available from the level of the tab Main → Customers/Vendors

Upon starting the system, the CRM-related functions are disabled.  To activate the functions, it is necessary to:

  • define a new employee
  • associate the employee with a currently logged-in operator

To be able to use the module in full, it is necessary to define the subordination structure.

CRM area


Calendar

Calendar allows for easy managing of tasks, questionnaires and CRM activities. Thanks to the calendar form, employees can quickly preview tasks assigned to them and managers are able to supervise work of employees.

Depending on <<permissions>> granted to operators, in a calendar it is possible to:

  • preview and manage tasks, activities and questionnaires assigned to a logged-in user and of:
    • all employees
    • co-workers, that is employees assigned to the same unit
    • co-workers and employees assigned to child units of that unit
  • modify own activities and tasks and those of other employees

Example

  1. Operator Anna Smith belongs to a group of operators with granted permission CRM -> Calendars of employees in child centers. In the subordinated structure, Anna Smith is assigned to Finance and Accounting Department center.
  1. In employees sections, calendars of all employees belonging to the following departments are available:
  • Financial and Accounting Department
  • Financial Department
  • Accounting Department

Calendar can be presented in the following modes:

  • Daily
  • Working Days
  • Week
  • Month
  • Timeline View


Calendar

Depending on the type of an object added to the calendar, such object is marked in a color dedicated to it. Objects with ended/confirmed status are additionally marked in red.

For operators with granted permission to display activities of other employees on the side panel, the system presents a list of persons to whose calendars the currently logged-in operator has access.

From the level of a calendar, the operator can also add new tasks, contacts and meetings.

Upon selecting [Add] button, a form of a given object appears on the ribbon. Defining of new <<activities>> is described in article.


Tasks

Tasks allow for registering activties and topics assigned to employees, which are automatically saved in their calendars.

The list of tasks is available from the level of Main → CRM → Tasks

List of tasks

Depending on <<permissions>> granted to an operator, the list presents task assigned to:

  • currently logged-in employee
  • all employees
  • employees in child centers

Example

In the database, operator Anna Smith was defined, who belongs to the following operator groups:

  • FA_Department
  • B2_default
  1. The operator is assigned to the Financial and Accounting Department unit from the level of Subordination Structure.
  • The following permission was granted to the FA_Department group: Tasks of employees in child centers.
  1. The operator opens the list of tasks CRM -> My Activities. The list presents meetings created by employees of:
  • Financial and Accounting Department
  • Financial Department
  • Accounting Department 

The possibility of modifying lists of tasks of other employees depends on activating of permission CRM – Modification of tasks. It allows for applying changes to tasks of operators who are not authors or performers of activities.

Note
If the permission to modify the list of tasks is not granted, while the permission to display the list of tasks of co-workers/all employees is granted, it is still possible to preview such tasks.

In order to add new task, it is necessary to click on button [Add]. The form is composed of the following tabs: General, Execution, Attributes, Attachments and Change History.

In order to save a new taks, it is mandatory to fill in Subject field.

In section Scheduling Details, it is possible to specify effective dates of a given task, mark it as an all-day event or create an analogical task to execute (parameter Set another task in).

In the tab Execution, an employee associated with a currently logged-in operator is displayed. An operator with granted permission to see lists of tasks of other employees can assign a given task to another emplyee.

Task form

Note
Only one employee can be assigned to each task.


Batch generation of questionnaires

Batch addition of questionnaires allows for assigning a given questionnaire to serveral objects simultaneously. The functionality is available under [Generate] button, placed on the ribbon above the following lists:

  • Customers/Vendors
  • Employees
  • Contact Persons
  • CRM Activities

To add a questionnaire in a batch, it is necessary to:

  • In Questionnaire field, select one of questionnaires assigned to a given object
  • Add it to customers/vendors/employees/contact persons/activities selected from a list

In section Respondendt, select an employee who will answer the questions. To make a generated questionnaire available also from the level of the calendar, it is necessary to check parameter Add to te calendars of employees.

Window for batch addition of questionnaires

Add supervisors from customer/vendor form – this parameter can only be checked if a questionnaire is added from the level of customer/vendor list. After checking the parameter, the list Respondent gets deactivated and only supervisors of a given customer/vendor will be available as respondents.

Clicking on [Generate] button assings the questionnaire to selected objects. Assigned questionnaires can be displayed with the help of [List] button, available on the list of customers/vendors/employees/contact persons/CRM activities.


Questionnaire templates

The system provides the user the possibility of creating his/her own questionnaires based on previously defined questions and answers. A list of questionnaire templates is available from the level of Configuration → CRM → Questionnaire Templates.

The Questionnaire Templates list presents templates defined in the system.

The questionnaire form is composed of dedicated tabs General and Objects, as well of standard tabs: Attachments and Change History.

The process of defining of question of which a questionnaire is composed is described in article Defining questionnaire. Before saving a template, it is necessary to complete Name field.

To be able to use a defined questionnaire template, it is necessary to assign it to an object for which it is supposed to be available. From the level of the tab Objects, it is necessary to assign a template for:

  • Customer/Vendor
  • Employee
  • Contact
  • Meeting
  • Contact person

Objects assigned to a questionnaire will be also available on the tab Objects of the questionnaire form.


Defining questionnaire

Questionnaires allow for collecting additional information about employees and customers/vendors which can later be used in sales processes, e.g. when creating new <<opportunities>>.

A questionnaire is composed of a list of questions which can be defined from the level of:

  • Configuration CRM Questions
  • questionnaire form → section Questions → addition of new question

All questions defined in the system can be freely grouped into selected Questionnaires.

List of questions

After adding a new question, it is necessary to complete the following fields:

  • Name – question
  • Group – mandatory field, retrieves values from generic directory Question Group (Configuration → Generic Directories → CRM → Question Group). Enables grouping of defined questions into relevant categories.
  • Text – if the parameter is checked, the question is an open-ended question
  • Values – checking of the parameter allows for using an attribute value as response. As a response value can be selected only an attribute which:
    • on its form, has parameter Response to question checked.
    • Has one of the following formats: text/number/logic value/list/date

After selecting an attribute of list type, in Values section of the question form, it is also possible to define value of points for each answer. After a questionnaire is confirmed, an evaluation expressed in numeric values, calculates as product of points defined on question details and question group weight, is presented on it.

  • Required – parameter checked by default, requires providing of responses on a questionnaire question
  • Default Value – defining a default value for a response. This parameter can be edited only for questions with checked parameter Required.

Adding new question

After saving a question form, with the use of Question Details, available on the list of questions, it is possible to precise their content. This section presents values defined in generic directory CRM Question Details (Configuration → Generic Directories → CRM) which can be associated with a given question and one of them can be set as default.

[Alert]

Questions assigned to a questionnaire can be modified only through an operator who adds a questionnaire to an object and has permission Modification of questionnaire to fill granted. The permissions are available from the level of Configuration → Company Structure → Operator Groups Other permissions. [/alert]

After defining a list of questions, it is possible to assign them to a <<questionnaire template>> and attach it to selected object. Questionnaires activities are available from the level of the list of:

  • customers/vendors
  • contact persons
  • employees

To open the list, it is necessary to select button [List] available on one of the above-mentioned lists.

Buttons available in Questionnaires section


List of opportunities

Opportunities reflect forecast sales of particular items divided by customers/vendors. Thanks to reporting the chances of sale, they can be analyzed in BI. An example can be an analysis of chances (quantity-based and value-based) in reference to the actually achieved results.

To display opportunity list in the menu available from the level of customer/vendor list, click on the button [Opportunities].

The form of a new opportunity contains General tab and tabs:

  • Supervisors – the list is automatically completed with contact persons assigned to a customer/vendor with the possibility of editing them
  • Attributes
  • Attachments
  • Change History

Section Sales Opportunities with the following fields:

  • Category – a drop-down list allowing for selecting and specifying category of a defined opportunity. The field is available in opportunity details. Defining of new opportunity categories is available from the level of Configuration → Generic Directories → CRM → Opportunity Categories. Predefined values of the directory: Promotion Action, Standard Business Activities.
  • Classification – value selected from among those defined in the generic directory Opportunity Classification. The directory is available from the level of Configuration → Generic Directories → CRM → Opportunity Classification. Predefined values of the dictionary: Cold, Warm, Hot.
  • Probability – percentage estimation of the execution of the assumed opportunities
  • Customer/Vendor – field with code and name of the entity an object is assigned to (inactive field)

Section Schedule and Sales with the following fields:

  • Status – allows for determining opportunity status for a given customer/vendor. The list of opportunity statues is available from the level of Configuration → Generic Directories → CRM → Opportunity Status. Default values of the generic directory: New, Lost, Preliminary Negotiation, Advanced Negotiation, Successfully Closed.
  • Price Type – field with price type from which an item price will be retrieved for the purpose of price autocalculation
  • Estimated Total Price/Offered Price – numeric value defined by an operator
  • Autocalculated Price – currently calculated sum, on the basis of unit prices and item quantities added in Items Price of items is retrieved from the most recent price list created on the basis of selected price type, in reference to specified day and hour of expected date of sale. This value is recalculated automatically when:
    • Changing quantities of items on the list
    • Adding/deleting items to/from the list
    • Changing price type
    • Changing currency type (according to the current date of the system; if the currency exchange rate has not been provided, the value 0 is displayed)
  • Recently Calculated Total – this is an autocalculation of price calculated during the last editing/adding of an opportunity. In addition mode, this value always equals to that of the field Autocalculated Price. After saving and reopening the window, presented value is the one with which a given opportunity was recently saved

Section Items, where, besides the standard columns identifying a given item, the following fields are available:

  • Unit Price – retrieved from the price list created on the basis of a previously selected price type (the date Effective From is the most current date from among all the price lists and is, at the same time, earlier than the date Expected Date of Sale specified on the form of opportunity)
  • Currency – retrieved from the price list created on the basis of a previously selected price type
  • Expected Quantity – numeric value defined by an operator

Note
The values of the panel Supervisors, available in CRM tab, are copied to the mentioned tab during the addition of an opportunity for a customer/vendor. The values on that list can be changed, but the entered modifications will not affect the list of supervisors on a customer/vendor form.


CRM contacts

Contacts are used for registering information about planned and conduced conversations carried out by an employee with contact persons of customers/vendors.

A new contact can be added from the level of:

  • Main → CRM → My Activities
  • Main → Customers/Vendors → CRM Activities

To save a new meeting, it is necessary to complete:

  • Customer/vendor whom it concerns
  • Contact person

In addition to the standard fields, the following fields are also available on the form:

  • Time – field counting contact duration, that is the time from opening a new window to saving it.  Next to this field, there is [Start/Pause] button on the left.
  •  Set up the next contact in – checking the parameter will create on the list an analogical contact whose date will be compliant with the time set in the field of hours, days, weeks from the current contact or selected directly from a calendar available aside.
  • Add to the calendar of employee – if checked, an object will be displayed in the calendar of an employee.
  • Ended – upon checking this parameter, all fields available in the window are deactivated.
  • Employee – by default, this field displays an employee associated with a currently logged- in operator, with the possibility of changing it to another, defined in the system, employee.
  • Contact icon – lows for proceeding to edition of another contact (specified on the form of a previously   added contact, in the scheduling details panel) which is opened in a new window
  • Type – enables to define the contact type (telephone, e-mail) by selecting a value from among the values defined in the generic directory Contact Form available in the menu Configuration → Generic Directories →   CRM → Contact Type
  • Priority – enables determining activity priority thanks to the possibility of selecting a value from a drop-down   list containing values defined in the generic directory available from the level Configuration → Generic   Directories → CRM → Activity Priorities. 
  • Category –   allows for classifying a newly added object   according to existing categories available from the level of Configuration → Generic Directories → CRM. → Categories.
  • Notes – text box allowing for entering any string of characters. Moreover, for not ended activities on the list of CRM Activities (Contacts, Meetings, Tasks) it is possible to edit the Notes field directly in the list.
  • Customer/Vendor – field completed automatically in case the list of activities is opened directly from the list of customers/vendors.

Section Contact Persons allows for attaching persons (Main → <<Contact Persons>>) who participate in the conversation.

Note

In the activity window, it is possible to add only a contact person who is associated with   a customer/vendor selected on the activity form.  In case of adding an activity from the level of   the list of all activities, the addition of contact persons is disabled until a customer/vendor has   been selected (the plus button is inactive).


CRM meetings

Meetings are used for registering information about conducted and planned conversations carried out by an employee/employees with contact persons in the specified time limits and generating certain costs.

On the CRM Activities list, in All Activities tab, all actions previously defined for a given customer/vendor are displayed. The following fields are available on the form of a new meeting:

  • Venue – place of a held or planned meeting; venue name can be composed of an unlimited number of   characters
  • Priority – enables determining activity priority thanks to the values defined in the generic directory available from the level Configuration → Generic   Directories → CRM → Activity Priorities. 
  • Category –   allows for classifying a newly added object   according to existing categories available from the level of Configuration → Generic Directories → CRM. → Cetegories. Predefined directory values: Negotiations, Acquiring of Customer, Processing of Orders and Keeping of Customer.
  •  Set up the next contact in – checking the parameter will create on the list an analogical contact whose date will be compliant with the time set in the filed of hours, days, weeks from the current contact or selected directly from a calander available aside.
  • Add to the calendar of employee – if checked, an object will be also displayed in the calendar of an employee.
  • Expected Costs – possibility of determining an expected cost of a meeting. Next to this fieled, there is a drop-down list which allows for defining te currency in which the expected cost will be determined.
  • Actual Costs – determining of an organized meeting actually incurred. Next to this field, there is a drop-down list   that enables to select the currency in which the actual costs are determined

To save a new meeting, it is necessary to complete:

  • Customer/Vendor
  • Employee
  • Contact person


Types of CRM activities

The user can use activities registiered in the system can be used for creating BI analyses, e.g., when preparing report on negotiations with a client, on efectiveness of actions of particular employees or on probability of acquiring customers from different sectors etc.

To register marketing and sales actions, it is possible to add:

  • Contact – usually a meeting of one employee with one representative of a customer.
  • Meeting – detailed meeting with certain attendees, within specified time limits and place

CRM activities are available from the level of:

  • Main → CRM → My Activities – the list presents actions associated with all customers/vendors
  • List of customers/vendors – upon selecting a customer/vendor and clicking on [Activities] button, a list of all activties related to that customer/vendor is presented.

The visibility of activities for a logged-in operator depends on permissions assigned to operator groups.


Personal data export

Personal data administrator is obliged to grant access to processed data to a person whom it concerns, if that person makes such request. For that purpose, it is possible to export data in the form of an XML file and print it.

Exporting of data, which is available from the level of CRM Export, regards:

  • customers/vendors
  • employees
  • contact persons

After selecting a relevant object for export, window of data export is displayed.

Included Attributes – a multiple-choice selection list, containing the names of all attributes assigned to a   given object.  By default, all attributes are deselected

Generate XML – selecting this button generates an XML file which will be saved in a location selected by the user

Print – selecting this button creates the printout of a relevant file in the preview mode


Personal data anonymization

Data anonymization consists in disabling the possibility of identifying of a specific person on the basis of data available in the system. On demand of a Consent Giver, an operator who has permission Personal Data – Anonymization may delete personal data of a given customer/vendor or contact person.

The functionality of anonymization is available from the level of CRM -> Anonymize Data. After selecting a grup of objects from the drop-down list:

  • selected custmer/vendor/contact person becomes deactivated
  • all data related to that customer/vendor/contact person, including contact data from addresses assigned to him/her, gets deleted

In the case of the customer/vendor form, before anonymization is performed, the system first of all verifies if a   given customer/vendor is assigned to:

  • a non-canceled document with a date later than the one required for the minimum retention period specified as part of the relevant document definition in the parameter Obligatory minimum retention period. This   parameter is available for particular document types within a company/center
  • an active voucher
  • SCL/PCL document (complaint) whose status is different than Processed, Closed, or Canceled
  • SO/PO document whose status is different than Processed, Closed, or Canceled
  • an uncompleted payment/unpaid operation
  • an account selected in a journal entry/accounting note, and if the retention period set up for the relevant   document type has not expired

Note

If any of these conditions is met, the data anonymization process will be aborted and the system will display a   message containing the details of the blockade.

If the first verification succeeds, the system additionally verifies if a given customer/vendor form is assigned with:

  • attachments
  • attributes
  • questionnaires
  • CRM objects

If such an assignment exists in the system, a message will be displayed, encouraging the user to verify if the   abovementioned objects contain any references to personal data which would require to be deleted separately   or if they may be the basis for the abortion of data anonymization.

In the case of contact person forms, prior to performing anonymization the system additionally verifies whether   the contact person is not defined as default for a customer/vendor.  If yes – a message informing about the impossibility of anonymization of selected object is displayed.

Note
It is not possible to reactivate an anonymized object.


Sorting, grouping and summing data on lists

Grouping, sorting and summing up data on lists allows for incrementing their clarity in accordance wit user’s needs.

Sorting

By default, a list of items is sorted in alphabetical order according to a value displayed in the first column.  However, all displayed items can be arranged by value displayed in each of the columns presented in the list according to the user’s preferences, e.g. by code, name, etc. The list can be arranged by ascending or descending. In order to sort the list, click once on a column name with the left mouse button. A a little triangle presenting the items display direction appears. After clicking again on a column name, the direction will be rearranged.

List of warehouses sorted by ascending by the symbol with sorting icon marked

To sort data on a list, it is also possible to use Sort By Ascending and Sort By Descending options which are available in the context menu displayed upon clicking with the right mouse button on the header of a given columns.

To clear sorting, it is necessary to select option Clear Sorting (all columns), which is also available in the context menu displayed for the header of a column.

Sorting option in the context menu

Grouping

The system allows for grouping list by each column. Thanks to that, it is possible to easily distinguish data, in accordance with user’s preferences.

To group a list, it is necessary to indicate the header of the column by which the grouping is to be done and drag it to on the bar over the list, containing message Drag the column header here to group by that column.

[Example]

To group the list of internal orders by warehouses, it is necessary to drag the header of the list Warehouses over the bar placed above the list. For each warehouse the system will create a group of documents issued for that warehouse.

To group a list by columns, it is also possible to use Group By This Column option, which is available in the context menu displayed upon clicking with the right mouse button on the header of a given columns.

Context menu of a column header contains also Hide Grouping Panel option, thanks to which the user can hide the grouping panel displayed above the list.

Grouping option in the context menu

To clear grouping, it is necessary to select option Ungroup, which is also available in the context menu displayed for the header of a column, if the column was previously grouped. The user can also drag a given header out of the grouping bar and in such case the column will be hidden. To display it again, it is necessary to select it from the context menu with the use of Select Column option After ungouping, the standard layout of the list will be restored.

Other functions in the context menu available for a grouped list are the following:

  • Full expand – expands the list grouped by a given column
  • Full collapse – collapses the list grouped by a given column

Options for grouped list

Clicking on an arrow symbol placed next to an item related to the column according to which items were grouped, respectively expands or collapses the list of objects belonging to a given group.

Summing below a list

A user is provided with possibility to sum up all rows selected on a list by clicking on the icon . The summing  function is available for most lists in the system. The summed values are displayed in fields below the columns which present values.

Summary of values below list

t is possible to display the total of all selected rows or the value of a single row.

After grouping documents, a total value of the documents included in a given group is displayed on the list. Clicking on the summary button, instead, displays in the summary bar a total value of all documents on the list.

On lists where summary bar is not available, it is possible to add it by selecting option Show Summary Row, which is available in the context menu of the headers row.

Show Summary Row option

Moreover, for selected lists, the following options are provided in the context menu for the row with summar:

  • Total/Min/Max/Average – displays in the summary, depending on selected aggregation, the value of rows   according to setting of Aggregate Only Selected parameter. The option is available in selected lists with   columns displaying numerical values.
  • Count – displays number of rows depending on setting of parameter Aggregate Only Selected.  The option is   available in selected lists.
  • Aggregate Only Selected – this option is checked, by default and can be unchecked. The summary is updated   dynamically, depending on items marked on the list. To guarantee a better perform, it is recommended to leave the option checked.
  • None – deletes selected aggregation from below the list


Search engine

Search engine is used for quick retrieval of key information present in the system. Contrarily to <<search panel>>, opened with the use of <Ctrl>+<F> keys, the search engine allows the user for searching whole system, not only a currently opened window.

The functioning of the search engine is based on two servers:

  • Search server – responsible for receiving and displaying  the results referring to a phrase being searched
  • Indexing server –  communicates  with  a  company  database,  browses  it,  and  creates  a  file  indexing  optimally  the   information so that answers to subsequent questions be displayed faster

Configuration of search engine in the system configuration tool

Before starting work with the search engine, it is necessary to configure it. To do so, open the system configuration tool (available in the system setup folder – fileNewAltumConfigurator.exe), check database configuration in Database Selection tab and open Search Engine tab.

Tab Search Engine in the system configuration tool window

In the Search Engine tab, the following sections and fields are available:

  • Configuration Database:
    • Server – name of SQL server where configuration database is stored
    • Integrated  security  –  if  checked,  the  system  enters,  itself,  the  username  and  password  integrated  with   Windows account
    • SQL Login
    • Password
    • Database – name of configuration database for which the search engine is to be configured
  • Certificate – allows for verifying the installation of the certificate for the search engine service
  • Search Server – allows for defining Http and TCP ports for the search server
  • Indexing Server  – allows for defining Http and TCP ports for the indexing server

After completing required fields and saving settings, it is necessary to check connection status. It should be Correct.  After that, open tab Services and start Search Engine service with the use of  button. Upon completing the above-mentioned steps, start Comarch ERP Standard system.

Started Search Engine service

Configuration of search engine in the system

After starting the system, open the menu System -> Configuration -< Search Engine, where it is possible to define parameters of servers responsible for global searching in the system.

[Alert]

To enable the search engine on ends, it is necessary to deactivate Windows firewall or add exceptions to the firewall for specific ports (on server and end).

Parameters of servers responsible for searching

Both for the search server and the indexing server, it is necessary to set reference to an appropate server by completing fields Host (name of the computer or IP address) and Port.

Indexing can be updated automatically through a schedule or manually by clicking on [Index Search] button. Detailed description of indexing configuration can be found in part <<Indexing configuration>>.

If a reference to the server is invalid or the service is not running, the following message is displayed:

Message informing the that there is no connection with the server

Indexing configuration

File  AEntities.xml, available in the system setup folder, is responsible for indexing frequency. Section <Jobs>, available in the file, contains the following parameters:

  • OptimizeIndex – optimizes the search indexes for the purpose of more efficient work of the tool
  • AltumFull – sets full indexing of data on company databases attached to a selected configuration database
  • AltumIncremental – indexing of incremented data, that is the data added since the recent indexing

Values of cycle types (Schedule Cycle Type) can be set to hourly, daily, weekly, and monthly.

[Alert]

If  there are several  company  databases  attached  to  a  configuration  database,  the   indexing  service  will  gain  data  contained  in  the  attached  company  databases.  Hence,  it  is   recommended to reduce the number of attached company databases for better operation of   the service.

Searching data

To start the search engine in the system, it is necessary to enter a given phrase in the search bar available on the ribbon and select the magnifying glass button or the <Enter> buutton on the keyboard.

Search bar

The system opens the searching engine window, composed of textual field in which it is possible to enter again the phrase to be searched and of search results field.

Search engine window

In the search engine window, on the right sight of the search bar placed on the ribbon and of the texutal field, there are two buttons:

– starts searching in company databases in terms of an entered phrase

–opens a window in which it is possible to define search area(s) with the use of one of the following options:

  • Search Entire System  – searching in all available areas
  • Ogranicz przeszukiwanie do wskazanych typów – wyszukiwanie w ramach obszarów wybranych przez użytkownika

Defining search areas Searching results limited to the Directories area


Assignment of profiles to user groups

Each profile can be assigned to any user group. Profiles are assigned on the form of selected operator group.

Forms of operator groups contain tab Profiles, in which it is necessary to assign a profile to a group.

Tab Profiles on the form of operator group

The tab Profiles is divided into two panels. In the first panel on the left, there are all the profiles not assigned to the edited operator group, whereas profiles assigned to the group are presented in the panel on the right. The number of profiles available for a single user depends on the number of operator groups the user is assigned to and on the center of company structure to which the user is currently logged on.

After assigning profiles, it is necessary to restart the system to be able to select new profiles in menu System Profiles.

Porifles menu in Comarch ERP Standard


Conversion Manager

The conversion manager is a tool allowing for generating a script containing the differences between versions. The script can next be run in a selected profile generated on the basis of a standard profile with enabled tracking changes option. The script will add all the newly added buttons referring to the functionalities implemented in this version.

As in the case of the profile editor, the conversion manager can be started by selecting an appropriate button on the database manager ribbon.

Menu with highlighted Conversion Manager button


The conversion manager window contains the following buttons:

[Load] – uploads the profiles stored in a configuration database. The profiles are presented in the form of a tree – the profile, on the basis of which the other profiles were generated, is displayed on the top

[Convert] – creates a script which contains all the buttons available, by default, in the field Target Version

[Open Folder] – opens the location of a generated script

Conversion Manager window

In the Conversion Manager window, there is also information about the profile versions. Start and target versions are the points of reference for the generated scripts.

In the conversion manager, Track Changes option plays an important role. It can be checked while creating a new profile or saving changes made to the profile. Checking this option results in associating the two profiles. The original profile is the parent profile, while its copy, that is a newly generated profile, is the child profile. During conversion of a child profile, a script, which copies all the changes from parent profile to child profile, is generated. That script must be executed manually on configuration database.

Conversion Manager window with the tree of profiles available for the configuration database

When converting profiles, the system uses numbers of configuration database versions. Before starting the conversion of profiles, it is necessary to know the version of configuration database before its conversion. Version can be checked in the database manager in the main menu with the use of button [Check Version] available in Configuration Database button group. Moreover, the table below presents subsequent versions of Comarch ERP Standard system and configuration databases starting from version 5.5.

Comarch ERP Standard versionConfiguration database version
5.55.5.154
5.5.15.5.157
5.5.25.5.182
5.5.35.5.192
5.5.45.5.212
6.06.0.103
6.16.1.37
6.26.2.32
6.36.3.31
2015.07.0136
2015.17.1.14
2015.27.2.32
2015.57.5.36
2015.67.6.9
2015.6.17.6.9
2016.08.0.93
2016.18.1.29
2016.58.5.93
2016.5.58.5.104
2016.5.68.5.104
2017.09.0.57
2017.19.1.14
2017.59.5.86
2017.5.19.5.90
2018.0.110.0.95
2018.110.1.40
2018.1.110.1.41
2018.210.2.6
2018.510.5.49

Note
A profile for which the option Track Changes was not checked during its generation cannot be converted.

Note
Profiles must be obligatorily migrated after migrating Comarch ERP Standard system to a later version. During migration of configuration database, version of only Standard profile is upgraded. All other profiles need to be migrated manually with the use of Conversion Manager.

Note
If upgrade of system involves a big leap between versions, e.g., migration from version 5.5.x or 6.x to 2016.x, the generated converting script contains several tens of thousands of lines. Problems may occur in the SQL service, concerning execution of such large scripts. In such case, it is recommended to divide the script into smaller parts and convert a profile gradually from version to version, by specifying subsequent numbers of versions in fields Start Version and Target Version.


Creating and editing profiles

General information

To add a new profile, it is necessary to select button [Add] from the Profile Editor ribbon. A window opens, where the user can define the name of the new profile.

New profile name definition window

A profile can also be defined on the basis of already existing profile. To do this, you need to check the parameter Copy profile and then select a profile from the list of the available profiles. If checked, an appropriate entry, that combines the newly created profile with the profile on the basis of which the former profile was copied, will be created in the database. It won’t be possible to include the changes made in one profile can be included in associated profiles by checking the option Track changes after conversion.

Note
If the Track changes option is not marked, after converting the database to an upper version, it will not be possible to include changes included in the Standard profile in other profiles with the use of the conversion manager.

Message informing about creation of a new profile

The entered changes can be confirmed by clicking [OK]. The message confirming the creation of the new profile will then be displayed.

MainTabs tab

To add tabs to the main tab, mark a tab on the tree in the Explorer panel and then click [Add Tab]. A window presented below will then be opened:

New tab form

To add a tab, first the tab name must be given in the system language. The name can be typed upon clicking on the arrow symbol. In an opened window, apart from specifying the name, it is possible to define its translations in other languages and to define shortcuts. Translation can be provided upon prior selection of a language. After defining the tab name in the system language and possibly in other languages, the specified name must be confirmed by clicking [Confirm]. Setting on order is not required, but the editor allows the user to set the order of tabs in the menu individually.

A shortcut is created automatically for each tab and button (standard and added by operator). The system will select the first letter of the tab name. If there is already another tab or button with name starting with the same letter, the system will select the second letter or, if necessary, the following ones, until the shortcut of the tab or button is unique.

A button group is added to a tab by clicking [Add Button Group]. A button group form is then opened:

New button group

The name of the button group is defined in the group form the same way as in case of tab name.

  • Translation – group name in a given language
  • Option Command – if checked, it is possible to enter a command into the field
  • Identifier – provides information identifying a given group
  • Elements Layout – possible options are horizontal or vertical position of the button group
  • Importance – the bigger natural number the later it is collapsed when decreasing the application window
  • Order – field for specifying the order of buttons on the list
  • Big Icon – an icon can be selected from the list or entered manually

Form for adding new button to a button group

Adding an element (buttons) to a group consists in the selection of an appropriate button group in the Explorer panel to which the button selected in the Buttons Library panel must be added. The selected button must be confirmed by clicking [Append Button] available in the Elements button group. In an opened form, the user may define a target layout of the button in the main menu.

The form is composed of the following fields:

  • Translation – button name which will be displayed in a given language in the main menu. A name is defined in the entire profile editor in the same way (see chapter Main tabs)
  • Run Context – clicking on the button located in this field enables the selection of a context from the list to be run
  • Command – command running the button
  • Display Mode – method of presenting a button Icon + Text, Icon only, Text only
  • Icon Size – the size of the button’s icon; possible options are: Big, Small
  • Label Alignment – position of text against icon, possible options are: Left, Right, Below
  • Drop Style – collapsing method, possible options: None, Integral, Separate
  • Order – order of the button within a button group
  • Stretch – if checked, a button name will be stretched
  • Visibility – determines whether a button will be visible in a mode of List, Selection or Always
  • Quick Access Panel – is available only in the ContextMenus group and if checked, the button icon will appear in the quick access panel; the user may also define an order of the icon on the panel

ContextMenus context menu

A context menu is used in the system in all lists of documents/elements. By clicking the right mouse button on the list of elements, it will be presented in the form of a drop-down menu or a quick access bar which is available below the list. A new context menu is added by clicking [Add Menu] upon prior selection of the ContextMenus on the tree. A context menu form, where the buttons are grouped, is opened.

Form for adding new context menu

The form contains the following elements:

  • Translation – name of the menu in a given language
  • Context Group – enables the selection of context from the list
  • Context – command referring to an appropriate context in the system

Buttons are added to a context menu in the same way as in the case of the MainTabs tab.

ContextTabGroups context tabs

A new group of tabs is added by clicking [Add Context Tab Group] upon prior selection of the ContextTabGroups on the tree. A form presented below is then opened:

Form for adding new tab group

The form contains the following items:

  • Name – tab group name
  • Context – context name
  • Color – setting a color for a tab group

To add a new tab, upon marking a tab group on the structure tree, it is necessary to select [Add Tab] option. The following form is opened:

New tab form

To add a new button group, upon marking a tab on the structure tree, it is necessary to select [Add Button Group] option. The following form is opened:

New button group form

Group of buttons and buttons are added to the context menu in the same way as in the case of the MainTabs tab.

DesktopButtons desktop shortcuts

In Comarch ERP Standard, it is possible to add icons – shortcuts to a given place in the system. However, this option is available only for buttons in the Main Tabs.

In order to add a button icon to Comarch ERP Standard desktop, the option Add To My Desktop can be used, which is called from the drop-down menu upon clicking on the button [Add] in the Explorer panel menu. This option is active if in the Explorer panel an element located on the lowest level of the tree, i.e., a button, in the Main Tabs is selected. Upon selecting the option Add To My Desktop and saving changes, entry for a given button is copied to the DesktopButtons.

Adding icon to the DesktopButtons section

The button will appear on the desktop upon restarting the system.

Icons on desktop

Upon adding an icon, it is possible to:

  • freely arrange icons on your desktop of Comarch ERP Standard system, on the same basis as it is done in Microsoft operating systems
  • double-click on icon to activate the functionality associated with a given icon
  • activate context menu upon clicking the right mouse button on the icon or on desktop. Options available in context menu are the following:
    • [Show Small Icons] – changes size of icons displayed on the desktop
    • [Delete All Shortcuts] – removes all icons from the desktop
    • [Align Icons to Grid] – icons will be aligned according to grid
    • [Sort By Name] – icons will be sorted by name and arranged one under another, starting from the left upper corner
    • [Restore Default] – – if selected, the default icons layout on desktop is restored
    • [Show Web Toolbar] – shows a toolbar with references to community portals
  • Activate context menu for a given button by clicking on it with the right mouse button. The context menu contains the following options:
    • [Open] – opens a reference
    • [Delete] – removes a shortcut
    • [Properties] – opens the button properties window. In this window t is possible to enter translation of the button name in different languages and change the icon.

Context menu for a button


Profile composition

The purpose of the profile editor is to enable the user to interfere in the layout of the main menu (ribbon), context menu, quick access bar, or the ergonomic panel. An easy modification or addition of a profile is possible thanks to the created frame structure of the profile which composition is described in this article

Profile structure

The profile editor is composed, by default, of the Standard profile which can be edited in accordance with the user preferences. By clicking [Load] and selecting the Standard profile, the profile is automatically loaded.

Profile loading window

Each profile is composed of four standard elements: tabs MainTabs,, context menu ContextMenus, context tab groups ContextTabGroups, and desktop shortcuts Desktop Buttons. All these elements can be found in the Explorer panel.

Standard profile elements

The MainTabs branch contains the basic tabs, which are displayed in the main menu right after the system is started. From the level of these tabs, it is possible to open subsequent tab groups which are assigned to contexts.

Profile tabs

Button groups can be added to tabs and particular elements can be added to the groups.  For example, a group Directory List (name of the whole group) and the elements: Employees, Banks, Warehouses etc. were added to the tab Main.

Tab Main along with its elements

Another element of the profile is the context menu ContextMenus:

Context menu for the list of sales invoices and its elements on the tree of profiles

Buttons are added directly to context menus. After adding a button, there is no need to format it (its size, text location, etc.) Each button is formatted automatically.

The last component of the profile is context tab groups ContextTabGroups.

Context tab groups wlong with their elements on the tree of profiles


To the context tab groups, it is possible to add groups/context tab groups (e.g., Chart, Table, Discounts), and to the group/context tab group, it is possible to add a tab Items. Then, to this tab, it is possible to attach button groups (e.g.: Payments) and to the group, it is possible to add buttons (e.g. [Close], [Apply]).

Example
Tab Items is attached to Discounts context tab. Group List, containing containers Commands1 and Commands2, is added to the items. In the Commands1 container, there is [Add] button.

Button

In the profile editor, there is a separate section in the menu which allows for the addition, modification or deletion of a button. A new button can be added by clicking [Add] in the Button Library panel. A button form will then be opened:

  • Translation – button name and its translations in other languages
  • Command – command defined for the button
  • Shortcut to Command – allows to enter an abbreviation to the button by pressing the combination of the keys: Alt+key referring to the command
  • Big Icon – allows the selection of a big icon for given button
  • Small Icon – allows the selection of a small icon for given button

New button form

After defining the new button, it must be saved by clicking [Save] or [Save and Close] in the main menu.

A request to save the button will be registered in the Pending Changes panel. The button can be saved in the configuration database by clicking [Save] in the Pending Changes panel.


Profile editor – general information

General information

Profile editor is a tool allowing the user to customize the main menu and interface of Comarch ERP Standard to individual needs and preferences.

The profile editor is available in the database manager in menu Configuration.

Profile Editor button

Layout of profile editor

The layout of the profile editor is composed of several windows which can be freely   moved (detailed description of the functionality of window docking can be found in article Window docking).

The area of the profile editor is divided into main menu and workspace.

Default Profile Editor layout

Main menu

In the main menu, there are all buttons which allow the user to work with the profile editor. The list of displayed buttons depends on the context selected in the workspace.

Profile editor main menu

Buttons available in the button group Profile:

[table “” not found /]

Workspace

Below, elements available in the profile editor workspace, are listed:

Button Library/Icon Library panel

  • Button library – this tab contains all the buttons created for the purpose of the system
  • Icon Library – contains the icon libraries which can be made available when adding buttons

Button Library panel


Below the panel header, in the Button Library tab, there are buttons useful for managing the changes in the button library. These buttons are the same as those available in the List button group of the profile editor menu.

The Button Library table is composed of the following columns:

  • Small Icon – presents small icon for given button
  • Name – presents button name
  • Command – presents command defined for a button

The tab Icon Library presents the library of icons used in Comarch ERP Standard and it is selected by default. It is also possible to change library.

  • Change library – checking this option allows the selection of a different icon library
  • Library – in this field, it is possible to select an application the given icon library will be applied for
  • Prefix – library providing information about icons
  • Apply – saves the changes made in the icon library

Icon Library panel


Pending Changes panel

Pending Changes panel includes all changes made in the profile before saving it in the database.

Pending Changes panel


Buttons available in the Pending Changes panel are the following:

[Save] – saves the changes made in the profile in a configuration database

[Save and Generate Script] – saves the changes made in the profile in a configuration database and enables to save the changes to a file with .txt extensio

[Undo] – withdraws the changes marked in the Current Changes panel

[Track Changes] – clicking on this button in case of saving changes enables propagating those changes to profiles   that are subsidiary to the one being edited by means of Conversion Manager tool

[Emergency Mode] – if changes are saved incorrectly, then this functionality allows for exporting recent changes to an xml file.  The function is dedicated to advanced users

Messages panel

Messages panel contains information about the errors and activities that occurred in the profile.

Messages panel


Button [Clear] removes all the messages recorded in the panel.

Explorer panel

Explorer panel presents the structure of the profile including all its elements.

Explorer panel


Buttons available below the header of the Explorer panel.

[Add from List] – adds the button selected in the buttons library to the element marked in the Explorer panel

[Add] – adds the selected elements to the element marked in the Explorer panel.  Available options:

[Add Tab Group] – this button is available only when the highest level of the ContextTabGroups branch is selected A tab group is a set of tabs relating to one context in the system. It can be assigned only to one context and a context may have only one task assigned. Each place in the system is also called a context. Such places are, among others, document lists,   document forms, customer and vendor forms, employee forms, item forms, etc. The name of each tab group is   displayed in Comarch ERP Standard system above the main menu. A specific tab group is the MainTabs branch which is not assigned to any context, hence, it is its individual feature

[Add Tab] – this button is active only for a tab group selected under ContextTabGroups or for the entire MainTabs branch Individual tabs are the main components of the entire profile. They are grouped and assigned to contexts. Normally, a group of tabs contains two tabs, by default, one of which is editable from the level of Profile Editor. It is not, however, prevented from including more tabs in one group.

[Add Group] – this tab is available only for single tabs, which had been added with the help of [Add Tab] button

[Add Container] – this button is available for button groups or other containers. Button groups and containers are used to classify buttons in the main menu. Each tab may contain several button groups and containers.  Moreover, button groups can be named and the containers may include other containers   within. Using of button groups and containers improves transparency of tabs.

List button group with four vertical containers, available in Items tab in Sales Invoices tab group.  There are four vertical containers in the button group

Containers can be either vertical or horizontal. Container orientation depends on the position of buttons included   in it. Buttons in a vertical container are arranged downwards, whereas each column contains three buttons, maximum. Buttons in a horizontal container are arranged rightwards, whereas each row contains three buttons, maximum.

Note
The button group Printouts and Reports is generated automatically to each tab created   in the Profile Editor.  It can be neither edited, nor hidden or deleted.

Note
A container becomes visible not until at least three buttons are included in it. Otherwise, the line, which separates the container from other elements of the button group, will not be visible.

[Add Menu] – this button is available only for ContextMenus branch. A context menu is a group of options which are added to contexts which, in turn, contain lists, e.g., item list, customer/vendor list, invoice list, etc. The menu is activated by clicking the right mouse button. Only one menu can be assigned to each context. All the menus in ContextMenus branch are named after a context they are   assigned to

Example
In order to find the right menu, first it is necessary to find a group of tabs of the same context. A tab group Sales Invoices is attached to the context context://salesinvoice/list (figure below). After typing the context name in the search field of the ContextMenus branch, the menu   attached to the context is found.

Below is the same menu which is visible in Comarch ERP Standard system:

Note
The buttons [BPM Processes] and [Add shortcut to Altum desktop] are added   automatically to each context menu and they cannot be edited, hidden or deleted.

[Add To My Desktop] – this button is available for each single button in a tab. It adds a given button to Comarch ERP Standard desktop

[Change] – opens the element modification window

[Delete] – removes the element marked in the Explorer panel

Buttons available in the lower part of the Explorer panel:

[Search] (magnifying glass icon) – searches through an element marked for filtering a given structure (MainTabs , ContextMenus, ContextTabGroups ) in terms of occurrence of entered phrase

[Up]/[Down] – buttons become active upon marking an element in a given group of elements and allow for chaning ints position against other elements

[Sort] – sorts elements of a selected structure in aplhabetical order

Preview panel

Preview panel simulates the layout of the main menu (ribbon) upon applying the change.

Preview panel


Importing and exporting of interface settings

This article presents two methods of importing and exporting interface modifications provided by Comarch ERP Standard. Owing to that function, settings can be easily transferred among multiple company databases of the system.

The first method allows for exporting all changes made in the interface which were applied in a database. The file will contain formation regarding:

  • operators/operator groups for which changes were made
  • place of changes
  • changed elements

During export, all changes are saved in *.la file. While importing data from the   file to a company database, all the changes are uploaded for operators/operator groups and they will correspond to data from the file.  If any operator or group does not exist in a company database but is included in the file, data from file referring to that operator or group will not be uploaded.

The tool enabling import/export is available in tab System → Configuration → Forms.

Importing/exporting of interface modifications for a whole company database

The second method provided by the system allows for import and export of modifications for selected operator   groups or operators. The mechanism of importing and exporting is the same. The function of import and export   for operators and groups is available in the main menu for those objects.

Buttons for import and export of interface modifications for operator groups and operators


Interface item management

General information

This article describes how the system allows for adapting the interface to the user’s needs.

If a user selects (marks) an item in the layout tree view available in the interface editor, it is marked with blue lines in the edited window. It helps user to find quickly a given item.

Tab Layout Tree View – marked item


After selecting a given item and clicking on it with the right mouse button, a contextual menu is expanded, which allows for managing an item, placing it in the structure, describing its field and extending it.

Interface editor – item context menu

Managing interface item

The following options available in the context menu refer to item management:

  • Hide Customization Form – closes the customization window
  • Size Limit – it is possible to limit the size of a displayed item. The following options regarding size limiting are available:
    • Restore Default – restores default settings
    • Free Sizing – does not limit an item
    • Lock Size – blocks the width and the height of an item
    • Lock Width – blocks the width of an item
    • Lock Height – blocks the height of an item

Size limit

  • Hide Item – makes an item invisible for the user. Such item will be moved to the Hidden Items group of buttons. The user may set it as visible after logging on to his profile. The item can be made again visible by dragging it to the form from the Hidden Items tab to a target place.
  • Create Empty Space Item – adds an empty space under the selected item

Creating empty space

  • Set Shortcut – allows the user to define a shortcut. On the form, there is a window being opened to suggest   what letters may refer to the selected item. The user can also select option Other to use a field for selecting a shortcut. After selecting a suggestion on entering an own character and confirming the entered letter by pressing [OK], each time you click the combination of the keys Alt+ (the selected letter) in given window, the mouse cursor will be redirected to given item

Defining shortcut

Management of item location in the structure

Depending on the current place of an item, the following options are displayed:

  • Group – allows grouping the items

Grouping items

  • Ungroup – ungroups the previously grouped items
  • Create Tab Control – this option becomes available upon selecting a previously defined group of items. It allows for the creation of a separate tab

Created tab control with tabs – units

  • Remove Tab Control
  • Add Tab – adds new tabs to which it is possible to define the following items or item groups

Managing item field description

Options related to this area:

  • Rename – allows the change of item field description if option Hide Text is not selected

Changing item name

  • Hide Text – hides field description related with given item from the user
  • Unhide Text – shows a previously hidden field description
  • Label Alignment – allows the selection of position for field description (top, bottom, right, left)

Alignment of field description on item

Extension Management

Options connected with an extension become available upon the addition of an extension field. The possibility of adding extensions is available on all detail forms in the system (e.g., customer form, item form etc.).

To add an extension to a form, it is necessary Add Extension Form option. A form definition window opens, where it is possible to define and extension based on three definitions: Attribute, Extension Object and Component. Below is detailed description of particular options.

LayoutAvailable for
Text on Formdescription which will be presented on form Attribute
Extension object
Components
Text in Customization Windowdescription which will be presented in the interface editor Attribute
Extension object
Components
Read onlyif selected, edition of a field in a form is disabled (the field will be insensitive) Attribute
Extension object
Components
Component DetailsAvailable For
Component Typetype of an added extension (Text Field, Numeric Field, Logic Field, Date Field, Checkbox, Multivalued drop-down list field, System Object); moreover, it is possible to select the type of control that will represent a given field on a formAttribute
Extension object
Binded Property Nameinformation about the type of data the system is expecting from the user (data types change depending on the selected type of component)Attribute
Extension object
Data BindingAvailable For
Attributefield connected with adding of extension of Attribute type. A list of attributes assigned to given object which value will be included in the added extension field is displayedAttribute
Source Objectfield connected with adding of extension of Extension Object type. A data source is specified in this fieldExtension Object
Source Object Propertya list of public properties defined for the previously selected source object is displayedExtension Object
Update Modeselection of one of the three available methods of refreshing data (in company database) entered into the added extension field (Never, After changing the value, After verifying the correctness)Attribute
Extension Object
Data Source Propertyhere it is necessary to select a public property of a selected extension in order to provide values displayed in a checkboxExtension Object
Name of Property with Valuethe property from which a value will be retrieved and set in the property selected in the Source Object Property fieldExtension Object

Defining extension – Attributes

Note
In order to use Interface Editor, it is not necessary to have a license for DevExpress which is used by Comarch ERP Standard. However, if a user wants to add new extension fields to the interface based on their own libraries, a license for DevExpress will be necessary.

Note
Each time after updating Comarch ERP Standard system, it is necessary to verify operation of extensions in forms.

Example

The user wants to add an extension field to item forms, which will allow for defining values for Size attribute. To do so, the user performs the following actions:

  • In the interface editor, opened for item form, the user finds item in which the attribute field should be displayed and selects Add Extension Field option from the context menu
  • In the extension definition window, in tab Attributes, the user defines information which should be displayed for the extension in the interface, sets the component type to Numeric Field and the attribute to Size.

  • After saving the entered changes, the attribute field will be displayed on the item form in the selected place.

Apart from adding objects, it is possible to:

  • Edit Extension Field – edits the previously added extension field
  • Remove Extension Field – deletes the previously added extension field from the form


Interface editor structure

General information

The interface editor is composed of a button container, a list of operators and operator groups and tabs Hidden Items, Layout Tree View and General. After selecting for editing of an operator group, also Container Properties tab becomes available.

Interface editor window

Interface editor buttons

[My Profile] – this button opens interface settings for the account of a currently logged-in user; it is visible only for users who are administrators

[Save] – this button saves changes. Next to a group or an operator selected for editing, for whom the changes have been saved, an icon with a red diskette , which symbolizes a modified interface, appears.

The interface editor allows for saving changes for many operators or groups of operators at the same time. First, it is necessary to select all objects for which the entered changes should be saved. Changes are entered on the interface of an operator or a group marked for editing. Subsequent operators or operator groups can be marked by highlighting them on the list with the use of the left right mouse button and <Ctrl> key (marking single operator/group) or <Shift> (marking all operators/groups between two selected operators/groups).

Marking many operators in the interface editor

Note
Several operators can be marked only if an operator is selected for editing. The same rule applies to operator groups. 

[Mark for Edit] – allows for the edition of a form layout for the selected user group or user. A key icon appears next to the selected operator group or operator.

[Undo Changes] – deletes unsaved changes

[Delete] – deletes all changes for the selected user group or account

[Delete All] – deletes all changes made in all user groups and accounts – visible only to the users who are logged   in as administrator

Tab General

This tab contains information about an edited element (users’ group or user account) and it is the following:

  • Edited Element – provides information about the selected window element
  • Name – name of the users’ group or user account
  • Type – type of the edited element
  • Description – element description

Below the description, there are:

  • List of user accounts – if a group of users is marked for edit
  • List of groups to which a user belongs – if a user account is marked for edit

Tab General

Tab Layout Tree View

The layout is typically composed of two elements: Group and Hidden Items.

  • Group – this element contains the whole structure of given window in which the interface editor was run
  • Hidden Items – the second element contains items added to the view, which are not displayed. Items included in this element are described in the next chapter of this article.

Most items are grouped. To see them, click on the  symbol.

After selecting the , the list of all items creating a given element is expanded. In this tab it is possible   to copy the contents of a given form, e.g., among tabs with the help of the drag & drop method.

Tab Layout Tree View

Tab Hidden Items

This tab is composed of three elements which can be used to modify the window:

  • Empty Space Item – adds an empty space to a form
  • Texts – enables adding a text
  • Separator – separates the fields available in a window
  • Splitter – adds an element allowing the user to manipulate the size of the items displayed in the window

The tab presents also items hidden with the use of Hide Item, available in the context menu for an item, in the tab Layout Tree View. Detailed description of the option Hide Item can be found in article Interface item management.

To use one of window modification elements or a hidden item, it is necessary to drag and drop it in a target place.

Tab Hidden Items

Tab Container Properties

This tab is visible, when a group of operators is marked for edit. The tab allows for:

  • Withdrawing access to a single control field

Tab Container Properties for a single control field


After withdrawing access, a given control field is transferred to the Hidden Items tab. However, contrarily to a hidden control field, a control field with withdrawn access cannot be dragged back by a user who does not belong to the B2_admin group.

  • Withdrawing access to columns on a list

Tab Container Properties for a list


After withdrawing access to a column, such column is no longer visible on a list and it is not possible to drag it back with the use of [Select Column] option, which is available under the right mouse button upon clicking on a list header. Thanks to that, a user who does not belong to the B2_admin group will not be able to restore the column to the list.

Note
When saving the layout of an edited window, the setting of the opened tab as default is saved as well. After opening for editing of a given window again, the tab which was visible at the moment of saving of the interface, will be dragged on top as first.


Interface editor – general information

Interface editor allows for changing the appearance of all key windows in the system. Thanks to that tool, the system administrator can easily hide and block items on forms or take away from users and user groups the access to a given column or field, while a user can adapt the layout of a window to his/her needs and preferences.

To start the interface editor, it is necessary to click the right mouse button on the empty window area, not related to data insertion, and select [Customize Layout] button.

[Customize Layout] button
 

Button [Customize Layout] Since particular forms in the system are divided into areas, each of them has separated interface. Hence, when selecting for editing the area placed on the left side of a form (area marked with number 1 in the figure below), the user will not be able to edit theright side of that form (area marked with number 2 in the figure below).


Areas on a form


Permissions to modify interface

Comarch ERP Standard System allows for handling permissions to interface modification. On the form of an operator group, in Other Permissions tab, there is Modification of interface permission available, which allows operators from a given group for opening interface editor. Once the permission is withdrawn, operators from that group will not be able to open the interface editor.

Modification of interface permission assigned to an operator group

Operators who belong to B2_group can:

  • Edit interface for all operators and operator groups
  • Limit the possibility of editing of singular control fields for operators who do not belong to the B2_admin group

Operators who belong to B2_group can edit only their own interface.

Note
It is necessary to remember that permissions add up in the context of a whole center. If an operator belongs to several groups within one center and at least one of those groups has the permission to modify the interface assigned, that operator will be able to modify the interface.


Searching panel and filters

General information

The user can search and filter data by:

  • Using searching panel
  • Defining filter in column headers
  • Defining filter in filter builder

On lists of objects, filters have different applications and may refer to:

  • Values selected from a list
  • Values entered manually

Searching panel

The functionality of searching panel is available upon pressing <Ctrl> + <F> key combination on a list of objects, e.g., on the list of items.

Searching panel above the list of items

With the use of the searching panel, the user can search values by:

  • Searching a single text – after entering one sequence of characters, all records containing the entered sequence in any column, will be displayed
  • Searching several sequences of characters – after entering sequences of characters, separated by spaces, records containing any of the entered sequences of characters (space is considered as a logical operator OR) in any column, will be displayed.
  • Searching text containing a space – sequences of characters placed in quotes are considered as a complex expression. In such case, those records which contain the expression placed in quotes in any column, are displayed.
  • Indicating the column in which a given sequence of characters should be searched – a sequence of characters should be preceded by the name of the column and colon.
  • Searching of records fulfilling many conditions – each subsequent condition must be preceded by “+” sing
  • Creating condition excluding displaying of a given record – such condition must be preceded by “-” sign

Note
Closing of a list of objects automatically closes searching panel.

In the table below, exemplary search criteria are presented

Search criterionDescription
shirtDisplays records containing expression "shirt" in any column
blue shirt 40Displays records containing expression "shirt" or "blue" or "40" in any column
"blue shirt"Displays records containing expression "blue shirt" in any column
"blue shirt" + 40Displays records containing expression "blue shirt" and "40" in searched columns
blue + shirt - 40Displays records containing expression "shirt" and "blue" and not containing expression "40"
blue shirt - 40Displays records containing expression "shirt" or"blue" and not containing expression "40"
Code: "40" + Name: "blue shirt"Displays records which, in the first column, beginning with "Code" expression, contain expression "40" and, in the first column beginning with "Name" expression, contain "blue shirt" expression
40 - Name: shirtDisplays records containing expression "40" in any column and not containing "shirt" expression in the first column, beginning with "Name" expression

Defining filter in column headers

Headers of columns on lists available in the system contain a button which allows the user to specify the criteria of filtering data within selected column. To edit filter, it is necessary to place the mouse cursors in a column header where funnel button, used for activating filter.

Filter symbol in a column header

After selecting the funnel button, a list of options related to column filter edition, is displayed.

  • All – shows all items on a list (deletes filter from a column)
  • Define – opens Customize Filter window which allows an advanced filter configuration
  • Blanks – displays only those items on a list, which contain an empty value in a given column
  • Non-Blanks – displays only those items on a list, which contain a specific value in a given column

Defining filter in a column header

Thanks to the Customize Filter window, the user can select advanced logical operators, such as Equals to, Does not equal to etc.

Defining filter in a column header

Parameter Field, available in the Customize Filter window, allows for filtering data in relation to another column.

Example
In filter definition window of Quantity column, which is available on the list of items, the user sets the operator to Equals to, checks the Field parameter and selects Available Quantity column from the drop-down list. Upon confirming changes, the list presents only those rows, in which the value of the column Quantity equals to the value of the column Available Quantity.

Defining filter in filter builder

Thanks to the filter builder, it is possible to execute advanced configuration of a filter applied on a list. It also allows for constructing a complex filter, or by a visual construction of criteria, in a simple graphic form, or in a textual form. In the filter builder, it is possible to make reference to all standard columns available on a given list, also to columns hidden by default.

To edit filter, it is necessary to click the right mouse button on a column header and select Edit Filter option Edition of a filter is possible also after selecting [Edit Filter] button, placed in the right bottom corner of a list.

Builder window opened from the level of a column header

The filter builder window is composed of two tabs – Graphic and Textual – which allow for editing or creating filter in one of the two ways: The following description refers to the basic version, that is editing filter in the graphic version.

To create a filter, it is necessary to enter conditions in the following way:

  • Select parent logical operator (And, Or, And not, Or not)
  • Select column which is to be filtered

Selecting column in filter builder

Selecting logical operator in filter builder

Values can be entered:

  • Manually
  • By selecting date from a calendar (in case of columns related to dates)
  • Indicating another column to which the selected column is to refer – to do so, it is necessary to select the symbol placed next to the field for entering values and select an appropriate item from the list of values (corresponding to columns available on the list)

To build a filter composed of many conditions joined by one logical operator, it is necessary to add subsequent conditions by selecting the plus button.

Many filtering conditions

The filter builder allows for creating filtering criteria containing many logical operators joining simple filtering conditions. To build such criterion, firs, it is necessary to identify those condition groups, in which the groups is a set of simple conditions connected with the same logical operator.

To group conditions, it is necessary to select a field with logical operator and select Add Group option. Whereas, a group can be deleted by selecting option Remove Group, available after clicking on the operator of the group which is supposed to be deleted.

Example

On the list of items, only those items whose quantity and ordered quantity is equal to zero or quantity and reserved quantity is equal to zero. In this case, search criteria will be as follows:

Filtering panel

Filtering panel is placed below lists of objects and is used for managing filters defined with the use of the locator, filter builder or filter defined in column headers.

Filtering panel


Exporting data to spreadsheet

The system allows the user for exporting data presented on lists and forms to a spreadsheet.

Data export configuration

Default settings of the functionality of exporting data can be changed in the menu System → Configuration → Computer, in section Export To Spreadsheet.

Export To Spreadsheet section in Computer tab

The section Export To Spreadsheet contains the following options:

  • File Format – allows for specifying format of spreadsheet created during data export:
    • xls (default) – handles 256 columns and 65536 rows
    • xlsx – handles 16384 columns and 1048576 rows. This format is handled from the version of Microsoft Excel.
  • Default Export Mode – allows for selecting a default mode of exporting data to a spreadsheet:
    • DataAware (default) – allows for exporting data along with conditional formatting rules applied for a given list
    • WYSIWYG – presents exported data in the same or similar layout to that displayed in the system. This mode handles Ageing Structure of Clearings printout, in which there is an option implemented for sending to spreadsheet the section with details for master-detail structure. This option is not supported in DataAware mode.
  • File Opening Options After Exporting Data – allows for determining if a file should open after data is exported:
    • Don’t open – a file will be saved in a selected location with no data preview
    • Open – data will be displayed only in the preview window without saving a file on the disk
    • Ask (default option) – a file will be saved in a selected location, and the system will ask the user if he/she wants to open it. Upon confirmation, the file will be opened directly in a spreadsheet.

Data export

To export data from a list or form, it is necessary to click on [Export To Spreadsheet] button, available on the quick access bar.

Button [Export To Spreadsheet] on the list of purchase invoices
Before exporting data, regardless of default settings, the user can also select the direct mode on a given list or form, by indicating the appropiate option in the drop-down menu available next tot the [Export To Spreadsheet] button.

Data export mode selection


Conditional formatting

The functionality of conditional formatting allows for distinguishing particular values in columns with the use of colors, change of formatting and adding appropriate icons classifying values of columns to specific intervals. Thanks to the conditional formatting, the user can decide, according to his/her own needs, how data is displayed on lists in the system and improve its readability.

Row conditional formatting options

The user can determine conditional formatting for any column. To do so, it is necessary to click the right mouse button in a column header, indicate Row Format option with the cursor and select one of the following options:

  • Highlight cell rules (such as, e.g., Less Than.., Between…, Equal To…)
  •  Data bars (allowing for marking values with different width and colors of bars)
  •  Color scales (coloring rows with different colors)
  • Icon sets

Option Manage Rules opens a new window which displays all rules defined on the list. The window allows for adding new rules and editing or deleting of already existing rules. Here it is also possible to determine the order of executing rules on a given list.

Rules managing window

A new formatting rule can be added with the use of [New Rule] button.

New formatting rule window

A new formatting rule window contains the following options:

  • Available rule type options:
    • Format all cells based on their values – all cells from a formatted column will be equated to scale specified in the rule. Only for this formatting type it is possible to determine comparative scale. This formatting does not allow for applying rule to entire row
    • Format only cells that contain – only cells satisfying the rule condition are formatted. This formatting allows for applying formatting style to entire row
    • Format only top or bottom ranked values – this option formats first or last values of cells from a given column. This option allows specifying how many cells should be formatted. It is possible to apply formatting to entire row
    • Format only values that are above or below average – average from values of cells of a given column is calculated and values above and below that average are formatted, respectively. This option allows for formatting entire row
    • Format only unique or duplicate values – this option formats only those cells which have unique or duplicate values within entire column
    • Use a formula to determine which cells to format – this option allows for creating own complex algorithm for formatting cells. It is possible to apply formatting to entire rows
  • Available rule description options:
    • On the basis of scale – option available only for type Format all cells based on their values. It allows for selecting 2-color scale, 3-color scale, data bar or icon set for graphic presentation of data. The most important possibility is specifying a scale in percentage or numeric formats in any ranges. The formatting applies only to cells from a given column – it cannot be applied to entire rows
    • On the basis of cell values – option available for all the other formattings. It is used to specify font, its color, font style settings (bold, italics, underline, etc.) and cell background. Predefined formats are also available. It is possible to apply formatting to entire rows

In the upper right corner of the rule manager window, there is a selection field enabling filtering of rules for each column from the list separately.

Example
In order to increase clarity of the item list, the following list formatting rules will be added:

  • For quantity equal to 0, row text will be displayed in bold and in red – must be applied to entire row

In Quantity column header, open context menu with the use of right mouse button and select option Row Formatting. From the displayed menu, choose Highlight Cell Rules and then Equal To….

In the first field of the opened window, specify value to which all values from rows of column Quantity will be compared.

For the formatting to be applied to entire row, option Apply formatting to an entire row must be selected.

Formatting style can be selected form the list of predefined styles. Select style Red Bold Text. Click [OK] for the changes to be applied.

  • For quantity greater or equal to 20, row will be displayed in green – must be applied to entire row

In Quantity column header, open context menu with the use of right mouse button and select option Row Formatting. From the displayed menu, choose Manage Rules.

In order to add a new rule, select [New Rule] and then the option Format only cells that contain. In the bottom part of the window in drop-down lists, set Cell Value and Greater Than or Equal To. In the displayed field, enter value to which values from rows will be compared – in this particular case, 20.

Next, open the window for selecting cell formatting by clicking on the button [Format]. According to the mentioned requirement, set font color to green.

Confirm addition of the new rule by selecting [OK].

In the window for managing rules, it is also necessary to select option Apply to the row so the formatting pertains to entire row.

  • For available quantity, add data bar presenting in graphic form available resource on a scale from 0 to 100

Upon opening context menu of Quantity column and selecting Row Formatting, choose option Data Bars. Select one of the available bars. In the new window, specify the scale. Set type Number for Minimum and Maximum and scale from 0 (Minimum) to 100 (Maximum). Set any colors for the data bar.

  • Items with 0.00 subtotal price should be marked with red X sign

Open context menu for column Subtotal and select Row Formatting. For option Icon Sets choose from group Symbols and set type Number.

After all the defined rules are applied, the list of items should look as follows:


Column adjustment

Deleting and adding columns

The system allows for deleting (hiding) and adding (displaying) columns available on a given list. Thanks to that, is is possible to adjust the appearance of a given list to user’s needs.

To delete a column, it is necessary to click right mouse on button its header and select [Delete Column] button from the context menu.

[Delete Column] button
[Delete Column] button. To add a column, it is necessary to click right mouse button on the header of any column displayed on a list and select [Column Selection] button from the context menu.

[Column Selection] button
The button opens Customization window, which contains the names of hidden columns available on a given list. If there are hidden columns created on the basis of attributes assigned to an object, the names of such columns are marked in italics. The user can add a hidden column in two ways:

  • By double-clicking on its name in the Customization window
  • By dragging the name of that column and placing in in a specific place on the column headers bar, which allows to precise the position of the column

Customization window

Changing column width

In the menu System → Configuration, in Computer tab, there is parameter Column Autofit to Window which allows for automatic fitting of the width of columns on all lists of the system. After checking option Yes, which is available for the parameter, columns are located proportionally over the entire width of a list window.

Parameter Column Autofit to Window the menu System → Configuration

Option Allow modification allows for activating or deactivating the automatic width of columns, regardless of the settings of the main parameter. Once the option is selected, an additional option Activate/Deactivate Window Autofit appears in the context menu.

The user can also freely change the default width of columns displayed on lists. To do so, it is necessary to indicate with the mouse cursor a line limiting the width of a given column and drag it to the left or to the right, until the expected result is achieved.

To set optimal size of a column or of all columns on a list, it is also possible to use Best Adjustment or Best Adjustment (all columns) option, which is available in the context menu opened by clicking right mouse button on the header of a given column.

Best Adjustment

Blocking columns

The context menu on lists contains Block Column option. It allows the user to place selected column permanently on the right or on the left side of a list. Until such column is unlocked, which can also be done from the level of the context menu, its position is blocked and cannot be changed. The user can block any number of columns on selected side of a list.

Block Column option


Standard buttons

In the system, there is a set of standard buttons allowing for handling particular window. They are placed on the ribbon (main system menu), in context menus, on quick access bars and in particular sections of forms. The list below presents the most common system buttons:

Button Description
Adds new object or document.
Adds a group of objects (e.g., of items or clients/customers).
Modifies selected object or document
Modifies selected group of objects
Deletes selected object or document.
Copies selected object or document.
Updates currently opened form or list.
Allows for automatic batch generation of objects, e.g., of vouchers.
Selects objects to be added to a form or list.
Selects a given object on a list, e.g., when there is a selection field in a column.
Deselects a given object on a list, e.g. when there is a selection field in a column.
(eraser button) Erases data from a field, next to which it is placed.
This button moves upwards an object selected on a list.
This button moves downwards an object selected on a list.
Confirms a document
Confirms and posts a document at the same time.
Posts a document.
Sums up all rows selected on a list. Summed values are presented on the summary bar*.
Cancels a document
Updates selected data, e.g., posting schemes.
Attaches and starts manually BPM processes previously defined in BPM Process Editor**.
Opens a list of activities related to a given object or document, which take place in a specific time interval.
Imports data related to an object.
Exports data from a list or form to a spreadsheet***.
This button, which also appears under the name [Print List], [Print Form] or
[Print Document] and others, is used for generating a printout of a given document or list.
Hides filter section on a list****.
Shows filter section on a list****.
Opens filter builder window****.
(funnel button)Allows for specifying filtering criteria for a given column****.
Saves changes applied to a currently opened system window.
Closes currently opened system window.

*Detailed description of the functionality of summing up can be found in article <<Sorting and grouping of lists>>.

**Detailed description of BPM tool can be found in category <<BPM>>.

***Detailed description of the functionality of exporting data can be found in article <<Exporting data to a spreadsheet>>.

****Detailed description of the functionality of filters can be found in category <<Searching and filtering data>>.


Advanced column edition

Besides the standard possibilities related to adjusting columns on lists, the system offers also a set of options allowing the user for an advanced column edition. The user can, for example, configure the visibility of columns for a specific operator group, add or delete additional columns or modify data related to columns, such us presentation of their names or tooltips.

Permissions for advanced editing of columns on lists

Advanced editing of columns is available for operators in possession of permission Advanced editing of columns on lists, which can be granted from the level of an operator group form, in Other Permissions tab. The permission is active, by default, for b2_admin operator group.

Advanced editing of columns on lists permission

Manage Columns window

To open the window of advanced column edition, it is necessary to select Manage Columns option, which is available in the context menu displayed form column headers on lists.

Option Manage columns

The window Manage Columns is composed of the following sections:

  • Column Management – displays standard columns, attribute columns and extension columns available on a given list, as well as additional columns upon adding them in Column Selection window.
  • Groups – presents operator groups assigned to a column selected in the Column Management section. If an operator group is assigned to a given column, such column becomes visible for operators belonging to that group.
  • Other Groups – presents operator groups not assigned to a column selected in the Column Management section.

Column Edition window

Column visibility

Columns marked in the Column Management section are visible on a given list for those operators who belong to groups presented in the section Groups (this section narrows displayed results to those operator groups which are assigned to the currently marked column). To share a given column with an operator group, it is necessary to mark it in the section Column Management and next attach a selected group with the use of [Add Group] button, which is available on the quick access bar of the section Other Groups. Analogically, the user can detach a specific group from the Groups section with the use of [Detach Group] button.

Buttons [Attach group] and [Detach group]
Note
At the beginning, group b2_default is attached to all objects from the section Column Management. It means that all standard columns are visible, by default, for all operators (or can be displayed with the use of the option Column Selection – for hidden columns).

Changes of visibility of columns entered in the window Column Edition, are also saved in the database, for each operator individually. It means that if an operator belongs to many groups, the system will save the settings of the group with the highest priority assigned in the section Groups, in column Priority. In order to determine the visibility priority for a given group, it is necessary to use buttons [Increase Priority] or [Decrease Priority], available on the quick access bar of the section Groups.

Setting of the priority of columns visibility for operator groups

The section Groups contains also parameter columns:

  • Displayed By Default – if this parameter is marked, a given column will be automatically displayed on the list for a selected operator group. Otherwise, it will be possible to add such column to the list with the use of the option Column Selection.
  • Always Displayed – if this parameter is checked, option Delete Column is blocked for the operators who belong to a given group.

Visibility parameters in the section Groups


Hint
In the system, there is also available a mechanism allowing for parametrizing the access to columns with the use of  the interface editor.

Adding columns

The user can add additional columns to the list, which are available in the data source (view, procedure, etc.). To do so, it is necessary to select [Add] button, which is placed on the quick access bar, in the section Column Management.

Button [Add] in Column Management section
Button [Add] in the section Column management. An additional window Column Selection, where the user can select an additional column. The names of columns in the Column Selection window are displayed in accordance with the names in the database.

Column Selection window

To add a column, it is necessary to double-click a given row in the Column Selection window. It will appear in the section Column Management of the main Column Edition window.

Columns Modification

The section Column Management in the window Column Edition, contains the following columns:

  • Column – presents the name of a column, retrieved from the database
  • Name Displayed – allows for entering a name which will be displayed on the list for a given column. After selecting the flag button, it is also possible to add translations for the displayed name.

Selecting language of displayed name

  • Type – presents column type. Available values:
    • Text
    • Real Number
    • Integer
    • Logic Value
    • Natural Number
    • Date
  • Extension Type – presents column type. Available values:
    • Standard
    • Attribute
    • Additional
    • From Extension
  • Format – allows for defining format of data displayed for columns of Natural Number, Integer, Real Number and Date type. Button , available in the column Format for these types, opens Value Formatting window, where the user can define data format in two ways:
    • By selecting a predefined format in Format field
    • By defining his/her own format in Format Code field

Value Formatting window

  • Tooltip – allows for entering a description which will be displayed in the tooltip of a given column on a list. After selecting the flag button, it is also possible to add translations for the description.

Selection of tooltip language

Before leaving the Column Edition window, it is necessary to confirm all modifications by clicking [Apply] button, available in the bottom of the window.

Button [Apply]

Deleting columns

The user can delete an additional column from the section Column Management, with the use of [Delete] button, which is available on the quick access bar. Deleting an additional column from the Column Management section deletes it also from a given list and block the possibility of displaying it (however, does not delete it from the database).

Button [Delete] in the section Column Management
Note
Standard columns, attribute columns and columns from extensions cannot be deleted from the Column Management section.

Hint
To make it impossible to display additional columns on the list and, at the same time, maintain modified settings for them, it is necessary to just detach operator groups from that column, without deleting them from the section Column Management.


Forms

Forms represent the basic type of windows present in the system. Their layout and content vary depending on the type of a currently handled document or object.  Most common forms available in the system are document form and object form.

Form layout

Most of forms are composed of similar parts:

  • Header (side panel) – is placed on the left side of a form. It contains the most important information for a given form.
  • Tabs section – is placed on the right side of a form. It presents detailed data regarding a given form.
  • Description section – is placed below the tab section. This section allows for entering additional information regarding a given form.

Document form – sales invoice

Object form – item

Standard fields and buttons on forms:

  • Mandatory field – marked in yellow. A mandatory field must be completed, otherwise the possibility of saving a form will be blocked.

Mandatory field

  • Eraser – deletes an object entered in a field from that field

Eraser button

  • Magnifying glass – opens form of object entered in a given field

Magnifying glass button

  • Button for opening a list – opens a list of objects possible to select in a field

Button for opening a list

  • Button for expanding a list – allows for a quick selection of an object from a drop-down list

Button for expanding a list

Adjusting forms

A user can expand or hide a form header by clicking on one of arrows placed in the upper right corner of a header.

Buttons for expanding and hiding a form header

Button for expanding a hiding a form header It is also possible to adjust height or width of form sections separated by fields with a button with four dots. To do so, it is necessary to place the mouse cursor over separating field and drag it towards selected direction.

Fields separating sections.

For an advanced configuration of layout and windows content, including forms, it is possible to use Interface Editor.


Window docking

In order to optimize the area of the application, it is possible to use the functionality of window docking which allows for displaying two or more windows next to each other. To do so, it is necessary to open selected windows and drag the tab of a given window to the center of the main window.  A place in which the dragged window can be arranged is indicated with the arrows. To place the new window in a given place, it is necessary to trop its tab over the proper part of the symbol. Other windows can be placed in any place of the active window.

Window docking

Exemplary arrangement of windows


Main menu (ribbon)

The main menu of the system is also called ribbon. It allows to access all areas and actions used for handling the system. The ribbon is thematically grouped, which facilitates using of the system.

System main menu (ribbon)

In the upper left corner of the ribbon, there are the following icons and buttons:

System icon

Center selection menu – allows for a quick change of a company structure center without the necessity of logging-out and logging-in

Changing of center structure company

The title bar contains information regarding: name of the database, name of the company structure center to which the user is currently logged–on, name of the user and system version.

The ribbon itself is divided into different menus allowing to access a given system area:

  • System
  • System
  • Main
  • Sales
  • Purchase
  • Warehouse
  • CRM
  • Finances
  • Accounting
  • Fixed Assets
  • BSC
  • Reporting
  • Budgeting
  • Allocation
  • Subsidiaries
  • Add–ons
  • Configuration

The access to the functionalities available on the ribbon, which belong to the menus CRM, BSC, Reporting, Budgeting and Allocation is possible upon a proper configuration of the system or/and granting appropriate operator permissions.

Upon selecting any button on the ribbon, an additional menu regarding the window opened by the button, is displayed.

Changing of center structure company

Menu Elements displayed on the ribbon for the list of customers

The user can collapse and expand the ribbon, by selecting the arrow button, placed next to the help icon.

Button for collapsing ribbon

The system allows also for handling the ribbon with the help of predefined key shortcuts. Detailed description of that functionality can be found in article Keyboard shortcuts.

On the right side of the arrow used for collapsing and expanding the ribbon, there is the help button, which opens the site of Comarch ERP Standard Knowledge Base.

Help button

The last field of this part of the ribbon is searching tool. Detailed description of this tool can be found in article Searching tool.

Quick access bar (ergonomic panel)

Some windows, forms and list contain also a so–called quick access bar (ergonomic panel), that is a bar with the most important buttons for a given place.

Qucik access bar (ergonomic panel)


Context menu

Context menu is expanded with the use of right mouse button. It contains a list of possible actions whose availability depends on the place in which the menu is being expaned. Within one window, it is possible to expand different context menus.

Context menus


Basic settings

This article contains information about the basic settings related to the user interface and customizing of the system.

In the menu System → Configuration, tab General contains settings regarding the appearance and default system language.

Tab General in the menu System -> Configuration

In this tab, the user can:

  • Check the default database language (non editable field)
  • Define the default system country (value selected in this place of the system is automatically suggested according to addresses defined in the system)
  • Select system background by loading a graphic file from the computer and fitting it
  • Set location and orientation of tabs

WWW shortcuts

In the last section of the tab General, the user can set website shortcuts related to Comarch ERP products which will be displayed in the application or define his/her own shortcuts and determine the way in which they will be presented – in the application window or in the Internet browser.

By default, the following shortcuts allowing for quick operning of web pages of Comarch ERP products are added in the system:

  • Comarch-Nowości – new functionalities offered by Comarch
  • YouTube – a shortcut to Comarch channel on YouTube, which contains video footage of conference presentations and important events, tutorials and marketing materials
  • Facebook – a shortcut to Comarch ERP Facebook page
  • iBard24 – a shortcut to an application for managing data in a company
  • BI Point – a shortcut to a service used in cooperation with Comarch Retail POS application
  • e-Sklep (e-Shop) – a shortcut to Comarch e-Sklep (e-Shop) platform website
  • Comarch Mobile – a shortcut to a site dedicated to mobile applications for companies

A toolbar with WWW shortcuts will be presented after selecting Show Web Toolbar option from the contextual menu on the system desktop

Web toolbar


Keyboard shortcuts

Using of the keyboard

After launching the application, the main menu (ribbon) appears in the upper corner of the screen. Operating the system with the use of shortcuts can be initiated by pressing the left <Alt> key. After pressing that key, in the menu, you will see the letters symbolizing the shortcuts to each of the tab elements. As a rule, it has been applied that the shortcuts refer to the first letters of the names of the menus, objects, etc. If, in a given context, there is more than one name beginning with the same letter, such shortcuts are then composed of two letters, which are two subsequent letters of a name.

Main menu with keyboard shortcuts

Pressing a proper letter on the keyboard and holding the button at the same time opens particular tabs.

  • X – allows changing a center
  • AP – launches the application configuration window
  • M – launches the main menu of the system (the list of directories)
  • SA – launches the menu Sales
  • P – launches the menu Purchase
  • W – launches the menu Warehouse
  • CR – launches the menu CRM
  • FI – launches the menu Finances
  • AC – launches the menu Accounting
  • FX – launches the menu Fixed Assets
  • R – launches the menu Reporting
  • BS – launches the menu Business Scorecard
  • BU – launches the menu Budgeting
  • AL – launches the menu Allocation
  • SU – launches the menu Subsidiaries
  • AD – launches the menu Add-ons
  • CO – launches the menu Configuration

With the use of the above-presented shortcuts, it is possible to navigate through all the elements available in the system.

If the <Alt> key is pressed from the level of a list or form, the system will display shortcuts applicable to buttons active in the context of that list or form.

To go to the lower level of keyboard shortcuts, it is necessary to press a button applicable to a given context. In a situation presented in the above image, selecting button <I> (items) will open the context of the items of the opened list.

Additionally, the user can move along the ribbon with the use of the key <Alt> and arrows on the keyboard. <Enter> or <Spacebar> select a given  button.

On most of the list it is possible to use standard buttons, such as: <Insert> (adds a new row), <Delete> (removes a selected row), <Tab> (moves on to the next field), and <Enter> (accepts entered values).

Also with the use of the button <Insert>, it is possible to add new item to documents, regardless of the cursor’s location, when the tab Elemetnts is active.

In the system, it is possible to define individual shortcuts which then can be used for editing the content of particular fields or transferring the context to lists. Such combinations of shortcuts can be defined separately for particular user groups as well as for individual users. Detailed description of this functionality can be found in article Interface item management.

Predefined shortcuts

In the system, there are also other predefined shortcuts available. They are dedicated to particular behaviors of the system for some forms:

  • <Alt> + <F4> – asks whether to close the system
  • <Ctrl> + <F> – opens a search engine window
  • <Alt> + <downwards arrow> – expands a list of values
  • <Alt> + <upwards arrow> – collapses a list of available values
  • <F5> – refreshes a list
  • <Insert> – adds an item
  • <Esc> – closes an active window

Below are the following shortcuts which are, in turn, available in the row editing mode (edit in place):

  • <Insert> – adds an item
  • <Ctrl> + <upwards arrow> – increases value in the field Quantity in the edited row
  • <Ctrl> + <downwards arrow> – decreases value in the field Quantity in the edited row
  • <Upwards arrow> – jumps to an upper row
  • <Downwards arrow> – jumps to a lower row
  • <Enter> – activates a cell in the mode of editing (clicking enter will enable edition of, e.g. a unit of measure cell when being highlighted on a list of SI items)
  • <Delete> – removes a row in the row editing mode
  • <Rightwards arrow>/<Leftwards arrow> – enables navigation to cells of a given row, as in case of using <Tab> and <Shift> + <Tab> keys
  • <Ctrl> + <Shift> + <C> – copies selected objects together with headers


General information

Comarch ERP Standard system contains a set of functionalities allowing the user to edit user interface:

  • Information regarding the basic settings and keyboard shortcuts can be found in General information category
  • The functioning of the menu and of the most used keyboard shortcuts is described in System menu category
  • Information regarding layout, adjusting and formatting of windows, as well as data export, are described in Windows, forms and lists category
  • Options related to searching, sorting and filtering data in the system, are described in Searching and filtering data category
  • For more advanced interface modifications, dedicated tools are used: Interface Editor allows for changing appearance and content of all principal windows (such as forms and lists), whereas thanks to Profile Editor, it is possible to customize the main menu and system desktop according to user’s individual needs and preferences


Migration – Before updating

Before proceeding to update Comarch ERP Standard and Comarch Retail versions, it is necessary to take note of changes implemented between versions.

Changes which should be verified before updating version are described in this article.

In <<Update process>> article, processes and changes which should be carried out or verified in order to ensure the proper functioning of the system, are described.

In addition, it is recommended to read:

  • Articles in category <<New functionalities>>. Here, it is possible to find information about important changes implemented in the system and description of new functionalities.
  • Articles in category <<Hardware scalability>>. Hardware requirements and information about required programs are updated every time a new version is released.

Test update

Before updating a version in a production environment, it is recommended to perform a test update of the environment on test servers and accurately check the functioning of the system with extensions.

Recent fixes

Before updating the environment, it is necessary to ask Technical Assistance for the recent fixes dedicated to the version to which the system is to be updated. The fixes should be first tested on prepared test environment.

Updating Microsoft SQL Server and checking collation

Before executing the migration, it is necessary to check whether MSQ SQL Server version is compliant with the requirements of the version which is going to be installed.

Each instance of Microsoft SQL Server used by Comarch ERP Standard or Comarch Retail must be updated with the recent Service Packs. This requirement regards both the database Comarch ERP Standard environment and Comarch Retail POS workstations.

The collation value of the SQL server must be the same as the collation value of the company database, that is Latin1_General_CI_AS or Polish_CI_AS. If the server and the database have different collations, errors may occur, for which Comarch shall not be held responsible.

Note
 From the 2015.0 version the database engine SQL Server 2005 and the Windows XP operating system are not supported.

Note
From the 2019.0 version the database engine SQL Server 2008 and SQL Server 2008 are not supported.

Migration of environment to a new SQL server.

After transferring databases to a new MS SQL Server instance, it is necessary to remember that the new instance is a clear environment and databases do not store information about objects such as job, maintenance plan, users, roles or privileges. In consequence of migration to a new server, a full SQL server configuration is performed and users existing in the database are added to the SQL server and mapped again with selected database.

Note
After migration to a new server, it is always necessary to create with the use of Database Manager a new company database and configuration database, to be able to perform a proper configuration.

Changes related to conversion of configuration and company database

From version 2015.5 of Comarch ERP Standard information about production date has been added. It is available from the level of System → Configuration → About Program.

From the version 2015.5, before starting conversion of a configuration database, a window containing detailed information about the conversion, is displayed.

Window with information regarding configuration database conversion

Before converting a company database, the system also displays a window with information about the configuration of the conversion process.

Window with information regarding company database conversion

The user can select:

  • execution of a backup copy and database conversion (default value)
  • database conversion – in this case a backup copy will not be performed
  • reindexing of database after finishing the conversion (recommended)

It is also possible to check license expiration date by clicking on [Check Validity Date] After completing the server and license key number and clicking on [Check] button the expiration

License Server Selection window

After clicking on [Continue], login parameters will be saved and the window will be closed. The user will be transferred back to the conversion window. To convert database, it is necessary to click on [Execute].

When logging-in to the system, the system expiration date specified in its license key, is verified.

If the expiration date in a key is earlier than the application date, the user will not log-in to the system. Once the window is closed, License Server Selection window is automatically opened, where the user should indicate a different key/server in order to log-in.

If a possessed key has an expiration date earlier than the production date, a window with the message will be displayed again.

New licensing service

From the 2015 version, a new licensing method is in force. Before performing the migration, it is necessary to contact Comarch Technical Assistance in order to retrieve new license keys.

From the 2018.2 version it is necessary to update the Key Manager to the newest version due to addition of procedures related to the digital signature which is verified when checking POS license.

Printouts functioning verification

Due to changes between versions, it is necessary to verify the proper functioning of non-standard printouts in an updated test environment.

Changes to table [Dictionaries].[TranslationValues]

From the version 2018.1. the number of characters stored in the field Value of the table [Dictionaries].[TranslationValues] has been changed from 1000 to 2000. Before converting a database, it is necessary to verify views and extensions in the context of that change.


Running the program

In order to run the program, it is necessary to click on the shortcut located on desktop or in the Start menu. Once the program is started, a login window is opened.

Login window

To log in to the system, the following fields must be filled in:

  • Database – name of a company database, selected from a list of databases attached to the current configuration database in Database Manager.
  • User – operator’s name. The system suggests an operator who has last logged in to a given workstation.
  • Password – the operator’s internal password
  • Integrated security – the operator may log in to the system with a login and password integrated with the Windows domain. If the user selects this option, the system automatically fills in the fields User and Password on the basis of access data integrated with the Windows domain.

The login window contains the following buttons:

[Database Manager] (1) – opens Database Manager

[Refresh the list of databases] (2) – updates the list of available databases

[Log On] (3) or <Enter> button – it starts the verification of login data and logging-in to the system. If a notification on connection problems is displayed, it is necessary to verify:

  • If the user’s login has been added as an SQL account and mapped in the selected database
  • If the database is available on the SQL server
  • If SQL server connection is active

Note
It is recommended that no diacritical signs be included in user names, since they may cause errors related to third-party software used by the system.

In the login window, it is also possible to select a system language. To do so, it is necessary to select an appropriate flag symbol (4).

If an operator has permissions to more than one centers, the center to which he/she wants to log-in must be selected from a drop-down list.

Login window with the possibility of selecting a center


Transferring of a key to another computer

Transferring of a key to another computer requires execution of the following steps:

  • deleting it from the first installation
  • activating it later on a new computer after installing Comarch ERP Key Manager

Without deleting the virtual key from the   primary computer, it will not be possible to activate it in the new environment.

If the computer, where the virtual key was activated, cannot be accessed or connected to the Internet, please contact Comarch Technical Assistance in order to have the settings of the virtual key being transferred reset.


Functions available in Configuration tab

Virtual keys available in the Key Manager require a cyclic connection to Comarch servers, which is executed every 2 hours in order to verify the availability of license modules on a key. The maximum time between subsequent connections is 72 hours.

The following options are available in Configuration tab:

  1. Advanced – opens an additional window with advanced configuration parameters

Advanced option window

  • Time to release inactive module – this time is expressed in seconds and it determines the time after which the incorrectly released modules (for instance, as a result of forced application shutdown from the level of the Task   Manager) are deleted. The minimum time is 7- seconds. By default, it is set to 1800 seconds
  • Logon Level – determines the level of detail for saved logs: 0 – only exceptions, 1 – minor, 2 – average, 3 – major. This parameter is set to 0, by default
  • Compress Logs – clicking on this button compresses all the Key Manager’s logs and stores it in folder C:\Users\user\AppData\Local\Temp of Windows user.
  • Proxy Settings – activates communication through a further defined proxy server
  • Server IP Address/Name – IP address or name of the proxy server
  • Port – port used by the proxy server
  • Proxy Authentication – selecting of this parameter enables the option of providing authentication data on the proxy server
  • User – name of the user to be authenticated on the proxy server
  • Password – password of the user to be authenticated on the proxy server
  • Cluster-based installation – selecting this parameter activates the Key Manager in SQL cluster
  • SQL cluster name – names of a clustered SQL server service
  • Administrator’s e-mail address – e-mail address to which important messages relating to Manager Key will be sent as well as notifications that a virtual key has lost connection with Comarch servers
  • Notify whenever the key loses connection to Comarch servers – by selecting this option, a notification will be sent to the e-mail address of virtual key Administrator in case one of the virtual keys connected in a given instance has not established connection to Comarch servers for at least 72 hours
  • Restore Default Settings – restores standard advanced settings
  1. Update Modules – forces connection to Comarch servers and updates the view
  2. Update modules if Internet connection is unavailable – used in case there is no network connection, allows for activating modules for another 72 hours

Window for updating modules in case of no network connection

Such activation can be done in three ways:

  • By sending a text message, as shown in the frame in the upper part of the window, to the number 7148 (the cost is 1 PLN + VAT) ERP PL Activation code. The letter case is not distinguished. The activation service via a text message is available in Poland only. The reply that is sent to a received text message contains an activation code, which must be typed into the empty fields at the bottom of the window. Moreover, instead of typing manually a text message, a QR code can be scanned with the help of the application.  After this operation is performed, a relevant text message will be prepared and will be awaiting user’s confirmation of sending it.
  • By sending an e-mail message to the address: mk@comarch.pl. The message should include the entire activation code displayed in the frame, that is: ERP language_code_activation_code. It is also possible to click on the button [Send an e-mail to activate], which will prepare a ready-to-send message. This   function requires configuration of a default mail client in Windows system, where Key Manage is installed.
  • By calling +48 12 681 4300 and providing the code from the frame to a consultant. An activation will then be generated on the basis of the provided code. The generated activation code must, next, be typed into the empty fields.
  1. Add – adds a virtual key. To add a key, it is necessary to insert customer’s ID, PIN (4 digits), key number (50000xxxxx) and e-mail address if it is not provided in the Key Manager configuration.

Virtual key data

  1. Edit – this option allows for the edition of data relating to virtual key and it can be used only if the virtual key is not yet active.
  2. Delete – deletes a virtual key. A deleted virtual key can be activated on a different computer. If there is no access to the Internet, it is possible to connect it on a different computer without the necessity of restarting it.


Key Manager Monitor

The Key manager consists of the monitor application (ComarchMLTray). This is the application which is responsible   for displaying the padlock icon at the right bottom corner of the screen.  The Monitor is run from the level of the Key Manager installation directory. By default, its:

C:\Program Files (x86)\Comarch ERP Key Manager\Key Manager\ComarchMLTray.exe

Monitor icon

A green color of the padlock icon informs about the proper status which allows using the latest software versions for the purchased modules.

A yellow color of the padlock icon informs that the program is beyond warranty. It is possible to work using only the versions, which production dates are earlier than the expiration dates of the purchased modules.  It is recommended to extend the warranty validity.

A red color of the padlock icon informs about lack of information about available modules or stopped service Managing Keys of Comarch ERP products (ComarchML). Comarch applications can be run only in DEMO mode.

Upon right-clicking the padlock icon, the following options are available:

Available Key Manager Monitor options

  • Show Configuration – displays the application window
  • Start Service – starts the service ComarchML
  • Restart Service – restarts the service ComarchML
  • Stop Service – stops the service Comarch ML
  • Release Modules – logs out particular users from the service and hence releases the downloaded modules the for selected keys
  • Update modules in the HASP key – updating of modules in HASP keys (programming of a HASP key attached to the computer)
  • Turn off Comarch ERP Key Manager Monitor – deactivates the padlock icon

Moreover, double-clicking on the green (or yellow) padlock icon will open Comarch ERP Key Manager application   window, which is tantamount to selecting the option [Show Configuration]. Clicking the option [Show Configuration] opens the application window which is composed of three tabs:

  • Available Modules
  • Downloaded Modules
  • Configuration

The tab Available Modules presents a list of available modules from the modules activated in Comarch (virtual key). The same information is also available on the

Website http://localhost:5150. The number of the Key Manager version is visible in the window header.

Key Manager window

The window is composed of the following columns:

  • Number– numerical identification of a license module
  • Module – module name
  • Initial Number – number of modules available on a key
  • Current Number– number of free modules remaining on a key
  • Options – information whether module contains additional options (e.g., EDI data exchange)
  • Validity Date – module expiration date

The color of the listed modules informs whether a given module is valid or whether its warranty has expired. The modules with a valid warranty are displayed as green (validity date is later or equal to the current date), whereas the modules beyond warranty are displayed as yellow (validity date is earlier than the current date).

If there more than one key has been added to the Key Manager, an additional field Select Key appears, which allows for switching between the added keys.

Key Manager window

Tab Downloaded Modules provides information about the modules downloaded by the application, which use the Key Manager.  Information about a user, who downloaded a given module, is provided in the column Logged In Users. If Comarch ERP Standard is run several times on the same computer, each of those startups is displayed in tab Downloaded Modules, however, each unique module will be downloaded from the sever only once. In case of connections via terminal, such operation takes place within one connection. Running Comarch ERP Standard when another connection is initiated to the same server (but from a different session) will download a separate set of modules.

Downloaded modules, which are not refreshed by application for a certain time with the help of the parameter:   Time to release inactive module (by default, it is set to 1800 s), are removed from the list of downloaded modules   and the number of available modules is updated.

  • Refresh (F5) – allows for updating the view
  • Delete – deletes all the downloaded modules for a selected user. The exception are modules per device (e.g., Comarch Retail POS application) which are assigned permanently. Once downloaded modules are not released after logging out of the application. Also restarting of a service does not release a module which was assigned to an ID sent by a device. Such module can be reset by calling Comarch Customer Service.

In tab Configuration you can find the name of SQL server on which the Key Manager service is installed and a list of   all the keys connected to the Key Manager.

Key Manager window with selected Configuration tab

The window is composed of the following columns:

  • Company Details – tax identification number of the company, which owns the key
  • Key Type – virtual or HASP
  • Key No.
  • Status – information about the current status of a given key
  • Time Remaining To Renew The Key – maximum time remaining before the cyclic connection to Comarch servers.

If at least one of the keys on the list is time-limited (regardless of modules’ expiration dates), then the date of this   time limit is displayed in an additional column Key Time Limitation. The other keys on the list, which do not have   this restriction, are labeled as: Unlimited If key time limitation date is exceeded, then color of such a key changes to red and the numbers of all the modules connected to that key are reset. In such case retrieving a license module and working in the Comarch ERP Standard system is not possible.


Installation and configuration of Key Manager

Key Manager is installed on a server on which SQL sever is installed, on Comarch ERP Auto Update main profile.

Comarch ERP Auto Update configuration window with selected product Comarch ERP Key Manager

Comarch ERP Auto Update configuration window with selected Comarch ERP Key Manager

After adding Comarch ERP Key Manager product and component, it is necessary to configurate them. The following fields must be filled in:

  • Local name of the database server instance, on which the component is to be installed, along with logon credentials of the user with administrative privileges,
  • Customer ID, PIN, license key number,
  • Optionally, e-mail address for receiving notifications whenever the key loses connection to Comarch server.

Key Manager configuration window

During the installation, the following actions are peformed:

  • Installation of HASP key drivers
  • Configuration of database server
  • Addition of exception to tfirewall in order to enable working over the network
  • Installation of Managing Keys of Comarch ERP products (ComarchML) service
  • Installation of the application Key Manager Monitor


Database update

If you already have a database that was generated for an earlier version than that you are going to work on, it is necessary to update the database to the current version of the system. Before the conversion, it is recommended to make a backup copy and reindex it. Since working on a converted database declines the performance, it is recommended to reindex such database.

Before starting conversion of a configuration database, information window is displayed, in which it is possible to read details about the conversion which is about to be performed.


Configuration database conversion window

Database backup is done when:

  • Converting a database
  • Installing new system version, quick fixes, add-ons

A database backup can be done also from the level of Database Manager.

Before converting a company database, a window concerning configuration of the conversion process will open.

Company database conversion window


Actions related to company database

In the menu Database Manager → Databases, there are additional options available for the list.

Options available in Database Manager menu

The following buttons are available in the menu:

  • Restore – restores previously created backup copy of a database
  • Make Backup – creates a backup copy of a selected database
  • Create – opens a company database creation window
  • Delete – removes selected database from the server
  • Detach – detaches selected database from the server, but does not remove it
  • Attach – after entering the server name and the path to a file with database, it attaches the database to the list of company databases and to the server
  • Add to List – after typing the server name and selecting a database, it adds the database to the list of databases
  • Remove from List – removes selected database from the list
  • Refresh – refreshes data in the list
  • Convert Database – converts database to its new version
  • Refresh Version – retrieves version from the database itself and checks it with the current version
  • Reindex – rebuilds all database index files. Reindexing is recommended when restoring backups of a database or when slower performance of a database is noticed
  • Login Parameters – open window for defining login parameters for selected databases
  • Quick Fixes – opens window for determining parameters of quick fix installation for selected databases, which allows for selecting one of the two options: Create a backup copy and install quick fixes or Install quick fixes
  • Add-Ons – opens window for determining parameters of add-on installation for selected databases, which allows for selecting one of the two options: Create a backup copy and install add-ons or Install add-ons
  • Service Actions – opens a panel allowing the user to execute a service action and verify the correctness of audit installation in a company database. Data audit is available only for databases created in French
  • Change Displayed Name – it opens a window allowing the modification of a database name displayed upon logging in to the system.
  • Add Server Messages – messages on the level of MS SQL are required to ensure proper system operation. Messages are added automatically when creating a database on server. However, if Comarch ERP Standard database was never created on the server and only restoring operation is performed, such messages must be added from the level of database manager


Creating a company database

A company database can be created in the menu of Database Manager, as well as from the level of the list of company databases. To create new company database, it is necessary to click on [Create] button. A database creation window will be opened.

Company database creation window

It is necessary to complete all available fields:

  • Server – name of the SQL server on which a database will be created.
  • Database – name of a new company database on the SQL server
  • Name Displayed – name displayed in Comarch ERP Standard logon window
  • User – name of the user with privileges to generating a database on a given SQL server
  • Password
  • Language – language in which a company database will be created. A database creation language in strictly connected with data that will be included in it after being generated. Comarch ERP Standard application is offered on international markets which, in certain areas of the system, operate with their own values (e.g., directory values, chart of accounts) applicable only to a particular country
  • Initial Size of Database – specifies the initial size that will be reserved for the creation of a company database and using the system (mdf file); minimum value – 100MB
  • Autogrowth of Database By – specifies the size of database growth
  • Initial Size of Log – specifies the initial size that will be reserved for the creation of a log file (ldf file); minimum value – 20MB
  • Autogrowth of Log By – specifies the size of log growth

It is necessary to specify the size of database growth and the size of log file growth in accordance with an anticipated database size.

After filling in all the mandatory fields, click [Create] in the menu. A process performance window presenting progress of company database creation process will be opened.

Note
It is not possible to abort the creation of a new company database.

Note
The mechanism of Crystal Report printouts disables the creation of database names containing a dot “.”. As a consequence, it will be possible to work with a created database in Comarch ERP Standard. However, each attempt to run a Crystal Report printout will fail.

After the database creation is finished, it will appear in the login window in the Database field. If it is not displayed in that field, you need to refresh the list of databases by clicking [Refresh].


Creating new configuration database and changing configuration database

Menu Create, available from the level of Database Manager, allows for creating a new configuration database.

Configuration database creation window

Before creating a database, it is necessary to specify:

  • SQL server name
  • name of created database
  • name/login and password of the user with administrative privileges on SQL server

Menu Change allows for selecting another, already existing on a given SQL server, database.

Changing configuration database

In order to change configuration database, it is necessary to enter analogical data as when creating a new database.


Database manager

Database Manager contains information regarding configuration database and attached company databases of Comarch ERP Standard system. Database Manager is opened from the level of the system login window.

System login window

Database Manager main menu is divided into two menus: Database Manager and Configuration

Menu of the database manager window is divided into three button groups:

  • Databases − related to company databases, that is main databases of the system which contain all data
  • Configuration Database − related to configuration databases which store user profiles and contain associations with company databases
  • Application − related to configuration databases which store user profiles and contain associations with company databases


Database manager window

From this level it is possible to:

  • Create new configuration or company database
  • Attach another database
  • Execute a database backup copy or open a list of such backup copies
  • Update configuration database to make it compatible with the current system version
  • Assign permissions to configuration database for an SQL user on a local machine or domain
  • Configurate languages of logging-in to company databases
  • Check database version


Add-ons wizard

Add-on wizard is a tool which improves the creation of extensions for Comarch ERP Standard and Comarch POS products. Add-ons created in this way are adjusted to be propagated and installed in each subsidiary of a company structure via Comarch ERP Auto Update program.

In order to install add-on wizard, go to the menu ConfigurationProducts Add Product. Finally, from a dropped-down list choose [Comarch ERP Tools].

Product tree

Appropriate component can be added to a selected product. To do so, right click on Comarch ERP ToolsAdd Component option and select the option [Add-on Wizard] from a dropped-down list.

Component tree

After configuring the component, you may proceed to downloading and installing it. After the installation and startup, the main window of Add-ons wizard appears.

Add-ons wizard main window

To go to the main menu of the wizard, it is necessary to right click on any place of the application.

Add-ons wizard main menu

From the level of the main menu, the following actions are available:

  • Create New – starts new add-on creation process,
  • Upload New – adds an add-on to the wizard’s add-on list
  • Configuration – opens application’s configuration window
  • Help – displays the help file


Managing structure of child agents

From the level of the parent agent it is possible to manage the structure of child agents with the use of remote actions, such as:

  • updating of Comarch ERP Auto Update application version (child agent)
  • downloading of (sending to the parent agent) an updated or the most recent component version
  • installing of a sent component
  • rolling back of an installed component to its previous version
  • uninstalling of a component


Child agent configuration

Before installing a child agent it is necessary to deselect the Connect this agent to Comarch server. A child agent will connect to he main agent. In the Agent Code field, a a code defined for the child agent in the settings of the parent agent should be entered. In the field Parent Agent Address, name or server IP and port on which the parent agent is installed, must be entered.

Child agent preconfiguration window

After first startup of a child agent, it is necessary to complete fields Host:

  • Connect with the parent agent – name or IP address of the server, as well as port on which the parent agent is installed,
  • Configure the service for child agents – name of the local computer and port on which the child agent is installed.

Child agent configuration window


Adding child agent

Child agents are added from the level of More → Agent Structure

Agent Structure icon

In the window for adding new child agent, it is necessary to specify child agent code (the same code should be entered during the configuration of the child agent) and select a product to install. From among available products, for Comarch ERP Standard it is possible to add:

  • HQMaster – Headquarters Server
  • HQ – Headquarters Workstation
  • BIServer – Business Intelligence Server

Window for adding new child agent

After addding a child agent, it will be presented in the agent structure

List of child agents

After adding a child agent to the agent structure, new section Configurate the service for child agents will be added. In this field, it is necessary to enter the name or the IP address of the server on which the main agent is installed, as well as port (11365, by default).

Child agent configuration window


Advanced actions

The window of advanced actions wizard can by opened by selecting [Advanced Actions] button, available in the left down corner of the Comarch ERP Auto Update main window. The wizard of advanced actions allows for:

  • Downloading selected product version
  • Installing selected product version
  • Making a rollback of selected product version
  • Uninstalling selected product version

Advanced actions wizard

In the next step, it is necessary to move selected elements to the right side of the window.

Selecting components to download

When installing, making rollback to a previous version or uninstalling a product, all related programs and services will be closed. When uninstalling a given product, it is possible to delete downloaded files and configuration backup copies.

Note
It is necessary to remeber that after uninstalling Comarch ERP Standard system, the database is not deleted.


Profiles

The functionality of profiles allows for installing several product versions on one machine. A profile is a set of configurations which enables creating an independent work environment.

In Comarch ERP Auto Update, there are two types of profiles available:

  • Main Profile – created during installation of Comarch ERP Auto Update application
  • Additional profiles – created by users. Each profile has an individual configuration, a local database, and individual: setup folder, folder for downloading add-ons and quick fixes as well as separate ports allowing for the installation of services.

Note
Comarch ERP Auto Update can be run simultaneously only for one profile.

List of profiles in Comarch ERP Auto Update


Configuration of additional profile

All defined profiles are available from the level of Configuration –> Profiles.  To add a new profile, it is necessary to select [Add] button and complete the following parameters:

  • Profile Name
  • Profile Code – it can be composed of 5 characters maximum and it must be unique
  • Client ID/Agent code – depending on agent level (master or child agent), it will be a client ID delivered by Comarch company or agent code previously added to the master agent
  • Setup Directory – folder in which components will be installed within a currently created profile. Each profile must have an individual setup directory specified.
  • Default profile language – language selected from a predefined list
  • Base port – port which will be reserved for a given profile along with the subsequent 99 ports. It is specified only for master agents. The range of ports that will be reserved for child agents is the same as the one used when connecting to the master agent for the first time. The field can be edited upon checking Connect to Comarch Server

Moreover, in section Connection, it must be specified whether the profile defined must connect to Comarch server or whether it must be connected to another agent, as well as to specify a communication port.

Window for adding a new profile


Parent agent configuration

In the agent structure, a parent agent always connects to Comarch server at the address update.comarch.com and the port 8466. In case there is no connection, that is when the message Agent has not registered with parent agent appears, it is necessary to check whether the entered client ID is correct and check the connection with Comarch servers.

Example
With the use of the telnet function, by entering, in the command line of cdm console:

telnet update.comarch.com 8466

Parent agent configuration window

In Product Configuration window, the user can specify which applications should be installed, by selecting a given product from the list.

Product selection

Next, it is necessary to select a component within that product. For example, for the main agent, for the Comarch ERP Standard product, it is possible to select [Headquarters Server] component.

Component selection

The difference between the server component and the workstation component is that the following services are installed along with the server component:

  • Comarch ERP BPM Server
  • Comarch ERP Search service
  • Comarch ERP Business Services
  • Comarch Retail POS Data Service


Comarch ERP Auto Update preconfiguration

When Comarch ERP Auto Update is launched for the first time, the interface language selection window is opened. A language can be selected for the duration of a given program session or language selection can be remembered by the system permanently by selecting the parameter Remember selection. There are five supported languages available: Polish, English, German, French and Spanish (the language of the   operating system is suggested by default).

Language selection

In the case of initial configuration of:

  • The parent agent – it is necessary to leave the parameter Connect this agent to Comarch server selected and enter a client ID (provided by Comarch).

Parent agent preconfiguration window

  • A child agent – it is necessary to deselect the parameter Connect this agent to Comarch server and enter a code of the agent previously added to the agent structure in the parent agent. Additionally, it is necessary to provide IP address of the main agent and port.

Child agent preconfiguration window

Completing preconfiguration will open Comarch ERP Auto Update application window and an attempt to connect to the Comarch server will be performed.

If the agent does not register with parent agent properly and the following message is displayed when   attempting to establish connection: “Agent has not registered with parent agent. The agent does not have the required permissions. The permissions must be granted from the level of the parent agent.” It may mean that:

  • the client ID given is incorrect
  • the agent code has not been added to the parent agent or it has been deleted
  • the entered address/name of the parent computer is invalid

Connection with a parent agent can also be blocked by system firewall/antivirus program.


Auto Update installation

Before beginning the installation and configuration of Comarch ERP Standard system, it is necessary to properly   install and configure Comarch ERP Auto Update program.

To do so, it is necessary to:

  1. Download the installer file UpdateAgent_Setup_[version_no]_EN.exe
  2. Run the installer
  3. Accept the software terms and conditions of warranty and use
  4. Select a setup folder for Comarch ERP Auto Update
  5. Start the application

Note
The installer file UpdateAgent_Setup_[version_no]_EN.exe is available on the server ftp1.support.comarch.pl in the Pub directory in Comarch ERP Auto Update folder, as well as on individual websites dedicated to business partners.


Hardware requirements for a workstation

This article presents minimum hardware requirements for a workstation, which are necessary to run   Comarch ERP Standard and Comarch Retail systems as well as other components of those systems.

ERP StandardBIPOS 2.0
Operating SystemMicrosoft Windows 8/8.1/10 Microsoft Windows 8.1/10
CPUIntel Core i3/i5/i7 3rd
Gen/ Intel Core i3/i5/i7 4th Gen
AMD ATHLON II X2
AMD ATHLON II X4
Intel Dual Core
Intel Core 2 Duo
RAM*4 GB8 GB4 GB
Screen Resolution1280x768 pixels1024x768 pixels
SQL**Microsoft SQL Server 2012 Express
Microsoft SQL Server 2014 Express
Microsoft SQL Server 2016 Express
Microsoft SQL Server 2017 Express
Microsoft SQL Server 2012 Standard Edition x64
Microsoft SQL Server 2014 Standard Edition x64
Microsoft SQL Server 2016 Standard Edition x64
Microsoft SQL Server 2017 Standard Edition x64
Microsoft SQL Server 2014 Express
Microsoft SQL Server 2016 Express
Microsoft SQL Server 2017 Express

*In case of client applications (such as the BI Reports Book) installed on server version of Windows systems, RAM should be increased by 2   GB (that is, there should be 6 GB instead of 4 GB)

** With the latest Service Pack.   In the case of ERP Standard and BI, the requirements refer to the simplest installation for a single   workstation with a local database. Workstations connecting with a database on an external server do not need the SQL Server software.

Note
The above-mentioned minimum requirements allow for starting the application. Each other system installed on a workstation may cause decrease of performance and increase of requirements.


Additional requirements

Environment management

In order to facilitate management of system infrastructure and application environment, all servers should be   assigned to one domain and all SQL instances used in stores should be linked in the Headquarters. Performing   of administration activities for many subsidiaries is significantly simplified in case of having a domain and the   possibility of central control of resources. It is particularly important in case of Comarch Retail system, where it   is necessary to manage an environment comprised of several dozens of computers

In a distributed environment, computers should be members of a domain or be connected to the internal   network via a VPN tunnel, because a properly operating agent network requires a permanent IP of computers   on which a child agent is installed.

Disk matrix

Appropriate disk matrix must be provided for correct, efficient and uninterrupted operation of the system. Depending on particular needs, requirements and funds, corresponding matrix solutions should be   implemented (e.g., RAID 1, 5, 10) with appropriate options such as Hot-Spare.

Virtualization

Instead of purchasing separate physical servers which will have a specific role, it is recommended (particularly   in case of having own hardware infrastructure) to purchase one machine with better parameters, which will act as a virtualizer, on which subsequent virtual machines will be run. The division into virtual machines allows for   running each server role (database, terminal server, Business Intelligence, etc.) separately on one server while   maximally using maximally resources of the server with simplified management of other server roles, as well as   with easier monitoring of resource use.

Comarch ERP BPM Server

Comarch ERP BPM Server service does not require Microsoft SQL Server Standard version – Microsoft SQL   Server Express version is sufficient to run the service.

Note
In order to provide correct configuration and operation of BPM processes, Comarch ERP   BPM Server must be registered and run on a database server.

Hard disk space for Comarch ERP Standard/Comarch Retail installation

Space on a disk occupied by individual installations of Comarch system:

ProductSpace on Disk
Comarch ERP Auto Update4 GB*
Headquarters Server/Workstation1.5 GB
Comarch Retail POS0.5 GB

* Application along with all components. Free disk space required for download of new versions must be taken into account


BI requirements

Minimum requirements for BI server, BI Web Reports Book and BI Point are presented in tables below.

In case of BI server, it is recommended that server collation is the same as collation of Comarch ERP Standard collation and collation of SQL server on which the production environment is located.

Note
Business Intelligence module has been adjusted to operate in a domain-based environment (Active Directory) and all its functionalities can be used only in such configuration. In cooperation with Excel program, the required minimum MS Office version is 2003 (or later). BI can cooperate with a mail client (MS Outlook only) when the application is already running and configured.

BI Server

In the table below, there are minimum requirements for a Buisnes Intelligence server, depedning on a Comarch ERP Standard system database size.

Comarch ERP Standard Database Size*<10 GB10-50 GB50-80 GB
Number of Reporting Persons2510
CPU1 CPU Quad Core > 2,0
GHz
1 CPU Eight Core > 2.0
GHz
2 CPU Eight Core > 2.4
GHz
RAM***16 GB**40 GB**64 GB**
Disk Drives****100 GB300 GB600 GB
RAID At least RAID 0, recommended RAID 10
Operating System*****Microsoft Windows
Server x64 2008 R2
Standard or later****
Microsoft Windows Server x64 2008 R2
Standard/Enterprise or later****
SQL*****MS SQL Server 2008
R2/2012/2014/2016/201
7 Standard Edition
x64****
MS SQL Server 2008 R2/2012/2014/2016/2017
BI/Enterprise Edition x64****
Additional.NET Framework 4.6.2

*Does not apply to binary data, individual consultations are recommended for databases over 80 GB

** 0.5 GB must be added for each BI user

*** RAM with high frequency, e.g. 21333 MHZ is recommended. All RAM should maintain the same frequency

**** Fast SSD drives are recommended

***** With the latest Service Pack

Note
Real Time Data Warehouse and Data Mining functionalities require environment with installed MS SQL 2008 R2/2012/2014/2016/2017 Enterprise/BI Edition. MS SQL 2008/2008 R2/2012/2014/2016/2017 Standard Edition version allows to run Business Intelligence module without mentioned functionalities.

Web Reports Book

Below are the requirements for server and client workstation in order to use the Web Reports Book application.

ServerClient
Operating System
Microsoft Windows Server 2008 R2 x64
Microsoft Windows Server 2012 x64
Microsoft Windows Vista x64
Microsoft Windows 7 x64
Microsoft Windows 8 (8.1) x64
Microsoft Windows 10 x64
Any operating/mobile system
supporting one of the following
Internet browsers in the latest
available version:

Internet Explorer 11 or higher

Firefox 3.6 or higher

Latest version of Google Chrome available
SQLMS SQL Server 2008
R2/2012/2014/2016/2017
-
Additional RequirementsNET Framework 4.0

Internet Information Services 7.0 or higher
-
Active DirectoryDomain environment required

BI Point

In case if Business Intelligence installation uses BI Point functionality, hardware configuration should include the following requirements

ServerClient
CPUUp to 10 simultaneous users – 2x2.4 GHz,
additional core for each subsequent 5
users
-
RAMMinimum 8 GB for maximum 4
simultaneous (using BI at the same time)
users + 0.5 GB for each additional user
-
Operating System**Microsoft Windows Server 2008 R2 x64
Microsoft Windows Server 2012 x64
Microsoft Windows Vista x64
Microsoft Windows 7 x64
Microsoft Windows 8 (8.1) x64
Microsoft Windows 10 x64
Any operating/mobile system
supporting one of the following
Internet browsers in the latest
available version:

Internet Explorer 11 or higher**

Firefox 3.6 or higher

Latest version of Google Chrome available

Latest version of Safari available
SQLMS SQL Server 2008
R2/2012/2014/2016/2017
-
Additional Requirements.NET Framework 4.6.2

Internet Information Services 7.5 or higher

PostgreSQL 9.6.3

PostGIS 2.2.0 or higher
-

* 0.5 GB must be added for each BI user

** Selection of the system depends on maximum quantity of RAM which is supported

*** Comarch does not ensure support for Internet Explorer with Enhanced Security configured

Hint
A recommended Web browser for BI Point service is Google Chrome.


Comarch e-Shop requirements

Cooperation between Comarch ERP Standard and Comarch e-Shop requires:

  • .NET Framework 4 environment
  • Microsoft Web Services Enhancements (WSE) 3.0 Runtime add-on
  • SQLXML 3.0 component
  • TLS 1.2 Protocol

Cooperation between Comarch ERP Standard and Comarch e-Shop

Depending on version, Comarch ERP Standard system cooperates with the following versions of Comarch e-Shop:

Comarch e-Shop VersionComarch ERP Standard Version
Comarch e-Shop 7.4, 7.5Comarch ERP Standard 6.3
Comarch e-Shop 7.5Comarch ERP Standard 2015.0 and 2015.1
Comarch e-Shop 7.6, 7.7, 7.8Comarch ERP Standard 2015.2
Comarch e-Shop 7.9, 2015.5.2 (8.0)Comarch ERP Standard 2015.5 and 2015.6
Comarch e-Shop 2015.5 and 2016.0Comarch ERP Standard 2016.0
Comarch e-Shop 2015.5, 2016.0 and 2016.2Comarch ERP Standard 2016.1
Comarch e-Shop 2015.5, 2016.0 and 2016.2Comarch ERP Standard 2016.5
Comarch e-Shop 2016.5 Comarch ERP Standard 2016.5
Comarch e-Shop 2017.0Comarch ERP Standard 2017.0
Comarch e-Shop 2017.1Comarch ERP Standard 2017.0 , 2017.1, 2017.5.1
Comarch e-Shop 2017.5Comarch ERP Standard 2017.1 , 2017.5.1
Comarch e-Shop 2018.0Comarch ERP Standard 2018.0.1
Comarch e-Shop 2018.1Comarch ERP Standard 2018.0.1
Comarch e-Shop 2018.2Comarch ERP Standard 2018.0.1
Comarch e-Shop 2018.3Comarch ERP Standard 2018.0.1, 2018.1.1
Comarch e-Shop 2018.5Comarch ERP Standard 2018.2
Comarch e-Shop 2018.6, 2018.7 Comarch ERP Standard 2018.5
Comarch e-Shop 2019.1 Comarch ERP Standard 2019.0

Note
Cooperation with Comarch e-Shop is not possible on computers with Windows 98, Windows ME and Windows XP operating systems.


Comarch Retail POS requirements

Minimal technical parameters necessary for a workstation are described in <<Hardware requirements for a workstation>>.

Additionally, to install and ensure proper operation of Comarch Retail POS application, the following components must be
installed:

  • Microsoft .Net Framework 4.6.2
  • Express version of Microsoft SQL Server 2014 or higher in a version compliant with that of the operating
    system (x86/64)


Requirements for a terminal server

The suggested configuration does not assume that the terminal server operates also as file server for users   working on it. In a case when such solution is necessary, number of required hard disks must be increased in   proportion to that suggested below.

The set of minimum requirements for database server per user/users is presented in the below table.

Physical ProcessorUp to 40 users: 4-Core
Up to 60 users: 6-Core
Up to 80 users: 8-Core
Up to 100 users: 10-Core
Virtual Processor*Up to 20 users: 1-vCPU + 1-vCPU / 5 users
Over 20 users: 1-vCPU + 2-vCPU / 10 users
RAM0.7 GB / user
HDD0.5 GB / user + 40 GB for operating system / 2 x SAS 15000 rpm
RAIDRAID 1
NIC 100 Mb/s
Operating SystemMicrosoft Windows Server 2012 R2 Standard
Microsoft Windows Server 2016 Standard
Microsoft Windows Server 2017 Standard

* Refers to virtualized environments based on Hyper-V

If more than one server supports terminal connections, the infrastructure must be properly configured, taking into account the resource load balancing
Comarch ERP Standard system can be installed in 32- or 64-bit infrastructure.

Example
Minimum requirements for terminal server on which 50 Comarch ERP Standard users will be working:

  • CPU: 1 x 6-Core / 11-vCPU
  • RAM: RAM: 40 GB (includes 5 GB for the operation of Windows system)
  • HDD: 120 GB (includes virtual memory on the level of 1,5 x amount of RAM memory)

Note
Each additional integration and application increases the demand for the terminal   server’s resources.

Note
Due to the fact that sessions of operators using BI reports require significantly increased   RAM, this requirement must be respectively taken into account while designing or changing   the infrastructure for the needs of Comarch ERP Standard system. BI operator session may occupy even three times more of RAM than session of an operator not using BI.


Requirements for a database server

Comarch ERP Standard system runs in Client/Server architecture. In case of the simplest installation on a single workstation, both the layer of the database server and the application may be running on one workstation.  In practice, the functions of the database server are available on a separate hardware platform.
Below, additional facets, which must be taken into account when creating an infrastructure for the system.

Note
The most recent updates and Service Packs for Microsoft SQL Server are necessary for   proper operation of Comarch ERP Standard and Comarch Retail system.

When installing a database server, it is important to pay attention to MS SQL server collation as well as its   default language. The required collation is Latin1_General_CI_AS or Polish_CI_AS, and the required language is English. In case of using a different collation or a case-sensitive feature or a different language, errors may occur when creating a database or during work with the system.

Note
The collation settings of the created databases should be the same as MS SQL server collation settings.

While working with several Comarch ERP systems (Optima, Standard, XL), it is recommended that each created   database for those systems be on different MS SQL Server instance.

  • In a situation when Comarch ERP Standard and Comarch ERP Optima are installed on the same server and due to collation required for Comarch ERP Optima (Polish), two cases must be distinguished:
    • Comarch ERP Standard database has a collation Polish – both databases can be installed on the same server
    • Comarch ERP Standard database has a collation Latin – databases must be installed on different SQL instances, compatible with their collation
  • In case of BI server, it is recommended that server collation is the same as collation of Comarch ERP Standard collation and collation of SQL server on which the production environment is located

Recommended server requirements

The supported server processors should be of Xeon class or comparable. It is also recommended that the   processors support Hyper-Threading Technology, which is used for increasing performance of calculations   made simultaneously by microprocessors That means that for each physical core of a processor, the operating   system assigns two virtual processors (vCPU).

Example
A processor with 8 cores with Hyper-Threading Technology will have 16 virtual processors (vCPU).

Hardware requirements for database server presented below are specified for Comarch ERP Standard system.

The set of minimum requirements for database server per user/users is presented in the below table

Resources/Number of Users5102030405080100
Physical Processor*2-core2-core4-core4-core6-core6-core8-core8-core
Virtual Processor**3-vCPU 4-vCPU5-vCPU6-vCPU 8-vCPU10-vCPU14-vCPU16-vCPU
RAM6 GB12 GB16 GB24 GB32 GB36 GB48 GB64 GB
HDDSDD or SAS 15000 rpm.disks
RAIDRAID 10
NIC100 Mb/s
Operating System Microsoft Windows Server 2012 R2 Standard Edition
Microsoft Windows Server 2016 Standard Edition
Microsoft Windows Server 2017 Standard Edition
SQLMicrosoft SQL Server 2012 Standard Edition or higher
Microsoft SQL Server 2014 Standard Edition or higher
Microsoft SQL Server 2016 Standard Edition or higher
Microsoft SQL Server 2017 Standard Edition

* Due to the fact that physical cores are paired, potential power of a processor on physical hardware may be higher than it is required for   given number of users
** Refers to virtualized environments based on Hyper-V

Note
In order to ensure proper and seamless functioning of the operating system and other   applications, additional memory must be provided, as well as additional server roles (e.g.   printer, file, backup server, etc.)

In case of synchronization services, which ensure exchange of data between applications, number of   subsidiaries in which the application is installed is recalculated into number of Comarch ERP Standard users   imposing load on a database:

  • Service of data exchange between Comarch ERP Standard and POS – 4 POS workstations = 1 Comarch ERP Standard user

Note
In case of large amount of:

  • integrations (e.g., e-shops, Comarch WMS, Comarch DMS)
  • data (e.g., customers and vendors, items, documents)
  • additional processes (e.g., BPM processes, own extensions, triggers)

it is required to respectively increase the environment’s parameters or estimate the hardware   configuration individually.